Table of Contents
Advertisement
Advertisement
Table of Contents

Related Manuals for AVer VB342+


Summary of Contents for AVer VB342+
- Page 1 VB342+ Conference Camera User Manual...
- Page 2 The information contained in this documentation is subject to change without notice. In no event will AVer Information Inc. be liable for direct, indirect, special, incidental, or consequential damages arising out of the use or inability to use this product or documentation, even if advised of the possibility of such damages.
- Page 3 © 2019 AVer Information Inc. All rights reserved. All rights of this object belong to AVer Information Inc. Reproduce d or transmitted in any form or by any means without the prior written permission of AVer Information Inc. is prohibited. All information or specifications are subject to change without prior notice.
- Page 4 Do not mix and use different types of batteries: alkaline, standard (carbon-zinc) or rechargeable (nickel-cadmium). Do not dispose of batteries in a fire. Do not attempt to short circuit the battery terminals. Contact Information AVer Information Inc. 668 Mission Ct Fremont, CA 94539 www.averusa.com Toll-free: 1(877)528-7824 Local: 1(408)263-3828 Support.usa@aver.com...
-
Page 5: Table Of Contents
Extended Microphone Installation ..............8 Wall Mount Installation ..................9 Using VB342+ ....................... 11 Make a Video Call ..................11 LED Indicator ....................11 Install Displaylink Driver ................12 Phone in Connection ..................14 AVer PTZApp ......................15 Install AVer PTZApp ..................15 Use AVer PTZApp ..................15... - Page 6 Set the Camera Number ................24 Hotkey Control ....................25 Home / Sleep Position ...................26 OpenGL ......................27 Full Screen Mode ..................28 Install EZLive ......................29 Use AVer EZLive ...................29...
-
Page 7: Package Contents
Package Contents Remote Power Adaptor VB342+ unit USB Cable controller Power cord* USB type-A to Screws(x4) Screws(x2) Wall mount bracket type-C adapter for wall mount for TV mount Mount rubbers(x Quick Guide Warranty card AAA Batteries 2) for TV Mount *The power plug will vary depending on the standard power outlet of the country where it is sold. -
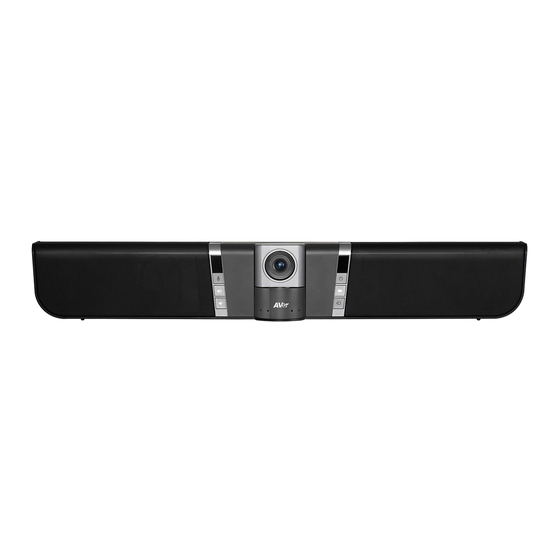
Page 8: Product Introduction
Product Introduction Overview Camera Power IR sensor Preset Mute Phone in button Volume + Reset Volume - (10) (11) (12) (13) (14) (15) (10) HDMI Out (13) RS232 (11) MIC Input (14) USB port(to PC) (12) Phone In port (15) DC 12V Power Jack... -
Page 9: Pan And Tilt
Pan and Tilt ±35° ±15°... -
Page 10: Remote Controller
Remote Controller Name Function 1. Camera select One remote can control up to 3 AVer VC/CAM. Use AVer PTZApp sets number associated with each camera, select which camera you like to control on the remote. [Note] If you only have one camera and don’t need to do any setting, the default is camera 1. - Page 11 Name Function 3. Smart faming One-click automatic FOV adjustment to fit all participants. Press on the remote for 1 second can switch the Smart framing function between auto and manual mode; a message (as figure shown) will display on the screen to indicate in auto or manual mode.
- Page 12 Name Function 14. Brightness + Increase the brightness. 15. Hang up* End the call. * Function requires AVer PTZApp **Not supported...
-
Page 13: Setup Vb342
Connect the power to the VB342+ and camera head will move, and the power indictor will light up. Install Aver PTZApp on laptop/PC that is connected with VB342+. The app can be used to adjust and setup the parameters of the camera (refer to section of AVer PTZApp). -
Page 14: Extended Microphone Installation
3. Connect the power to the VB342+ and camera head will move, and the power indictor will light up. 4. Install Aver PTZApp on laptop/PC that is connected with VB342+. The app can be used to adjust and setup the parameters of the camera (refer to section of AVer PTZApp). -
Page 15: Wall Mount Installation
Wall Mount Installation Please refer to the following drilling dimension for drilling the wall mount holes. 500.0mm 28.5mm Drill 2 holes on the wall and screw the screws into the holes. Leave some space between wall and screws for hanging the VB342+ on the wall. - Page 16 Install the wall mount bracket on the VB342+ unit. Hang the VB342+ on the wall.
-
Page 17: Using Vb342
Set the VB342+ camera as the primary camera and speakerphone for your video application (refer to your video application user guide). You can now make your call. We do recommend installing the AVer PTZApp for a better user experience. For information on how to install and use the AVer PTZApp, refer to the AVer PTZApp section in this user manual. -
Page 18: Install Displaylink Driver
Following is how to install Displaylink driver on Windows and Mac. Windows(Win7 and Win8) 1. Run the AVer PTZApp on your laptop/PC. 2. In AVer PTZApp, select “Diagnotics Utility” > “Install Displaylink”. [Note] If your laptop/PC is Win10, the “Install Displaylink” button will not show up. Because bulit-in support on Win10. - Page 19 3. Follow the on-screen instruction to complete the installation. Mac OS 1. Run the AVer PTZApp on your laptop/PC. 2. In AVer PTZApp, select “Diagnotics Utility” > “Install Displaylink”. 4. Scroll to the bottom and select “Accept” for license.
-
Page 20: Phone In Connection
5. Select “DisplayLink Software installer” and flow the on-screen instruction to complete the installation. [Note] Maximum output is1080p resolution. Phone in Connection 1. Power on VB342+. 2. Connect your device to VB342+ through the “phone in” port. 3. Press button 2 times to switch to Phone in mode. 4. -
Page 21: Aver Ptzapp
Use AVer PTZApp Run your video application and make a video call. During your video call, you can use the AVer PTZApp to pan, tilt and zoom the camera in/out and enable/disable the true WDR, brightness, and sharpness feature. For the first time use, you can check the connection, camera, and speakerphone status, and setup... - Page 22 Currently selected device: This field displays currently selected VC, CAM, or VB device controlled by PTZApp. If you have more than one AVer VC, CAM, or VB devices connected to this PC/Mac PTZApp is running, you can click on the drop down list to select other AVer VC, CAM, or VB device.
- Page 23 PTZ: To control the camera direction, zoom in and out, and to enable/disable the “Smart Framing” during your video call. Smart Framing: One-click automatic FOV adjustment to fit all participants. Click “Smart Framing” button to enable Smart Framing manually. [Note] While in conferencing meeting, participants must face the camera for face detection (smart framing).
- Page 24 Tracking Mode: Select the mode from drop-down list. Manual frame/Auto frame: FOV (field of view) adjustment to fit all participants. Enable manual or auto smart frame function. Off: Turn off all function included the hotkey on remote controller. ! To trigger the audio tracking, the presenter needs to speak over 3 seconds.
- Page 25 Diagnostic Utility: To display the S/W and F/W version and the devices connection status. You can also test the camera and speakerphone status, and update the firmware of the camera. Minimize: Minimize the app to system tray. To quit the application, right-click the icon on the system tray and select “Quit”.
- Page 26 Normal Un-normal Connection diagnostic: Display devices connection status. If the AVer PTZApp has detected that some of the devices are not connected well, the diagram will display a “//” and “?” on the device to indicate the connection has a problem. If the camera is in use by another application, it will...
- Page 27 Test Camera: Click the Test Camera button to check the camera status. Click to view camera live video. Use direction and zoom in/out button to check camera view. Click “Advanced Control” can setup camera parameters. To leave the page, click the “Back” button. ...
- Page 28 FW Update: Allows the user to update the VB342+ firmware. 1. Click” FW Update”. 2. A dialog will display the current firmware version and available new firmware version (internet connection is required). 3. To auto update, click “Auto Update” and update process will start. The new firmware will be downloaded first;...
- Page 29 Install Displaylink: The VB342+ requires Displaylink drive for HDMI connection. If your laptop/PC doesn’t have installed Displaylink drive, click “Install Displaylink” and follow the on-screen instruction to complete installation. [Note] Maximum output is1080p resolution. Troubleshooting: collect more system information for troubleshooting before you contact AVer technical support.
-
Page 30: Set The Camera Number
Set the Camera Number With multiple cameras connection, users can set each camera to buttons 1 to 3 on the remote control. If PTZApp detects computer connects to multiple VC/CAM, you can select which camera you like to control through the dropdown list. Next, Click Change Binding button. -
Page 31: Hotkey Control
Hotkey Control Enable hotkey control to use keyboard control camera’s movement and backlight. The default is off. In AVer PTZApp, select “Settings” Set Hotkey Control to “On”. A hotkey description as below figure shown:... - Page 32 When hotkey control is enabled, a hotkey tip will display when mouse is moved to the PTZ control button in PTZ mode.
-
Page 33: Home / Sleep Position
Home / Sleep Position Home Position: There are three options: Last operating position/Factory central position/ Preset 0 Sleep Position: There are two options -- Factory sleep position/ Preset 9 If the camera idles for more than 3 minutes, it will enter sleep mode. OpenGL The default setting is off. -
Page 34: Full Screen Mode
Full Screen Mode PTZApp can switch to full screen mode. Move the mouse to the right corner bottom of the video screen and a “ ” icon is displayed on video screen. Click “ ” icon and video screen will switch to full screen mode. -
Page 35: Install Ezlive
Install EZLive Please go to http://www.aver.com/download-center to download the AVer EZLive software. After downloading, double-click on the file and follow the on-screen instructions to complete the installation. Use AVer EZLive During a video call, EZLive can help user to do:...
Need help?
Do you have a question about the VB342+ and is the answer not in the manual?
Questions and answers