Table of Contents
Advertisement
Quick Links
Tools required for assembly (Not Included): Pliers, Philips & Flathead Screwdrivers and Adjustable Wrench.
⚫
This instruction manual contains important information necessary for the proper assembly and
safe use of the appliance.
⚫
Read and follow all warnings and instructions before assembling and using the appliance.
⚫
Follow all warnings and instructions when using the appliance.
⚫
Keep this manual for future reference.
Never use grill indoors. Carbon Monoxide poisoning that can lead to death.
163910 / 126067930 / OG2026001-OG English
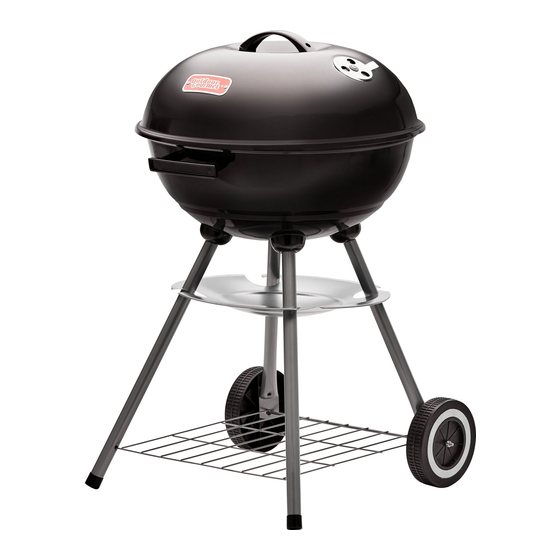
18" KETTLE GRILL
Owner's Manual
Assembly and Operating Instructions
Model # 163910 / 126067930 / OG2026001-OG
WARNING
OUTDOOR USE ONLY!
1
Joe Oakes
10/13/20
20201013 Ver1
Advertisement
Table of Contents

Subscribe to Our Youtube Channel
Summary of Contents for Outdoor Gourmet OG2026001-OG
- Page 1 18” KETTLE GRILL Owner’s Manual Assembly and Operating Instructions Model # 163910 / 126067930 / OG2026001-OG Tools required for assembly (Not Included): Pliers, Philips & Flathead Screwdrivers and Adjustable Wrench. ⚫ This instruction manual contains important information necessary for the proper assembly and safe use of the appliance.
- Page 2 Grill is hot when in use. To avoid burns: ⚫ DO NOT attempt to move the grill. ⚫ Wear protective gloves or oven mitts. ⚫ DO NOT touch any hot grill surfaces. 163910 / 126067930 / OG2026001-OG English 20201013 Ver1...
-
Page 3: California Proposition 65 Warning
State of California to cause cancer, and carbon monoxide, which is known to the State of California to cause birth defects or other reproductive harm. For more information go to www.P65Warnings.ca.gov. Wash your hands after handling this product. 163910 / 126067930 / OG2026001-OG English 20201013 Ver1... -
Page 4: Product Diagram
(Component 4) PLA-KG0013 PLA-KG0013 (Component 7) (Component 7) MET-KG0058 (Component 2) MET-KG0067 (Component 13) MET-KG0066 (Component 12) MET-KG0065 (Component 11) MET-KG0064 (Component 10) MET-KG0061 (Component 5) MET-KG0068 PLA-KG0014 (Component 14) (Component 15) 163910 / 126067930 / OG2026001-OG English 20201013 Ver1... -
Page 5: Components List
12. Rear Leg Part Number: MET-KG0064 Part Number: MET-KG0065 Part Number: MET-KG0066 2pcs 2pcs 13. Leg Bow 14. Wire Rack 15. Wheel Part Number: MET-KG0067 Part Number: MET-KG0068 Part Number: PLA-KG0014 4pcs 2pcs 163910 / 126067930 / OG2026001-OG English 20201013 Ver1... - Page 6 Attention: This bolt is pre-assembled on the grill leg. Washer (M6) 4pcs Attention: This washer is pre-assembled on the grill leg. Lock Nut (M6) 2pcs Bolt (M6 x 15) 4pcs Heat Resistant Washer 6pcs Washer (M6) 4pcs 163910 / 126067930 / OG2026001-OG English 20201013 Ver1...
-
Page 7: Assembly Instruction
(I), 2pcs of washers (C) and 2pcs of nuts (B). Tighten all bolts and nuts. Step 2: Attach Lid Air Vent (9) to the Lid (1) using bolt (D) and nut (B). 163910 / 126067930 / OG2026001-OG English 20201013 Ver1... - Page 8 2. Attach Rear Leg (12) and Leg Bow (13) to Grill Body (2) using 2pcs of bolts (E) and 2pcs of washers (F). 3. Half tighten all the bolts. Step 4: Attach Wire Rack (14) to Front Leg and Rear Leg. Tighten all bolts on the Grill Body at this moment. 163910 / 126067930 / OG2026001-OG English 20201013 Ver1...
- Page 9 Attach Grill Body Handle (7) to Grill Body (2) using 2pcs of bolts (H), 2pcs of washer (J) and 2pcs of heat resistant washers (I) for each handle. Attach Grill Body Air Vent (10) under the Grill Body using bolt (D) and nut (B). 163910 / 126067930 / OG2026001-OG English 20201013 Ver1...
- Page 10 Step 7: Attach the Ash Pan (5) onto the Leg. Step 8: Place the Charcoal Grid (4) and Cooking Grate (3) into the Grill Body. 163910 / 126067930 / OG2026001-OG English 20201013 Ver1...
- Page 11 Step 9: 1. Tighten All Hardware. 2. Finished. 163910 / 126067930 / OG2026001-OG English 20201013 Ver1...
-
Page 12: Preparation For Use & Lighting Instructions
Pick up by handle and pour lit charcoal on to charcoal grid. Start with 2.6 pounds (1.2 kg) of charcoal. This should be enough charcoal to cook with, once the curing process has been completed. 163910 / 126067930 / OG2026001-OG English 20201013 Ver1... - Page 13 Pick up by handle and pour lit charcoal on to charcoal grid. Start with 2.6 pounds (1.2kg) of charcoal. 163910 / 126067930 / OG2026001-OG English 20201013 Ver1...
- Page 14 Place food on cooking grate and close grill lid. Always use a meat thermometer to ensure food is fully cooked before removing from grill. Step 7 Allow grill to cool completely, and then follow instructions in the “After-Use Safety” and “Proper Care & Maintenance” sections of this manual. 163910 / 126067930 / OG2026001-OG English 20201013 Ver1...
-
Page 15: Flavoring Wood
Charcoal Chimney Starter to light additional charcoal and / or wood and add to existing fire. WARNING Never add charcoal lighting fluid to hot or even warm coals as flashback may occur causing severe burns. 163910 / 126067930 / OG2026001-OG English 20201013 Ver1... -
Page 16: After-Use Safety
⚫ Never apply paint to the interior surface. Rust spots on the interior surface can be buffed, cleaned, and then lightly coated with vegetable oil or vegetable oil spray to minimize rusting. 163910 / 126067930 / OG2026001-OG English 20201013 Ver1... -
Page 17: Limited Warranty
RANKAM (CHINA) MANUFACTURING COMPANY LIMITED 18/F., New Lee Wah Centre, 88 Tokwawan Road, Kowloon, Hong Kong Customer Service: – – – 1380 customerservice@rankam.com 8:00am to 5:00pm, Pacific Standard Time, Monday to Friday 163910 / 126067930 / OG2026001-OG English 20201013 Ver1...


Need help?
Do you have a question about the OG2026001-OG and is the answer not in the manual?
Questions and answers