Table of Contents
Advertisement
Quick Links
Advertisement
Table of Contents

Subscribe to Our Youtube Channel
Related Manuals for Morris MDB-16150HIW


Summary of Contents for Morris MDB-16150HIW
- Page 1 MDB-16150HIW...
-
Page 2: Table Of Contents
Contents Safety Instructions Installation Parts Control Panel Remote Control Quick reference guide Positioning Water Drainage Care and Maintenance Troubleshooting Product Repair Technical Data Appendix Wifi Instructions Manual This product is using the environment friendly refrigerant R 290. (ODP value is 0, GWP value is 3.3) , this refrigerant is tasteless and combustrible,... -
Page 3: Safety Instructions
SAFETY INSTRUCTIONS The room area of this product should be more than 4m² when it is used, repaired and stored. This product needs to be used and stored where there is no fire source(such as electric heater at work, stove with open fire, etc.) This product refrigerant maybe odorless. - Page 4 Avoid restarting the dehumidifier unit unless 5 minutes have passed since being turned off. This prevents damage to the compressor. Never use the mains plug as a switch to start and turn o ffthe dehumidifier. Use the provided ON/OFF switch located on the control panel. Always place the unit on a dry and stable surface.
-
Page 5: Installation
The compressor dehumidifiers are ideal for normal domestic or office environments which are heated during the winter months with temperatures above 12-15 C. MDB-16150HIW dehumidifiers are easy to move around on castors and intelligent dehumidifiers which will extract unwanted humidity while saving money due to their humidistat and power saving logic. -
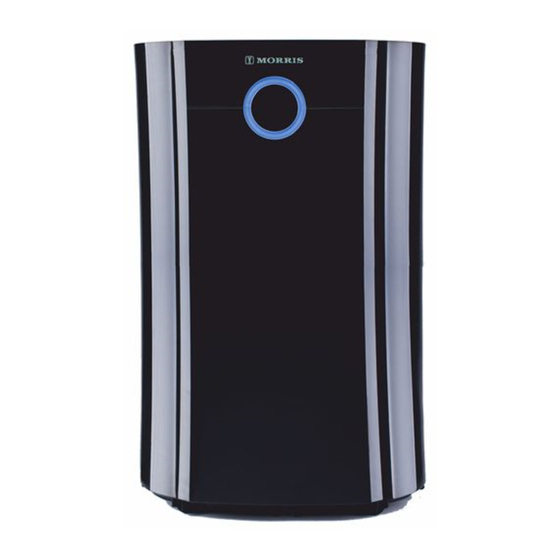
Page 6: Parts
PARTS Control Panel Air outlet Handle Humidity indicator light Wheels Air inlet Pre-filter/activated Carbon filter Continuous Drain Port Water tank Power cord HEPA Filter Activated carbon filter... -
Page 7: Controlpanel
CONTROLPANEL On/Off Sleep Down Mode Power Laundry Mode UV/ION Timer Water full indicator Defrost indicator POWER Turn on/o ffthe appliance. MODE BUTTON Select the mode of the unit between : SMART/HIGH/LOW/andFAN. The unit will default to SMART mode the first time it is switched on and remains in this mode until another option is chosen. - Page 8 HUMIDITY SETTING Press UP/DOWN key to select the desired relative humidity level, default relative humidity is 55%. If relative humidity 35% is selected, the compressor will not stop until the water tank is full. TIMER (timer function) Press timer to program time. "TIMER" light comes on while timer is being programmed.
-
Page 9: Remote Control
REMOTE CONTROL Press the MODE button to change Smart/high/Low/Fan/Laundry mode. Smart mode-desired humidity set to 50-55% relative humidity and the fan is automatically adjusted depending on current humidity level. The desired humidity can not be changed in this mode. High/Low mode - Select the fan speed, t he desired humidity can then be adjusted using the up and down buttons. - Page 10 "i-Feel" Mode - The dehumidifier will work from the humidity reading taken by the remote, rather than from the dehumidifier itself. To do this, the remote sends a humidity reading to the dehumidifier each hour, which is then compared against the current setting, to decide whether the dehumidifier should be operating.
-
Page 11: Quick Reference Guide
QUICK REFERENCE GUIDE Press to turn the dehumidifier on and off. Power Key Timer : Select timer settings key then use keys to adjust the timer(1-24hrs, start/stopping timer) . In power on mode the set number will represent the number of hours the unit will run for before turning off. This will remain unaffected if the unit goes into defrost mode or the tank is emptied and then reinserted. - Page 12 The dehumidifer is built to be compact and lightweight. The castors on the bottom of the unit make it easy to move from room to room. Your MORRIS dehumidifier is an advanced micro-CPU controlled device able of self- diagnostics. The LCD display may also show the error and protections codes.
-
Page 13: Positioning
Positioning the dehumidifier A badly positioned dehumidifier will have little effect. In positioning the dehumidifier please ensure circulation of air in not restricted around the unit. Allow at least 20cm space around the unit. This dehumidifier is designed only for indoor residential/small office applications and any commercial or industrial use will invalidate the warranty. -
Page 14: Care And Maintenance
NOTES : When you remove the bucket, do not touch sensors or any parts which are situated behind tank. Doing so may damage the product. Be sure to push the tank gently all the way into the unit. Banging the bucket against anything or failing to push it in securely into place may cause the unit not to operate. - Page 15 outlet grilles get soiled easily, so use a vacuum attachment or soft brush to clean. Wipe the dehumidifier body with a soft damp cloth or kitchen towel. Remove the ABS frame and pull out the filters from the frame. Hoover gently the carbon filter once every 2-3 weeks approximately.
-
Page 16: Troubleshooting
Troubleshooting Issue Cause Solution When the unit is in dehumidifying mode it absorbs Hot or cold Normal Operation humid air from room and freezes it to reduce the air being humidity. produced During the cold cycle there should be cold air coming out of the unit. -
Page 17: Product Repair
PRODUCT REPAIR Warning : The appliace should b stored in a well-ventilated room. The area of the room should be equal to the room area required for maintenance. --Warning : Appliances should be stored in rooms where there is no continuous burning fire (such as ignited gas appliances) and ignition sources(such as electric heaters at work) ---All operators or refrigeration circuit maintenance personnel should obtain a valid certificate issued by an industry-approved assessment agency to determine their qualification... - Page 18 The following inspection items apply to the installation of flammable refrigerant appliances : -The charge should be determined according to the size of the room containing the refrigerant containing components ; -Ventilation equipment should operate normally and vents should be free from obstructions ; -If an inter-refrigeration refrigeration cycle is used,...
- Page 19 F. Leak detection method For systems containing flammable refrigerants, the following methods for detecting leaks are acceptable : Electronic leak detectors can be used for the detection of flammable refrigerants, but the sensitivity may not be sufficient or may require recalibration (the instrument calibration should be performed in a refrigerant-free environment) to ensure that the leak detector does not become a potential ignition source,...
- Page 20 I. Retired Before proceeding with this procedure, technicians should be fully familiar with the equipment and all its features and recommend the practice of safe recovery of refrigerants. To recycle the recovered refrigerant, analyze the refrigerant and oil samples before performing the work. Before testing,...
-
Page 21: Technical Data
Herewith, we state that this product, complies with the requirements of below directives : EMC-Directive : 14/30/EU Low Voltage Directive : 14/35/EU ROHS directive : (EU) 15/ 863 CE Marking : 93/68/EEC The detailed declaration of conformity can be found at www.morris.gr... - Page 22 WIFI INSTRUCTIONS MANUAL BEFORE YOU START Ensure your router provides a standard 2.4 GHz connection. If your router is dual band ensure that both networks have different network names (SSID). The provider of your router/ISP will be able to provide advice specific to your router. Place the dehumidifier as close as possible to the router during set up.
- Page 23 3. Enter either your mobile phone number or email address to receive a verification code, a nd press next. 4. Once you have received the verification code, e nter it and create a password in the lowerbox before pressing confirm. Remark :...
- Page 24 CONNECTION METHODS AVAILABLE FOR SETUP This smart device has two different setup modes, " Add Manually" and "Search by Device". Before starting the set up, please ensure that your dehumidifier is placed as close as possible to your wifi-router. ENTERING CONNECTION MODE To enter connection mode on your dehumidifier press and hold the MODE button for 3 "...
- Page 25 2. Tap on the top left the "Add Manually"option. On the left side scroll down to "Small Home Appliances". Select the type of device as "Dehumidifier". 3. Ensure the wi filight on the dehumidifier is flashing quickly. If not, hold the wifi button for 3 seconds,...
- Page 26 4. Select your home network, enter your wi fipassword and press confirm. 5. This will then transfer the settings to the dehumidifier. Wait until the connection has been completed succesfully. If the connection fails, retry. If the connection is still failing please review the troubleshooting section for further help.
- Page 27 CONNECTING USING THE "SEARCH FOR DEVICE" TAB Before initiating the connection, make sure the unit is switched on, with the connection light flashing. If not, p ress the WiFi button again and keep it pressed for 3 seconds, while also ensure that your phone is connected to the wifi network. 1.
- Page 28 3. You should be seeing the name of your home network, to which your mobile device should already be connected as well. Enter the password in the relative field and press Confirm. Important : Only 2.4GHz Wi-Fi networks are supported. 4.
- Page 29 CONTROLLING YOUR DEVICE THROUGH THE APP Now that your dehumidifier is linked up to your network, you can control it from your phone. From the main control screen you can turn your device on and off by sliding on the power icon on the upper side of the device.
- Page 30 Press the button on top right to enter the Device Details Page PROFILE TAB The profile tab gives you the option to edit both your details, and use the added features of the unit. When further settings can be set, three dots appear on the screen (..) CHANGING THE NAME OF YOUR DEVICE Tap on the pencil icon on the top right corner.
- Page 31 DEVICE SHARING SET UP The person you add will need to have the TUYA's APP installed on their phone. Open the APP and choose the appliance. Tap the 'pen' icon in the top right corner of the screen. Tap 'Share Device' to enter the number of the person you want to include or tap the phone icon to select the persons phone number from your contacts.
- Page 32 Mobile phone remote operation (connect dehumidifier power and turn on the side switch, so that the dehumidifier is in standby mode). Open the "TUYA SMART LIFE" APP to select the dehumidifier (when using one mobile phone to control multiple appliances, you need to select the dehumidifier to be operated) .
- Page 33 MODE Mode can be set to Auto, Fan, H igh or Low. Press the 'Mode' icon to set the required operating mode. Auto Mode : Maintains the room at an ideal domestic environment humidity of 50-55% relative humidity(RH) while saving electricity. The compressor will work until the desired humidity is reached and will then stop.
- Page 34 OSCILLATING BUTTON Press this button to set the louvre position at 45 degrees, 90 degrees or to oscillate between both positions.
- Page 35 TIMER (SCHEDULE) In the main APP screen, scroll down to find the Schedule button under the dehumidifier controls. Press this button to set smart timer. The timer in the APP has far more functionality than the timer button on the unit. Press the button to add a 'Schedule',...
- Page 36 ADDING ADDITIONAL DEHUMIDIFIERS You have the ability of adding additional devices to be controlled by this application. This feature is particularly convenient in case you have more than one of our dehumidifiers, o r in case you have other TUYA powered smart appliances in your possesion,...
- Page 37 Make certain that the device to be added is already in "Wi ficonnectivity" status. In case of a MORRIS dehumidifier, r evert to the connectity section in the previous pages. In case of another TUYA powered smart device please revert to its own connectivity manual.
- Page 38 Exclusive Distributor Amiridis-Savvidis S.A 87A,17is Noemvriou Str P.C.55535 I Pylea I Greece T:2310 944944...
Need help?
Do you have a question about the MDB-16150HIW and is the answer not in the manual?
Questions and answers