Table of Contents
Advertisement
Quick Links
Advertisement
Table of Contents

Subscribe to Our Youtube Channel
Summary of Contents for Falco AR-60-PYRS
- Page 1 INSTALLATION AND USER MANUAL MODELS AR-60-PYRS AR-90-PYRS AR-60-CGS AR-90-CGS...
-
Page 4: Table Of Contents
Table of Contents INTRODUCTION............................5 SAFETY PRECAUTIONS..........................5 INSTALLATION (EXTERNAL DUCTING).....................6 INSTALLATION (AIR RECIRCULATION) ....................10 OPERATION............................11 MAINTENANCE ............................11 TROUBLESHOOTING..........................13 FREQUENTLY ASKED QUESTIONS ......................14 ENVIRONMENTAL PROTECTION......................17... -
Page 5: Introduction
INTRODUCTION This instruction manual is designed to provide you with all the required instructions related to the installation, use and maintenance of the appliance. In order to operate the unit correctly and safety, please read this instruction manual carefully before installation and usage. This extractor makes use of high quality materials and is made with a streamlined design. -
Page 6: Installation (External Ducting)
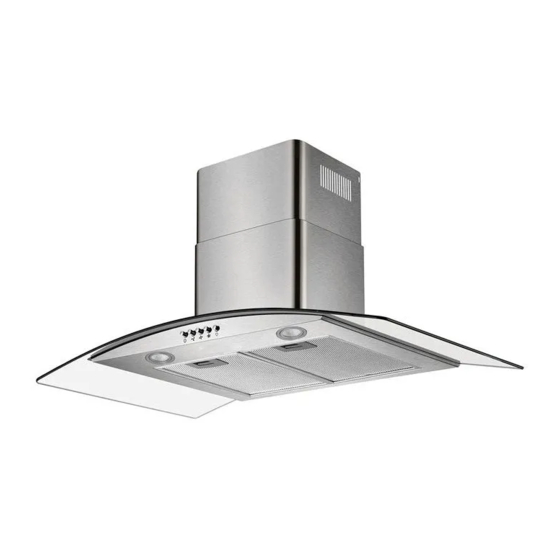
INSTALLATION (EXTERNAL DUCTING) 1. If you plan on ducting the air to the outside, your extractor can be connected as per the picture below to a ducting pipe with an internal diameter of 150mm. 2. The extractor should be mounted at the following distances above the counter top: ... - Page 7 4. Lift up the extractor and hang it on the now mounted wall bracket. 5. Fix the provided ducting pipe to the air outlet of the extractor as in the picture below: Fitting the Chimneys for a Curved Glass Extractor: Slide the top chimney piece (this is the one with the vents holes cut into the sides) into the bottom section (this one is solid with no vent holes).
- Page 8 2. Drill 2 x 8mm holes to accommodate the Plate II. Screw and tighten the plate II onto the wall with the two screws provided. Fit the chimney section on top of the extractor and fix it in place with the screws.
- Page 9 2. Fix the bottom chimney section to the extractor with the 2 screws (4 x 8mm). 3. Slide the chimney sections to adjust the chimney height. Once the required height is reached, then fix the bracket (plate I) into place with the 2 x screws provided (4 x 8mm) as shown in the picture below.
-
Page 10: Installation (Air Recirculation)
INSTALLATION (AIR RECIRCULATION) If ducting the air to the outside with the ducting pipe is not possible, then the ducting pipe can be discarded. The installation of the extractor is the same as previously shown, the only difference that carbon filters (provided) assist... -
Page 11: Operation
OPERATION OFF BUTTON Used to turn off the extractor. LOW SPEED BUTTON Suitable for simmering which does not create much steam. MEDIUM SPEED BUTTON Airflow speed ideal for standard cooking operation HIGH SPEED BUTTON When high levels of smoke are produced during cooking, press for highest level of extraction. - Page 12 2. Remove the lamp cover by unscrewing two screws. 3. Unscrew the incandescent bulb. 4. Replace with the same type and rated bulb E14 Incandescent Bulb: (220V E14 Max 28W) FOR LED LAMPS (Max 2W) REPLACEMENT 1. Please get in touch with christie@falco.co.za for assistance.
-
Page 13: Troubleshooting
TROUBLESHOOTING Fault Cause Solution Light on, but The fan blade is jammed. Switch off the unit and repair by a fan does not qualified service agent. work The motor is damaged. Both light and Replace the bulb with correct rating. Light bulb burn. -
Page 14: Frequently Asked Questions
Using the extractor you purchased on any commercial application poses a serious fire risk and will result in immediate void of your warranty. Please contact our Falco offices for assistance with Gas Braai Extractors. 3. Q: What is the correct installation height? A: The recommended installation height is 700mm above gas and 650mm above electrical. - Page 15 A: Yes. Please make sure of your measurements before starting your installation process. Additional bottom chimneys and installation brackets are sold by Lategan & Van Biljoens in Pretoria and they are used to extend the chimneys on Falco units. 13. Q: My extractor is blowing and not extracting? A: There are three main reasons that can cause your extractor to blow instead of extracting and most of the time (98%), this is caused by faulty installations.
- Page 16 A: Full range of spares is available from Lategan & Van Biljoens in Pretoria. www.appliancesspares.co.za 15. Q: What is the diameter of my ducting hose? A: 150mm 16. Q: More Queries? A: Please email any queries to: info@falco.co.za, Tel: 011 454 6423/4314. Spares can be viewed and ordered online: www.appliancespares.co.za...
-
Page 17: Environmental Protection
ENVIRONMENTAL PROTECTION Waste electrical products should not be disposed of with household waste. Please recycle where facilities exist. Check with your Local Authority or retailer for recycling advice. This appliance is marked according to the European directive 2012/19/EU on Waste Electrical and Electronic Equipment (WEEE). By ensuring this product is disposed of correctly, you will help prevent potential negative consequences for the environment and human health, which could otherwise be caused by inappropriate waste handling of this...


Need help?
Do you have a question about the AR-60-PYRS and is the answer not in the manual?
Questions and answers