
Subscribe to Our Youtube Channel
Related Manuals for Falco AR-60-701


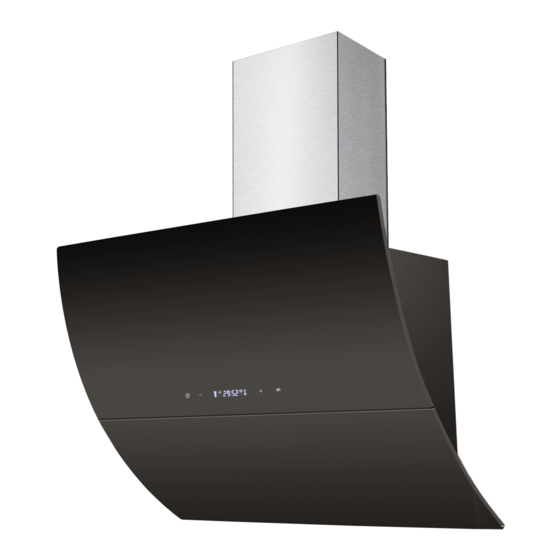
Summary of Contents for Falco AR-60-701
- Page 1 INSTALLATION AND USER’S MANUAL Model: AR-60-701, AR-90-701 AR-60-736, AR-90-736 AR-60-706RGB, AR-90-706RGB...
- Page 2 Warranty and service certificate: This certificate is issued by Falco Domestic Appliances, supplier of ALL Unbranded Falco Extractor fan models. Hereinafter referred to as ‘The Company’, to the original purchaser only, of the product/appliances described on the certificate and shall constitute the only warranty given in respect of this product/appliance.
- Page 3 Alternatively using the following link: www.falco.co.za/service. Any service-related queries should be directed directly to the dealer (store) where the unit was purchased. Alternatively, the purchaser can contact the appointed call centre on the details provided above.
-
Page 4: Table Of Contents
INTRODUCTION ....................... 5 SAFETY PRECAUTIONS .................... 5 INSTALLATION (EXTERNAL DUCTING) ..............6 INSTALLATION (AIR RECIRCULATION) ..............10 OPERATION (AR-60-701 / AR-90-701) ..............11 OPERATION (AR-60-736 / AR-90-736) ..............15 OPERATION (AR-60-706RGB / AR-90-706RGB) ............ 18 MAINTENANCE ...................... 22 TROUBLESHOOTING ..................... 24 FREQUENTLY ASKED QUESTIONS ................. -
Page 5: Introduction
INTRODUCTION This instruction manual is designed to provide you with all the required instructions related to the installation, use and maintenance of the appliance. In order to operate the unit correctly and safety, please read this instruction manual carefully before installation and usage. This extractor makes use of high quality materials and is made with a streamlined design. -
Page 6: Installation (External Ducting)
INSTALLATION (EXTERNAL DUCTING) 1. If you plan on ducting the air to the outside, your extractor can be connected as per the picture below to a ducting pipe with an internal diameter of 150mm. 2. The extractor should be mounted at the following distances above the counter top: Above a gas hob or cooker –... - Page 7 3. Drill 3 x 8mm holes to accommodate the mounting bracket. Screw and tighten the bracket onto the wall with the provided screws and plugs. Screw (4mm x Holes on wall 30mm) Screw Plug Wall Bracket 4. Lift up the extractor and hang it on the now mounted wall bracket. Cooker hood Wall bracket Certain models will require that additional screws be used to further...
- Page 8 5. Fix the provided ducting pipe to the air outlet of the extractor as in the picture below:...
- Page 9 Fitting the Chimneys to the Extractor: Slide the top chimney piece (this is the one with the vents holes cut into the sides) into the bottom section (this one is solid, with no vent holes). 1. Adjust the total chimney length, by sliding the two chimney sections to the required length.
-
Page 10: Installation (Air Recirculation)
INSTALLATION (AIR RECIRCULATION) If ducting the air to the outside with the ducting pipe is not possible, then the ducting pipe can be discarded. The installation of the extractor is the same as previously shown, the only difference is that carbon filters (provided) assist in trapping/capturing odours. -
Page 11: Operation (Ar-60-701 / Ar-90-701)
Please note that once the filters are fitted to the extractor, the suction power of the unit will decrease somewhat. OPERATION Touch control for models: AR-60-701, AR-90-701 Touch control panel Remote Control Before using the remote control, please remove the battery’s plastic film. - Page 12 Standby Mode After initial plug in, the flashes slowly, this means the unit is in standby, mode. Switching the unit on and off In standby mode, press the button, the display will illuminate, and the extractor will switch on. The unit is now in WORKING MODE. If it’s the initial startup, the motor will be on the low speed and the downlights will remain off.
- Page 13 Changing the fan speed If the fan speed button is pressed on the extractor or the remote, the extractor’s motor will cycle through fan speeds Low / Medium / High. This button will not power-off the unit. Switching the downlights on and off Short pressing the light button will switch on/off the extractor’s downlights.
- Page 14 To save the time press and hold the following for 1 second, or simply refrain from pressing any buttons for 5 seconds to automatically save the setting. Timer setting When the motor is working, press and hold for 1 second. The display will show the following “00:00”...
-
Page 15: Operation (Ar-60-736 / Ar-90-736)
LCD DISPLAY 1. Fan symbol, will turn on when the fan is working 2. Time display 3. Timer 4. Light 5. Fan speed 6. Alarm symbol 7. Cleaning symbol, appears when total working time reaches 14 hours or at the initial start-up. OPERATION Touch control for models: AR-60-736, AR-90-736... - Page 16 After the plugging the extractor into the power supply, the unit will automatically go into STANDBY MODE SPEED INCREASE BUTTON Used to switch on the extractor and to increase the fan speed. SPEED DECREASE BUTTON Used to switch off the extractor and to decrease the fan speed. TIMER BUTTON While the unit is in STANDBY MODE press the timer button to enter CLOCK SETTING MODE.
- Page 17 Quick Timer: Press and hold for 1 second, the digital display will flash and countdown from 5 minutes, after which the motor and downlights will switch off. LIGHT BUTTON Short press the light button to switch the downlights on and off. Long pressing the light button 1.
-
Page 18: Operation (Ar-60-706Rgb / Ar-90-706Rgb)
7. Cleaning symbol, appears when total working time reaches 14 hours or at the initial start-up. OPERATION Touch control for models: AR-60-706RGB, AR-90-706RGB Controls downlights and Mood lighting functionality After the plugging the extractor into the power supply, the unit will automatically go into STANDBY MODE SPEED INCREASE BUTTON Used to switch on the extractor and to increase the fan speed. - Page 19 P1: Lowest speed P2: Middle speed P3: High speed TIMER BUTTON While the unit is in STANDBY MODE press the timer button to enter TIMER SETTING MODE. The minutes display will flash, use to adjust the minutes. Press to save the setting or wait 10 seconds to save automatically.
- Page 20 1. Short pressing (about 1 second) the light button will turn on the downlights of the extractor. To switch off the lights, repeat the above. 2. Long pressing (5 seconds) the light button a. Will turn off the cleaning symbol and reset the total working time of the extractor –...
- Page 21 If the motor and mood lighting are on at the same time, the following will be displayed: (P1- motor speed, A1- Mood lighting setting) If the motor is off and the mood lighting is on, the following will be displayed: (A2- Mood lighting setting) To increase or decrease the intensity of the light, simply push either buttons when the A1, A2, A3, A4 is selected.
-
Page 22: Maintenance
LCD DISPLAY 1. Fan symbol, will turn on when the fan is working Countdown timer display 3. Timer 4. Light 5. Fan speed 6. Alarm symbol 7. Cleaning symbol, appears when total working time reaches 14 hours or at the initial start-up. MAINTENANCE Before cleaning, switch off the unit by unplugging from the wall socket, or if connected directly to the mains, switch off at the isolator switch. - Page 23 MONTHLY CLEANING OF THE GREASE FILTER (ALUMINIUM) Clean the filter monthly to prevent fire hazards due to oil build up. The grease filter collects oil, so its cleanliness directly affects the extractor’s efficiency. If not cleaned regularly, the grease build up will block the air from flowing through and thereby affect the suction rate of the extractor.
-
Page 24: Troubleshooting
TROUBLESHOOTING Fault Cause Solution The fan blade is Light on, but jammed. Switch off the unit and repair by a fan does not work qualified service agent. The motor is damaged. Replace the bulb with correct Light bulb burn. Both light rating. -
Page 25: Frequently Asked Questions
Using the extractor you purchased on any commercial application poses a serious fire risk and will result in immediate void of your warranty. Please contact our Falco offices for assistance with Gas Braai Extractors. 3. Q: What is the correct installation height? A: The recommended installation height is 700mm above gas and 650mm above electrical. - Page 26 A: Yes. Please make sure of your measurements before starting your installation process. Additional bottom chimneys and installation brackets are sold by Lategan & Van Biljoens in Pretoria and they are used to extend the chimneys on Falco units. 13. Q: My extractor is blowing and not extracting? A: There are three main reasons that can cause your extractor to blow instead of extracting and most of the time (98%), this is caused by faulty installations.
- Page 27 A: Full range of spares is available from Lategan & Van Biljoens in Pretoria. www.appliancesspares.co.za 15. Q: What is the diameter of my ducting hose? A: 150mm 16. Q: More Queries? A: Please email any queries to: info@falco.co.za, Tel: 011 454 6423/4314. Spares can be viewed and ordered online: www.appliancespares.co.za...
-
Page 28: Environmental Protection
ENVIRONMENTAL PROTECTION Waste electrical products should not be disposed of with household waste. Please recycle where facilities exist. Check with your Local Authority or retailer for recycling advice. This appliance is marked according to the European directive 2012/19/EU on Waste Electrical and Electronic Equipment (WEEE). By ensuring this product is disposed of correctly, you will help prevent potential negative consequences for the environment and human health, which could otherwise be caused by inappropriate waste handling of this...
Need help?
Do you have a question about the AR-60-701 and is the answer not in the manual?
Questions and answers