
Subscribe to Our Youtube Channel
Related Manuals for Home Decorators Collection BELFORD


Summary of Contents for Home Decorators Collection BELFORD
- Page 1 Item #XXX XXX Model #SW1732/ DAMP ORB BELFORD LED 52 INCH CEILING FAN FOR DAMP LOCATION...
- Page 2 Installing the Light Kit ..........7 Attaching the Fan Blade..........10 Hanging the Fan............11 To reduce the risk of fire or electric shock, this fan should only be used with fan speed control part NO.:DL-1170FCS-03, manufactured by: Summer Wind International. ,Ltd.
- Page 3 Fan size Speed Volts Amps Watts N.W. G.W. C.F. 1172 0.04 0.05 3.17 1880 8.32 kg 9.7 kg 0.09 5.61 2672 2.66’ ft. (18.3 lbs) (21.34 lbs) 0.17 10.46 3548 21.56 4544 0.32 0.47 33.53 5063...
- Page 4 Wire nuts (not to scale) Mounting screw (preassembled) Mounting screw Blade bracket screw Glass cover screw...
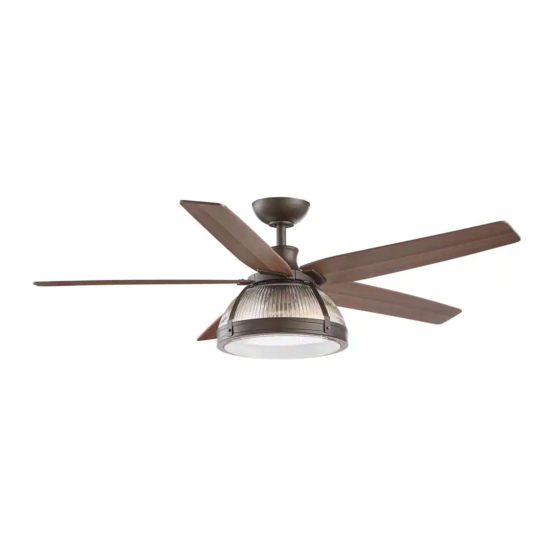
- Page 5 Blade Glass Mounting bracket Decorative scroll Canopy 6 W LED Bulb Canopy Cover Glass Cover Hanging Ball (preassembled) Blade bracket Downrod (preassembled) Couping Cover Fan motor assembly Light kit Plate Light kit...
-
Page 7: Installing The Light Kit Plate
Installing the Light Kit Installing the light kit plate Remove one of the three screws (LL) from the fan motor assembly (H) mounting ring and loosen, but do not remove, the other two screws (LL). Place the key holes from the light kit plate (I) over the two screws (LL) previously loosened from the fan motor assembly (H) mounting ring. - Page 8 Installing the Light Kit (continued) Installing the decorative scrolls Put the light kit assembly down into the glass (K) . Align holes in glass (K) and the light kit plate (I) and the decorative scroll (L) , secure them together with the mounting screw (LL) .
- Page 9 Installing the Light Kit (continued) Installing the glass cover Installing the bulbs Align holes in the decorative scroll (L) and the glass Install the two 6 watt LED standard E26 base bulbs (M) cover (N), and secure with the glass cover screws (NN). into the sockets.
- Page 10 Attaching the Fan Blade Fastening the blade assemblies to Fastening the blade to the blade the fan motor assembly bracket Attach the fan blades (A) to the blade bracket (O) by Tighten the blade assemblies on the fan motor using three blade screws (AA) and fiber washer (BB). assembly (H) by using the blade bracket screws (MM) .
-
Page 13: Making The Electrical Connections
Assembly -Hanging the Fan (continued) Making the electrical connections WARNING: To avoid possible electrical shock, ensure the electricity is turned off at the main fuse box before wiring. WARNING: To avoid possible electrical shock, ensure the electricity is turned off at the circuit breaker or main fuse box before wiring. - Page 14 Assembly -Hanging the Fan (continued)
-
Page 15: Learning Process
A23G 12V 1.2.3.4.5.6 buttons: Learning process... - Page 16 Reverse function button (QQ): Controls the fan direction.
- Page 18 Blade Mounting bracket Canopy Canopy Cover Hanging Ball Downrod Couping Cover Fan motor assembly Light kit Plate Light kit Glass Mounting screw Decorative scroll 6 W LED Bulb Mounting screw Glass Cover Blade bracket screw Glass cover screw Blade bracket...
Need help?
Do you have a question about the BELFORD and is the answer not in the manual?
Questions and answers
Where is the RR button located to reverse fan direction? Nothing on the remote itself.