Table of Contents
Advertisement
Quick Links
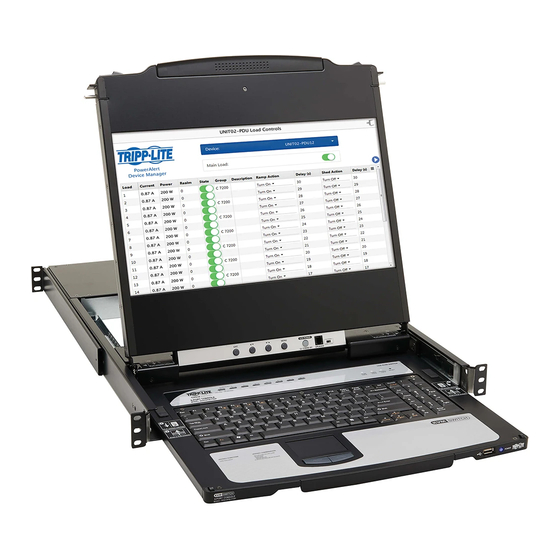
NetDirector
Console KVM Switch
Models: B030-008-17-IP, B030-DP08-17DIP, B030-DP16-17DIP
Quick Start Guide
with IP Access
WARRANTY REGISTRATION
Register your product today and be
automatically entered to win an ISOBAR
surge protector in our monthly drawing!
tripplite.com/warranty
1111 W. 35th Street, Chicago, IL 60609 USA • tripplite.com/support
Copyright © 2020 Tripp Lite. All rights reserved.
Rack-Mount
®
®
1
Advertisement
Table of Contents

Related Manuals for Tripp Lite NetDirectorB030-DP16-17DIP


Summary of Contents for Tripp Lite NetDirectorB030-DP16-17DIP
- Page 1 WARRANTY REGISTRATION Register your product today and be automatically entered to win an ISOBAR ® surge protector in our monthly drawing! tripplite.com/warranty 1111 W. 35th Street, Chicago, IL 60609 USA • tripplite.com/support Copyright © 2020 Tripp Lite. All rights reserved.
-
Page 2: Table Of Contents
The user must use shielded cables and connectors with this equipment. Any changes or modifications to this equipment not expressly approved by Tripp Lite could void the user’s authority to operate this equipment. -
Page 3: Package Contents
1. Package Contents • NetDirector B030-Series Rack-Mount Console KVM Switch with IP Access • (x2) High-Speed HDMI Cables - 6 ft. or (x2) DisplayPort Cables - 6 ft. (depending on model purchased) • (x2) USB 2.0 A/B Cables – 6 ft. •... -
Page 4: System Requirements
2. System Requirements 2.1 Built-In LCD Console The integrated LCD monitor’s maximum resolution is 1920 x 1080 @ 60 Hz. Ensure all resolution settings of the connected computers do not exceed the LCD monitor’s maximum resolution. 2.2 Optional External Console •... -
Page 5: Features
3. Features • Rack-Mount Console KVM Switch with built-in IP Access in a dual-rail housing with top and bottom clearance for integrated operation in 1U of rack space. • KVM console combines a 17.3” LCD monitor, keyboard and touchpad. • Model B030-008-17-IP: connect an external DVI monitor or computer using HDMI to DVI adapter cables. •... -
Page 6: Components
3. Features 3.1 Components Front View Component Description Handle Pull to slide the KVM module out; push to slide it in. LCD Module After sliding out the KVM module, flip up the cover to access the LCD monitor. LCD Controls The buttons to control the position and picture settings of the LCD monitor are located here. - Page 7 3. Features Rear View Note: B030-008-17-IP is shown below. B030-DP08-17DIP is identical, except the video input port is DisplayPort. B030-DP16-17DIP is identical, except the video input port is DisplayPort and there are 16 ports Component Description Power Socket This is a standard 3-prong C14 AC power connector. The power cord from an AC source plugs in here. Power Switch This is a standard rocker switch that powers the device on and off.
-
Page 8: Important Safety Instructions
• Consideration should be given to the connection of equipment and the supply circuit, as well as what effect overloading the supply circuit might have on overcurrent protection and supply wiring. • To help protect the system from unexpected transient increases and decreases in electrical power, use a Tripp Lite Surge Protector, Line Conditioner, or Uninterruptible Power Supply (UPS). -
Page 9: Rack-Mounting Safety Instructions
4. Important Safety Instructions 4.2 Rack-Mounting Safety Instructions • The ambient operating temperature in the rack may be an issue and is dependent upon the rack load and ventilation. When installing in a closed or multi-device rack assembly, ensure the temperature will not exceed the maximum rated ambient temperature. •... -
Page 10: Installation
5. Installation The Console KVM Switch is designed for mounting in a 1U rack system. A rack-mounting kit is included for quick installation. The various mounting options are explained in the following subsections. The installation instructions depict model B030-008-17-IP , but all steps are the same for all models. -
Page 11: Opening/Closing The Console
Connect the LAN port on the back of the device to the network using Cat5e/6 cable. Plug the included power cord into a Tripp Lite Surge Protector, Power Distribution Device (PDU), Uninterruptible Power Supply (UPS) or AC wall outlet. -
Page 12: Opening Together
5. Installation 3. Rotate the top panel all the way back to expose the LCD screen. 4. Reach underneath and pull out the keyboard module until it clicks into place. 5.5.2 Opening Together Refer to the diagrams in the Opening Separately section as you do the following: 1. -
Page 13: Opening Precautions
5. Installation 5.5.3 Opening Precautions The maximum load bearing capacity of the keyboard module is 65 lb. Failure to heed the instructions below can result in damage to the keyboard module. CORRECT Rest your hands and arms lightly on the keyboard module as you work. INCORRECT! •... -
Page 14: Closing The Console
5. Installation 5.5.4 Closing the Console 1. Engage the release catches located on either side of the keyboard to release the keyboard module, then slide in the module slightly. 2. Release the catches. Using the front handle, push the keyboard module all the way in. - Page 15 5. Installation 3. Rotate the LCD module all the way down, then engage the rear catches to release the LCD module. 4. Using the front handle, push the module all the way in.
-
Page 16: Network Setup - Ip Address Configuration
5. Installation 5.6 Network Setup – IP Address Configuration By default, the KVM will automatically have an IP address assigned via DHCP server. To configure a fixed IP address, you will need to access the KVM switch in one of three ways: Local Console, IP Installer or Browser. 5.6.1 Local Console Note: The local console OSD only allows IPv4 network settings configuration. -
Page 17: Ip Installer
5. Installation 5.6.2 IP Installer Computers running Windows can use the IP Installer utility found in the included CD-ROM to assign an IP address to the KVM. Notes: • The IP Installer Settings section located in the KVM’s Web Management Interface network page must be enabled in order to use the IP Installer to assign an IP address. - Page 18 5. Installation 3. If accessing the KVM for the first time, enter the username administrator and the password password. For security purposes, changing the username and password is strongly recommended. Once the default username and password are entered, the web management interface will appear with the following page displayed: 4.
-
Page 19: Basic Operation
6. Basic Operation 6.1 LCD OSD Configuration 6.1.1 LCD Buttons The LCD OSD configures the LCD. Four buttons are used to perform the configuration, as described in the table below: Button Function MENU • When the LCD OSD Menu function has not been entered, pressing this button initiates the Menu function and the Main Menu. •... -
Page 20: Kvm Operation
7. KVM Operation 7.1 Local Console Login When accessing the console KVM switch for the first time, a prompt will appear asking for a username and password. The default username is administrator, and the default password is password. For security purposes, changing the username and password on this account is strongly recommended. - Page 21 7. KVM Operation 4. The AP Windows Client main screen will appear. 5. The AP Windows Client will search the network for any KVM switches and display their Model Name(s) and IP Address(es) in the main screen’s Server List. If the KVM you wish to connect to is displayed in the list, highlight it and click the Login button. If not, enter the IP address and port number assigned to it and click the Login button.
- Page 22 7. KVM Operation AP Windows Client Connection Screen Menu Bar The Menu Bar contains two menus: File and Help. The File Menu allows the operator to Create, Save and Open Work files. The Help Menu displays the AP Windows Client version number. Server List Each time the WinClient.exe file is run, it searches the User’s LAN segment for B030-008-17-IP KVM Switches and lists in the box any that are found.
-
Page 23: Ap Java Client Login
7. KVM Operation 7.2.3 AP Java Client Login In cases when an Administrator does not want the KVM Switch to be available via browser and the remote user is not running Windows, the AP Java Client provides access to the KVM switch. After downloading the AP Java Client, double-click on the program download location on your hard disk to show the connection screen. -
Page 24: Warranty And Product Registration
EXCEPT AS PROVIDED ABOVE, IN NO EVENT WILL TRIPP LITE BE LIABLE FOR DIRECT, INDIRECT, SPECIAL, INCIDENTAL OR CONSEQUENTIAL DAMAGES ARISING OUT OF THE USE OF THIS PRODUCT, EVEN IF ADVISED OF THE POSSIBILITY OF SUCH DAMAGE. Specifically, TRIPP LITE is not liable for any costs, such as lost profits or revenue, loss of equipment, loss of use of equipment, loss of software, loss of data, costs of substitutes, claims by third parties, or otherwise.
Need help?
Do you have a question about the NetDirectorB030-DP16-17DIP and is the answer not in the manual?
Questions and answers