Table of Contents
Advertisement
Quick Links
DANGER
Failure to follow these instructions
could result in fire or explosion that
could cause property damage,
personal injury or death.
DANGER
DO NOT use Grill indoors or in any
enclosed area. DO NOT use in or on
boats or recreational vehicles. Toxic
fumes and carbon monoxide can
accumulate and cause asphyxiation.
WARNING
Improper installation, adjustment,
alteration, service or maintenance
can cause injury or property damage.
Read the installation, operation
and maintenance instructions
thoroughly before installing or
servicing this equipment.
PROP 65 WARNING
Chemicals known to the state of
California to cause cancer, birth
defects or other reproductive harm
are created by the combustion of
propane.
WARNING
FOR YOUR SAFETY:
For Outdoor Use Only (outside any
enclosure)
JXG6205SS
Owner's Manual
5-Burner Split Lid LP Gas Grill
SAVE THESE INSTRUCTIONS FOR FUTURE REFERENCE. IF YOU
ARE ASSEMBLING THIS UNIT FOR SOMEONE ELSE, GIVE THIS
MANUAL TO HIM OR HER TO SAVE FOR FUTURE REFERENCE.
FOR CUSTOMER SERVICE, CALL 1-888-841-7304 (TOLL-FREE)
07:00 A.M. – 05:00 P.M. (PST), MONDAY-FRIDAY.
OR EMAIL US AT CUSTOMER.SERVICE@BONDMFG.COM OR
VISIT OUR WESITE AT WWW.BONDMFG.COM
0
ITEM# JXG6205SS
Advertisement
Table of Contents

Related Manuals for Black & Decker Signature 6500 Series


Summary of Contents for Black & Decker Signature 6500 Series
- Page 1 ITEM# JXG6205SS DANGER Failure to follow these instructions could result in fire or explosion that could cause property damage, 5-Burner Split Lid LP Gas Grill personal injury or death. DANGER DO NOT use Grill indoors or in any enclosed area. DO NOT use in or on boats or recreational vehicles.
- Page 2 QUESTIONS, PROBLEMS, MISSING PARTS WITH THIS PRODUCT? DO NOT RETURN TO YOUR RETAILER. PLEASE CALL OUR CUSTOMER SERVICE DEPARTMENT AT 1-888-841-7304, 7:00AM to 5:00PM (PST), MONDAY THROUGH FRIDAY. OR EMAIL US AT CUSTOMER.SERVICE@BONDMFG.COM OR VISIT OUR WEBSITE AT WWW.BONDMFG.COM Grill Operation 1-2-3 Before Grilling Step 1 Keep your grill a safe distance away from your property.*...
-
Page 3: Table Of Contents
Table of Contents For Your Safety....................3 Package Contents....................5 Illustrated Parts List ..................5 Hardware List....................6 Assembly Instructions..................7 Operating Your Grill..................9 Connecting & Disconnecting The Gas Cylinder..........10 Checking for Leaks..................10 Lighting Your Grill....................10 Excess Flow Safety Valve Reset Procedure............13 Care and Maintenance..................14 Troubleshooting....................15 Warranty Program.....................17 JXG6205SS... -
Page 4: For Your Safety
For Your Safety Dear Valued Customer, Congratulations on purchase of your new Black & Decker 6500 Series Gas Grill!! In this manual, you will find assembly instructions, suggestions for grilling and helpful hints, as well as guidelines for the safe operation, proper care and use of your grill. - Page 5 Safe Locations For Use Of This Outdoor Grill DANGER Never use this outdoor grill inside any building, garage, shed or breezeway, or inside any boat, trailer or recreational vehicle to prevent a possible fire and to prevent the possibility of carbon monoxide poisoning or asphyxiation. WARNINGS Do not use this appliance under overhead combustible surface or covered area (e.g., awnings, umbrellas, porches or gazeboes).
-
Page 6: Package Contents
Package Contents Illustrated Parts List A. Body & cart assembly 1 pc. B. Left side table 1 pc. C. Right side table 1 pc. D. Knob E. Knob seat 1 pc. F. Left warming rack 1 pc. G. Heating plate 4 pcs. -
Page 7: Hardware List
Hardware List BBB: M6X 15 bolt 8 pcs. CCC: M4X 10 bolt 6 pcs. DDD: M6 flat washer 8 pcs. EEE: M6 spring washer 8 pcs. FFF: M4 flat washer 6 pcs. GGG: M4 spring washer 4 pcs. HHH: Battery 3 pcs. -
Page 8: Assembly Instructions
Assembly Instructions Remove all contents from the carton packaging. Make sure all parts are present before attempting assembly. Once the grill is fully assembled, go back and check to make certain all the bolts are secure. Tighten again using the screwdriver provided if necessary. Estimated Assembly Time: 25 minutes (Assemble the side tables with body assembly) Step 1... - Page 9 Step 4 (Side burner frame assembly) a) Open the side burner lid and place the side burner frame (L) on the right side table. Make certain the venturi tube is connected properly with valve. b) Align the holes on the side burner frame (L) with the holes on the right side table.
-
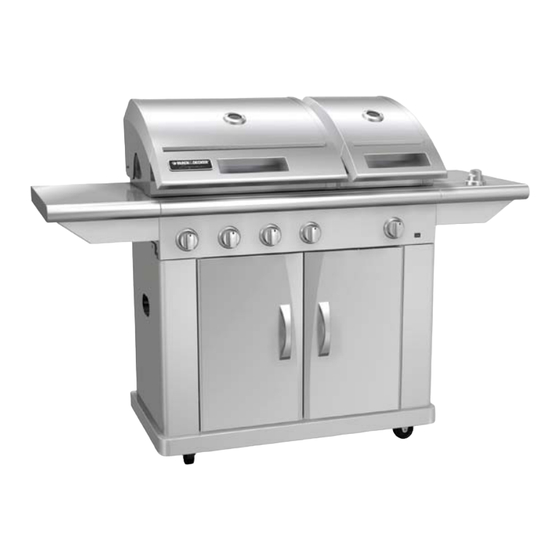
Page 10: Operating Your Grill
Fully Assembled View Left Side Right Side Operating the Grill CAUTION: Use only the regulator provided. If a replacement is necessary, call our customer service center. The use of unauthorized parts can create an unsafe condition or environment and will void the warranty The propane gas supply cylinder used must be constructed and marked in accordance with the Specifications for Propane Gas Cylinders of the U.S. -
Page 11: Connecting & Disconnecting The Gas Cylinder
Connecting & Disconnecting the Gas Cylinder LP (Propane) Gas Supply Connection 1. Always place the propane cylinder on the tank brackets located on the right side of the cart. 2. Always confirm that all burner control knobs are in the OFF position before activating the gas supply. 3. - Page 12 Main Burner Open lid while lighting burners. WARNING: Attempting to light the burner with the lid closed may cause an explosion. Make sure there are no obstructions of airflow to the gas unit. Spiders and insects can nest and clog the burner/venturi tube at the orifice. A clogged burner tube can lead to a fire beneath the appliance.
- Page 13 Observe flame height when lit: Flame should be a blue/yellow color between 1 to 2 inches high. 2 in. 1 in. Confirm that the burner is properly lit and that the flame pattern is as desired (see fig. A,B and C below for the proper flame patterns). If the flame pattern is other than normal, consult 0 in.
-
Page 14: Excess Flow Safety Valve Reset Procedure
WARNING: DO NOT adjust the air-shutter while the grill is in operation. If it still hot, please wear protective gear and be careful. Failure to follow this instruction could cause personal injury. Flare-ups “Flare-ups” sometimes occur when food drippings fall onto the hot heat distribution plate or burners and ignite. Some flaring is normal and desirable as it helps impart the unique flavors associated with grilled foods. -
Page 15: Care And Maintenance
Care and Maintenance Always allow to completely cool off before covering your grill to prevent corrosion from condensation. Caution: All cleaning and maintenance should be done when the grill is cool, with the fuel supply turned off at the control dial and the propane cylinder disconnected. -
Page 16: Troubleshooting
Troubleshooting Problem Possible Cause Prevention/Cure Clean wire and /or electrode with Wires and/or electrode covered Burner will not light using knobs or igniter. rubbing alcohol. with cooking residue. Electrode and burners are wet. Wipe dry with cloth. Electrode cracked or broken – Replace electrode. - Page 17 Turn knobs to OFF. Turn gas OFF at Persistent grease fire. Grease trapped by food buildup propane tank. Leave lid in closed position around burner system. and let fire burn out. After grill cools, remove and clean all parts. Clean burner and/or burner tube(s). Flashback [fire in burner tubes].
-
Page 18: Warranty Program
Warranty Program Proof of purchase is required to access this warranty program, which is in effect from the date of purchase. If unable to provide proof of purchase or after the warranty has expired, customers will be subject to parts, shipping and handling fees. Full 30-Day Warranty Any missing parts can be replaced at no charge within 30 days from the date of purchase with a valid proof of purchase.
Need help?
Do you have a question about the Signature 6500 Series and is the answer not in the manual?
Questions and answers