Table of Contents
Advertisement
Quick Links
DSC PowerSeries Neo Image Sensor Installation Guide - ADC-
IS-300-LP
Product summary and technical specifications
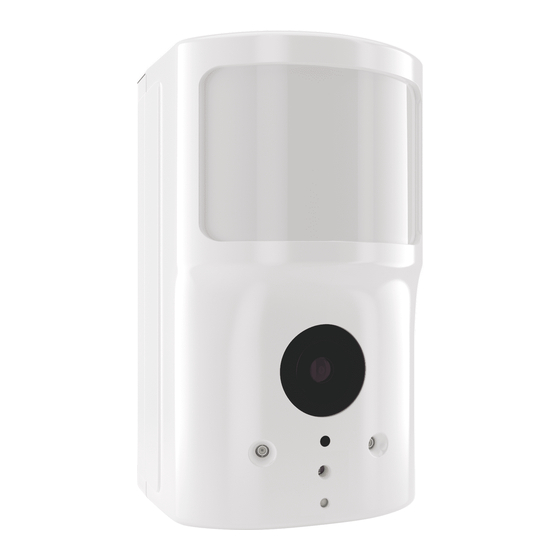
The Image Sensor is a pet immune PIR (passive infrared) motion detector with a built-in camera designed to capture
images during alarm or non-alarm events when motion is detected.
Product features:
• Communicates wirelessly to the security control panel
• 35 foot detection range with a 90 degree horizontal FOV
• Configurable PIR sensitivity and pet immunity settings
• Image: VGA 640x480 pixels
• Color Images (except in night vision)
• Night vision image capture with infrared flash (black & white)
• Tamper detection, walk test mode, supervision
• All systems can support up to three Image Sensors
• UL 639 certified
Technical specifications:
Alarm.com model number
https://answers.alarm.com/ADC/Partner/Installation_and_Troubleshooting/Image_Sensor/Image_Sensor_Version_3/Alarm.com_Image_S
ADC-IS-300-LP
Updated: Wed, 19 Jun 2019 01:33:47 GMT
1
Advertisement
Table of Contents

Related Manuals for Alarm.Com IS-300-LP


Summary of Contents for Alarm.Com IS-300-LP
- Page 1 • Night vision image capture with infrared flash (black & white) • Tamper detection, walk test mode, supervision • All systems can support up to three Image Sensors • UL 639 certified Technical specifications: Alarm.com model number ADC-IS-300-LP https://answers.alarm.com/ADC/Partner/Installation_and_Troubleshooting/Image_Sensor/Image_Sensor_Version_3/Alarm.com_Image_S Updated: Wed, 19 Jun 2019 01:33:47 GMT...
-
Page 2: Pet Immunity Settings
DSC PowerSeries Neo panel requirement Must be on panel version 1.0 + Must be one of the following: • 3G8080(I) controller Alarm.com cellular module requirement • CD8080(I) controller • TL880LT Dual-Path controller Two-Way Voice Compatibility Images cannot be transmitted while a Two-Way Voice call is in session. When the Image Sensor is installed on a system with Two-Way Voice over the cellular network, image transmission during an alarm may be interrupted by the two-way session. -
Page 3: Camera Led Reference Chart
Low Battery Notification: Panel will display a low battery alert for the sensor and/or notifications are issued via the Alarm.com platform if the customer has subscribed to this notification type. Replacing batteries: To replace the sensor batteries, slide the front of the sensor up off the sensor-back. Dispose of used batteries per the battery manufacturer instructions and following local regulations. - Page 4 Updated: Wed, 19 Jun 2019 01:33:47 GMT...
-
Page 5: Resetting The Image Sensor
There are two ways to reset the Image Sensor: Power Cycle A power cycle can be performed by one of two ways, either: • Take out and reinsert batteries. • Press and release the sensor reset button. https://answers.alarm.com/ADC/Partner/Installation_and_Troubleshooting/Image_Sensor/Image_Sensor_Version_3/Alarm.com_Image_S Updated: Wed, 19 Jun 2019 01:33:47 GMT... - Page 6 7. Scroll to see Test PIR, then press [*] to test the Image Sensor's PIR. The screen displays I.S. [#] In Test For Next 3 Min to indicate the test mode command is sent. https://answers.alarm.com/ADC/Partner/Installation_and_Troubleshooting/Image_Sensor/Image_Sensor_Version_3/Alarm.com_Image_S Updated: Wed, 19 Jun 2019 01:33:47 GMT...
-
Page 7: Installation
Hardware compatibility requirements. 3. Register module and test the system. ◦ Power up the panel and initiate a comm-test to ensure the Alarm.com module is properly installed and communicating with the Alarm.com NOC. Enroll the Image Sensor Daughterboard required for Rev6.0 (ADC-600T). No daughterboard required for Rev6.2 (ADC-620T). - Page 8 Zone Definitions menu via sections [001] through [004] in Installer Programming. Sensor groups can also be changed through the Alarm.com Partner Portal. After enrollment, be sure to keep the sensor and panel powered so the sensor can complete an initialization process with the Alarm.com Network Operations Center. This process will take several minutes.
- Page 9 Mounting Image Sensor 1. Determine the desired mounting angle – 3 options 2. Screw bracket to back plate. https://answers.alarm.com/ADC/Partner/Installation_and_Troubleshooting/Image_Sensor/Image_Sensor_Version_3/Alarm.com_Image_S Updated: Wed, 19 Jun 2019 01:33:47 GMT...
- Page 10 Use the provided large screws and anchors to attach the bracket to the wall. (Leave at least 3 inches of clearance above the sensor to allow for battery replacement without uninstalling the mounting https://answers.alarm.com/ADC/Partner/Installation_and_Troubleshooting/Image_Sensor/Image_Sensor_Version_3/Alarm.com_Image_S Updated: Wed, 19 Jun 2019 01:33:47 GMT...
- Page 11 7. Set PIR Sensitivity Settings – 3 options that can be set through the panel or on the Partner Portal: 8. Verify and Test Image Sensor Setup https://answers.alarm.com/ADC/Partner/Installation_and_Troubleshooting/Image_Sensor/Image_Sensor_Version_3/Alarm.com_Image_S Updated: Wed, 19 Jun 2019 01:33:47 GMT...
-
Page 12: Deleting Image Sensor From Panel
1 or if the Image Sensor is out of range of its current network. PIR Lens and Camera Coverage Diagrams Figure 3.Side View: PIR Lens Coverage https://answers.alarm.com/ADC/Partner/Installation_and_Troubleshooting/Image_Sensor/Image_Sensor_Version_3/Alarm.com_Image_S Updated: Wed, 19 Jun 2019 01:33:47 GMT... -
Page 13: General Troubleshooting Steps
• Verify Range: Under the Image Sensor Setup menu, scroll to Image Sensor Settings, select the sensor and verify under Signal that the sensor is registering a strong signal. If signal strength is low, move non-responsive sensor https://answers.alarm.com/ADC/Partner/Installation_and_Troubleshooting/Image_Sensor/Image_Sensor_Version_3/Alarm.com_Image_S Updated: Wed, 19 Jun 2019 01:33:47 GMT... -
Page 14: False Motion Activations
• Enable Auto Uploads: During the first four hours after any sensor is enrolled onto the system, alarm images will not automatically be uploaded to Alarm.com. Automatic uploads are automatically enabled after four hours. Enable uploads sooner from the Partner Portal.
Need help?
Do you have a question about the IS-300-LP and is the answer not in the manual?
Questions and answers