Table of Contents
Advertisement
Quick Links
Advertisement
Table of Contents

Subscribe to Our Youtube Channel
Related Manuals for Electrolux EEC5750AOX


Summary of Contents for Electrolux EEC5750AOX
- Page 1 EEC5750AOX Oven User Manual...
-
Page 2: Table Of Contents
15. ENERGY EFFICIENCY.................. 34 WE’RE THINKING OF YOU Thank you for purchasing an Electrolux appliance. You’ve chosen a product that brings with it decades of professional experience and innovation. Ingenious and stylish, it has been designed with you in mind. So whenever you use it, you can be safe in the knowledge that you’ll get great results every time. -
Page 3: Safety Information
ENGLISH SAFETY INFORMATION Before the installation and use of the appliance, carefully read the supplied instructions. The manufacturer is not responsible for any injuries or damages that are the result of incorrect installation or usage. Always keep the instructions in a safe and accessible location for future reference. -
Page 4: Safety Instructions
Always use oven gloves to remove or put in • accessories or ovenware. Before carrying out any maintenance, disconnect the • appliance from the power supply. Ensure that the appliance is switched off before • replacing the lamp to avoid the possibility of electric shock. - Page 5 ENGLISH • Make sure that the parameters on the • Make sure that the ventilation rating plate are compatible with the openings are not blocked. electrical ratings of the mains power • Do not let the appliance stay supply. unattended during operation. •...
- Page 6 • Always cook with the oven door – any excess food residues, oil or closed. grease spills / deposits. • If the appliance is installed behind a – any removable objects (including furniture panel (e.g. a door) make shelves, side rails etc., provided...
-
Page 7: Product Description
ENGLISH 2.6 Internal light • Disconnect the appliance from the mains supply. • The type of light bulb or halogen lamp • Cut off the mains electrical cable used for this appliance is only for close to the appliance and dispose of household appliances. -
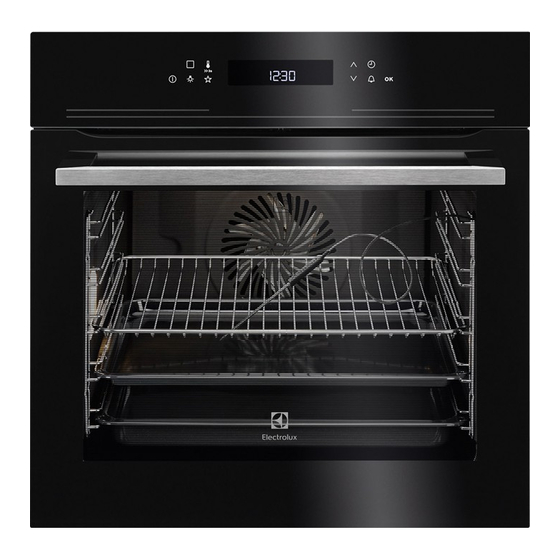
Page 8: Control Panel
4. CONTROL PANEL 4.1 Electronic programmer 7 8 9 10 Use the sensor fields to operate the appliance. Sensor Function Description Field ON / OFF To activate and deactivate the appliance. OPTIONS To set an oven function, a cleaning function or an automatic programme. -
Page 9: Before First Use
ENGLISH 4.2 Display A. Oven function symbol B. Number of the oven function / programme C. Indicators for the clock functions (refer to the table "Clock functions") D. Clock / residual heat display E. Temperature / time of day display Other indicators of the display: Symbol Name... -
Page 10: Daily Use
Put the accessories and the removable 2. Let the appliance operate for 1 hour. shelf supports back to their initial 3. Set the function True Fan Cooking position. and the maximum temperature. 4. Let the appliance operate for 15 5.2 Preheating... - Page 11 ENGLISH Oven function Application Defrost This function can be used for defrosting frozen foods, such as vegetables and fruits. The defrosting time depends on the amount and size of the frozen food. Keep Warm To keep food warm. ECO Roasting When you use this function during cooking, it allows you to optimize the energy consumption.
-
Page 12: Clock Functions
The Fast heat up function decreases the If you activate the Fast heat up function, heat up time. horizontal bars on the display flash to show that the function operates. To activate the Fast heat up function touch and hold for more than three seconds. -
Page 13: Automatic Programmes
ENGLISH 7.4 Setting the END and the time setting flash in the display. The appliance deactivates 1. Set an oven function and automatically. temperature. 8. Touch a sensor field or open the 2. Touch again and again until oven door to stop the acoustic signal. starts to flash. -
Page 14: Using The Accessories
8.1 Automatic programmes Programme number Programme name ROAST BEEF ROAST PORK CHICKEN, WHOLE PIZZA MUFFINS QUICHE LORRAINE WHITE BREAD POTATO GRATIN LASAGNE 8.2 Automatic programmes 1. Activate the appliance. 2. Touch 1. Activate the appliance. 3. Touch to set the weight 2. - Page 15 ENGLISH 9.2 Telescopic Runners Keep the installation instructions for the telescopic runners for future use. With telescopic runners you can put in and remove the shelves more easily. CAUTION! Do not clean the telescopic runners in the dishwasher. Baking tray / Deep pan: Do not lubricate the telescopic runners.
-
Page 16: Additional Functions
10. ADDITIONAL FUNCTIONS 10.1 Using My Favourite SAFE comes on in the display. The door is locked. Programme function To deactivate the Child Lock function repeat step 2. Use this function to save your favourite temperature and time settings for an 10.3 Using the Function Lock... - Page 17 ENGLISH Description Value to set FAULTY TONE ON / OFF DEMO MODE Activation code: 2468 SERVICE MENU RESTORE SETTINGS YES / NO 1) It is not possible to deactivate the tone of the ON / OFF sensor field. 10.6 Brightness of the display 1.
-
Page 18: Hints And Tips
11. HINTS AND TIPS • Do not put the objects directly on the WARNING! appliance floor and do not put Refer to Safety chapters. aluminium foil on the components when you cook. This can change the The temperature and baking... - Page 19 ENGLISH Food Top / Bottom Heat True Fan Cooking Time Com‐ (min) ments Tempera‐ Shelf po‐ Tempera‐ Shelf po‐ ture (°C) sition ture (°C) sition Short‐ 3 (2 and 20 - 30 In a cake bread mould dough Buttermilk 80 - 100 In a 26 cm cheese‐...
- Page 20 Food Top / Bottom Heat True Fan Cooking Time Com‐ (min) ments Tempera‐ Shelf po‐ Tempera‐ Shelf po‐ ture (°C) sition ture (°C) sition Biscuits / 140 - 150 25 - 45 In a bak‐ pastry ing tray stripes -...
- Page 21 ENGLISH Bread and pizza Food Top / Bottom Heat True Fan Cooking Time Com‐ (min) ments Tempera‐ Shelf po‐ Tempera‐ Shelf po‐ ture (°C) sition ture (°C) sition White 60 - 70 1 - 2 pieces, bread 500 gr per piece Rye bread 190 30 - 45...
- Page 22 Food Top / Bottom Heat True Fan Cooking Time Com‐ (min) ments Tempera‐ Shelf po‐ Tempera‐ Shelf po‐ ture (°C) sition ture (°C) sition Pork 90 - 120 On a wire shelf Veal 90 - 120 On a wire...
- Page 23 ENGLISH 11.6 Grilling Preheat the empty oven for 3 minutes before cooking. Food Quantity Tempera‐ Time (min) Shelf po‐ ture (°C) sition Pieces 1st side 2nd side Fillet max. 12 - 15 12 - 14 steaks Beef max. 10 - 12 6 - 8 steaks Sausages 8...
- Page 24 Pork Food Quantity (kg) Temperature Time (min) Shelf posi‐ (°C) tion Shoulder, neck, 1 - 1.5 160 - 180 90 - 120 1 or 2 ham joint Chop, spare rib 1 - 1.5 170 - 180 60 - 90...
- Page 25 ENGLISH 11.8 Moist Fan Baking During cooking, open the appliance door only when For best results follow the necessary. baking times listed in the table below. Food Temperature Time (min) Shelf posi‐ (°C) tion Pasta gratin 190 - 200 45 - 55 Potato gratin 160 - 170 60 - 75...
- Page 26 11.10 Defrost Food Quantity Defrosting Further defrost‐ Comments time (min) ing time (min) Chicken 1000 100 - 140 20 - 30 Place the chicken on an upturned saucer placed on a large plate. Turn halfway through. Meat 1000 100 - 140 20 - 30 Turn halfway through.
-
Page 27: Care And Cleaning
ENGLISH Vegetables Food Temperature (°C) Cooking time until Continue to cook simmering (min) at 100 °C (min) 160 - 170 50 - 60 5 - 10 Carrots Cucumbers 160 - 170 50 - 60 Mixed pickles 160 - 170 50 - 60 5 - 10 Kohlrabi / Peas / 160 - 170... - Page 28 • To clean metal surfaces, use a dedicated cleaning agent. • Clean the appliance interior after each use. Fat accumulation or other food remains may result in a fire. The risk is higher for the grill pan. • Clean stubborn dirt with a special oven cleaner.
- Page 29 ENGLISH 4. Touch again and again until the The oven door can close if display shows "Pyro" and the number you try to remove the glass of the cleaning programme. panels before you remove the oven door. 5. Touch 6. Touch to set the duration CAUTION! of the cleaning procedure:...
- Page 30 8. Hold the door trim (B) on the top edge of the door at the two sides and push inwards to release the clip seal. 9. Pull the door trim to the front to remove it. 10. Hold the door glass panels by their top edge and carefully pull them out 5.
-
Page 31: Troubleshooting
ENGLISH WARNING! Danger of electrocution! Disconnect the fuse before you replace the lamp. The lamp and the lamp glass cover can be hot. CAUTION! Always hold the halogen lamp with a cloth to prevent grease residue from burning on the lamp. 1. - Page 32 Problem Possible cause Remedy The oven does not heat The automatic switch-off is Refer to "Automatic switch- activated. off". The oven does not heat The Child Lock is on. Refer to "Using the Child Lock". The oven does not heat The fuse is blown.
-
Page 33: Installation
ENGLISH Problem Possible cause Remedy The appliance is activated The demo mode is activa‐ Refer to "Using the set‐ and does not heat up. The ted. tings menu" in "Additional fan does not operate. The functions" chapter. display shows "Demo". 13.2 Service data plate is on the front frame of the appliance cavity. -
Page 34: Energy Efficiency
15. ENERGY EFFICIENCY 15.1 Product Fiche and information according to EU 65-66/2014 Supplier's name Electrolux Model identification EEC5750AOX Energy Efficiency Index 81.2 Energy efficiency class Energy consumption with a standard load, con‐ 0.93 kWh/cycle ventional mode Energy consumption with a standard load, fan- 0.69 kWh/cycle... - Page 35 ENGLISH 15.2 Energy saving the heating elements automatically deactivate earlier in some oven The appliance contains functions. features which help you The fan and lamp continue to operate. save energy during everyday Keep food warm cooking. Choose the lowest possible temperature General hints setting to use residual heat and keep a Make sure that the oven door is closed...
- Page 36 www.electrolux.com/shop...
Need help?
Do you have a question about the EEC5750AOX and is the answer not in the manual?
Questions and answers