Table of Contents
Advertisement
Quick Links
Advertisement
Table of Contents

Related Manuals for Faro ScanPlan


Summary of Contents for Faro ScanPlan
-
Page 1: Getting Started Pages
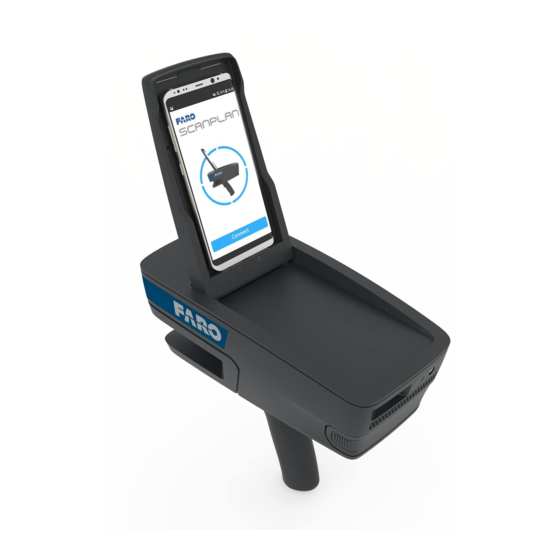
ScanPlan Public Safety-Forensics Manual V1.01 QR code to FARO Assist Note: Unless specified, all instructions are applicable for either Android or iPhone David Dustin, Global Director of Public Safety - Forensics April 1, 2019 © 2018 FARO Technologies, Inc. © 2017 FARO Technologies, Inc. -
Page 2: Table Of Contents
Page 5-6 Getting Started – Powering On Page 7 Getting Started – Preparing the Cell Phone Page 8-10 Getting Started – Mounting Phone to ScanPlan Page 11-12 Connecting Android Phone to ScanPlan Page 13-16 Connecting the ScanPlan App (Android & iOS) - Page 3 Preparing to Export Your Project Page 61 Exporting Project to USB Drive Page 46-49 Exporting to Scene2Go Page 62-64 Exporting for FARO Zone 2D&3D Page 65-68 Exporting for WebShareCloud Page 69-74 Exporting for Present4D (VR-Suite) Page 75-83 Exporting for DXF Page 84-89 Using “ScanAssist”...
-
Page 4: What Comes In The Case
What Comes in the Case USB with FARO Zone 2D, ScanPlan instruction manuals, and extra handle screws. ScanPlan USB with FAROZone and ScanPlan instruction manuals Hex key for removing handle of ScanPlan USB Cable Power supply & cord Cell Phone (if purchased... -
Page 5: Getting To Know The Scanplan
Front of ScanPlan... - Page 6 Rear of ScanPlan...
-
Page 7: Getting Started - Powering
Getting Started Power on the ScanPlan – Power button is on the underside of the ScanPlan to the front of the handle Power Button blink-blink-pause = booting up Solid illumination = device on Blink-pause = shutting down... -
Page 8: Getting Started - Preparing The Cell Phone
Getting Started (cont.) Note: If magnet is already attached to phone skip to step 3 1. Place the phone in the tray of the ScanPlan taking note of where the two magnets will contact the phone. 2. Remove the phone from the... - Page 9 Getting Started (cont.) Check to see if FARO ScanPlan app is installed on the cell phone. If not, download the app from the Google Play store (Android) or the iTunes App store (iOS)
- Page 10 Getting Started (cont.) 1. Choose the appropriate (supplied) USB adapter for the phone being using with the ScanPlan 2. Insert into charging port of phone USB adapter inserted into charging port of cell phone...
-
Page 11: Getting Started - Mounting Phone To Scanplan
Getting Started (cont.) 1. Flip open the tray on the ScanPlan for the phone until it “clicks” into place 2. Place the phone into the tray making sure the magnet charger is securely in place... - Page 12 Getting Started (cont.) Place the phone in the tray of the ScanPlan, make sure the magnetic connector drops into the recess on the ScanPlan. This is needed to establish communication between the phone and the ScanPlan. The magnet on the back of the phone should pull the phone snugly into the tray.
-
Page 13: Connecting Android Phone To Scanplan
Connecting Android to ScanPlan Once the phone is connected to the ScanPlan the following message will appear: Select "OK"... - Page 14 Connecting Android to ScanPlan (cont.) 1. Open the ScanPlan App 2. Click "Connect to ScanPlan"...
- Page 15 Connecting Android to ScanPlan (cont.) There will be 2 pages of tutorials Note: You can check the box “Don’t show it again” and you will be able to bypass this step the next time Click the green check mark on the...
- Page 16 Connecting Android to ScanPlan (cont.) Once the phone is connected to the ScanPlan, this message will appear: Select “OK"...
-
Page 17: Connecting The Scanplan App (Android & Ios)
Opening the ScanPlan App • Return to the phone Home screen • Tap the ScanPlan App... - Page 18 Connecting ScanPlan App 1. Tap “Connect to ScanPlan" 2. Tap Green Checkmark 3. Tap Green Checkmark 4. Click “OK” to activate USB Tethering...
- Page 19 Connecting to the ScanPlan 1. Tap the USB Tethering slider to the right 2. Message will show “Connecting over USB” 3. A list of available projects will be displayed 4. Tap the 3 dots...
- Page 20 Connecting to the ScanPlan (cont.) Tap “Settings” Set the units to your preference Turn “Line Recognition” off (it will help you see what you’re mapping) Make sure “System Monitor” is on Tap the “<“ to exit...
- Page 21 Connecting iPhone to ScanPlan (cont.) Once the phone is connected to the ScanPlan in the cradle, the following message will appear: 1. Select “Trust“ 2. Enter your passcode to trust the ScanPlan...
- Page 22 Connecting iPhone to ScanPlan (cont.) Go to the settings area of the phone 1. Press the “Personal Hotspot” area if it isn’t already enabled 2. Enable the “personal Hotspot”...
- Page 23 Connecting iPhone to ScanPlan (cont.) Returning to the phone home screen, open the ScanPlan App 1. Tap the ScanPlan app icon 2. Press the “Connect” button...
- Page 24 Connecting iPhone to ScanPlan (cont.) Opening the ScanPlan App 1. The icon may spin for some time. Wait for the icon to stop. If it fails, try to connect again 2. The Setup Assistant will run the first time only 3.
- Page 25 Connecting iPhone to ScanPlan (cont.) Initial setup continued 1. Agree to the license agreement 2. Agree to the “System Monitor” if your company or Agency policies allow it 3. Click “Continue”...
- Page 26 Connecting iPhone to ScanPlan (cont.) There will be 2 pages of tutorials Swipe right to view the animated files...
- Page 27 Connecting iPhone to ScanPlan (cont.) • The ScanPlan is ready to begin mapping...
-
Page 28: Connecting To Scanplan Via Wi-Fi
Connecting Phone to ScanPlan via Wi-Fi The following steps are an alternative method to connecting a device to the ScanPlan, however it is recommended to use the USB tethering method. Note: Steps may vary slightly based on phone model. Connecting to Wi-Fi is... - Page 29 Connecting Android Phone to ScanPlan via Wi-fi (cont.) Once the ScanPlan and phone are powered on: 1. Settings 2. Press Wi-Fi icon...
- Page 30 Connecting Android Phone to ScanPlan via Wi-Fi (cont.) If the phone is set to automatically connect to a Wi-Fi network, select "Wi-Fi" to display other available networks...
- Page 31 Connecting Android Phone to ScanPlan via Wi-Fi (cont.) ScanPlan appears as the serial number located on the FARO label on the underside of the unit (ex: SP018P00008)
- Page 32 Connecting Android Phone to ScanPlan via Wi-Fi (cont.) 1. Type password: "0123456789" 2. Select "Connect"...
- Page 33 Connecting Android Phone to ScanPlan via Wi-Fi (cont.) Phone is connected via Wi-Fi...
-
Page 34: Recommended Settings
Settings Tap “Settings” Set the units to your preference Turn “Line Recognition” off (it will help you see what you’re mapping) Make sure “System Monitor” is on Tap the “<“ to exit... -
Page 35: Creating A Project
Creating New Project • Once the ScanPlan App is open you will see a list of the projects loaded on the device • Click the blue “+” in the bottom right corner to begin a new project... - Page 36 Creating New Project (cont.) 1. Enter new project name (NO SPACES) 2. Click "Create"...
- Page 37 Creating New Project (cont.) 1. Select the level of the building that you will be mapping 2. Click Add...
-
Page 38: Mapping
The blue icon represents starting point. • Walk around area to be mapped out. ScanPlan will fill in data as you move. To fill in areas around furniture, raise or lower the height of the... - Page 39 Mapping (cont.) Be mindful of the ScanPlan level in the top right corner Note: If you get an error while mapping, reposition the ScanPlan until in "good" range and it will resume mapping the area Good...
- Page 40 Pausing Mapping 1. Press the “Pause” icon to Press “YES” to pause mapping pause the mapping...
- Page 41 Pausing Mapping (cont.) 1. Press the “Play” icon 2.Walk through the map to locate again followed by “YES” to resume...
- Page 42 Pausing Mapping (cont.) 1. Once map is located correctly, press “YES” 2. Mapping can now continue...
-
Page 43: Adding Images (From Phone And Theta)
Adding Pictures and Files Select the green "+" button... - Page 44 Adding Pictures and Files (cont.) Choose the type file to be added (photo in this instance)
- Page 45 Adding Pictures and Files (cont.) 1. Position the ScanPlan as close as possible to the position of the object to be inserted into the scan 2. A red beam will illuminate on the floor to identify the position for the image location 3.
-
Page 46: Exporting Project To Usb Drive
Adding Pictures and Files (cont.) 1. Position the device to view the desired area for capture, then press the capture photo button 2. Press the check mark to accept or the retake icon to attempt another capture 3. The image will be placed into the drawing... - Page 47 Adding Pictures and Files (cont.) The photo is identified by the green icon. If the image is not located correctly, press and hold on the green icon and drag it to the correct position...
- Page 48 Inserting panoramic images with the Ricoh Theta camera is extremely easy. The camera can be positioned strategically and the images will be automatically located into the drawing. These images will be viewable in SCENE2Go, WebshareCloud, Present4D, FARO Zone 2D&3D...
- Page 49 Adding Ricoh Theta Pictures (cont.) Note: The Ricoh Theta camera will need to be previously connected via Wi-Fi. Please see the Theta connection section located on Page 141 1. Select the “+” icon 2. Choose Pano-Photos...
- Page 50 Adding Ricoh Theta Pictures (cont.) You’ll be prompted to position the ScanPlan in front of the Theta camera (be sure to position the ScanPlan in front of the LARGE BUTTON on the Theta) and press “CONFIRM”. Move to a position to ensure you’re not blocking anything OR move into a different room and then press “CONFIRM”...
- Page 51 Adding Ricoh Theta Pictures (cont.) • Once the file has been captured and transferred, there will be a green icon placed into the view. • The icon can be moved to another location by pressing and holding on top of the icon and dragging it to a different location •...
-
Page 52: Adding Measurements
Adding Measurements 1. Select the ruler icon 2. Choose Measurement Option... - Page 53 Adding Measurements (cont.) 1. Position ScanPlan as close to area as possible and select “Add” icon to capture first position 2. Move ScanPlan to area of final location to be measured and select add icon 3. Select red icon to...
- Page 54 Adding Measurements (cont.) Measurement is captured and identified...
-
Page 55: Finalizing Project
Finalizing Your Project • To complete your map return to the original starting point to "close the loop" • Press the red stop button to end the mapping process... - Page 56 Finalizing Your Project (cont.) 1. Choose “STOP SAVE”, to stop mapping and save the file 2. “CANCEL” will cancel the stop operation 3. “STOP DISCARD” will display the message below. Press “OK”...
- Page 57 Wall Generating Tool The ScanPlan gives you the option of generating walls in your project. Click this icon to initiate the feature.
-
Page 58: Optimizing Your Project
Optimizing Your Project • The project must be optimized to be able to send to FARO Zone 2D, WebShare Cloud, and SCENE2Go • Select "Optimize" to begin... - Page 59 Optimizing Your Project (cont.) A list of the projects that have not been optimized will populate. 1. Check the project that you are working with 2. Select "Start" Note: This step will vary in time based on the size of your project.
- Page 60 Optimizing Your Project (cont.) After map has been optimized 1. Press the < button 2. Select Yes Final Project Note: Project data is stored on the ScanPlan rather than the phone...
-
Page 61: Preparing To Export Your Project
Preparing to Export Your Project • Insert USB into ScanPlan - Wait approximately 10 seconds for USB to be recognized... -
Page 62: Exporting To Scene2Go
Exporting Your Project to SCENE 2go 1. Select the menu tree 2. Choose "Export"... - Page 63 Exporting Your Project to SCENE 2go (cont.) Choose "Export to SCENE 2go"...
- Page 64 Exporting Your Project to SCENE 2go (cont.) 1. Click "OK" 2. Click "Yes"...
-
Page 65: Exporting For Faro Zone 2D&3D
Exporting Your Project (FARO Zone 2D) to USB Drive 1. Select the menu tree 2. Choose "Export"... - Page 66 Exporting Your Project to USB Drive (cont.) Choose "Export to USB Drive“ Note: Once exported in this manner, the project can be opened in FARO Zone 2D or 3D...
- Page 67 Exporting Your Project to USB Drive (cont.) Once the project has exported you will get a notification at the bottom of the screen. 1. Either select "Dismiss" option at the bottom or wait until the message times out. 2. Click the "X" to close the project...
- Page 68 Exporting Your Project to USB Drive (cont.) Click "Yes" to close the project...
-
Page 69: Exporting For Websharecloud
Exporting Your Project to WebShare Cloud • Note that in order to upload a project to WebShare Cloud, you will need to have an active account in one of the WebShare Cloud Domains • Contact David Dustin to create one for demonstration purposes... - Page 70 Exporting Your Project to WebShare Cloud (cont.) 1. Go to the Settings area and connect to a Wi-Fi source (unless the phone is equipped with a SIM card). One or the other is required to upload to the WebShare Cloud servers...
- Page 71 Exporting Your Project to WebShare Cloud (cont.) 1. Select the menu tree 2. Choose "Export"...
- Page 72 Exporting Your Project to WebShare Cloud (cont.) 1. Choose WebShare 2. Enter account information...
- Page 73 Exporting Your Project to WebShare Cloud (cont.) 1. Slide area upward till 2. Press “EXPORT” “EXPORT” is visible...
- Page 74 Exporting Your Project to WebShare Cloud (cont.) 1. Once the export is complete, press “OK” to close the dialog...
-
Page 75: Exporting For Present4D (Vr-Suite)
To Export to VR-Suite (Present4D) 1. Go to the Settings area and connect to a Wi-Fi source (unless the phone is equipped with a SIM card). One or the other is required to upload to the VR-Suite (Present4D cloud) - Page 76 Exporting Your Project to VR-Suite (cont.) 1. Select the menu tree 2. Choose "Export"...
- Page 77 Exporting Your Project to VR-Suite (cont.) Choose "Export to VR-Suite"...
- Page 78 Exporting Your Project to VR-Suite (cont.) 1. If there is a message “could not retrieve license info!” Click “OK” 2. Choose “ACTIVATE NEW LICENSE” Note: License will only need to be added the first time...
- Page 79 Exporting Your Project to VR-Suite (cont.) 1. Enter the 32 character serial # 2. Choose “ACTIVATE” 3. Click “OK”...
- Page 80 Exporting Your Project to VR-Suite (cont.) 1. Select the menu tree again 2. Choose "Export"...
- Page 81 Exporting Your Project to VR-Suite (cont.) Choose "Export to VR-Suite"...
- Page 82 Exporting Your Project to VR-Suite (cont.) Checking the license status...
- Page 83 Exporting Your Project to VR-Suite (cont.) 1. Enter the supplied 6 letter portal number with your license (XXX-XXX) 2. Choose “EXPORT” 3. Exporting to VR-Suite...
-
Page 84: Exporting For Dxf
To Export to DXF 1. Select the menu tree 2. Choose "Export"... - Page 85 To Export to DXF (cont.) 3. Choose “DXF (AutoCAD)” 4. Insert USB stick...
- Page 86 To Export to DXF (cont.) 5. Choose level for export 6. Export finished and press “OK”...
- Page 87 Open DXF in your CAD System (e.g. AutoCAD) DXF file is saved on the USB stick in folder "FAROScanPlanCADExport" together with the map as PNG image file...
- Page 88 Open DXF in your CAD System (e.g. AutoCAD) • Start your CAD System and open the DXF file • Depending on your CAD System, the link to the image file must be set to the right path...
- Page 89 Open DXF in your CAD System (e.g. AutoCAD) (cont.) • If the image overlays the lines, set the drawing order to back (AutoCAD command: „DRAWORDER“ • Change the line color if needed...
-
Page 90: Using Scanassist
Laser scanner based on the recorded 2D map. Additional scanner positions can be added manually. • The ScanPlan can be used to navigate to a planned position by using the already captured map as orientation. • The user can easily plan a complete scan project by getting a fast overview of the situation. - Page 91 Scans are located approximately Scene configuration has to be changed slightly (auto registration is set to Cloud to Cloud) Not intended for multi-story (separate projects for each floor) Need to have the ScanPlan powered up and the project file open...
- Page 92 ScanAssist Check Firmware Connecting your Scanner to the ScanPlan. Scanner will need firmware 6.4.0.1474 (or higher) From the Home screen, go to Manage Then General Settings...
- Page 93 ScanAssist Check Firmware Connecting your Scanner to the ScanPlan. Scanner will need firmware 6.4.0.1474 (or higher) Choose “Scanner Details” Check the Firmware version Press the Home icon when finished...
- Page 94 ScanAssist Configure the WLAN From the Home screen, go to Manage Slide the screen up and tap the “Remote Access to Scans” slider to the right Tap the “WLAN” area...
- Page 95 ScanAssist Configure the WLAN Disable the WLAN by sliding the switch to the left Tap the Mode area Select “WLAN” Tap the left “<“ to return to the previous page...
- Page 96 A list of available networks will be displayed Make sure the ScanPlan is powered on and choose the ScanPlan from the list of available networks (press refresh if it is not listed) It will begin with “SP” Enter 0123456789 as the...
- Page 97 Using ScanAssist (cont.) 1. Start ScanAssist during mapping 2. Choose „Generate a Set of Points“...
- Page 98 Using ScanAssist (cont.) 3. ScanAssist will guide you through the parameter for the calculation...
- Page 99 Using ScanAssist (cont.) 4. Choose your Scanner model 5. Set the desired Point Distance...
- Page 100 Using ScanAssist (cont.) 5. Specify the desired scan resolution 6. Select the Quality setting...
- Page 101 Using ScanAssist (cont.) 7. Select color options if needed Note: Most indoor scans in PS will use “Horizon weighted” for the exposure Press “NEXT” to calculate the scan positions...
- Page 102 Using ScanAssist (cont.) 8. Summary: Number of created scan positions based on the chosen parameters Scanning time per Scan and Total Scan Time Pressing “Done” brings up the “Before you scan, please validate the proposed scan positions”...
- Page 103 ScanAssist So what happens if you don’t like the automatically generated locations? They can be moved or deleted What if there are locations that need to be added? Additional locations can be added manually...
- Page 104 ScanAssist – Removing a Location...
- Page 105 ScanAssist – Removing a Location Position has been removed...
- Page 106 ScanAssist - Adding a Location Position is added Move to the desired location then press here...
- Page 107 ScanAssist - Triggering a Scan 1. Move the scanner close to the recommended location 2. The icon will turn when the ScanPlan is in the proximity of the predetermined scan location 3. Place the scanner in the recommended position 4. Press the “TRIGGER SCAN”...
- Page 108 ScanAssist - Triggering a Scan Scan Positions will turn blue after Scan is completed...
- Page 109 Results in SCENE Unregistered scans...
- Page 110 Results in SCENE Registered scans...
- Page 111 Change Registration Method to Cloud to Cloud...
-
Page 112: Opening The Scene2Go Project (From Thumb-Drive)
Opening Your SCENE2Go or ScanPlan Project Remove the USB from the ScanPlan and insert it into one of the USB drives of your computer If you see this error message click "USB Drive (E:)" Note: Drive letter may be different depending on the... - Page 113 Opening Your SCENE2Go or ScanPlan Project (cont.) Select "Scan and Fix (recommended)" Select "Repair Drive"...
- Page 114 Opening Your SCENE2Go or ScanPlan Project (cont.) 1. Allow computer to scan and repair 2. Click "Close"...
- Page 115 Opening Your SCENE2Go or ScanPlan Project (cont.) Locate and open the USB drive on your computer...
- Page 116 Opening the SCENE 2go Project 1. Open the Scene2go folder 2. For Windows operating systems select "Start SCENE2go on Windows" or Mac operating system select "Scene2go on Mac" (Note: You may see a batch file window run)
- Page 117 Opening the SCENE 2go Project (cont.) Select "Allow Access"...
- Page 118 Opening the SCENE 2go Project (cont.) A SCENE2go Browser will open. Select the image with the project to be opened...
- Page 119 Opening the SCENE 2go Project (cont.) To open pictures, documents or text inserted in scan: 1. Click to highlight the JPEG 2. Click on open link...
-
Page 120: Opening The Faro Zone Project
Opening a project in FARO Zone 2D 1. Open FARO Zone 2D 2. Select "New Scene"... - Page 121 Opening a project in FARO Zone 2D (cont.) • Select "Import" • Select "Import ScanPlan Project"...
- Page 122 Opening a project in FARO Zone 2D (cont.) • Select project file to be opened...
- Page 123 Opening a project in FARO Zone 2D (cont.) • Open the project name. Note, it may indicate it’s a "Shockwave Flash Object"...
- Page 124 Opening a project in FARO Zone 2D (cont.) • Project opened • Double click Green icons to open images...
- Page 125 Opening a project in FARO Zone 2D (cont.)
-
Page 126: Opening The Project Pdf
Opening Project as a PDF Locate and open the USB drive on your computer... - Page 127 Opening Project as a PDF (cont.) Select "FAROScanPlan"...
- Page 128 Opening Project as a PDF (cont.) Select Your Project...
- Page 129 Opening Project as a PDF (cont.) Open "PROJECTS_META_DATA"...
- Page 130 Opening Project as a PDF (cont.) 1. Right click project 2. Select "Open With" 3. Choose preferred program...
- Page 131 Opening Project as a PDF (continued) The final exported PDF can be imported into a wide variety of 3rd party software and reports.
-
Page 132: Configuring The Ricoh Theta Camera (With Android)
Configuring the Ricoh Theta V Camera • Connect to USB port • Charging the Theta V before use • Downloading the Theta PC program • Powering on the Theta V • Updating the Theta V Firmware • Download the Smartphone app •... - Page 133 Theta V camera at one time! • If another smartphone (in your possession) other than the phone you will use with the ScanPlan, has been used to connect and configure the Theta camera, make sure that phone is NOT set to automatically connect to the camera.
- Page 134 Connecting to the USB Port • Connect with the supplied cable to mini USB connector port • Connect the other end to a USB Port on your computer. Note: I find the left front port on the HP Zbook works well...
- Page 135 Charging the Theta V • When the device is charging, the green LED will be illuminated (not flashing) (will flash blue on low battery) • When fully charged, the LED will go off • It’s best to charge the Theta from your computer (remove overnight) •...
- Page 136 Downloading the PC app • Download the RICOH THETA Setup.exe from https://support.theta360.com/en/download/ • Install to the default/recommended directory • Run the “RICOH THETA” app by clicking the start button and scrolling down to RICOH and selecting the RICOH app OR start typing Ricoh in the search window and then selecting “RICOH THETA”...
- Page 137 Updating the Theta V Firmware • It is recommended to use a computer to update the firmware as the files are large. • With the Theta camera connected, press the Power Button (top button) The blue LED on the front of the camera will turn on and the camera icon will be illuminated •...
- Page 138 Updating the Theta V Firmware 1. With the RICOH THETA app open 2. Select File 3. Select Firmware Update...
- Page 139 Updating the Theta V Firmware 1. Click “OK” 2. The current version and newest version will be shown (update if different)
- Page 140 Install the Theta Smartphone app (iOS Android) 1. Apple Store (iOS) 2. Google Play (Android)
- Page 141 Connecting to the Theta Wi-Fi 1. Remove the USB connector from the Theta camera (the Wi-Fi can’t be enabled while it’s connected) 2. Turn on the Theta camera (if it is not already on) by briefly pressing the power button on the side 3.
- Page 142 Connecting to the Theta Wi-Fi 1. The Theta serial number is the default Wi-Fi password (just the numbers NOT the “YL”) 2. It is NOT advised to change the password as there is no password recovery feature 3. The Theta camera will be visible in the list of available Wi-Fi sources as “THETAYLXXXXXXXX.OSC”...
- Page 143 Connecting to the Theta Wi-Fi (Android) 1. Settings 2. Network & Internet 3. Wi-Fi...
- Page 144 Connecting to the Theta Wi-Fi (Android cont.) 1. Select the Theta camera 2. Enter the password (8 digit serial number). It will say “connected, no internet” after connecting...
- Page 145 Connecting to the Theta Wi-Fi (Android cont.) 1. Answer the security questions according to your agency’s or company’s policies Note: configuration only needs to be performed one time...
- Page 146 Connecting to the Theta Wi-Fi (Android cont.) 1. Select the Gear to open the first page of settings 2. Default settings are fine 3. Battery level can be checked here 4. Press the arrow to return to the previous page...
- Page 147 Connecting to the Theta Wi-Fi (Android cont.) 1. Press the camera icon to move to the next set of parameters Note: Images and videos can be captured manually by pressing the round white button...
- Page 148 Connecting to the Theta Wi-Fi (Android cont.) 1. The top right gear has no important features for us to be concerned with for our uses 2. Press the lower gear to open that section of parameters...
- Page 149 Connecting to the Theta Wi-Fi (Android cont.) 1. Don’t change this as there is no method of recovery if the password is lost or forgotten 2. Press the “Camera Settings” to open that section 3. All other settings can be left as is...
- Page 150 Connecting to the Theta Wi-Fi (Android cont.) 1. It is important to have at least 10 minutes for the sleep timer or the camera will timeout and go to sleep. If 10 minutes is too short, it can be disabled 2.
-
Page 151: Configuring The Ricoh Theta Camera (With Ios)
Connecting to the Theta Wi-Fi (iPhone) 1. Ensure the Theta camera is powered on 2. In settings, locate the Theta camera from the list of available Wi-Fi sources... - Page 152 Connecting to the Theta Wi-Fi (iPhone cont.) 1. Enter the password (8 digits from the bottom of the Theta camera) 2. Then press “Join” 3. Once successful, there will be a blue checkmark next to the Theta...
- Page 153 Connecting to the Theta Wi-Fi (iPhone cont.) Note: the configuration steps only need to be performed one time...
- Page 154 Connecting to the Theta Wi-Fi (iPhone cont.) 1. Open the Theta App 2. The first time the app is opened, you’ll need to allow access to your photos...
- Page 155 Connecting to the Theta Wi-Fi (iPhone cont.) 1. The first time connecting to the Theta app, you may be required to “Register”. 2. Registration simply enables wireless communication from the app and the camera...
- Page 156 Connecting to the Theta Wi-Fi (iPhone cont.) 1. Open the Theta App 2. Press the top right gear to enter some of the setup parameters Fix this part...
- Page 157 Connecting to the Theta Wi-Fi (iPhone cont.) 1. After inspecting the camera settings, press the “Done” button 2. The settings on this page are the default. 3. The battery level can be checked on this page as well...
- Page 158 Connecting to the Theta Wi-Fi (iPhone cont.) 1. Once back in the initial screen, press the Camera icon in the lower left corner to open additional settings...
- Page 159 Connecting to the Theta Wi-Fi (iPhone cont.) 1. The top right gear has no important settings we are concerned with 2. Press the “Settings” area to check the parameters...
- Page 160 Connecting to the Theta Wi-Fi (iPhone cont.) 1. Don’t change the password as there is no recovery utility or password reset function. Forgotten or lost passwords will NOT be recovered 2. Press the “Camera Settings” area to check the parameters...
- Page 161 Connecting to the Theta Wi-Fi (iPhone cont.) 1. It is important to have at least 10 minutes for the sleep timer or the camera will timeout and go to sleep. If 10 minutes is too short, it can be disabled completely (will shorten battery life) 2.
- Page 162 Comments Please direct any comments regarding this material to: david.dustin@faro.com Jennifer.Shadburn@faro.com Should you find an error, please let one of us know.
Need help?
Do you have a question about the ScanPlan and is the answer not in the manual?
Questions and answers