Table of Contents
Advertisement
Advertisement
Table of Contents

Related Manuals for Faro FocusM 70


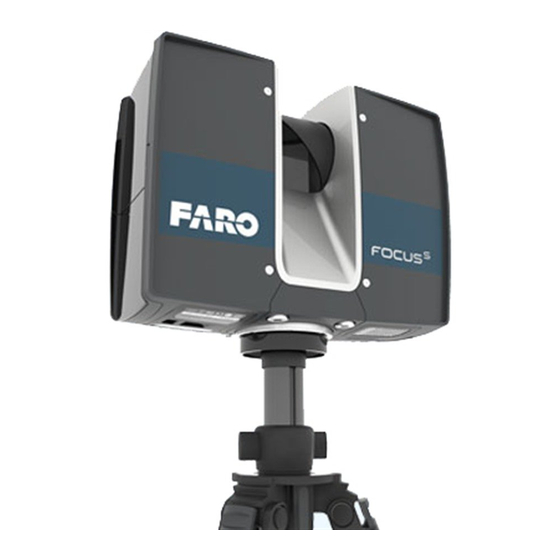
Summary of Contents for Faro FocusM 70
- Page 1 For more information contact Synergy Positioning Systems or visit the Synergy Positioning Systems website at www.synergypositioning.co.nz All branches: Phone 0800 867 266 Email: info@synergypositioning.co.nz FARO L ASER CANNER ANUAL 2017 EPTEMBER...
- Page 2 Trademarks FARO, FARO Laser Scanner, and FARO Scanner Freestyle Objects are registered trademarks or trademarks of FARO Technologies Inc. All other brand and product names are trademarks or registered trademarks of their respective companies. Microsoft, Internet Explorer, Windows, Windows 7 and Windows 8 are either registered trademarks or trademarks of Microsoft Corporation in the United States and/or other countries.
-
Page 3: Table Of Contents
6.1.1 Charging the Battery in the FARO Laser Scanner....... 20... - Page 4 6.8 Shutting Down the FARO Laser Scanner ........
- Page 5 ® FARO Laser Scanner Manual 9.3 Cleaning of Strongly Contaminated Optics ........137 9.3.1 Dry Pre-Cleaning (Non-Contact Cleaning).
- Page 6 ® FARO Laser Scanner Manual...
-
Page 7: Chapter 1: General Information
® FARO Laser Scanner Manual Chapter 1: General Information 1.1 Notes and Signs DANGER A DANGER notice denotes a hazard. It calls attention to an operating procedure or practice that, if not correctly performed or adhered to, will result in personal injury or death. - Page 8 ® FARO Laser Scanner Manual Note A NOTE denotes additional information that aids you in the use or understanding of the equipment or subject. They are not used when a WARNING or CAUTION is applicable. They are not safety related and may be placed either before or after the associated text.
-
Page 9: Chapter 2: Introduction
The resulting images are an assembly of millions of 3D measurement points. Unless otherwise stated, we use the term FARO Laser Scanner for any of the FARO Laser Scanner Focus 70, Focus... - Page 10 • WLAN to remotely control the scanner. The FARO Laser Scanner works by sending an infrared laser beam into the center of a rotating mirror. The mirror deflects the laser beam on a vertical rotation around the environment being scanned; scattered light from surrounding objects is then reflected back into the scanner.
- Page 11 For more information, see Online Help and Notifications on page 111. A list of the potential fields of application of the FARO Laser Scanner can be found on the FARO web page www.faro.com. Chapter 2: Introduction...
- Page 12 ® FARO Laser Scanner Manual...
-
Page 13: Chapter 3: Equipment
® FARO Laser Scanner Manual Chapter 3: Equipment The FARO Laser Scanner is shipped with the following standard equipment: Scanner transport and carry case Laser scanner. An SD card is already inserted in the scanner ... - Page 14 ® FARO Laser Scanner Manual AC power cable Recommended additional equipment: • Tripod • Spare battery Retain all packing materials as you may need them later. The SD memory card, a charged Power Block battery and a tripod are the minimum required equipment you need to carry out a scanning project.
-
Page 15: Chapter 4: Safety Precautions
• Do not use parts which have not been supplied or recommended by FARO. • Only replacement parts authorized by FARO may be used according to the instructions obtained from FARO. -
Page 16: Electrical Safety
Disposal on page 150. • Do not use the FARO Laser Scanner and its accessories in an explosive atmosphere. Do not operate the instrument in the presence of flammable gases or fumes. Operation of any electrical instrument in such an environment constitutes a definite safety hazard. -
Page 17: Power Block Battery Safety Measures
• Only use the charger recommended by FARO to charge the battery. • Do not charge or discharge damaged batteries. • Do not charge the battery in the FARO Laser Scanner when it is stored in the transport case. • Do not use wet or dirty batteries in the FARO Laser Scanner or with the charger. -
Page 18: Mechanical Safety
Ensure that the scanner head of the FARO Laser Scanner can rotate freely and will not hit any objects during the scan. • CAUTION: The FARO Laser Scanner may only be used when set on a flat and stable surface. Injuries may result if the FARO Laser Scanner overturns. -
Page 19: Storage
• The FARO batteries are lithium-ion batteries and are thus classified as dangerous goods. When transporting or shipping the FARO batteries, please ensure that you observe all applicable local and international rules and regulations. - Page 20 ® FARO Laser Scanner Manual • Objects have fallen onto the product. • The product does not operate normally by following the operating instructions. • The product exhibits a distinct change in performance. • The required service and calibration date is reached.
-
Page 21: Chapter 5: Parts And Their Functions
Figure 5-4: Display side of the FARO Laser Scanner Power On/Off button - Press this button to power on the FARO Laser Scanner. If the scanner is on and running, press this button to power it down. Pressing and holding the button more than 3 seconds will switch the FARO Laser Scanner off without shutting down. -
Page 22: Battery Side
FARO Laser Scanner Manual 5.1.2 Battery Side Figure 5-5: Battery Side of the FARO Laser Scanner Battery compartment cover Socket to plug an external power supply LED showing battery status SD card slot ... -
Page 23: Front Side
® FARO Laser Scanner Manual 5.1.3 Front Side Figure 5-6: Front View of the FARO Laser Scanner Mechanical Scanner mirror - for safety and cleaning instructions see Safety on page 13 and Cleaning Instructions for Optics on page 129. -
Page 24: Power Dock Battery Charger
Cover of the automation interface for automated applications. Remove to get access to the automation interface of the FARO Laser Scanner. For more information, please read the FARO Laser Scanner automation interface manual. Cover the automation interface if it is not needed or not in use. -
Page 25: Chapter 6: Getting Started
FARO Laser Scanner to recording your first scan. 6.1 Charging the Battery The Power Block battery can be charged in the FARO Laser Scanner or in the FARO Power Dock battery charger. Carefully read the safety measures described in... - Page 26 4. Connect the AC power cable to the power supply unit as well as to a power outlet. Check the input voltage on the type label before connecting. 5. If the FARO Laser Scanner is turned off, the LEDs of the scanner will start blinking blue while charging. The LEDs will stop blinking and will illuminate to constant blue when the battery is fully charged.
-
Page 27: Charging The Battery With The Power Dock Battery Charger
1. Connect the cable of the power supply unit to the power socket of the FARO Power Dock battery charger. If you forcibly insert the plug in a wrong direction, the plug and the Power Dock battery charger can be damaged. -
Page 28: Tips For Using The Battery
® FARO Laser Scanner Manual Figure 6-12: Placing the battery on the Power Dock battery charger 5. Charging starts automatically; the LED blinks and illuminate according to Power the current charging state of the battery. For more information, see Dock Battery Charger on page 19. -
Page 29: Setting Up The Faro Laser Scanner
• In windy conditions, use a heavy weight or sandbags attached to the center hook of the tripod to stabilize and secure the tripod. Although the scanner can be mounted directly onto a tripod, using the FARO Quick Release is recommended for ease of use. Caution... - Page 30 ® FARO Laser Scanner Manual • An imperial 3/16” hex key for the central 3/8” thread in the mount plate and for tightening the base plate • A metric S3 hex key for the set screw in the base plate, also used as an...
- Page 31 ® FARO Laser Scanner Manual 1.Ensure that the set screw is recessed. It must not stick out of the surface facing the platform of the tripod. If it sticks out of the surface, use the S3 hex key to recess it.
- Page 32 ® FARO Laser Scanner Manual 4. Use the S3 hex key to tighten the set screw of the base plate completely against the platform of the tripod. The base plate is now securely tightened on the tripod’s platform, and unable to spin in any direction.
- Page 33 ® FARO Laser Scanner Manual The mount plate of the Quick Release has a central 3/8” screw for mounting it 3. Attach mount plate underneath the underneath the scanner. The threaded collar has three openings which are scanner used in combination with the six openings of the inner ring to interlock the mount plate while tightening it.
- Page 34 ® FARO Laser Scanner Manual The mount plate is now securely attached to the scanner. 4. Mount the 1. Align one of the three holes scanner of the threaded collar with the corresponding mark of the base plate. 2. Put the scanner on the base plate.
-
Page 35: Sd Card
6.3.1 Preparing an SD Card The FARO Laser Scanner stores the recorded scans on a removable SD card. This memory card can also be used to create backups of the scanner settings, to import scanner settings, and to install firmware updates. -
Page 36: File Structure Of The Sd Memory Card
See Firmware Update on page 107. FARO-LS - Signature file, used to identify the SD card as a FARO Laser Scanner card. This file will be created automatically as soon as a scan has been started. Chapter 6: Getting Started... -
Page 37: Inserting The Sd Card
LEDs will blink orange. When the FARO Laser Scanner is ready, the LEDs will stop flashing and will illuminate constantly blue, the Home screen of the scanner's controller software will appear on the integrated touch screen. -
Page 38: Initial Scanner Settings
Laser Scanner Manual Figure 6-15: Home Screen of the controller software The FARO Laser Scanner can be operated to its full extent by simply tapping the elements on the screen with your fingers. You can use a capacitive stylus to navigate through the user interface. - Page 39 ® FARO Laser Scanner Manual Figure 6-16: Language Selection Screen Select the language by tapping the corresponding button. The selected language will be highlighted. If the list of available languages exceeds the screen size, scroll the list up or down.
-
Page 40: Setting The Date And Time
Select time zone - Tap to choose the date format. The currently selected date format is displayed with the option. Change date and time - Tap to set the internal clock of the FARO Laser Scanner. Chapter 6: Getting Started... -
Page 41: Setting The Date Format
® FARO Laser Scanner Manual 6.5.3 Setting the Date Format Figure 6-18: Change Date Format Select the date format by touching the corresponding button. You can select between the date formats DD.MM.YYY, MM/DD/YYYY or YYYY-MM-DD, where YYYY is the year, DD the day and MM the month. The selected format will be highlighted. -
Page 42: Setting The Unit Of Length And The Temperature Scale
GPS coordinates are either displayed in decimal degree notation (e.g. +34.9823450 °E) or in degree-minute-second notation (e.g. 34º 58' 56.44'' E). 6.5.6 Entering Scanner Information You can specify a scanner name and the owner of the FARO Laser Scanner. Starting from the Home screen, go to Home >... -
Page 43: Scanning
® FARO Laser Scanner Manual Figure 6-21: Scanner Details Scanner name - Tap to change the name of the scanner. Owner - Tap to enter the name of the company or person owning the scanner. For more information, see Scanner Details on page 99. - Page 44 ® FARO Laser Scanner Manual To choose a predefined scan profile or to change the scanning parameters tap the Parameters button. Figure 6-22: Change the Scan Parameters Selected Profile - Shows the name of the selected scan profile. Tap to select a scan profile.
- Page 45 ® FARO Laser Scanner Manual and will be used in the point cloud processing software SCENE to automatically colorize the recorded scan data. Color Settings - Shows the current exposure metering mode used for taking the color photos. Tap to change the exposure metering mode.
- Page 46 ® FARO Laser Scanner Manual This view shows a list of all available scan profiles. This list contains factory predefined profiles that are read-only and custom profiles that can be created and manipulated under Manage > Profiles. Factory Settings on page 108 for an overview of the available factory predefined scan profiles.
- Page 47 ® FARO Laser Scanner Manual The resulting Scan Duration, vertical and horizontal scan points (Scan Size [Pt]), as well as the resulting scan size in megapoints (MPts) will be displayed in the middle of the view. Point Distance [mm/10m] / [in/30ft] is the distance between the captured scan points in mm (in) in a scan distance of 10 meters (30 ft).
- Page 48 ® FARO Laser Scanner Manual displayed. If there is no preview picture available, a grid is displayed, where the space between the horizontal and vertical lines is equivalent to 30°. The highlighted rectangle illustrates the selected scan area. Selecting the Sensors Home >...
- Page 49 ® FARO Laser Scanner Manual made by the altimeter. You will find the altimeter settings under Manage > Sensors > Altimeter. For more information, see Altimeter on page 86. Use GPS - Turn the GPS sensor ON or OFF. Unlike the other sensors, the GPS data is only recorded during scanning and will thus only be available for scan registration in SCENE if this button is switched to ON.
- Page 50 ® FARO Laser Scanner Manual the case if the vertical start angle is set to a value > -30° or if the vertical end angle is set to a value < 30°. The exposure metering area will then be moved up or down and set to the center of the remaining vertical scan area.
- Page 51 ® FARO Laser Scanner Manual Set the HDR capturing by tapping the + or - button from 2x to 5x. This setting corresponds to the exposure levels. If no option is selected, then OFF selection is displayed. When HDR is enabled, the larger number of captured images will result in a longer capturing time.
-
Page 52: Scanning Parameters Overview
® FARO Laser Scanner Manual Far Distances - Select this option when scanning outer spaces where the scan surfaces are located at distances greater than 20 meters from the scanner position. This setting is not recommended when scanning indoors. Recommended Settings - Enables the Clear Contour and Clear Sky filters. -
Page 53: Starting A Scan
® FARO Laser Scanner Manual Quality Mio. Pts Net Scan Point Distance pt/360° Resolution (full scan) Time 1/16 0:01:27 24.5mm/10m 2,560 1/16 0:02:47 24.5mm/10m 2,560 1/16 0:08:09 24.5mm/10m 2,560 1/20 0:01:17 30.7mm/10m 2,048 1/20 0:02:09 30.7mm/10m 2,048 1/20 0:05:35 30.7mm/10m... - Page 54 ® FARO Laser Scanner Manual Figure 6-31: Scanning View To stop a scan, touch the Stop Scan button in the scanning view. You will then be asked to keep or delete the incomplete scan. After having completed scanning and capturing the pictures, depending on environmental conditions, the scanner may make another full turn to capture inclination data.
- Page 55 ® FARO Laser Scanner Manual Figure 6-32: Scan Preview The scan preview shows a grayscale picture of the captured scan to verify the scan itself and to check if all objects (e.g., targets) are clearly visible. This preview does not show color.
-
Page 56: Led Behavior
® FARO Laser Scanner Manual The Inclination in degrees is displayed in the header bar The following inclination warning message is displayed if the current inclination of the scanner is above 5°. Strong scanner inclination Inclination of the scanner is not within +/- 5°. This could result in slightly inexact scan measurements. -
Page 57: Shutting Down The Faro Laser Scanner
AC adapter are not detected 6.8 Shutting Down the FARO Laser Scanner To shut down the FARO Laser Scanner, press its Power On/Off button for 2 or 3 seconds or tap the Power button in the user interface drop-down list... - Page 58 ® FARO Laser Scanner Manual...
-
Page 59: Chapter 7: Controller Software
® FARO Laser Scanner Manual Chapter 7: Controller Software 7.1 General Elements 7.1.1 Status Bar Figure 7-33: Status Bar Clock - shows the current time of the scanner. See Setting the Date and Time on page 35 for information on how to change the date and time of the scanner. -
Page 60: Navigation Bar
If the charge state of the battery is below 25 percent, you will get a warning. Please switch to the spare battery as soon as possible. ® If the charge state of the battery reaches 10 percent, the FARO Laser Scanner will stop scanning and will automatically shut down. -
Page 61: Frequently Used Buttons
® FARO Laser Scanner Manual Home - returns you to the Home screen. See Home Screen on page 58. 7.1.3 Frequently Used Buttons Add button. Adds new scan profiles, projects or operators. Duplicate button. Adds new scan profiles, projects or operators by duplicating the selected list element. - Page 62 ® FARO Laser Scanner Manual Key to toggle keyboard between standard and special characters Moves the cursor in the text field right or left Delete key - deletes the complete text Backspace OK key - applies your input and returns to the previous screen ...
-
Page 63: Home Screen
® FARO Laser Scanner Manual 7.2 Home Screen Figure 7-37: Home Screen Start Scan button - Starts a scan. See Starting a Scan on page 48. Parameters button - Opens the dialog to select another scan profile and to ... -
Page 64: Scan Parameters
® FARO Laser Scanner Manual Figure 7-38: Home Screen with Info Box 7.3 Scan parameters Scanning parameters like resolution, quality or the scanning angles are the parameters used by the scanner for recording the scan data. There are two ways to set the scanning parameters: •... -
Page 65: Selected Profile
® FARO Laser Scanner Manual Figure 7-39: Change the Scan Parameters 7.3.1 Selected Profile Shows the name of the selected scan profile. Tap to select a scan profile. If the scanning parameters differ from the selected profile, altered is appended to its name. -
Page 66: Resolution And Quality
® FARO Laser Scanner Manual 7.3.2 Resolution and Quality Figure 7-40: Scan Parameters, Resolution, and Quality Displays the selected resolution in megapoints, and the selected quality. Tap the button to change these values. Chapter 7: Controller Software... -
Page 67: Horizontal And Vertical Scan Range
® FARO Laser Scanner Manual 7.3.3 Horizontal and Vertical Scan Range Figure 7-41: Scan Parameters - Scan Area Displays the scan range with the horizontal and the vertical start and end angles in degrees. Tap to adjust them. Chapter 7: Controller Software... -
Page 68: Select Sensors
® FARO Laser Scanner Manual 7.3.4 Select Sensors Figure 7-42: Scan Parameters - Select sensors Opens the screen to enable or disable the automatic use of the data of the built-in sensors for the scan registration in SCENE. 7.3.5 Scan with Color Switch colored scan recording on or off. -
Page 69: Color Settings
® FARO Laser Scanner Manual 7.3.6 Color Settings Set the exposure metering mode - Sets the way in which the integrated Scan Parameters, color camera determines the exposure for taking the color photos (if colored Color Settings scan recording is switched on). Select between three exposure metering modes to meet the requirements of the current lighting conditions and to get best possible results for the area of interest. - Page 70 ® FARO Laser Scanner Manual Horizon Weighted Metering - With horizon weighted metering mode, the camera will use the light information coming from the horizon to determine its exposure setting. This mode is commonly used in scenarios with bright light coming from directly above (e.g., indoors with bright ceiling lighting or...
- Page 71 ® FARO Laser Scanner Manual Figure 7-46: Exposure metering area for a limited vertical scan area set to e.g. 10° to 90° Zenith Weighted Metering - With zenith weighted metering, the camera will use the light information coming from above the scanner to determine its exposure setting.
-
Page 72: Manage
® FARO Laser Scanner Manual When HDR is enabled, the larger number of captured images will result in a longer capturing time. The processing time will be longer in SCENE. The HDR Mode and Night Mode are both mutually exclusive. -
Page 73: Scan Projects And Clusters
® FARO Laser Scanner Manual Projects/Clusters Select the current scan project, add new or edit existing projects. Tap to get a list of all available projects. Scan Projects and Clusters on page 68 for additional information Profiles Select the current scan profile, create new or edit existing scan profiles. - Page 74 ® FARO Laser Scanner Manual Before starting with your scan project, you may enter this structure here.You can reproduce the complete structure of your scan project within the scanner software; or with SCENE software and transfer the project to the scanner through the SD card.
- Page 75 ® FARO Laser Scanner Manual Figure 7-49: Projects List This view shows a list of all created scan projects/clusters. The Default_Project is a standard project that can be selected when working in no particular scan project. The Default_Project is not deletable and you can not change its name or parent project.
- Page 76 ® FARO Laser Scanner Manual Figure 7-50: View Project Here, you can change the name and enter further details of the new project. If you want the new project to be a main project without any parent projects, you must either change its parent project to No Parent Project, or select the Default_Project before adding the new project.
- Page 77 ® FARO Laser Scanner Manual Figure 7-51: Select Parent Project/Cluster This view shows all available projects and clusters that are applicable to be a parent project/cluster. Tap on a button to select the parent project/cluster. The selected parent project/cluster will be highlighted.
- Page 78 ® FARO Laser Scanner Manual To add a cluster, select the parent project or cluster and click the Add button . A new cluster will be added to the selected project/cluster. If you want the new cluster to be a main project without any parent projects, you have to change its parent project to „No parent project“.
- Page 79 ® FARO Laser Scanner Manual Selecting a Scan Project Figure 7-52: Project List The project list contains the currently selected project and all further projects stored on the SD card. To select a project, tap its button in the list. The selected project will be highlighted.
-
Page 80: Scan Profiles
The Profiles page displays a context sensitive toolbar at the bottom in order to add, duplicate, delete, or modify profiles Figure 7-53: Profiles As previously mentioned, the FARO Laser Scanner comes with factory predefined scan profiles (see Factory Settings on page 108 for an overview of the available factory predefined scan profiles). - Page 81 ® FARO Laser Scanner Manual Figure 7-54: Scan Profile Details Profile Name: name of the scan profile. Tap to change it. The further settings in this view are similar to the settings of the scanning parameters. For more information, see Scan parameters on page 59.
- Page 82 ® FARO Laser Scanner Manual Factory Predefined Scan Profiles Overview Indoor...10m Indoor 10m... Outdoor...20m Outdoor 20m... Preview Object HD Scan Scan Scan out- Scan out- Capture a Scan certain indoors indoors doors where doors where fast and objects or where the...
- Page 83 ® FARO Laser Scanner Manual Factory Settings of HDR, Night Mode and Far Distances Outdoor: Far Indoor HDR Outdoor HDR Distances Scan indoors Scan indoors where Scan outdoors where the dis- the distances from where the dis- tances from the...
-
Page 84: Operators
® FARO Laser Scanner Manual Please note: Outdoor: Far Distances is not supported on Focus 70 and Focus When taking color scans, the Night Mode may significantly increase the exposure time and lead to a much longer overall scan time. - Page 85 ® FARO Laser Scanner Manual To add a new operator profile, tap the Add button. You can also add new operator profiles by duplicating an existing operator profile. To do this, select the operator profile you want to duplicate and tap the Duplicate button. Tap again to view a screen to enter the operator profile details.
-
Page 86: Sensors
® FARO Laser Scanner Manual 7.4.4 Sensors Figure 7-57: Sensors Temperature - Tap to view the current scanner temperature and to switch the scanner's fan on or off. See Temperature Sensors on page 81. Inclinometer - Tap to level the scanner. See... - Page 87 ® FARO Laser Scanner Manual If a sensor is within a critical temperature range, just below or above a critical value, the indicator will be in the yellow area; scanning will still be possible, but the temperature might have a negative effect on the scan quality. Therefore, it is recommended to warm or cool down the scanner until the temperature indicator is within the green area again.
- Page 88 ® FARO Laser Scanner Manual inclinometer turns yellow, if the scanner is tilted more than 2°. In this case the accuracy of the inclination measurement is reduced. If the inclination is larger than 5°, the background color of the level will turn red.
- Page 89 ® FARO Laser Scanner Manual Compass Figure 7-60: Compass The built-in electronic compass measures the orientation of the scanner on the earth‘s surface which is useful information for the registration process. This information is attached to each scan and can be used for the scan registration in SCENE (see SCENE user manual for more information).
- Page 90 ® FARO Laser Scanner Manual This manual compass measurement only affects the output on this screen and it is not necessary for the orientation data measured during scanning. During scanning an orientation measurement is performed automatically. The accuracy of compass measurements can be affected by magnetic or other environmental interference.
- Page 91 ® FARO Laser Scanner Manual position (latitude and longitude). With four or more satellites in view, the receiver can determine the scanner‘s 3D position (latitude, longitude and altitude). The signal strength bars below the GPS information appear for each satellite in view with the appropriate satellite number underneath.
- Page 92 ® FARO Laser Scanner Manual The barometric height sensor (altimeter) determines the altitude of the current scanner position. The altitude determination is based on the measurement of the atmospheric pressure. The measured altitude is attached to each scan and can be used for the scan registration in SCENE (see SCENE user manual for more information).
-
Page 93: General Settings
® FARO Laser Scanner Manual 7.4.5 General Settings Figure 7-63: General Settings Sounds - Change the volume of the scanner sounds, enable or disable scanner sounds. Sounds on page 89. Power Management - View detailed settings regarding the administration of power like the battery charge level;... - Page 94 ® FARO Laser Scanner Manual Setting the Unit of Length and the Temperature Scale on page 37. - WLAN - The scanner has an integrated antenna that allows to remotely connect to the scanner with portable devices, like notebooks, PDAs or tablet computers.
- Page 95 ® FARO Laser Scanner Manual Sound during scanning - If switched on, the scanner will give a warning signal when laser is switched on and scanning starts. Sound when scan is finished - If switched on, the scanner will inform about scan completion with a sound.
- Page 96 ® FARO Laser Scanner Manual Battery health information - Provides information on the condition of the currently inserted battery. It informs about the amount of capacity remaining in the battery. Over time, the capacity of a Lithium Ion battery will decay. If the indicated battery condition is „Replace Battery“, the remaining capacity of the...
- Page 97 ® FARO Laser Scanner Manual Figure 7-67: WLAN Settings The scanner has an integrated WLAN module that allows you to remotely connect to the scanner with portable devices, such as notebooks, PDAs or tablet computers. Connect your remote device to the scanner through WLAN, and remotely access the scanner user interface with a standard web browser.
- Page 98 ® FARO Laser Scanner Manual • WLAN: This setting is also known as infrastructure mode. The network is configured such that the scanner can connect to an external access point. • Access Point: The scanner network is configured as an access point.
- Page 99 ® FARO Laser Scanner Manual http://172.17.16.23) to access the controller software. Tap to change the scanner‘s IP address. Figure 7-69: Connection to Scanner Interface through web browser If you prefer secured, encrypted communication with the scanner GUI, enable the secure connection https://172.17.16.23 in the address field of your web browser.
- Page 100 ® FARO Laser Scanner Manual Network prefix length: The subnet mask used in the WLAN network. DNS 1: First dynamic name server to use in the WLAN network. DNS 2: Second dynamic name server to use in the WLAN network.
- Page 101 ® FARO Laser Scanner Manual Reset Tap this button to reset the WLAN settings to default. If a connection cannot be established, the status will turn off immediately after the message “Enabling” is displayed. Please check in particular the Network Name and the Encryption Key when a connection in WLAN mode must be established.
- Page 102 ® FARO Laser Scanner Manual Update Tap this button to update the displayed settings. This might be necessary, if a connection is lost, for example, because the scanner was out of range. Example configuration of a notebook with Microsoft Windows Connecting the 1.
- Page 103 ® FARO Laser Scanner Manual Open user interface • When the notebook is connected to the scanner, open your web browser. in the web browser • In the address field of the web browser enter the WLAN IP address of the scanner (for example, http://172.17.16.23 or https://172.17.16.23 for a...
- Page 104 ® FARO Laser Scanner Manual Scanner Details Figure 7-73: Scanner Details Scanner Name - Give your scanner a name. Owner - Enter the owner of the scanner. LAN IP Address -The Ethernet IP address of the scanner. Subnet Mask -The Ethernet subnet mask of the scanner.
-
Page 105: On-Site Registration
® FARO Laser Scanner Manual 7.4.6 On-Site Registration Figure 7-74: On-Site Registration Settings This page displays the available settings to upload, process, and register scans on a connected SCENE instance. All uploaded scans will be continuously processed and registered according to the following settings. - Page 106 ® FARO Laser Scanner Manual Find Planes Turn this ON to automatically detect planes in the uploaded scans. This setting can improve a target based registration. Enable Colorization Turn this ON to enable the colorization of the uploaded scans. Build Scan Point Clouds Turn this ON to build a point cloud from the uploaded scans.
-
Page 107: Service
Factory Settings - Reset the scanner to its factory settings. See Factory Settings on page 108. FARO Customer Support - View the FARO Customer Support contact data. Command Prompt - Command prompt to send commands to the scanner. This function is for FARO Service purposes only. Chapter 7: Controller Software... - Page 108 ® FARO Laser Scanner Manual Last Service Date - Date of the last scanner maintenance and certification service. Errors and Warnings This view provides a list of present warnings and errors. Tap a list item to view details of the corresponding warning or error.
- Page 109 ® FARO Laser Scanner Manual Format Card - Format the inserted SD card. NOTICE Format the inserted SD card. This operation will delete all scans and other data of the SD card. Always use this formatting function for SDXC cards with a capacity of 64GB or more as Windows will format such cards with its own file system which is not supported by the scanner.
- Page 110 ® FARO Laser Scanner Manual current scanner settings each time you start a scan. It includes the current scan profiles, scanning parameters, operators, and general settings. Manual backup Additionally, you can also create manual backups of certain scanner settings. This manual backup option saves scanner parameters, operators, and scan profiles to the SD card.
- Page 111 For example, if you want to restore or import scan profiles, all the existing scan profiles on the scanner will be overridden by the new profiles. The scanner's default profiles remain unaffected from this operation. FARO recommends backing up your data before restoring. Chapter 7: Controller Software...
- Page 112 Firmware Update Figure 7-80: Service, Firmware Update There are two ways to update the firmware of your FARO Laser Scanner: • The scanner is online and can fetch the firmware from a server • The firmware is transferred with the SD card The update process can take up to 30 or 40 minutes depending on the extent of the update.
- Page 113 ® FARO Laser Scanner Manual Then insert the SD card into the scanner, and tap the Update from SD Card button. NOTICE Risk of data loss! Do not manually shut down or power off the scanner during the update process! After the update is complete the scanner might restart automatically, depending on the nature of the updates.
-
Page 114: View Scans
® FARO Laser Scanner Manual 7.5 View Scans You can examine preview pictures of the scans stored on the inserted SD card. A list of all available scans will be displayed: Figure 7-82: Scans List This list contains all scans that are available on the SD card, displayed with their name. - Page 115 ® FARO Laser Scanner Manual Figure 7-83: Zoomed Preview of a Scan Previous button - Shows the preview picture of the previous scan. Next button - Shows the preview picture of the next scan.
-
Page 116: Online Help And Notifications
® FARO Laser Scanner Manual 7.6 Online Help and Notifications 7.6.1 Notifications Tap the Notifications button in the navigation bar to receive warnings and other status messages. This button will not be enabled if there are no warnings or errors. -
Page 117: Chapter 8: Special Scanning Modes
• On-Site Registration • On-Site Compensation The external computer must run SCENE and connect to the FARO Laser Scanner via WLAN. By default, SCENE is not configured to offer these modes in the Workflow Bar. If you want to use them, activate the Scanning category in the settings under Settings >... - Page 118 3. If the IP address is not associated to an active laser scanner, an error message is displayed. 4. If a connection is successful to a supported FARO Focus Laser Scanner, button becomes active and green. Click to control the scanner Control through the HTML user interface.
-
Page 119: On-Site Registration
® FARO Laser Scanner Manual 5. SCENE starts the Scanner Control task and displays the scanner user interface. You can control the scanner remotely through this HTML interface. Figure 8-88: Finish or Cancel task 6. Click the Finish or Cancel button to close the scanner user interface, scanner control task and disconnect from the scanner. - Page 120 Address on the scanner user interface. Enter the IP address as it is, following exactly the given scheme of digits. 5. Connect to the FARO laser scanner after entering the IP address in the On-Site Registration task. The scanner Home page is displayed. Note the change in the available buttons at the bottom of the screen: instead of the Scans button, the Map button appears.
-
Page 121: Map Page
® FARO Laser Scanner Manual Figure 8-89: On-Site Registration overview map with list and status of scans 7. Click Start Scan button to start a new scan on your scanner, or remotely in SCENE. All recorded scans on the current cluster or project opened on the scanner will be uploaded to SCENE. - Page 122 ® FARO Laser Scanner Manual Figure 8-90: Map page The Map page has the following components: Overview Map Displays the map of a top down view of all scans in the current cluster or project that have been successfully registered. Scan positions are shown by blue markers.
-
Page 123: List Page
® FARO Laser Scanner Manual Scan Controls At the bottom of the screen three Scan Controls are available: • Parameters: Tap to view the Parameters page. • Start Scan: Tap to start a scan. • Cluster: Tap to switch to Project or Cluster selection. -
Page 124: Scan Details Page
® FARO Laser Scanner Manual • Status Unknown The scan is initiated but the status is unknown. Tap the arrow on the right of the scans to go to the Scan Details Page further actions on the particular scan. 8.2.4 Scan Details Page The scan details page shows detailed information for one scan. -
Page 125: On-Site Compensation
® FARO Laser Scanner Manual Register again This option is available for scans that were registered successfully or registration failed. A dialog pops up when you tap the right arrow. Tap Confirm if you want to register the scan again. The scan is registered again and the registration status is displayed as Unknown until the process is completed. -
Page 126: Connect Laser Scanner To Computer Through Wireless Lan
® FARO Laser Scanner Manual • Lighting conditions are less important because On-Site Compensation is done with the laser, video images are not used. 8.3.2 Connect Laser Scanner to Computer through Wireless LAN To be able to transfer the scanned data directly to your computer, you must connect the computer with the laser scanner and through WLAN to remotely access and control the scanner. -
Page 127: Setup
® FARO Laser Scanner Manual 8.3.4 Setup Figure 8-93: Setup: Select Output Folder Figure 8-94: Setup: Enter IP Address Enter Scanner IP Address 1. Enter the IP address of the laser scanner. You can find the IP address of the laser scanner by tapping Manage > General Settings > WLAN > IP Address on the scanner user interface. -
Page 128: Place Target
® FARO Laser Scanner Manual Figure 8-95: Place Targets 8.3.5 Place target Print target sheets On your Computer 1. In the Place Targets page, a picture is shown that describes how to place the targets and the scanner for the compensation. -
Page 129: Horizontal Alignment
® FARO Laser Scanner Manual • The distance between the target sheets and the scanner must be between 1.5 m to 3 m. • All target sheets must be vertically aligned. Laser Scanner Placement • Mount the laser scanner on a tripod. -
Page 130: Troubleshooting
® FARO Laser Scanner Manual • To apply this compensation to the scanner choose yes and click Finish. Choose no if you do not want to apply this compensation. • When the compensation is finished, the Compensation Report is displayed with the results of the compensation. - Page 131 ® FARO Laser Scanner Manual Error No consistent solution could be determined. Solution Make sure that the tripod and the targets did not moving during the procedure. Error The SD card of the scanner could not be accessed. Solution Make sure that the SD card is inserted and that it is not write-protected and has sufficient free space left (approximately 330MB).
- Page 132 ® FARO Laser Scanner Manual...
-
Page 133: Chapter 9: Maintenance
FARO Laser Scanner Manual Chapter 9: Maintenance We recommend that you check your FARO Laser Scanner at least once a month. This enables you to spot trouble before it starts and helps provide you with an efficient measuring system. The FARO Laser Scanner is a precision instrument that contains many sensitive components, and it must be handled with care. -
Page 134: Cleaning Instructions For Optics
In case of any doubts, please contact the customer service at FARO (See Technical Support page 131.). • Do not touch the optical surfaces with bare hands or laboratory gloves if possible. -
Page 135: Cleaning Slightly Contaminated Optics
® FARO Laser Scanner Manual Approved Cleaning Available from Recommended Suppliers Supplies Small dropping bottle and Optical / chemical www.thorlabs.de medium wash bottle supply store Optical / chemical Stainless steel forceps www.thorlabs.de supply store Powder-free lab gloves Optical / chemical... - Page 136 ® FARO Laser Scanner Manual Figure 9-98: Dry pre-cleaning with compressed air or duster cleaning spray NOTICE Damage of the scanner‘s mirrors and lenses Avoid any direct contact with the optical surface at any time! 1. Gently blow off particles from the optical surface with compressed air.
-
Page 137: Wet Cleaning By Tissue And Isopropyl Alcohol As A Cleaning Fluid
® FARO Laser Scanner Manual 9.2.2 Wet Cleaning by Tissue and Isopropyl Alcohol as a Cleaning Fluid NOTICE Damage of the scanner‘s mirrors and lenses Use a clean (new) pair of gloves for the following steps. Prepare the cleaning Figure 9-99: Assemble the cleaning pad 1. - Page 138 ® FARO Laser Scanner Manual Figure 9-101: Folding the cleaning pad (2) 2. Repeatedly fold the cleaning pads in half as shown in the pictures above-- fold twice on the long side, then turn 90°, fold twice more to create a soft pad that is about 30 mm long.
- Page 139 ® FARO Laser Scanner Manual Figure 9-103: Creating a T-shaped cleaning pad (1) Figure 9-104: Creating a T-shaped cleaning pad (2) 4. Slightly compress the pad on top of the spare cleaning tissues to create a T-shaped cleaning pad as shown in the two pictures above.
- Page 140 ® FARO Laser Scanner Manual Figure 9-105: Soaking the cleaning pad 5. Use the small drop bottle to soak the cleaning pad with isopropyl alcohol or cleaning fluid (Picture 7). Cleaning mirror module or sensor cover Figure 9-106: Cleaning mirror module with pad and isopropyl alcohol or...
- Page 141 ® FARO Laser Scanner Manual Figure 9-107: Cleaning sensor cover with pad and isopropyl alcohol or cleaning fluid NOTICE Damage of the scanner‘s mirrors and lenses • Ensure to avoid any contamination of the cleaning tissue! • Do not apply pressure when wiping, as this might cause damage to the optical surface! 6.
-
Page 142: Cleaning Of Strongly Contaminated Optics
® FARO Laser Scanner Manual 9.3 Cleaning of Strongly Contaminated Optics WARNING Hand injuries If the scanner is accidentally switched on, the mirrors might start to turn. Hence, before starting any cleaning activity, • shut down the laser scanner module and remove the battery pack. -
Page 143: Wet Cleaning By Water Or Diluted Mild Soap Solution
® FARO Laser Scanner Manual NOTICE Damage of the scanner‘s mirrors and lenses Avoid any direct contact with the optical surface at any time! 1. Gently blow off particles from the optical surface. 2. Perform visual inspection. 3. Repeat dry cleaning as required. - Page 144 ® FARO Laser Scanner Manual NOTICE Damage of the scanner‘s mirrors and lenses Use dust-free gloves for all following steps! Figure 9-110: Fix the mirror with your finger tips to keep it in this position 4. Turn the mirror module into vertical position, i.e., the mirror points away from scanner.
-
Page 145: Suppliers
132. 9.4 Suppliers In the following, we list special tools for optics cleaning as referenced in chapters 10.1 - 10.3. The use of [1] and [2] is highly recommended by FARO. [1] Non-flammable duster spray “Techspray DUSTER 1671" https://www.techspray.com/p-36-duster.asp http://www.thorlabs.de/thorproduct.cfm?partnumber=CA3... - Page 146 ® FARO Laser Scanner Manual...
-
Page 147: Chapter 10: Technical Data
® FARO Laser Scanner Manual Chapter 10: Technical Data 10.1 General Power supply voltage: 19 V (external supply) 14.4 V (internal battery) Power consumption: 15W (when device is idle) 25 W (while scanning) 80 W (while battery charges) Battery life: 4.5 hours... -
Page 148: Data Handling And Control
® FARO Laser Scanner Manual 10.3 Data handling and control Data storage: SD, SDHC™, SDXC™; 32GB card included Scanner control: Through touchscreen display and WLAN connection. Access by mobile devices through HTML5. 10.4 Ranging unit Focus Distance Accuracy: 1 mm... -
Page 149: Color Unit
® FARO Laser Scanner Manual Focus Unambiguity interval: 614 m for 122 to 488 kpts/s 0.6 m - 70 m indoor or outdoor with upright Range Focus incidence to a 10% reflective surface ±3 mm Ranging error Focus Measurement speed (pts/sec): 122,000 / 244,000 / 488,000 10.5 Color unit... -
Page 150: Deflection Unit
® FARO Laser Scanner Manual 10.8 Deflection unit Field of view: (vertical/horizontal): 300° / 360° Step size: (vertical/horizontal):0.009° (40,960 3D-Pixel on 360°) / 0.009° (40,960 3D-Pixel on 360°) Max. vertical scan speed: 5,820 rpm or 97 Hz 10.9 Ambient Conditions Ambient Temperature: 5 °C - 40 °C... -
Page 151: Scanner Dimensions
® FARO Laser Scanner Manual 10.11 Scanner Dimensions Figure 10-112: Scanner Dimensions All dimensions are in mm. Chapter 10: Technical Data... -
Page 152: Scanner Mount Dimensions
® FARO Laser Scanner Manual 10.12 Scanner Mount Dimensions Figure 10-113: Scanner mount The 3/8" central thread can be used to mount a fixation device below the scanner. The scanner has 4 M5 tapped holes as interface for helical operation. -
Page 153: Chapter 11: Error Messages
Restart scanner. If the problem still occurs after restart, contact FARO Customer Service. Color acquisition failure Color acquisition has stopped Save log file and contact FARO unexpectedly. Probably color Customer Service. acquisition is not complete. Out of time failure This indicates an internal scanner Restart scanner. - Page 154 Warning Permanent warning error. Restart scanner. If the problem still If an empty or full SD-card is occurs after restart, contact FARO inserted, the LED turns red and a Customer Service. permanent notification is displayed. However, when the SD-card is...
-
Page 155: Chapter 12: Disposal
FARO Laser Scanner Manual Chapter 12: Disposal At the end of its lifecycle, FARO Laser Scanner must not be disposed with normal waste, but instead must be returned to a recycling facility for electric and electronic devices. Contact your local government or local waste disposal operators if you are not sure. - Page 156 ® FARO Laser Scanner Manual Figure 12-114: WEEE Symbol Chapter 12: Disposal...
-
Page 157: Chapter 13: Technical Support
• Be sure to read the relevant sections of the documentation to find the help you need. • Visit the FARO Customer Care area on the Web at www.faro.com to search our technical support database. This is available 24 hours a day 7 days a week. - Page 158 FARO Laser Scanner Manual Asia Support Hours (Monday through Friday) 8:30 a.m. to 5:30 p.m. Singapore Standard Time (SST) e-Mail: supportap@faro.com Phone: +1 800 511 1360, +65 6511 1350 (Worldwide) Fax: +65 6543 0111 Japan Support Hours (Monday through Friday) 9:00 a.m.
-
Page 159: Appendix A: Software License Agreement
This Software License Agreement is part of the Operating Manual for the product and software System which you have purchased from FARO TECHNOLOGIES, INC. (collectively, the “Licenser”) By your use of the software you are agreeing to the terms and conditions of this Software License Agreement. - Page 160 ® FARO Laser Scanner Manual VIII.If a party engages the services of an attorney or any other third party or in any way initiates legal action to enforce its rights under this Agreement, the prevailing party shall be entitled to recover all reasonable costs and expenses (including reasonable attorney’s fees before trial and in appellate...
-
Page 161: Appendix B: Purchase Conditions
8.00 Definitions 1.00 Payment of Purchase Price 1.01 Purchaser hereby promises to pay to the order of FARO all deferred portions of the Purchase Price, together with interest on late purchase price payments payable at 1.5% per month (18% per annum). - Page 162 Maintenance/Warranty Period. If the Focus Laser Scanner or the Software is found by FARO, acting reasonably, to be defective, and if the defect is acknowledged by FARO to be the result of FARO’s faulty material or workmanship, the Focus Laser Scanner will be repaired or adjusted to the extent found by FARO to be necessary or at the option of FARO, replaced with a new Focus Laser Scanner or parts thereof at no cost to the Purchaser.
- Page 163 4.06 The Warranties do not apply to: a) Any defects in any component of a System where, if in the reasonable opinion of FARO, the Focus Laser Scanner, Software or System has been improperly stored, installed, operated, or maintained,...
- Page 164 4.11 FARO does not authorize any person (whether natural or corporate) to assume for FARO any liability in connection with or with respect to the Products. No agent or employee of FARO has any authority to make any representation or promise on behalf of FARO, except as expressly set forth herein, or to modify the terms or limitations of the Warranties.
- Page 165 FARO and the Purchaser. 7.02 No representative of FARO has any authority to modify, alter, delete or add to any of the terms or conditions hereof. Any such modifications shall be absolutely void unless made by instrument in writing properly executed by an actual authorized employee or agent of FARO.
- Page 166 ® FARO Laser Scanner Focus Manual...
-
Page 167: Appendix C: Industrial Service Policy
3rd party software updates and warranty service or claims. 1.07In the event that FARO replaces any product or replacement product, FARO retains all right, title, and interest in and to all products or portions of products that were replaced by FARO. - Page 168 States. Outside the Continental U.S., FARO will ship equipment directly to the customs broker. • Standard Service Plans are contracted at time of purchase or at any time while a unit is covered by a FARO hardware service plan (as described in more detail later). ®...
- Page 169 Laser Scanner FocusS 150s and Computers when service is required. All equipment shipping costs are paid for by FARO (both ways). FARO will make its best effort to ship all loaner Focus 150s within 24 hours of the receipt of the purchasers request.
- Page 170 ® FARO Laser Scanner Manual...
-
Page 171: Appendix D: Industrial Products Service Policy
FARO Knowledge base. FARO Software All FARO Software users will receive maintenance releases until the end of life for the version at no charge electronically or at a minimal fee for the computer media package. All enhancement and functionality upgrades will be available for purchase upon release. - Page 172 ® FARO Laser Scanner Manual...
-
Page 173: Appendix E: Implementation Notes
® FARO Laser Scanner Manual Appendix E: Implementation Notes The scanner's firmware includes several standard applications and libraries which are released under different licenses. google-breakpad Copyright (c) 2006, Google Inc. All rights reserved. Redistribution and use in source and binary forms, with or without modification, are permitted provided that the following conditions are met: •... - Page 174 ® FARO Laser Scanner Manual All rights reserved. Redistribution and use in source and binary forms, with or without modification, are permitted provided that the following conditions are met: • Redistributions of source code must retain the above copyright notice, this list of conditions and the following disclaimer.
- Page 175 ® FARO Laser Scanner Manual i2c controller core Copyright (C) 2001 Richard Herveille Filip Miletic This source file may be used and distributed without restriction provided that this copyright statement is not removed from the file and that any derivative work contains the original copyright notice and the associated disclaimer.
- Page 176 ® FARO Laser Scanner Manual "Source" form shall mean the preferred form for making modifications, including but not limited to software source code, documentation source, and configuration files. "Object" form shall mean any form resulting from mechanical transformation or translation of a Source form, including but not limited to compiled object code, generated documentation, and conversions to other media types.
- Page 177 ® FARO Laser Scanner Manual 4. Redistribution. You may reproduce and distribute copies of the Work or Derivative Works thereof in any medium, with or without modifications, and in Source or Object form, provided that You meet the following conditions: (a) You must give any other recipients of the Work or Derivative Works a copy of this License;...
- Page 178 ® FARO Laser Scanner Manual 8. Limitation of Liability. In no event and under no legal theory, whether in tort (including negligence), contract, or otherwise, unless required by applicable law (such as deliberate and grossly negligent acts) or agreed to in writing, shall any Contributor be liable to You for damages, including any direct, indirect,...
- Page 179 ® FARO Laser Scanner Manual To protect your rights, we need to prevent others from denying you these rights or asking you to surrender the rights. Therefore, you have certain responsibilities if you distribute copies of the software, or if you modify it: responsibilities to respect the freedom of others.
- Page 180 ® FARO Laser Scanner Manual To "propagate" a work means to do anything with it that, without permission, would make you directly or secondarily liable for infringement under applicable copyright law, except executing it on a computer or modifying a private copy. Propagation includes copying, distribution (with or without modification), making available to the public, and in some countries other activities as well.
- Page 181 ® FARO Laser Scanner Manual All rights granted under this License are granted for the term of copyright on the Program, and are irrevocable provided the stated conditions are met. This License explicitly affirms your unlimited permission to run the unmodified Program. The output from running a covered work is covered by this License only if the output, given its content, constitutes a covered work.
- Page 182 ® FARO Laser Scanner Manual b) The work must carry prominent notices stating that it is released under this License and any conditions added under section 7. This requirement modifies the requirement in section 4 to "keep intact all notices".
- Page 183 ® FARO Laser Scanner Manual Regardless of what server hosts the Corresponding Source, you remain obligated to ensure that it is available for as long as needed to satisfy these requirements. e) Convey the object code using peer-to-peer transmission, provided you inform other peers where the object code and Corresponding Source of the work are being offered to the general public at no charge under subsection 6d.
- Page 184 ® FARO Laser Scanner Manual those permissions, but the entire Program remains governed by this License without regard to the additional permissions. When you convey a copy of a covered work, you may at your option remove any additional permissions from that copy, or from any part of it.
- Page 185 ® FARO Laser Scanner Manual license, and (b) permanently, if the copyright holder fails to notify you of the violation by some reasonable means prior to 60 days after the cessation. Moreover, your license from a particular copyright holder is reinstated permanently if the copyright holder...
- Page 186 ® FARO Laser Scanner Manual this License, of making, using, or selling its contributor version, but do not include claims that would be infringed only as a consequence of further modification of the contributor version. For purposes of this definition, "control" includes the right to grant patent sublicenses in a manner consistent with the requirements of this License.
- Page 187 ® FARO Laser Scanner Manual Program, the only way you could satisfy both those terms and this License would be to refrain entirely from conveying the Program. 13. Use with the GNU Affero General Public License. Notwithstanding any other provision of this License, you have permission to link or combine any covered work with a work licensed under version 3 of the GNU Affero General Public License into a single combined work, and to convey the resulting work.
- Page 188 If you, the owner of the scanner, like to get a copy of the source code of GPL covered parts of the scanner's firmware, please contact our support team support@faroeurope.com. This offer is valid for three years and valid for as long as FARO offers spare parts or customer support for this product model. LGPL The scanner's firmware includes the following applications and libraries, which are covered by the LGPL: •...
- Page 189 ® FARO Laser Scanner Manual This version of the GNU Lesser General Public License incorporates the terms and conditions of version 3 of the GNU General Public License, supplemented by the additional permissions listed below. 0. Additional Definitions. As used herein, "this License" refers to version 3 of the GNU Lesser General Public License, and the "GNU GPL"...
- Page 190 ® FARO Laser Scanner Manual The object code form of an Application may incorporate material from a header file that is part of the Library. You may convey such object code under terms of your choice, provided that, if the incorporated...
- Page 191 If you, the owner of the scanner, like to get a copy of the source code of LGPL covered parts of the scanner's firmware, please contact our support team support@faroeurope.com. This offer is valid for three years and valid for as long as FARO offers spare parts or customer support for this product model. sha1 SCENE contains sha1.h and sha1.cpp, which are covered by the following copyright:...
- Page 192 ® FARO Laser Scanner Manual Redistribution and use in source and binary forms, with or without modification, are permitted provided that the following conditions are met: • Redistributions of source code must retain the above copyright notice, this list of conditions and the following disclaimer.
-
Page 193: Appendix F: Certifications
Appendix F: Certifications... -
Page 194: Ce Conformity
F.1 CE Conformity... - Page 195 Typ: 3D Laser Scanner Type: 3D Laser Scanner Modell: FocusS 150, FocusS 350, FocusM 70 Modèle: FocusS 150, FocusS 350, FocusM 70 Seriennummer: LLS081609000 - LLS081720000 Numéro de série: LLS081609000 - LLS081720000 der folgenden Harmonisierungsrechtsvorschriften der répond à...
- Page 196 Type: 3D Laser Scanner Tipo: 3D Laser Scanner Model: FocusS 150, FocusS 350, FocusM 70 Modelo: FocusS 150, FocusS 350, FocusM 70 Serienummer: LLS081609000 - LLS081720000 Número de série: LLS081609000 - LLS081720000 in overeenstemming is met de volgende commu- está...
-
Page 197: Fcc Notice
F.2 FCC Notice FCC Equipment Authorization Trade name: FARO Product Name: Focus These devices comply with Part 15 of the FCC Rules Operation is subject to the following conditions: 1. The devices may not cause harmful interference, and 2. The devices must accept any interference received, including interference that may cause undesired operation. - Page 198 250 Technology Park Lake Mary, FL 32746 800-736-2771 U.S. / +1 407-333-3182 Worldwide Email: support@faro.com FARO Europe GmbH & Co. KG Lingwiesenstrasse 11/2 D-70825 Korntal-Münchingen, Germany FREECALL +800 3276 73 78 / +49 7150/9797-400 FREEFAX +800 3276 1737 / +49 7150/9797-9400 Email support.emea@faro.com...
Need help?
Do you have a question about the FocusM 70 and is the answer not in the manual?
Questions and answers