Sign In
Upload
Download
Table of Contents
Contents
Add to my manuals
Delete from my manuals
Share
URL of this page:
HTML Link:
Bookmark this page
Add
Manual will be automatically added to "My Manuals"
Print this page
×
Bookmark added
×
Added to my manuals
Manuals
Brands
Faro Manuals
Scanner
Focus M70
User manual
Faro Focus M 70 User Manual
Hide thumbs
Also See for Focus M 70
:
Accessories manual
(36 pages)
1
2
3
4
Table Of Contents
5
6
7
8
9
10
11
12
13
14
15
16
17
18
19
20
21
22
23
24
25
26
27
28
29
30
31
32
33
34
35
36
37
38
39
40
41
42
43
44
45
46
47
48
49
50
51
52
53
54
55
56
57
58
59
60
61
62
63
64
65
66
67
68
69
70
71
72
73
74
75
76
77
78
79
80
81
82
83
84
85
86
87
88
89
90
91
92
93
94
95
96
97
98
99
100
101
102
103
104
105
106
107
108
109
110
111
112
113
114
115
116
117
118
119
120
121
122
123
124
125
126
127
128
129
130
131
132
133
134
135
136
137
138
139
140
141
142
143
144
145
146
147
148
149
150
151
152
153
154
155
156
157
158
159
160
161
162
163
164
165
166
167
168
169
170
171
172
173
174
175
176
177
178
page
of
178
Go
/
178
Contents
Table of Contents
Troubleshooting
Bookmarks
Table of Contents
Table of Contents
Chapter 1: General Information
Notes and Signs
Chapter 2: Introduction
Chapter 3: Equipment
Chapter 4: Safety Precautions
Intended Use
Improper Use
Operators
General Safety Information
Electrical Safety
Power Block Battery Safety Measures
Power Dock Battery Charger Safety Measures
Mechanical Safety
Transport
Storage
Servicing
Chapter 5: Parts and Their Functions
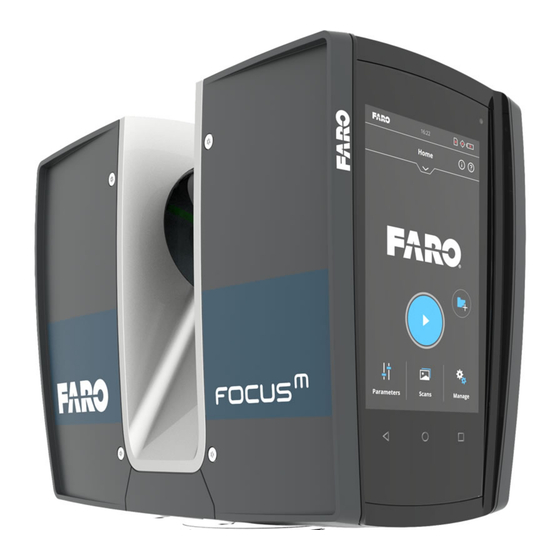
Scanner Parts
Display Side
Battery Side
Front Side
Bottom Side
Power Dock Battery Charger
LED Behavior When Charging Cradle Connected to Power Source
Chapter 6: Getting Started
Charging the Battery
Charging the Battery in the FARO Laser Scanner
Charging the Battery with the Power Dock Battery Charger
Tips for Using the Battery
Setting up the FARO Laser Scanner
Setting up the Tripod
Mounting and Using the Quick Release
SD Card
Preparing an SD Card
File Structure of the SD Memory Card
Inserting the SD Card
Switching the FARO Laser Scanner on
Initial Scanner Settings
Setting the Interface Language
Setting the Date and Time
Setting the Date Format
Changing Date and Time
Setting the Unit of Length and the Temperature Scale
Entering Scanner Information
Scanning
Setting the Scanning Parameters
Scanning Parameters Overview
Starting a Scan
LED Behavior
Data Security
Shutting down the FARO Laser Scanner
Powering off the FARO Laser Scanner
Chapter 7: Controller Software
General Elements
Status Bar
Navigation Bar
Frequently Used Buttons
Home Screen
Scan Parameters
Selected Profile
Resolution and Quality
Horizontal and Vertical Scan Range
Select Sensors
Scan with Color
Color Settings
Manage
Scan Projects and Clusters
Scan Profiles
Operators
Sensors
General Settings
On-Site Registration
Service
View Scans
Online Help and Notifications
Notifications
Help
Chapter 8: Special Scanning Modes
Scanner Control
On-Site Registration
On-Site Registration Setup
Map Page
List Page
Scan Details Page
On-Site Compensation
Preparing the Compensation Station
Connect Laser Scanner to Computer through Wireless LAN
On-Site Compensation Steps
Setup
Place Target
Horizontal Alignment
Scan & Compensate
Troubleshooting
Scan Groups
Creating a Scan Group
Retaking Pictures
Chapter 9: Maintenance
Cleaning Instructions for Optics
What's Needed
Cleaning Slightly Contaminated Optics
Dry Pre-Cleaning (Non-Contact Cleaning)
Wet Cleaning by Tissue and Isopropyl Alcohol as a Cleaning Fluid
Cleaning of Strongly Contaminated Optics
Dry Pre-Cleaning (Non-Contact Cleaning)
Wet Cleaning by Water or Diluted Mild Soap Solution
Chapter 10: Technical Data
General
Laser (Optical Transmitter)
Data Handling and Control
Ranging Unit
Color Unit
Multi-Sensor
Interface Connection
Deflection Unit
Ambient Conditions
Notes
Scanner Dimensions
Scanner Mount Dimensions
Chapter 11: Error Messages
Chapter 12: Disposal
Chapter 13: Technical Support
Appendix A: Software License Agreement
Appendix B: Purchase Conditions
Appendix C: Industrial Service Policy
Appendix D: Industrial Products Service Policy
Appendix E: Certifications
FCC Notice
Industry Canada (IC)
CE Conformity
Advertisement
Quick Links
1
Chapter 1: General Information
2
Chapter 2: Introduction
3
Setting the Scanning Parameters
Download this manual
FARO F
L
S
U
M
OCUS
ASER
CANNER
SER
ANUAL
D
2019
ECEMBER
Table of
Contents
Previous
Page
Next
Page
1
2
3
4
5
Advertisement
Table of Contents
Need help?
Do you have a question about the Focus M 70 and is the answer not in the manual?
Ask a question
Questions and answers
Related Manuals for Faro Focus M 70
Scanner Faro FOCUS Accessories Manual
Laser scanner (36 pages)
Scanner Faro Focus S Series On-Site Compensation Instructions
(8 pages)
Scanner Faro Focus 3D X 130 Training Manual
Focus series with scene 5.3 software (340 pages)
Scanner Faro Focus M Quick Start Manual
With hypermodulation (12 pages)
Scanner Faro FOCUS Premium User Manual
(12 pages)
Scanner Faro Focus Premium User Manual
(164 pages)
Scanner Faro Focus S Quick Start Manual
With hypermodulation (12 pages)
Scanner Faro Focus S Plus 150 User Manual
(178 pages)
Scanner Faro Orbis User Manual
Mobile scanner and datalogger (65 pages)
Scanner Faro FocusM 70 Manual
(198 pages)
Scanner Faro PanoCam Installation And Setup
For the focus s series (4 pages)
Scanner Faro ls 420 he User Manual
(51 pages)
Scanner Faro Edge FaroArm Instructions
Ethernet connection (2 pages)
Scanner Faro Focus3D Manual
Panorama tripod (5 pages)
Scanner Faro Photon 20/80 User Manual
(68 pages)
Scanner Faro Freestyle2 Setup Instructions
(3 pages)
This manual is also suitable for:
Focus s 70
Focus s 150
Focus s 350
Focus s plus 150
Focus s plus 300
Table of Contents
Save PDF
Print
Rename the bookmark
Delete bookmark?
Delete from my manuals?
Login
Sign In
OR
Sign in with Facebook
Sign in with Google
Upload manual
Upload from disk
Upload from URL


Need help?
Do you have a question about the Focus M 70 and is the answer not in the manual?
Questions and answers