Advertisement
Quick Links
Assembly Instructions
Instructions de montage
Instrucciones de armado
CONTACT US FIRST
parts@prepacmfg.com
1-877-PREPAC1
1-877-773-7221
Mon - Fri: 7am - 4pm PST / 10am - 7pm EST
•
For help with assembly
•
If you have received a damaged or
•
defective part or are missing hardware.
We will process replacement parts in 2 business days or less.Parts
are shipped via UPS Ground or mail.
Before you call please:
1)
Record the following information from the shipping label
on the outside of the box. You will need it for warranty
purposes:
Ship To Name
n
n Sales Order Number
2)
Note the product model number.
3)
Review the contents of your shipment to determine what
you are missing.
Prepac Manufacturing Ltd. 6705 Dennett Place, Delta, BC V4G 1N4
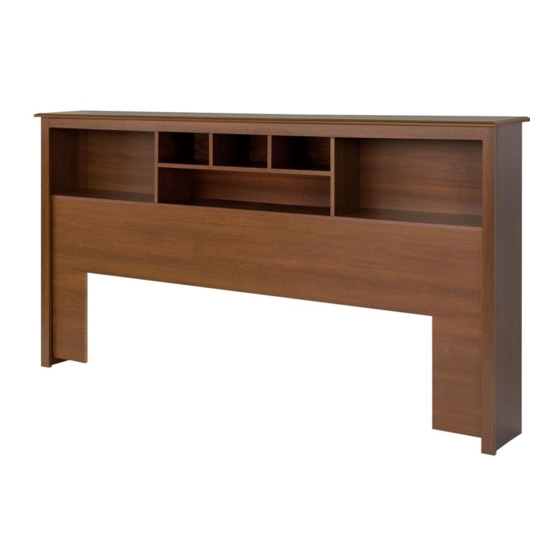
King Bookcase Headboard
Dossier de lit à compartiments pour très grand lit
Cabecera king con compartimento
Model / Modèle / Modelo # SH-8445
Online Option
Fill out the Replacement Parts Order form in the Product
Support section of our website: www.prepacmfg.com
Option de service en ligne
Complétez le formulaire Commande de Pièces de Rechange
disponible dans la section Soutien à la clientèle de notre site
web : www.prepacmfg.com
Pour parler avec quelqu'un en français, s'il vous plaît
contacter votre détaillant.
Opción de servicio en línea
Complete la forma para solicitud de piezas de remplazo en la
sección de soporte al cliente en nuestra página web
www.prepacmfg.com
O envíenos sus preguntas al correo parts@prepacmfg.com
Para solicitar ayuda en español por favor contacte su
distribuidor.
LB-0629-R 2015-08-20
Advertisement

Related Manuals for Prepac SH-8445


Summary of Contents for Prepac SH-8445
- Page 1 Sales Order Number Para solicitar ayuda en español por favor contacte su Note the product model number. distribuidor. Review the contents of your shipment to determine what you are missing. Prepac Manufacturing Ltd. 6705 Dennett Place, Delta, BC V4G 1N4 LB-0629-R 2015-08-20...
-
Page 2: Before You Begin
Required Tools / Caution Outils requis / Do not over tighten any screw. The last few turns Herramientas necesarias of each screw should be done very slowly or by hand. Optional Tools: Attention Using a power screwdriver Évitez de trop serrer les vis. Ralentissez la will speed up assembly. - Page 3 Black = noir / negro Cherry = cerise / cereza Espresso = expresso Maple = érable / caramelo White = blanc / blanco Top Molding (1) Outer Gables (2) Inner Gables (2) Small Inner Shelf (1) Dessus (1) Moulure supérieure Pignons extérieur Pignons intérieur Petite étagère intérieure...
- Page 4 You will assemble the headboard face down on the floor until step 9 shaded = unfinished Vous pourrez assembler le dossier de lit face vers le bas sur le sol jusqu’à l’étape 9 ombragé = non-fini Usted va a montar la cabecera de cara hacia abajo en el suelo hasta el paso 9 sombreado = sin acabado Lay out all parts on the floor with the finished side down.
-
Page 5: Online Help
ONLINE HELP To see how-to videos, go to the Product Support page on our website, (www.prepacmfg.com/content/assembly): For help with cams and connectors, click on: “How to Use The Hardware” L’AIDE EN LIGNE Pour voir un comment-à la vidéo, consultez la page de Soutien Produits sur notre site web : (www.prepacmfg.com/content/assembly). - Page 6 Left Side Côté gauche Lado izquierdo Right Side There are 3 holes on the front Côté droit edge of each sides for Lado derecho attaching moldings in Step 12. Il y a de 3 trous sur le bord de devant de chaque côté justes pour attacher des moulures dans Etape 12.
- Page 7 Attach the left side (H8) to the fixed shelf (H7), large stabilizer (H11) and right small stabilizer (H12). Tighten cams slightly. Make sure the stabilizers and shelf are positioned squarely with the side, then fully tighten cams. Attachez le côté gauche (H8) à l’étagère fixe (H7), au grand stabilisateur (H11), le petit stabilisateur juste (H12). Resserrer des ferrures légèrement.
- Page 8 Repeat for the right side Répétez pour le côté droit Repita en el lado derecho. Finished side faces the floor Le côté fini face au sol El lado terminado está de cara el suelo Right Side Côté droit Lado derecho Page 8 of 16...
- Page 9 OR / OU / Ó Page 9 of 16...
- Page 10 Finished edge faces floor Les bord fini face au sol El borde con acabado está de cara al piso Finished edge faces floor Les bord fini face au sol El borde con acabado está de cara al piso Page 10 of 16...
- Page 11 Insert halfway ONLY Insérez à mi-chemin seulement Inserte SOLAMENTE la mitad Page 11 of 16...
- Page 12 Insert halfway ONLY Insérez à mi-chemin seulement Inserte SOLAMENTE la mitad To attach moldings: Pour fixer les moulures : Para colocar las molduras: Use your hands and press firmly utilisez vos mains et appuyez fermement Use sus manos y presione firmemente DO NOT USE HAMMER NE PAS UTILISER DE MARTEAU NO USE EL MARTILLO...
- Page 13 Page 13 of 16...
- Page 14 Front Position nails in the center of the board Devant Lado Frontal Placez des clous dans le centre de la carte Coloque los clavos en el centro del tablero Page 14 of 16...
- Page 15 Page 15 of 16...
- Page 16 Move headboard into desired location and position King bed against headboard. Transférer le dossier de lit à l’emplacement désirés et placer le grand lit size contre la dossier. Coloque la cabecera en el lugar deseado y posicione la cama individual, king contra la cabecera. NOTE: if moving headboard in a carpeted room, lift headboard (with 2 people).
Need help?
Do you have a question about the SH-8445 and is the answer not in the manual?
Questions and answers