Table of Contents
Advertisement
Quick Links
Advertisement
Table of Contents

Related Manuals for Fermax DETECTA-6


Summary of Contents for Fermax DETECTA-6
- Page 1 DETECTA-6 DETECTA-6 ENGLISH Pag 1...
- Page 2 Technical publication of an informative nature, edited by FERMAX ELECTRÓNICA S.A.E. FERMAX ELECTRÓNICA S.A.E., in a policy of ongoing improvement, reserves the right to modify the contents of this document and the features of the products cited at any time and with no prior notice.
-
Page 3: Table Of Contents
ADS Detecta-6 installations wiring diagrams ............ 23 Wiring diagram of the Detecta-6 1-line ADS Video-entryphone Kit ........ 24 Wiring diagram of the Detecta-6 1-line ADS Building Video-entryphone Kit....26 Wiring diagram with Detecta-6 ADS Telephone .............. 28 Wiring diagram with Detecta-6 ADS Telephone and Monitor .......... 30 4+N/MDS Detecta-6 installations wiring diagrams .......... -
Page 4: Introduction
Detecta-6 is an electronic video entry system incorporating alarm central functions, with the option of connection to an alarm reception central. The Detecta-6 system comes with a basic factory configuration that covers most of the installations to be carried out, although it can be modified to adapt to the specific needs of any installation. -
Page 5: Regulations
DETECTA-6 DETECTA-6 REGULATIONS Pag 5... - Page 6 Security Forces and Organisations is strictly forbidden. 3.- Alarm and security devices installed must comply with safety regulations, preventing harm or inconvenience to third parties (Detecta-6 equipment complies with current legislation). 4.- Once the installation has been carried out by authorised personnel, the installer company shall carry out the necesssary checks to ensure that its preventive aim is fulfilled (this manual includes the checking protocol).
-
Page 7: Installation Conditions And Tips
DETECTA-6 DETECTA-6 INSTALLATION CONDITIONS AND TIPS Pag 7... - Page 8 INSTALLATION CONDITIONS AND TIPS FERMAX ELECTRÓNICA, S.A.E. certifies its products under the following conditions: · The system has been certified connecting the FERMAX Detecta 6 central to a grounded power source. · Cable length between the RS-232 pins of the circuit and the computer communication interface must not exceed 1 metre.
- Page 9 DETECTA-6 DETECTA-6 INSTALLATION TIPS FOR DETECTORS Presence Detectors (Intrusion) Avoid direct sunlight on the sensor. Avoid placing the sensor where there are draughts, where they may be detected, caused by ventilators or airconditioning. Avoid curtains, partitions, etc.. that may Do not place in unstable positions, where block the detection area.
- Page 10 DETECTA-6 DETECTA-6 Avoid zones where steam or high humidity Do not aim the sensor towards detection may cause condensation. zones with objects continually in movement (blinds, curtains..). Do not focus on outdoor zones where there is frequent movement. Flood Detectors...
- Page 11 DETECTA-6 DETECTA-6 Smoke Detectors Do not install Smoke detectors: - 4 ºC + 40 ºC In bathrooms, showers, garages or other rooms where steam, water and other smoke accumulate easily and may activate the detector. Nor is installation recommendable in attics or lofts where extreme temperatures are reached (below 4 degrees or over 40º).
- Page 12 DETECTA-6 DETECTA-6 Avoid positioning close to decorative objects, doors, lamps, mouldings, frames, etc., that may prevent the smoke from penetrating the detector. Smoke Detector Position Depending on the spot where you want to place the detector, ceiling or wall, it is...
-
Page 13: Detecta-6 Central Configuration
DETECTA-6 DETECTA-6 DETECTA-6 CENTRAL CONFIGURATION Pag 13... - Page 14 DETECTA-6 DETECTA-6 CENTRAL CONFIGURATION The Detecta-6 central has a basic factory configuration suitable for most types of installation, making startup easier. In any case, all the parameters or values of this configuration are completely modifiable by means of the monitor/telephone keypad (see «Programming» Manual code 97036) or the Detecta Express software (see «Help Menu»...
- Page 15 DETECTA-6 DETECTA-6 - Outputs Activation by... Activation Tim e Working Mode - Zones 1...6 Alarm 60 sec. In standby: Open Circuit Output 1 (siren) Activated: +12V - Centre Arming 10 sec. In standby: Open Circuit (deactivated w hen disarmed) Activated: Negative...
- Page 16 DETECTA-6 DETECTA-6 -Voice Messages Voice Message Repetition 3 times Voice Messages Pre-recorded (see table) Microphone Volum e 240 units (0-255) Loudspeak er Volum e 120 units (0-255) Message Type Recorded Voice Message Header Message Detecta 6 Alarm Centre Zone 1 Message...
- Page 17 DETECTA-6 DETECTA-6 INSTALLATION AND CONNECTION DIAGRAMS Pag 17...
-
Page 18: Power Supply Installation
DETECTA-6 DETECTA-6 POWER SUPPLY INSTALLATION DIN Rail Installation Fixing with screws Dismantling Assembly POWER SOURCE (LEDs) OVERLOAD On LED Maximum current exceeded LED indicator. Reduce charge. On LED + OVERLOAD blinking indicates short circuit. OUTDOOR PANEL INSTALLATION 10º 10º 10º... -
Page 19: Panel Settings
DETECTA-6 DETECTA-6 PANEL SETTINGS - Audio setting - Telecamera focus Pan&Tilt ( ± 10º) 10º 10º 10º 10º ADS panels - «Open Door» message language selection: By default, includes Spanish (A), French (B), English (C) and German (D), but there are interchangeable modules (VOX modules) with more languages (check availability). -
Page 20: Monitor Installation (Ads Y 4+N)
DETECTA-6 DETECTA-6 MONITOR INSTALLATION Assembly Dismantling ADS monitors require simple programming for correct functioning. See the section Programming the ADS Monitor 4+N monitors do not require programming. In MDS installations, it is the audio decoder, to which the 4+N monitor is connected, that... -
Page 21: Central Installation
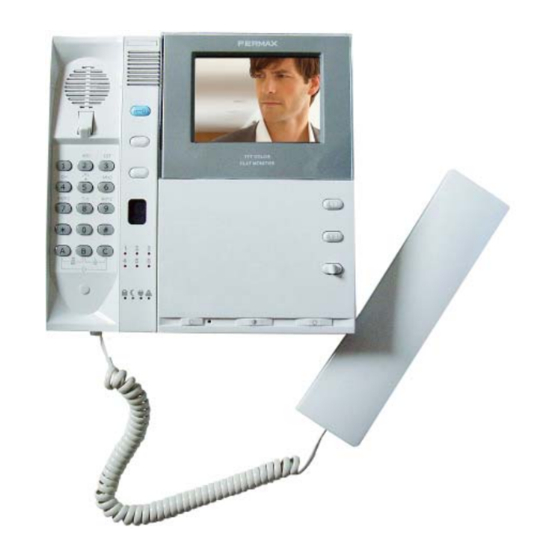
DETECTA-6 DETECTA-6 TELEPHONE INSTALLATION (Only available in ADS) TELEPHONE PROGRAMMING Programming Boutton F . * * < 2 min 1. With the telephone connected, press the programming button. You will hear a confirmation tone. 2. Press the house call button. Confirmation tone is heard again. -
Page 22: Wiring Diagramas
DETECTA-6 DETECTA-6 WIRING DIAGRAMS Below, you will find the following wiring diagrams of the Detecta-6 system in ADS and 4+N/MDS installations: ADS installations - Wiring diagram of the Detecta-6 1-line ADS Video-entryphone Kit. - Wiring diagram of the Detecta-6 1-line ADS Building Video-entryphone Kit. - Page 23 DETECTA-6 DETECTA-6 INSTALLATIONS WIRING DIAGRAMS Pag 23...
- Page 24 DETECTA-6 DETECTA-6 KIT 1/L WIRING DIAGRAM - ZONE 1 ZONE 2 PRESENCE DETECTOR PRESENCE DETECTOR OUTDOOR SIREN Optional * Optional BATTERY 12 Vdc TIERRA * Optional Relays Telephone Line Telephone * It is not necessary to reprogram the central if the optional devices shown in the diagram Device to Activate are connected.
- Page 25 DETECTA-6 DETECTA-6 ZONE 3 PRESENCE DETECTOR FLOOD DETECTOR ZONE 6 TAMPER DEVICES ZONE 4 If not using the Tamper Zone, make a short circuit between the «Z4» and «-» terminals F E R M A X max. 100m 30 m.
- Page 26 DETECTA-6 DETECTA-6 HOME BUILDING WIRING DIAGRAM - ZONE 2 ZONE 1 PRESENCE DETECTOR PRESENCE DETECTOR OUTDOOR SIREN Optional * Optional BATTERY 12 Vdc TIERRA * Optional Relays Telephone Line Telephone * It is not necessary to reprogram the Device to Activate...
- Page 27 DETECTA-6 DETECTA-6 ZONE 3 PRESENCE DETECTOR FLOOD DETECTOR ZONE 6 TAMPER DEVICES ZONE 4 If not using the Tamper Zone, make a short circuit between the «Z4» and «-» terminals F E R M A X max. 100m TO GENERAL ADS...
- Page 28 DETECTA-6 DETECTA-6 INSTALLATION WIRING DIAGRAM WITH DETECTA-6 TELEPHONE - ZONE 1 ZONE 2 PRESENCE DETECTOR PRESENCE DETECTOR OUTDOOR SIREN Optional * Optional BATTERY 12 Vdc TIERRA * Optional Relays Telephone Line Telephone * It is not necessary to reprogram the central if the optional devices shown in the diagram are connected.
- Page 29 DETECTA-6 DETECTA-6 ZONE 3 PRESENCE DETECTOR FLOOD DETECTOR ZONE 6 TAMPER DEVICES ZONE 4 If not using the Tamper Zone, make a short circuit between the «Z4» and «-» terminals max. 100m TO GENERAL ADS INSTALLATION Pag 29...
- Page 30 DETECTA-6 DETECTA-6 INSTALLATION WIRING DIAGRAM WITH DETECTA-6 TELEPHONE AND MONITOR - TIERRA Pag 30...
- Page 31 Notes: - Maximum number of Detecta-6 terminals in the same home: 3. - Maximum distance from the central unit to the last Detecta-6 terminal: 100m. It is possible to expand the installation with «non-Detecta-6» monitors/telephones, provided the power supply is adequate.
- Page 32 DETECTA-6 DETECTA-6 Pag 32...
- Page 33 DETECTA-6 DETECTA-6 4+N and MDS INSTALLATIONS WIRING DIAGRAMS Pag 33...
- Page 34 DETECTA-6 DETECTA-6 4+N ó MDS HOME BUILDING WIRING DIAGRAM - ZONE 1 ZONE 2 PRESENCE DETECTOR PRESENCE DETECTOR OUTDOOR SIREN Optional * Optional BATTERY 12 Vdc Telephone * Optional Relays Line Telephone * It is not necessary to reprogram the...
- Page 35 DETECTA-6 DETECTA-6 ZONE 3 PRESENCE DETECTOR FLOOD DETECTOR ZONE 6 TAMPER DEVICES ZONE 4 If not using the Tamper Zone, make a short circuit between the «Z4» and «-» terminals F E R M A X TO GENERAL 4+N INSTALLATION...
-
Page 36: Relay Connection Diagram
MAX 220 VAC / 1A. MICROPHONE-LOUDSPEAKER CONNECTION DIAGRAM The Detecta-6 central admits connection of a loudspeaker (with amplifier) and microphone that provide the system with new functions: - Set up communication with the house (listen and talk) so that you know what is going on in the home at any time (see «Telecontrol»... - Page 37 DETECTA-6 DETECTA-6 TECHNICAL FEATURES OF THE EQUIPMENT Pag 37...
-
Page 38: Technical Features
Protection: • AC input: 200mA. • Battery: • Siren output: Auto-protected 1A. • 12V outputs: Auto-protected 1A. Average Consumption: • Detecta-6 Central: 41 mA. • Monitor keypad: 17 mA. RFL Zones: • Normal: 2K2 Ohms. • Fault/Tamper: 820 Ohms. Outputs: •... -
Page 39: Installation Checking Protocol
DETECTA-6 DETECTA-6 INSTALLATION CHECK PROTOCOL Pag 39... - Page 40 DETECTA-6 DETECTA-6 CHECK PROTOCOL Once the Detecta-6 equipment is installed, we recommend using the «Transit Route» and «Output Test» to check that the installation has been carried out correctly. Transit Route 1.- Activate Transit Route To activate the «Transit Route», press on the monitor keypad: (Press for 2 seconds).
- Page 41 DETECTA-6 DETECTA-6 3.- Check Tamper Zone Zone 4 is configured as a Tamper zone. If the sensors are connected with the tamper, open the different detectors to check the correct operation of the tamper. When any of the detectors is opened, the monitor should emit the visual and acoustic...
- Page 42 DETECTA-6 DETECTA-6 Output Test (Siren, PGM, Relays) When the output test is run, the devices connected to the Central outputs are activated for 2 seconds (after this time, the devices are deactivated). To activate the «Output Test», press on the monitor keypad: (Press for 2 seconds).
-
Page 43: Incidents And Solutions Table
DETECTA-6 DETECTA-6 INCIDENTS AND SOLUTIONS TABLE Pag 43... - Page 44 DETECTA-6 DETECTA-6 VIDEO ENTRY SYSTEM INCIDENTS AND SOLUTIONS TABLE SYMPTOM POINTS TO CHECK - Negative section. Increase. - Distance between panel and monitor. Increase section • Does not enter programming or add additional power supply. mode. - Power supply location. Max distance from panel: 30 •...
- Page 45 DETECTA-6 DETECTA-6 Pag 45...
Need help?
Do you have a question about the DETECTA-6 and is the answer not in the manual?
Questions and answers