Table of Contents
Advertisement
Quick Links
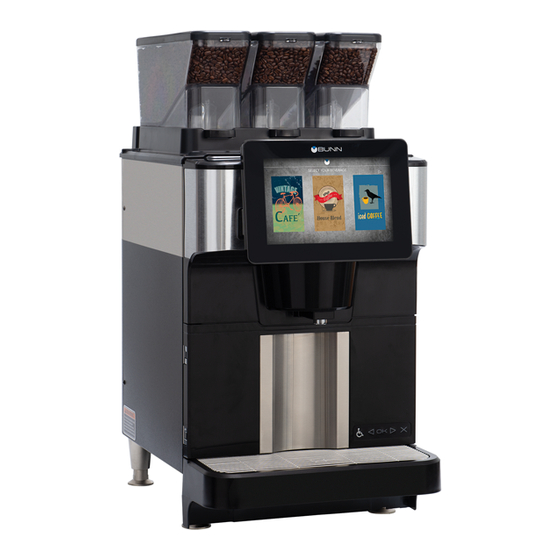
Fast Cup
®
Bean-to-Cup Single Serve Brewer
INSTALLATION & OPERATING GUIDE
For Technical Service, contact Bunn-O-Matic Corporation at 1-800-286-6070.
Bunn-O-Matic Corporation
Post Office Box 3227, Springfield, Illinois 62708-3227
Phone (217) 529-6601 | Fax (217) 529-6644
www.bunn.com
55038.0000 D 2/21 © 2019 Bunn-O-Matic Corporation
Advertisement
Table of Contents

Related Manuals for Bunn Fast Cup


Summary of Contents for Bunn Fast Cup
- Page 1 Fast Cup ® Bean-to-Cup Single Serve Brewer INSTALLATION & OPERATING GUIDE For Technical Service, contact Bunn-O-Matic Corporation at 1-800-286-6070. Bunn-O-Matic Corporation Post Office Box 3227, Springfield, Illinois 62708-3227 Phone (217) 529-6601 | Fax (217) 529-6644 www.bunn.com 55038.0000 D 2/21 © 2019 Bunn-O-Matic Corporation...
- Page 2 BUNN’S SOLE OPTION AS SPECIFIED HEREIN, TO REPAIR, REPLACEMENT OR REFUND. In no event shall BUNN be liable for any other damage or loss, including, but not limited to, lost profits, lost sales, loss of use of equipment, claims of Buyer’s customers, cost of capital, cost of down time, cost of substitute equip-...
-
Page 3: Table Of Contents
CONTENTS WARRANTY ................................2 USER NOTICES ..............................4 WARNINGS ................................4 NORTH AMERICA REQUIREMENTS ........................5 SITE REQUIREMENTS Plumbing ................................. 6 Water Treatment .............................. 6 Counter ................................6 Electrical (Hookup and Configuration) ......................6 INITIAL SETUP Plumbing Hook Up ............................8 Drain Hook Up .............................. -
Page 4: User Notices
Disconnect power before servicing. READ THE ENTIRE OPERATING MANUAL BEFORE Scan to view USING THIS PRODUCT 37881.0000 00986.0000M 10/14 ©1994 Bunn-O-Matic Corporation Fast Cup at bunn.com 00986.0000 As directed in the International Plumbing Code of the International Code Council and the Food Code... -
Page 5: North America Requirements
NORTH AMERICAN REQUIREMENTS • This appliance must be installed in locations where it can be overseen by trained personnel. • For proper operation, this appliance must be installed where the temperature is between 41°F to 95°F (5°C to 35°C). • Appliance shall not be tilted more than 10° for safe operation. •... -
Page 6: Site Requirements
” water supply line. A tight coil of copper tubing in the water line will facilitate moving the brewer to clean the counter top. Bunn-O-Matic does not recommend the use of a saddle valve to install the brewer. The size and shape of the hole made in the supply line by this type of device may restrict water flow. - Page 7 SITE REQUIREMENTS Electrical Configuration • 208VAC circuit (voltage range +5/-10%) • Dedicated 30-amp circuit: cord cap, receptacle, and breaker • Machine is supplied with a power cord AWG 10/3 30A/250V (PN 46908.0002) with Plug L1, L2, G. NOTE: (N) no neutral wire/conductor used. •...
-
Page 8: Initial Setup
INITIAL SETUP Plumbing Hook Up The plumbing connection is a 3/8" male flare fitting located on the lower, left, rear of the machine as shown. NOTE: Water pipe connections and fixtures directly connected to a potable water supply shall be sized, installed, and maintained in accordance with federal, state, and local codes. -
Page 9: Power Switch
INITIAL SETUP Power Switch 1. Open Customer Access door. 2. The switch is located on the lower, right side. Grounds Bin 1. Open Customer Access door. 2. Remove packing and tape from Grounds Bin. Keys (for Service Access Door) 1. Open Customer Access door. 2. -
Page 10: Drip Tray
INITIAL SETUP Drip Tray 1. Unpack the drip tray assembly. 2. Open Customer Access door. 3. Remove Grounds Bin. 4. Insert drip tray into the cut-out in the door. 5. The drip tray is equipped with a drain outlet that will automatically connect to the drain line when the tray is installed in the correct position under the brewer. - Page 11 INITIAL SETUP 2. Prior to installing the bean hoppers, visually verify that there is no debris or obstruction blocking the bean chutes or bean detection sensors. Chutes Image 3. Install the bean hoppers in any order. NOTE: Each hopper holds approximately 3.7 lbs (1.68 kg).
- Page 12 INITIAL SETUP Filling Bean Hoppers If bean hoppers are already locked in place, go to Step 3. 1. Place an empty hopper in opening on top of machine. Left Center Right 2. When placed, push gate handle back. 3. Remove lid(s). 4.
-
Page 13: Initializing
INITIALIZING 1. With the water supply line connected to the unit, turn the water on & check for leaks. 2. Open Customer Access door. 3. Connect the unit to the power source (plug it in). 4. Turn the unit on by setting the power switch to the ON position. -
Page 14: Bunnlink Activation
BUNNLINK ACTIVATION LTE Activation NOTE: BUNNlink Models Only. Purchase is required if not pre-installed on machine. ® If you experience any issues with activation; contact a BUNNlink administrator: bunnlink@bunnlink.com. 1. Scan the QR Code located on the machine. *If this is a kit install, scan the QR Code decal located in the package or on the back of the BUNNlink board. - Page 15 (Google, Safari, Mozilla, etc.). 5. Enter 192.168.1.1 in the web address bar. 6. On the BUNN LOGIN page enter the username BUNNService. Enter Bunn123! in the password text field. Press the LOGIN button.
-
Page 16: Wi-Fi
BUNNLINK ACTIVATION WI-FI Activation (continued) 7. From the HOME PAGE select Settings from the menu bar. 8. From the drop down menu, choose the desired Network to join. 9. Enter the Password for the specific network. 10. Press APPLY. 11. Select the BUNNLINK tab from MACHINE SETTINGS to verify: - The gateway has been connected - Machine serial number - Signal strength... -
Page 17: Product And Recipe Setup
PRODUCT AND RECIPE SETUP 1. Touch and hold the BUNN logo for a few seconds until SERVICE ACCESS appears on the display. 2. Select the ADVANCED icon. 3. Next, enter the passcode 6601. * * * * Importing Custom Configuration Files ... - Page 18 PRODUCT AND RECIPE SETUP Importing Custom Configuration Files (cont.) 2. Press the IMPORT tab. 3. Insert USB Stick. NOTE: The USB port is located behind left side of the touch screen. 4. Select new Configuration file. 5. Press Start button. 6.
-
Page 19: Product Setup
PRODUCT AND RECIPE SETUP 7. When the import is completed, the OK button can be selected and the USB Stick can be safely removed. 8. Press Reboot button to complete import. NOTE: This will restart the machine’s operating system. 9. The machine will update with your custom Configuration files. - Page 20 PRODUCT AND RECIPE SETUP Product Setup (continued) 2. Next, touch the PRODUCTS tab. 3. Choose a product to edit. 4. Or, create a New Product. We will use the “Light Roast” as an example. 5. Next, choose the Product Name Line 1 field. NOTE: There is a second field if you need more space to name your product.
-
Page 21: Grinder Calibration
PRODUCT AND RECIPE SETUP 9. Next, scroll side-to-side to see the available images. Press the chosen Product Image. 10. If a new image is chosen, press OK. 11. Press OK to complete this Product creation. 12. You can choose to edit or create new Products, or move on to creating or editing a coffee Recipe by pressing the RECIPE tab. - Page 22 PRODUCT AND RECIPE SETUP Grinder Calibration (continued) 2. Choose a hopper from the tabs. The default is the left hopper. NOTE: Choosing the hopper during calibration is simply telling the machine which grinder to turn on. A unique calibration is stored for each product.
- Page 23 PRODUCT AND RECIPE SETUP It’s time to Calibrate the grinder. 1. First, open the machine door. 2. Place a container, like the Grounds Bin, under the Coffee Chute. 3. Close door and return to Calibration screen. Option 2 a. Use the Service Key to unlock the door interlock so the door does not need to be closed completely.
- Page 24 PRODUCT AND RECIPE SETUP Grinder Calibration (continued) 7. Weigh cup. 8. Then, press the 1st Field to log the weight of the coffee in the cup. After pressing the 1st Field to log the weight of the coffee in the cup, the Input Screen will appear for you to input in these numbers.
- Page 25 PRODUCT AND RECIPE SETUP 2. a. Press Apply To Left button to automatically input average. b. Manually press on the Average Coffee Weight field to fill in this amount. 3. The input screen will appear. Type average weight. 4. Press Enter. NOTE: Steps 2, 3, and 4 do not need to be done for each hopper if Step 5 (Apply to All button) is selected.
-
Page 26: Recipe Setup
PRODUCT AND RECIPE SETUP Recipe Setup 1. Press the New button. 2. Or, edit an existing Recipe. For this example, we will select Light Roast to edit. NOTE: Definitions for sliders at top of screen. (they MUST be enabled per recipe if desired). Bold - increases the coffee throw weight by the percentage shown. - Page 27 PRODUCT AND RECIPE SETUP By pressing the Recipe Name Line 1 and Recipe Description Line 1 text fields, an input screen will appear. 7. Type the description. 8. Press the Return key to complete. 9. Next, the Recipe Image can be changed, if preferred.
-
Page 28: Editing Coffee Recipes
PRODUCT AND RECIPE SETUP Editing Coffee Recipes You can make changes to Recipes for the sizes enabled. 1. Press the COFFEE tab to start. Example: Each size with a green box is enabled. Coffee Recipes can be edited from this screen by clicking any of the numbers in the table cells. - Page 29 PRODUCT AND RECIPE SETUP The option to make a Bold beverage, or to Leave Room, can be enabled from this screen. 1. Press the square for either (as shown). • Leaving Room in a beverage means using 1 - 10% less total water volume, starting with the bypass.
-
Page 30: Enabling Products
PRODUCT AND RECIPE SETUP Enabling Products 1. Next, select the PRODUCT SETUP button to enable and setup the hoppers. NOTE: The Graphic User Interface will be set up through the Product Setup button. 2. Next, select the BEVERAGES OFFERED tab. 3. -
Page 31: Bean Hoppers Setup
PRODUCT AND RECIPE SETUP 6. You can organize the way the customer will view the coffees offered by pressing the Set Sort Order button. 7. By pressing and sliding, you can move through the entire icon library. Then, drag the icon chosen to the preferred position. - Page 32 PRODUCT AND RECIPE SETUP Bean Hoppers Setup (continued) 5. Select SERVICE ACCESS to return to HOME screen. The HOME screen should appear, and the Products and variables you just created should be available. You are ready to serve.
-
Page 33: Operating Interface
OPERATING INTERFACE User Interface The first screen to appear is the User Interface screen, also known as the beverage Carousel. 1. Available drinks are accessed by swiping left or right across the screen, or by touching the arrow located at the top right of the screen. 2. -
Page 34: Cancelling Beverage Preparation
OPERATING INTERFACE User Interface (continued) 5. Next, press the START button to begin. NOTE: If the beverage selected is an iced beverage, the screen will prompt the user to fill the cup with ice prior to placing the beverage container (cup) on the tray. 6. -
Page 35: Ada Operating Interface
OPERATING INTERFACE 2. The user will be presented with a new Customer Care Alert indicating that the machine is Resetting. 3. The user will then be returned to the original selection screen to choose again. ADA Interface 1. To activate the ADA screen interface, the user must press the Accessibility symbol (wheelchair icon). - Page 36 OPERATING INTERFACE ADA Interface (continued) 3. Navigate around the screens using the Left and Right arrows on the ADA interface. a. Select a beverage. b. Press the OK button to confirm. c. Pressing the X cancels the selection. NOTE: If the beverage selected is an Iced Beverage, the screen will prompt the user to fill the cup with ice prior to placing the beverage container (cup) on the tray.
- Page 37 OPERATING INTERFACE c. Navigate to the START button using the ADA arrows. d. Press OK to complete selection.
-
Page 38: Virtualtouch
QR code app) BUNN VirtualTOUCH requires a QR Code Scanner to access the application to dispense a drink. Depending on what brand tablet or smartphone you carry, it may require you to download a QR code app before using VirtualTOUCH. - Page 39 OPERATING INTERFACE 4. Select Size. Press NEXT. 5. Place your Cup in position. For iced beverage, place cup with ice in position. Press OK. 6. Enter the 4-digit code as it is shown on the display of the machine Press DISPENSE. NOTE: This is to confirm that you are standing in front of the machine and ready to take the drink.
-
Page 40: Care And Cleaning
• Use cleaning cloth provided, to clean the acrylic door panel. Accessing Care and Cleaning 1. Touch and hold the BUNN logo for a few seconds until the SERVICE ACCESS screen appears. 2. From the SERVICE ACCESS screen, press the CARE AND CLEANING button. -
Page 41: Cleaning Tab Descriptions
CARE AND CLEANING Cleaning Tab Descriptions Three cleaning tabs: Clean, Rinse, and Swiper. CLEAN Tab ► Daily Cleaning - includes wiping interior and exterior surfaces, emptying and cleaning Grounds Bin, and a Rinse Cycle. ► Weekly Cleaning - includes wiping interior and exterior surfaces, emptying and cleaning Grounds Bin, a Rinse Cycle, plus removing and cleaning... - Page 42 CARE AND CLEANING Daily Cleaning 1. Press the CLEAN tab. Follow directions shown on the screen. NOTE: The CLEAN tab prepares the brew system for cleaning. 2. Press Next to continue. NOTE: The next screen will not allow you to advance to the next step until the lower door is opened and closed.
- Page 43 CARE AND CLEANING Daily Cleaning (continued) d. Remove, clean and replace Grounds Bin. e. Close both Doors. 3. Press Next to continue. 4. Place a Tabz Cleaning Tablet in the ™ the opening on top of the machine.
- Page 44 CARE AND CLEANING Daily Cleaning (continued) 5. Place the Cleaning Tube under the dispense nozzle. 6. Press Start to continue. NOTE: This process can be stopped by pressing the Cancel button. This will reset the machine. NOTE: An automatic Clean cycle will start. A progress bar will appear to keep the operator informed 7.
- Page 45 CARE AND CLEANING Weekly Cleaning (continued) NOTE: Next, the screen will say “Preparing the brew chamber for cleaning, please wait...” NOTE: The next screen will not allow you to advance to the next step until the lower door is opened. Follow the close-ups below for this step.
- Page 46 CARE AND CLEANING Weekly Cleaning (continued) d. Remove, and clean the Grounds Bin. 3. Press Next to continue. 4. Remove Drip Tray. NOTE: Screen images will differ if Grounds Chute is installed. 5. Clean and re-install Drip Tray. NOTE: Wash both Drip Tray and Grate.
- Page 47 CARE AND CLEANING Weekly Cleaning (continued) 6. install Grounds Bin. 7. Close Door. NOTE: A reminder will appear if the door is not closed. 8. Press Start to continue. NOTE: An automatic Clean cycle will start. A progress bar will appear to keep the operator informed.
- Page 48 CARE AND CLEANING Weekly Cleaning (Every 3 Weeks) Drip Tray and Swiper 1. Reminder appears saying Drip Tray and Swiper are due for cleaning. 2. Press Next to begin. NOTE: Next, the screen will say “Preparing the brew chamber for cleaning, please wait...” 3.
- Page 49 CARE AND CLEANING Weekly Cleaning (Every 3 Weeks) (continued) Close-ups of steps. a. If Upper Door is not open, raise now for access. b. Push Release Lever to the left. c. Pull Swiper out. d. Pull Upper Door down. 5. Press Next button when complete.
- Page 50 CARE AND CLEANING Weekly Cleaning (Every 3 Weeks) (continued) 6. The screen will now show steps needed to wash and re-install the Swiper. Close-ups of steps. a. Wash and rinse the top of the Swiper assembly. b. Wash and rinse the bottom of the Swiper assembly.
- Page 51 CARE AND CLEANING Weekly Cleaning (Every 3 Weeks) (continued) e. Pull Upper Door down. 7. Remove Drip Tray. NOTE: Screen will transition to next step once Drip Tray is removed. Program allows about 15 seconds. 8. Clean Drip Tray. 9. Re-install Drip Tray. NOTE: Wash both Drip Tray and Grate.
- Page 52 CARE AND CLEANING Weekly Cleaning (Every 3 Weeks) (continued) 11. Close Lower Door to prepare Brew Chamber. NOTE: The doors must be closed to continue with cleaning process. 12. Place a Tabz Cleaning Tablet in the ™ the opening on top of the machine. 13.
- Page 53 CARE AND CLEANING Weekly Cleaning (Every 3 Weeks) (continued) NOTE: An automatic Clean cycle will start. A progress bar will appear to keep the operator informed NOTE: This process can be interrupted by pressing the Pause button. 15. Press Done button when complete.
- Page 54 CARE AND CLEANING ► RINSE As Needed 1. Selecting the RINSE tab from the Care and Cleaning screen will prepare the equipment for rinsing. Follow the directions shown on the screen. 2. Press the Start button. NOTE: An automatic Rinse cycle will commence.
- Page 55 CARE AND CLEANING ► SWIPER Tab - As Needed 1. Selecting the Swiper tab from the Care and Cleaning screen to show steps to remove the Swiper. 2. Press the Start button. The Piston will slide up to give access to the Swiper.
- Page 56 CARE AND CLEANING ► SWIPER Tab - Continued b. Slide Release Lever to the left. c. Remove Swiper. d. Lower the Upper door. 6. Press Next to continue. 7. The screen will now show steps needed to wash and re-install the Swiper.
- Page 57 CARE AND CLEANING ► SWIPER Tab (continued) Close-ups of steps. a. Wash and rinse the top of the Swiper assembly. b. Wash and rinse the bottom of the Swiper assembly. c. Install Swiper making sure it fully latches (clicks). NOTE: If Swiper is not found after pressing Next button, machine will position the piston and ask you to install again.
-
Page 58: Touch Screen
CARE AND CLEANING Touch Screen - As Needed 1. Touch and hold the BUNN logo for a few seconds until the SERVICE ACCESS screen appears. 2. From the SERVICE ACCESS screen, press the Clean Screen button. 3. During Touch Screen Cleaning, a countdown screen will appear, indicating time remaining to clean the touchscreen. -
Page 59: Cleaning Reminder
CARE AND CLEANING CLEANING REMINDER Setting a preferred DAY and TIME for Weekly cleaning reminder. 1. Select SERVICE ACCESS. 2. Select the ADVANCED icon. 3. Enter the passcode 6601. * * * * 4. Press the REMINDERS icon. - Page 60 CARE AND CLEANING CLEANING REMINDER (continued) 5. Use the drop down menu to select the preferred Day of the Week to clean. 6. Next, press the symbols to change the Time, then AM or PM. 7. Press SAVE if changes are made. 8.
-
Page 61: Active Notices
ACTIVE NOTICES 1. Touch and hold the BUNN logo for a few seconds until SERVICE ACCESS appears on the display. 2. From the SERVICE ACCESS screen, press the ACTIVE NOTICES icon. 3. The screen will display by Name & Description, any faults that have occurred, give probable causes, and a solution to clear the fault. -
Page 62: Your Brand
YOUR BRAND 1. Touch and hold the BUNN logo for a few seconds until SERVICE ACCESS appears on the display. 2. Select the ADVANCED icon. 3. Next, enter the passcode 6601. * * * * 4. Touch the YOUR BRAND icon. -
Page 63: Home Screen Tab
YOUR BRAND From the Your Brand home screen, you can customize the look of your layout. HOME SCREEN Tab 1. Press Home Screen tab to select the area you want to customize. Options Available: ■ CHANGE BRANDING LOGO a. Select LOGO field. NOTE: Logo size should be up to 500 x 53 pixels. -
Page 64: Theme Color
YOUR BRAND b. The Background Images screen will appear. By swiping side-to-side, you can see the image library. Press the chosen Background Image. c. If a new image is chosen, press OK. ■ THEME COLOR a. Select icon to change Theme Color. NOTE: The Theme currently says “Select Your Beverage”. -
Page 65: Beverage Icon Layout
YOUR BRAND ■ BEVERAGE ICON LAYOUT (continued) b. Layout screen appears. i. To change the columns and rows of the beverage icons, select the Plus or Minus buttons to edit the numbers. NOTE: Images will conform to the size selected. The optimal size for the layout selected is shown in the upper right corner of the screen. - Page 66 YOUR BRAND 4. Touch and hold the BUNN logo for a few seconds until the screen starts to reset. After the machine updates, the HOME screen will appear with any changes that were saved. You are ready to serve.
Need help?
Do you have a question about the Fast Cup and is the answer not in the manual?
Questions and answers