Table of Contents
Advertisement
Quick Links
Advertisement
Table of Contents
Troubleshooting

Related Manuals for Bunn SmartWAVE


Summary of Contents for Bunn SmartWAVE
- Page 1 BUNN TECHNICAL TRAINING ® Smar tWAVE®...
-
Page 2: Table Of Contents
Dispensing System ...................... 14 Unit 4: Preventive Maintenance Preventive Maintenance ..................... 16 PM Steps ..........................16 Unit 5: Troubleshooting Drain the Tank ........................18 Service Fault Codes - Digital SmartWAVE ..............18 ® Service Fault Codes - SmartWAVE Silver Series ............18 ®... -
Page 3: Unit 1: Installation
nstallation Unit Objectives Given a realistic scenario depicting a new site install, the learner will be able to install and setup the brewer for retail turnover without error. Given a new machine, all the necessary tools and safety equipment, the learner will be able to install the brewer without error. -
Page 4: Site Requirements
Counter able to support 25lbs • Level installation surface, brewer level on the surface Water Treatment • Sediment filtration to reduce large particles • Taste and odor filter to remove chlorine • Scale filtration as needed • For best results a BUNN Easy Clear filtration system should be used ® ® Plumbing • .75-11.5 NH (3/4” hose thread) fitting (¼” flare adapter included) • Dedicated water supply with shut-off •... -
Page 5: Electrical Install
Electrical Install An electrician must provide electrical service as specified in conformance with all local, state, and federal electrical codes. The SmartWAVE brewer is available as either a 120VAC or 120/208-120/240VAC configured unit. Ensure the loca- ® tion has the appropriate electrical requirements for the brewer being installed. Always refer to the brewer’s data plate for electrical specifications. For 120VAC Brewers: Step 1: Plug brewer into the power source. For 120/208VAC or 120/240VAC Brewers: Step 1: Remove the terminal block access panel on the rear of the brewer. -
Page 6: Unit 2: Setup
etup Unit Objectives Given a realistic scenario depicting a new site install, the learner will be able to install and setup the brewer for retail turnover without error. Given an installed machine, all the necessary tools and safety equipment, the learner will be able to set the machine up for initial operation. -
Page 7: Setup And Programing
The brewer can accept a variety of airpots and carafes. Even though the brewer’s clearance can accomodate a 3.0 L airpot, the largest vessel recommended for use with the SmartWAVE is a 2.5 L ®... -
Page 8: Programming Smartwave ® Silver Series
® The Silver Series brewer can brew two different batch sizes. Note that the maximum water on time is 5 minutes. When programming the SmartWAVE brewer It is important to know what type of holding vessel the customer will be ®... - Page 9 Step 3: Press the ENABLE BREW ON/OFF switch for 10 seconds. During those 10 seconds, the red LED will be on steady. After 10 seconds the green LED will begin flashing rapidly for 5 seconds. During those 5 seconds, release and again momentarily press the ENABLE BREW ON/OFF switch again to restore default settings. The LED will alternate rapidly Red and Green for a few seconds indicating the restore has been accomplished. Bunn-O-Matic Corporation...
-
Page 10: Program Switches
Program Switches There are 4 dip switches located on the control board that control optional settings on the SmartWAVE brewer. All of these switches are set to the OFF ® position from the factory. Switch # Function- Off position Function- On position... -
Page 11: Unit 3: Machine Composition
achine oMposition Unit Objectives Given a realistic scenario in which the learner has access to the machine’s internal components the learner will understand the composition and functions of the brewer. Given a realistic scenario requiring the learner to access the internal components of the machine the learner will be able to remove the shroud, top panel, and control board access panel. -
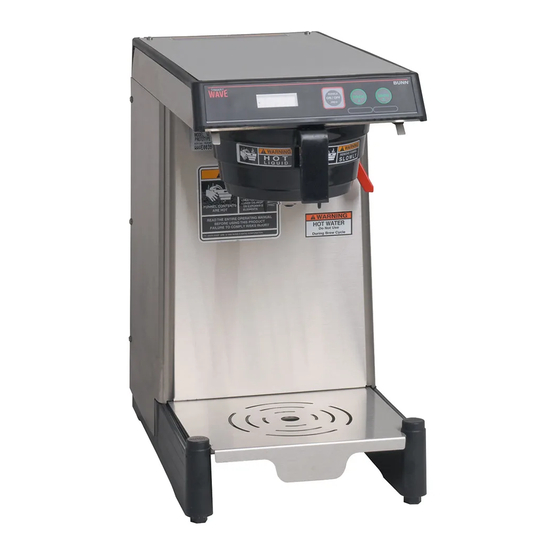
Page 12: Exterior Overview
Steady green- ready to brew Steady red- tank heating Flashing red- brewing Accessing the Inside of the Brewer The majority of service work to the SmartWAVE brewer will require ® the removal of the top panel, the front shroud or the control board access panel on the rear. -
Page 13: Machine Function And Operations
The control board monitors the water in the tank by a temperature sensor that is in contact with the water. This temperature sensor is a digital thermistor; the control board reads the temperature as value of resistance. The temperature sensor allows the control board to activate the heating element when the temperature drops below its programmed value and shut down the element when the water temperature reaches the programmed holding value. Bunn-O-Matic Corporation... -
Page 14: Dispensing System
The SmartWAVE series of brewers are shipped with a 6-078 sprayhead. The sprayhead is the output flow regulator ® for the brewer. The number and size of holes determines the output flow rate. If the sprayhead is changed to a differ- ent number the brew times will have to be adjusted. The SmartWAVE can use any BUNN sprayhead, including the 17 hole, A change of sprayhead will require adjusting the batch size. SmartWAVE Training Manual ®... -
Page 15: Unit 4: Preventive Maintenance
reventive aintenance Unit Objectives Given a realistic scenario depicting a machine requiring a preventive maintenance, the learner will be able to identify which elements of a component need to be serviced without error. Given a machine, all the necessary tools and safety equipment, the learner will be able to identify the components that need to be serviced for the PM. -
Page 16: Preventive Maintenance
Preventive Maintenance In order to maintain proper operation and long service life BUNN recommends performing the preventative main- ® tenance every 6 months. Individual customers will vary with some customers choosing not to receive preventative maintenance. Tools Required: • Flat blade screwdriver • Philips screwdriver • Adjustable wrench • Channel lock pliers • Needle nose pliers •... -
Page 17: Unit 5: Troubleshooting
roubleshooting Unit Objectives Given a realistic scenario depicting a broken machine, the learner will be able to effectively troubleshoot, diagnosis, and repair the problem returning the machine to normal operation. Given a machine displaying an error message, all the necessary tools and safety equipment, the learner will be able to diagnosis the problem. -
Page 18: Drain The Tank
Troubleshooting and Repair Draining the Tank Step 1: Disconnect the water and electrical supplies. Step 2: Remove the front cover. Step 3: Pinch off the fill hose. Step 4: Loosen the clamp from the fill solenoid. Step 5: Remove the hose from the solenoid and drain into a sink or bucket. Service Fault Codes- Digital SmartWAVE ® Display Message Description Action ER 1 Temperature sensor shorted Check the temperature sensor ER 2... -
Page 19: Filling System
(the use of a clip-on style probe will simplify this pro- cess). Using the other end of the probe, check for voltage on the L1 side of the element, both sides of the high-limit and on the control board at the con- nector marked Heater. Bunn-O-Matic Corporation... -
Page 20: Brewing System
Check the vent valve and air pump both components receive 12VDC from the control board. Brew Basket Overflowing Check the sprayhead tube and sprayhead for scale build-up. Switching Component Map 1. TH1 = Heater 2. Q2 = Air Pump 3. Q4 = Vent Valve 4. Q8 = Inlet Valve SmartWAVE Training Manual ®...
Need help?
Do you have a question about the SmartWAVE and is the answer not in the manual?
Questions and answers