Table of Contents
Advertisement
Advertisement
Table of Contents

Related Manuals for Metrohm 899 Coulometer


Summary of Contents for Metrohm 899 Coulometer
- Page 1 899 Coulometer Manual – Short Instructions 8.899.8002EN / 2014-10-24...
- Page 3 Metrohm AG CH-9100 Herisau Switzerland Phone +41 71 353 85 85 Fax +41 71 353 89 01 info@metrohm.com www.metrohm.com 899 Coulometer Manual – Short Instructions 8.899.8002EN / 2014-10-24...
- Page 4 Technische Dokumentation Metrohm AG CH-9100 Herisau techdoc@metrohm.com This documentation is protected by copyright. All rights reserved. This document has been prepared with great care. However, errors can never be entirely ruled out. Please send comments regarding possible errors to the address above.
-
Page 5: Table Of Contents
Connecting the Power Box ............ 16 Connecting sensors ............18 4.4.1 Connecting a generator electrode .......... 18 4.4.2 Connecting an indicator electrode ......... 19 4.4.3 Connecting a temperature sensor .......... 21 Connecting an additional stirrer ........22 Connecting a balance ............23 ■■■■■■■■ 899 Coulometer... - Page 6 Editing the sample table while a determination is running ..48 5.9.3 Editing the live parameters ............. 49 5.10 Results ................. 50 5.11 Statistics ................51 5.12 Printing a report manually ..........53 5.13 Manual control ..............54 5.13.1 Stirring .................. 54 Index ■■■■■■■■ 899 Coulometer...
-
Page 7: About These Short Instructions
In addition to an introduction, safety instructions and an overview of the instruments, you will also find information about the installation and operation of the 899 Coulometer in addition to informa- tion regarding the warranty. You will find the detailed manual as a PDF file at http://products.metrohm.com... -
Page 8: Introduction
As an alternative to the power supply with the power supply unit provi- ded, the 899 Coulometer can also be operated by means of an accumula- tor (a so-called Power Box). The Power Box is available as optional equip- ment. -
Page 9: Intended Use
Oven SC). 2.1.2 Intended use The 899 Coulometer is designed for usage as a titrator in analytical labora- tories. Its application field is coulometric water content determination according to Karl Fischer. The present instrument is suitable for processing chemicals and flammable samples. -
Page 10: Safety Instructions
2.3.2 Electrical safety The electrical safety when working with the instrument is ensured as part of the international standard IEC 61010. WARNING Only personnel qualified by Metrohm are authorized to carry out service work on electronic components. ■■■■■■■■ 899 Coulometer... -
Page 11: Tubing And Capillary Connections
Avoid applying excessive force to tubing connections. Damaged tubing ends lead to leakage. Appropriate tools can be used to loosen connections. Check the connections regularly for leakage. If the instrument is used mainly in unattended operation, then weekly inspections are manda- tory. ■■■■■■■■ 899 Coulometer... -
Page 12: Flammable Solvents And Chemicals
The correct disposal of your old equipment will help to prevent negative effects on the environment and public health. More details about the disposal of your old equipment can be obtained from your local authorities, from waste disposal companies or from your local dealer. ■■■■■■■■ 899 Coulometer... -
Page 13: Overview Of The Instrument
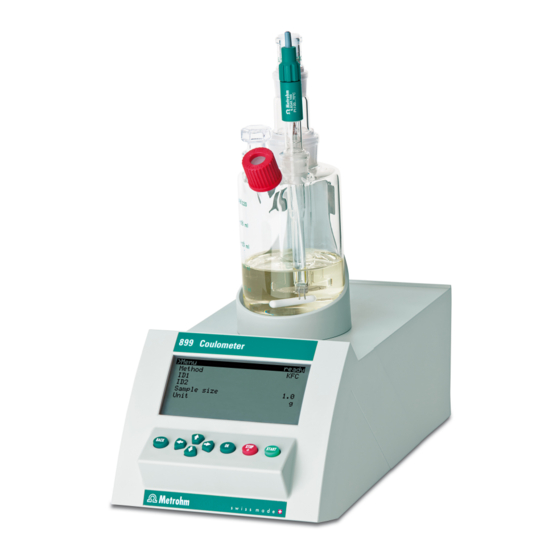
■■■■■■■■■■■■■■■■■■■■■■ 3 Overview of the instrument 3 Overview of the instrument Front Figure 1 Front 899 Coulometer Magnetic stirrer Display For attaching the titration vessel holder. Keypad ■■■■■■■■ 899 Coulometer... -
Page 14: Rear
Socket F. type Pt1000. Two B sockets, 2 mm. MSB connector (MSB 1) USB (OTG) connector Metrohm Serial Bus. For connecting an For connecting printers, USB flash drives, external stirrer. Mini DIN, 8-pin. USB hubs, etc. Mains connection socket (Power) Electrode connector (Gen.) -
Page 15: Setting Up The Instrument
Place the instrument in a location of the laboratory which is suitable for operation, free of vibrations, protected from corrosive atmosphere, and contamination by chemicals. The instrument should be protected against excessive temperature fluctu- ations and direct sunlight. ■■■■■■■■ 899 Coulometer... -
Page 16: Setting Up The Titration Cell For Coulometry
2 Insert the 6.1464.320 titration cell into the titration vessel holder. 4.2.2 Preparing the titration cell Filling the adsorber tube Before setting up the titration cell, the 6.1403.030 adsorber tube has to be filled with 6.2811.000 molecular sieve. Proceed as follows: ■■■■■■■■ 899 Coulometer... - Page 17 4 Seal the adsorber tube with the appropriate cover. NOTE Note that the molecular sieve must be replaced at regular intervals. Each time you refill the adsorber tube with molecular sieve, you can, for example, write the date directly on the adsorber tube. ■■■■■■■■ 899 Coulometer...
- Page 18 Make sure that the edges of the ground-joint sleeves are cut to size cleanly and that there are no fringes. The ground-joint sleeves must not protrude at the lower edge of the ground-joint opening. 3 Insert the 6.1403.030 adsorber tube into the generator electrode. ■■■■■■■■ 899 Coulometer...
- Page 19 1 Fill approximately 100 mL of reagent into the titration cell with the aid of the 6.2738.000 funnel. 2 Close the remaining ground-joint opening on the right with the 6.1437.000 ground-joint stopper (with ground-joint sleeve attached). ■■■■■■■■ 899 Coulometer...
-
Page 20: Mounting The Addition And Aspiration Tube (Utilization With Ti Stand)
4 Insert this assembly into the ground-joint opening. 5 Connect the tubing for the reagent addition at the upper connector of the addition and aspiration tube (5). ■■■■■■■■ 899 Coulometer... -
Page 21: Using The Titration Cell With A Karl Fischer Oven
4.3.1 Connecting the power supply unit The 899 Coulometer has an external power supply unit for a 24 V power supply (DC). This is connected to the power socket of the coulometer. WARNING An incorrect supply voltage can damage the instrument. -
Page 22: Connecting The Power Box
CAUTION Switch off the 899 Coulometer correctly by pressing the red [STOP] key before you interrupt the electricity supply. If this is not done, then there is a danger of data loss. - Page 23 CAUTION Switch off the 899 Coulometer correctly by pressing the red [STOP] key before you interrupt the connection with the Power Box. If this is not done, then there is a danger of data loss.
-
Page 24: Connecting Sensors
Connecting a generator electrode Screwing the electrode cable to the generator electrode 1 Unscrew the cover of the generator electrode. Figure 9 Unscrewing the cover from the generator electrode 2 Tighten the 6.2104.120 electrode cable to the generator electrode. ■■■■■■■■ 899 Coulometer... -
Page 25: Connecting An Indicator Electrode
If you wish to pull out the plug again, you first need to pull back the outer plug sleeve. 4.4.2 Connecting an indicator electrode Screwing the electrode cable to the indicator electrode 1 Unscrew the cover of the indicator electrode. ■■■■■■■■ 899 Coulometer... - Page 26 2 Tighten the 6.2104.020 electrode cable to the indicator electrode. 6.2104.020 Figure 13 Screwing the electrode cable to the indicator electrode Connecting the electrode cable to the coulometer 1 Plug the electrode plug into the Ind. socket of the coulometer. Figure 14 Connecting an indicator electrode ■■■■■■■■ 899 Coulometer...
-
Page 27: Connecting A Temperature Sensor
1 Insert the plugs of the temperature sensor into the Temp. sockets of the coulometer. Figure 15 Connecting a temperature sensor NOTE Always insert the red plug into the red socket. This is the only way that shielding against electrical interference can be ensured. ■■■■■■■■ 899 Coulometer... -
Page 28: Connecting An Additional Stirrer
2 Connect the connection cable of the magnetic stirrer to MSB 1 on the rear of the coulometer. Figure 16 Connecting a stirrer NOTE Make sure that the flat side of the plug matches the marking on the socket. 3 Switch on the coulometer. ■■■■■■■■ 899 Coulometer... -
Page 29: Connecting A Balance
Coulometer in addition to the manual for the balance. The following table offers an overview of the balances that you can use together with the 899 Coulometer and of which cable you will need for connection to the RS-232 interface: ■■■■■■■■... - Page 30 ME 46278 foot switch Ohaus Voyager, Explorer, Analyti- Cable AS017-09 from Ohaus cal Plus Precisa balances with RS-232-C 6.2125.080 + 6.2125.010 interface Sartorius MP8, MC, LA, Genius, 6.2134.060 Cubis Shimadzu BX, BW 6.2125.080 + 6.2125.010 ■■■■■■■■ 899 Coulometer...
-
Page 31: Connecting A Keyboard, Printer And Other Usb Devi- Ces
■■■■■■■■■■■■■■■■■■■■■■ 4 Installation Connecting a keyboard, printer and other USB devi- The 899 Coulometer has a USB (OTG) connector. Use the 6.2151.100 USB MINI (OTG) - USB A adapter supplied for connecting USB devices. 6.2151.100 Figure 18 Connecting USB devices... - Page 32 MINI (OTG) - USB A "Custom Neo's" printer with Directly on the USB (OTG) con- ■ 6.2151.120 cable nector of the 899 Coulometer "Custom Neo's" printer with With 6.2151.100 adapter USB ■ 6.2151.020 cable MINI (OTG) - USB A With USB hub ■...
- Page 33 USB hub that does have its own power supply (self powered). The USB (OTG) connector of the 899 Coulometer is not designed for supplying power to several devices with elevated electricity requirements.
-
Page 34: Connecting A Sample Changer To The Remote Connec- Tor
6.2148.030 RS-232/USB Box Connecting a sample changer to the remote connec- The 899 Coulometer can be connected to a sample changer with oven module with the aid of the 6.2141.390 remote cable. This makes it possi- ble to integrate the Coulometer in an automation system. -
Page 35: Operation
Proceed as follows: Keep the red [STOP] key pressed down for at least 3 s. ■ A progress bar is displayed. If the key is released during this time, then the instrument will not be switched off. ■■■■■■■■ 899 Coulometer... -
Page 36: Fundamentals Of Operation
5.2 Fundamentals of operation Fundamentals of operation 5.2.1 The keypad Figure 23 Keypad 899 Coulometer BACK Apply the input and exit the dialog. ⇧ ⇩ Move the selection bar either up or down by one line at a time. Select the character to be entered in the text editor. -
Page 37: Navigating In The Dialog
Use [OK] to apply the character in the input field. The following functions are available: Editing function Description Accept The modification is applied and the editing dialog is exited. Cancel The editing dialog is exited without applying the modification. ■■■■■■■■ 899 Coulometer... -
Page 38: Selecting From A Selection List
Appendix of the more detailed manual. 5.2.5 Selecting from a selection list In a selection list, select the individual entries with the arrow keys [⇧] and [⇩]. Accept the selection with [OK] or [BACK]. ■■■■■■■■ 899 Coulometer... -
Page 39: Formula Editor
[OK]. Variable Description End quantity, i.e. total amount of removed water at the end of the titration (in µg) Duration of the entire titration Drift for drift correction ■■■■■■■■ 899 Coulometer... -
Page 40: Methods
Duration of the entire determination Methods 5.4.1 Method templates The 899 Coulometer contains method templates which are already config- ured except for a few parameters. The following method templates can be selected: Coulometric Karl Fischer titration. The blank value is not taken into account for the calculation. -
Page 41: Saving A Method
In the function bar, select Store and press [OK]. ■ The name of the method template is suggested as the method name (e.g. KFC-Blank). If the method has already been saved once, then the method name already used will be displayed: Applying the name: ■■■■■■■■ 899 Coulometer... -
Page 42: Exporting A Method
Select the desired method. ■ 3 Exporting the method In the function bar, select Export and press [OK]. ■ The method is being exported. The directory structure on the USB flash drive is described in the more detailed manual. ■■■■■■■■ 899 Coulometer... -
Page 43: Control
This parameter is visible only when Autostart = on. Number of automatic starts. 1 - 50 Input range table Selection table Default value table The number of automatic starts corresponds to the number of samples in the sample table. ■■■■■■■■ 899 Coulometer... -
Page 44: Sample Data
Sample identification. The sample identification can be used in calculations as the variable CI2. Entry max. 10 characters Default value empty Sample size Sample size. The value of the sample size can be used in calculations as the variable C00. ■■■■■■■■ 899 Coulometer... -
Page 45: Requesting Sample Data At The Start Of The Determination
This dialog will be displayed until the entering of the sample data is confirmed with [START], even if the the titration is already completed. This ensures that the sample data is avail- able for calculations. ■■■■■■■■ 899 Coulometer... -
Page 46: Sample Table
3 Activating the sample table Select Sample table and press [OK]. ■ Select the entry on in the selection list and apply with [OK]. ■ Press [BACK]. ■ The menu item Sample table is displayed in the main menu: ■■■■■■■■ 899 Coulometer... - Page 47 Save the sample table. The sample table is saved in the internal device memory. NOTE You can save only one sample table. When you save a sample table, any previously saved sample table will be overwritten automatically. Load Load the sample table from the internal device memory. ■■■■■■■■ 899 Coulometer...
-
Page 48: Editing The Sample Data
CI2. Entry max. 10 characters Default value empty Sample size Sample size. The value of the sample size can be used in calculations as the variable C00. –999999999 - 9999999999 Input range Default value ■■■■■■■■ 899 Coulometer... -
Page 49: Sending The Sample Size From A Balance
If you would like to enter the sample size in a particular line, then you must open the corresponding editing dialog (i.e. the Sample data dia- log is displayed). If the editing dialog for the sample size is opened, then the sent value will be ignored. ■■■■■■■■ 899 Coulometer... -
Page 50: Carrying Out A Determination
The stirring rate can be reduced with Stir- and increased with Stir+. Off switches the stirrer off. On is now displayed instead. This can be used to switch the stirrer back on. This dialog is exited with [BACK]. ■■■■■■■■ 899 Coulometer... - Page 51 5 Starting the titration Press [START]. ■ The titration starts and the curve is displayed: The axes are scaled automatically. The stirring rate can be modified during titration with the Stirrer function. The following dialog is opened by pressing [OK]: ■■■■■■■■ 899 Coulometer...
- Page 52 The current status of the conditioning is displayed (see instruction step 2). If you wish to start the next titration, repeat the actions starting with instruction step 3. Canceling a determination manually A determination can be canceled at any time with the [STOP] key. ■■■■■■■■ 899 Coulometer...
-
Page 53: Live Modifications
The value entered must be entered once more and the determination must be recalculated. Make sure that the editing dialogs are closed before the determination is finished. ■■■■■■■■ 899 Coulometer... -
Page 54: Editing The Sample Table While A Determination Is Running
4 Editing the sample data Edit the sample data and apply with Accept or [BACK]. ■ NOTE In addition to the sample data, the method can also be modified, except in cases where the determination is running. ■■■■■■■■ 899 Coulometer... -
Page 55: Editing The Live Parameters
Proceed as follows to edit the parameters: 1 Displaying the main dialog Press [BACK]. ■ The main dialog is displayed. The determination continues to run in the background. 2 Opening the main menu Select Menu and press [OK]. ■ ■■■■■■■■ 899 Coulometer... -
Page 56: Results
Recalculate the current determination. The procedure will be executed immediately. Statistics Display the statistical overview of a determination series (see Chapter 5.11, page 51). Displaying the curve The curve of the current determination can be displayed with the Curve function. ■■■■■■■■ 899 Coulometer... -
Page 57: Statistics
(s abs and s rel) are displayed in the overview. For the mean value, the number of individual results from which it has been calculated is displayed in parentheses. In this example, it is 3. The Statistics line shows how many determinations have already been carried out and how many deter- ■■■■■■■■ 899 Coulometer... - Page 58 You can use the function Increase to add an additional sample to a determination series, e.g. because a determination was faulty and had to be removed from the statistics. The second number in the Statistics line will be increased automatically by one. ■■■■■■■■ 899 Coulometer...
-
Page 59: Printing A Report Manually
Result report with determination properties, sample data, calculated results, etc. Curve Curve report. The width of the curve is defined in the system settings. Measuring point Measuring point list report. list Parameters Report with all method parameters of the loaded method. ■■■■■■■■ 899 Coulometer... -
Page 60: Manual Control
Proceed as follows: 1 Opening the manual control In the main dialog, select Menu and press [OK]. ■ The main menu opens. Select the menu item Manual control and press [OK]. ■ Manual control opens. ■■■■■■■■ 899 Coulometer... - Page 61 The stirrer is started and stirs at the rate which has been set. Off is now displayed in the function bar. 4 Switching off the stirrer In the function bar, select Off and confirm with [OK]. ■ The stirrer is stopped. ■■■■■■■■ 899 Coulometer...
-
Page 62: Index
Fill ........13 Rear of the instrument ....8 USB (OTG) Recalculate ....... 50 Connector ......8 Remote USB device Instrument Connector ......8 Adapter ......25 Set up ........9 Connect ......25 Switch off ......29 ■■■■■■■■ 899 Coulometer...
Need help?
Do you have a question about the 899 Coulometer and is the answer not in the manual?
Questions and answers