Table of Contents
Advertisement
Quick Links
Advertisement
Table of Contents

Related Manuals for Metrohm Mira M-1


Summary of Contents for Metrohm Mira M-1
- Page 1 Mira M-1 Manual 8.923.8001EN / 2015-11-17...
- Page 3 Metrohm AG CH-9100 Herisau Switzerland Phone +41 71 353 85 85 Fax +41 71 353 89 01 info@metrohm.com www.metrohm.com Mira M-1 Manual 8.923.8001EN / 2015-11-17 ahag...
- Page 4 Technische Dokumentation Metrohm AG CH-9100 Herisau techdoc@metrohm.com This documentation is protected by copyright. All rights reserved. This document has been prepared with great care. However, errors can never be entirely ruled out. Please send comments regarding possible errors to the address above.
-
Page 5: Table Of Contents
Operation via power supply unit or USB connection socket ..11 Initial configuration ............11 Inserting vial holder or attachment lenses ....... 12 3.4.1 Mira M-1 with vial holder (laser class 1) ......... 12 3.4.2 Mira M-1 with SWD attachment lens (class 3B) ...... 13 3.4.3 Mira M-1 with LWD attachment lens (class 3B) ...... - Page 6 General notes ..............30 5.1.1 Care ..................30 5.1.2 Maintenance by Metrohm Service .......... 30 Quality management and qualification with Metrohm . . 30 6 Troubleshooting Basic function ..............32 Measuring result ..............32 7 Appendix Spectral libraries ..............33 8 Technical specifications Operating specifications ............
- Page 7 Sticker - Basic model version with vial holder ........6 Figure 5 Sticker - Advanced model version with attachment lenses ....6 Figure 6 Mira M-1 - front ................8 Figure 7 Mira M-1 - rear ................. 9 Figure 8 Inserting the batteries ..............
-
Page 9: Introduction
Mira spectrometers are the only handheld Raman spectrometers currently on the market with Orbital Raster Scan (ORS) technology. 1.1.1 Model versions Mira M-1 instruments are available in the following versions: Table 1 Model versions 2.923.0010 Mira M-1 Basic... -
Page 10: Power Supply
Intended use This instrument is suitable for measuring in chemicals and flammable sam- ples. Usage of the Mira M-1 therefore requires the user to have basic knowledge and experience in handling toxic and caustic substances. Knowledge with respect to the application of the fire prevention measures prescribed for laboratories or production plants is also mandatory. -
Page 11: Safety Instructions
■■■■■■■■■■■■■■■■■■■■■■ 1 Introduction [Next] Button or key WARNING This symbol draws attention to a possible life-threat- ening hazard or risk of injury. WARNING This symbol draws attention to a possible hazard due to laser radiation. WARNING This symbol draws attention to a possible hazard due to electrical current. -
Page 12: Laser Safety
60825-1, "Safety of laser products". WARNING Laser radiation The Mira M-1 Advanced instrument is a class 3B laser instrument which emits laser light with a power of up to 100 mW and a wave- length of 785 nm (NIR) during data acquisition. -
Page 13: Figure 1 Instrument With Warning Sticker
■■■■■■■■■■■■■■■■■■■■■■ 1 Introduction Figure 1 Instrument with warning sticker Laser aperture Type plate Laser specification / serial number Laser class Laser aperture The sticker marks the direction and position of the emerging laser beam when using attachment lenses. Figure 2 Sticker - laser emergence Laser specification / serial number The sticker contains the laser data, the serial number and the applicable... -
Page 14: Electrical Safety
The electrical safety when working with the instrument is ensured as part of the international standard IEC 61010. WARNING Only personnel qualified by Metrohm are authorized to carry out service work on electronic components. WARNING Never open the housing of the instrument. The instrument could be damaged by this. -
Page 15: Flammable Solvents And Chemicals
■■■■■■■■■■■■■■■■■■■■■■ 1 Introduction Power supply unit WARNING Use the power supply unit only for its intended purpose. Inappropriate use or use of non-approved or incompatible power supply units may cause fires or explosions and result in the revocation of the license or warranty. -
Page 16: Overview Of The Instrument
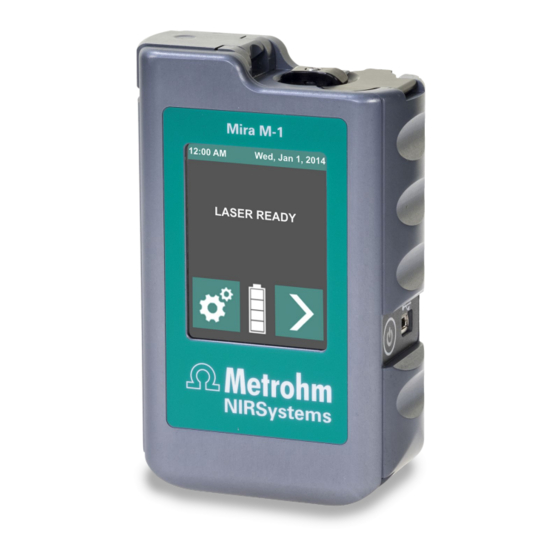
■■■■■■■■■■■■■■■■■■■■■■ 2.1 Front 2 Overview of the instrument Front Figure 6 Mira M-1 - front Vial holder Touch screen Battery compartment Type B mini USB connector On/off switch ■■■■■■■■... -
Page 17: Rear
■■■■■■■■■■■■■■■■■■■■■■ 2 Overview of the instrument Rear Figure 7 Mira M-1 - rear Accessories covering SWD attachment lens (class 3B) LWD attachment lens (class 3B) ■■■■■■■■... -
Page 18: Installation
■■■■■■■■■■■■■■■■■■■■■■ 3.1 Unpacking and inspecting the instrument 3 Installation Unpacking and inspecting the instrument 3.1.1 Packaging The instrument is supplied in highly protective special packaging together with the separately packed accessories. Keep this packaging, as only this ensures safe transportation of the instrument. 3.1.2 Checks Immediately after receipt, check whether the shipment has arrived com-... -
Page 19: Operation Via Power Supply Unit Or Usb Connection Socket
■■■■■■■■■■■■■■■■■■■■■■ 3 Installation Figure 8 Inserting the batteries Locking mechanism Hinged cover Rotary locking mechanism to open and close The polarity for the batteries is marked on the battery compartment. the inside. 3.2.2 Operation via power supply unit or USB connection socket For stationary use in the laboratory, the instrument can be operated via a power supply unit or the USB interface of a PC. -
Page 20: Inserting Vial Holder Or Attachment Lenses
(e.g. plastics or glass/ amber glass). 3.4.1 Mira M-1 with vial holder (laser class 1) The instrument is supplied with vials with the dimensions 12 x 32 mm. Closing the covering prevents laser radiation from emerging. -
Page 21: Mira M-1 With Swd Attachment Lens (Class 3B)
■■■■■■■■■■■■■■■■■■■■■■ 3 Installation Calibrating the instrument with the calibration standard Figure 10 Vial holder with calibration standard Measuring with vials Figure 11 Vial holder with vial 3.4.2 Mira M-1 with SWD attachment lens (class 3B) WARNING Laser radiation ■■■■■■■■... -
Page 22: Figure 12 Swd Attachment Lens
■■■■■■■■■■■■■■■■■■■■■■ 3.4 Inserting vial holder or attachment lenses The Mira M-1 Advanced instrument is a class 3B laser instrument which can emit laser light with a power of up to 100 mW and a wave- length of 785 nm (NIR) during data acquisition. -
Page 23: Mira M-1 With Lwd Attachment Lens (Class 3B)
Mira M-1 with LWD attachment lens (class 3B) WARNING Laser radiation The Mira M-1 Advanced instrument is a class 3B laser instrument which can emit laser light with a power of up to 100 mW and a wave- length of 785 nm (NIR) during data acquisition. -
Page 24: Figure 14 Lwd Attachment Lens
■■■■■■■■■■■■■■■■■■■■■■ 3.4 Inserting vial holder or attachment lenses Figure 14 LWD attachment lens Figure 15 Example with measurement through a bottle ■■■■■■■■... -
Page 25: Installing Firmware Update
■■■■■■■■■■■■■■■■■■■■■■ 3 Installation Installing firmware update NOTE Firmware update The installation of firmware updates is carried out via the Mira Cal software. You can find detailed information on the procedure in the tutorial for the Mira Cal software. ■■■■■■■■... -
Page 26: Operation
■■■■■■■■■■■■■■■■■■■■■■ 4.1 Autonomous operation 4 Operation Autonomous operation The following steps show how samples can be identified in autonomous operation without being connected to a PC. 1 Switching on the instrument Make sure the instrument is connected to the power supply. ■... - Page 27 ■ The instrument is now ready for measuring. 4 Measuring the sample NOTE Laser safety key of the Mira M-1 Advanced instrument must be pressed during measurement. Start the measurement with the key (and keep the key ■ pressed down until the result is displayed).
- Page 28 ■■■■■■■■■■■■■■■■■■■■■■ 4.1 Autonomous operation 5 Displaying and saving the result After the measurement, all activated spectral libraries are auto- ■ matically searched and the result of the identification is displayed with: – Name of the identified substance – Sample spectrum –...
-
Page 29: Configuration
■■■■■■■■■■■■■■■■■■■■■■ 4 Operation Enter a sample ID or a sample designation. ■ Confirm the entry with the key. ■ NOTE Saved measured data The saved measured data can be transferred into the Mira Cal software for further processing and evaluation. You can find information on this procedure in the tutorial for the Mira Cal software. - Page 30 ■■■■■■■■■■■■■■■■■■■■■■ 4.2 Configuration NOTE Storing the secret number Store the secret number (PIN) in a safe place. 1 Selecting the configuration menu Select the configuration menu with the key. ■ 2 Selecting the secret number menu Select the secret number menu with the key.
- Page 31 5 Confirming the new secret number Confirm the new secret number. ■ 6 Completing the entry Complete the entry with the key. ■ Activating/deactivating spectral libraries The libraries that were searched during the identification can be activated or deactivated in the Mira M-1 instrument. ■■■■■■■■...
- Page 32 ■■■■■■■■■■■■■■■■■■■■■■ 4.2 Configuration NOTE Applying spectral library The fewer libraries are activated for the spectral comparison, the ■ shorter the search. If many libraries are activated, the sample may have a high match ■ rate for several library substances and thus be difficult to identify. It is advisable to incorporate previous knowledge of the sample into the identification.
- Page 33 ■■■■■■■■■■■■■■■■■■■■■■ 4 Operation 3 Selecting the spectral library Tap twice on the desired spectral library. ■ 4 Activating/deactivating the spectral library Activate the spectral library with the [ENABLE] key or deactivate ■ it with the [DISABLE] key. Activate or deactivate additional spectral libraries following the ■...
- Page 34 ■■■■■■■■■■■■■■■■■■■■■■ 4.2 Configuration Calibrating the instrument The Mira M-1 instrument is very robust and stable and does not necessa- rily require regular calibration. In certain cases, a recalibration should be carried out, e.g. after the instrument was dropped. 1 Selecting the configuration menu Select the configuration menu with the key.
- Page 35 ■■■■■■■■■■■■■■■■■■■■■■ 4 Operation 4 Starting the calibration NOTE Laser safety key of the Mira M-1 Advanced instrument must be pressed during calibration. Start the calibration with the key (and keep the key pressed down until the result is displayed). 5 Waiting for calibration Wait for the calibration to start, until the message is displayed.
- Page 36 ■■■■■■■■■■■■■■■■■■■■■■ 4.2 Configuration The calibration is successful: ■ – Exit the calibration menu with the key. The calibration is not successful: ■ – Remove the calibration standard and check for contamina- tion and damages. – Reinsert the calibration standard. – Restart the calibration with the key.
-
Page 37: Operation With Mira Cal
Operation The following functions are carried out with the Mira Cal software: Configuration of the Mira M-1 instrument. ■ Remote operation of the Mira M-1 instrument. ■ Update and activation of the spectral libraries. ■ Automatic updating of date and time. -
Page 38: Operation And Maintenance
5.1.2 Maintenance by Metrohm Service Maintenance of the Mira M-1 is best carried out as part of annual ser- vice, which is performed by specialist personnel from Metrohm. A shorter maintenance interval may be necessary if you frequently work with caustic and corrosive chemicals. - Page 39 Maintenance The electronic and mechanical functional groups of Metrohm instruments can and should be checked by specialist personnel from Metrohm as part of a regular preventive maintenance schedule. Please ask your local Metrohm representative regarding the precise terms and conditions involved in concluding a corresponding maintenance agreement.
-
Page 40: Troubleshooting
■■■■■■■■■■■■■■■■■■■■■■ 6.1 Basic function 6 Troubleshooting Basic function Problem Cause Remedy The display flickers. The voltage of the batteries Insert new or charged batteries into the ■ is too low. instrument. The instrument does The batteries are dead. Insert new or charged batteries into the ■... -
Page 41: Appendix
7 Appendix 7 Appendix Spectral libraries Metrohm provides an extensive collection of Raman spectra for Mira spec- trometers. These are suitable for not only identifying unknown Raman spectra, but also characterizing a whole range of different materials. The spectral library that is available comprises more than 9,000 Raman spectra which have been measured in the National Institute of Advanced Indus- trial Science and Technology (AIST) in Japan and by scientists at S.T. - Page 42 ■■■■■■■■■■■■■■■■■■■■■■ 7.1 Spectral libraries Article number Designation Number of spectra 6.6071.611 Raman spectra of selected hazardous substances that are listed in the > 3,030 "EPA Cameo Database for Chemical Emergencies and Responders", "USCG CHRIS Hazardous Chemicals Database" and "NIOSH Guide to Chemical Hazards Databases", as well as chemicals that are regulated by the "Toxic Substances Control Act".
-
Page 43: Technical Specifications
2.5 mm measuring spot size Beam divergence 7.2 degrees Detection technique Orbital Raster Scan (ORS) to average over the sample Laser class according to EN 60825-1 Mira M-1 Basic ■ Class 1 Mira M-1 Advanced ■ Class 3B Protection Level according to EN 207... -
Page 44: Screen
■■■■■■■■■■■■■■■■■■■■■■ 8.3 Screen Screen Display size 2.8 inch, resistive touch screen Interfaces USB connector Type A/B mini USB connector (USB 2.0) with the following functions: Power supply ■ Data transmission ■ with USB cable (6.2151.110) Power supply Battery 2 x 1.5 V, size AA / LR6 Nominal input 5 V DC voltage... -
Page 45: Housing Specification
■■■■■■■■■■■■■■■■■■■■■■ 8 Technical specifications Housing specification Leak-tightness Protected against dust and splash water. Safety specifications This instrument fulfills the following electrical safety requirements: CE marking in accordance with the EU directives: 2006/95/EC (Low Voltage Directive, LVD) ■ 2004/108/EC (EMC Directive, EMC) ■... -
Page 46: Ambient Temperature
■■■■■■■■■■■■■■■■■■■■■■ 8.10 Ambient temperature 8.10 Ambient temperature Operation –20 °C - +40 °C (at a max. of 93% humidity) Storage/transport –20 °C - +70 °C (at a max. of 93% humidity) 8.11 Reference conditions Ambient tempera- +25 °C (±3 °C) ture Relative humidity ≤... -
Page 47: Accessories
Internet. You can download this information using the article number as follows: Downloading the accessories list 1 Type http://partslists.metrohm.com into your Internet browser. The Partslists webpage will be displayed. 2 Select the desired output language. -
Page 48: Index
■■■■■■■■■■■■■■■■■■■■■■ Index Index Metrohm Service ...... 30 Service ........6 Attachment lens 1, 2, 4, 9, 12, 13, Mira Cal ....11, 17, 21, 29 Spectral library .. 11, 21, 23, 29, 33 Supply voltage ......6 Operational qualification ..30 Calibration ......
Need help?
Do you have a question about the Mira M-1 and is the answer not in the manual?
Questions and answers