
Related Manuals for 360 Vision Illuminator HD


Summary of Contents for 360 Vision Illuminator HD
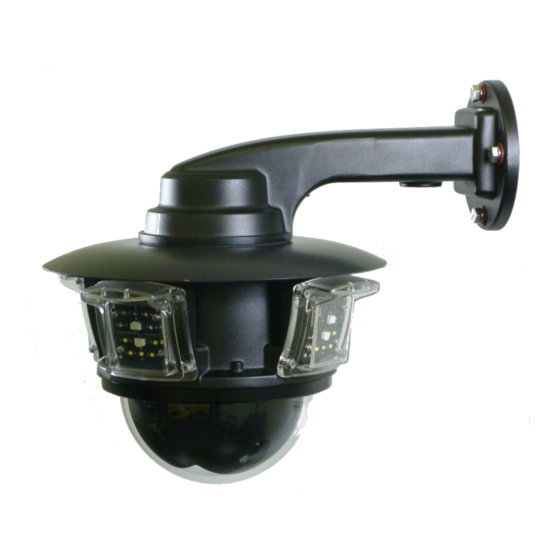
- Page 1 Illuminator HD Installation Manual V2.1.23 Page 1 Illuminator HD Installation/Configuration Manual © 360 Vision Technology Ltd.
-
Page 2: Table Of Contents
2 Housing Dimensional Drawing ........................3 3 Mounting Options ............................4 4 Connections ............................... 5 5 Locating the Illuminator HD on your Network ..................... 7 6 Connecting to the Illuminator HD ....................... 7 6.1 Live View ............................9 6.1.1 Live Video ..........................9 6.1.2 Status ............................ -
Page 3: Safety And Precautions
Illuminator HD Installation Manual V2.1.23 Page 3 1 Safety and Precautions 1. Please read these notes before attempting to operate the 360 Vision Illuminator HD, and keep for future reference. 2. All servicing and repairs must be handled by 360 Vision Technology. -
Page 4: Mounting Options
Illuminator HD Installation Manual V2.1.23 Page 4 3 Mounting Options Weight 2.5kg Illuminator PMB Bracket Weight 2.2kg Illuminator Corner Bracket 8.0 (x4) ON 101.6 (4 INCH) PCD. FIX PREDATOR USING: M8 (x4) ON 101.6 M8x30 HEX-HEAD BOLTS (x4) (4 INCH) PCD. -
Page 5: Connections
Illuminator HD Installation Manual V2.1.23 Page 5 4 Connections 30Vdc(-) 30Vdc(+) © 360 Vision Technology Ltd. - Page 6 (PTZ/IR Fast tour) Current/Voltage test at cable length (1.5mm²) To ensure optimum Illuminator HD performance these parameters must be adhered to. Failure to do so will invalidate the warranty. Internal Illuminator HD Connections The Illuminator HD connection board is located at the top of the dome.
-
Page 7: Locating The Illuminator Hd On Your Network
9001 TCP 6 Connecting to the Illuminator HD Type in the IP address of the Illuminator HD into the address bar of Internet browser and install the plug-ins as required. The web page of the camera will then appear. Illuminator HD Web Page Login screen... - Page 8 Illuminator HD Installation Manual V2.1.23 Page 8 If you select the box ‘Remember Password’ it could compromise the security of the Illuminator HD camera. Select Login The web page will show JPEG images every second (See Browser - page 27).
-
Page 9: Live View
Illuminator HD Installation Manual V2.1.23 Page 9 There are six main tabs on the left of the web page/screen. 1 Live View 2 Settings 3 Add/Edit Users 4 Maintenance 5 Browser 6 Logout 6.1 Live View 6.1.1 Live Video The Live Video page offers options to:- •... -
Page 10: Status
Illuminator HD Installation Manual V2.1.23 Page 10 6.1.2 Status Status page shows information relating to the camera status. Status page, top section. Status page, bottom section. © 360 Vision Technology Ltd. - Page 11 Illuminator HD Installation Manual V2.1.23 Page 11 • Save - Used to save the status page information as a HTML file. • Refresh - Select an automatic page refresh option. • Camera - Shows information relating to the camera time & date settings, the version of codec and mainboard software loaded •...
-
Page 12: Settings
Illuminator HD Installation Manual V2.1.23 Page 12 6.2 Settings 6.2.1 Video The Video page, offers options to setup:- • Camera - Add or edit the camera name. • Stream Type - Choice of single or dual video streams. • Codec - Choose which compression format the stream will use. -
Page 13: Video Advanced
Illuminator HD, the ‘multicast’ feature must also be available on the receiving device. Unicast If lots of receivers (users) want to receive video streams from the Illuminator HD, each receiver will have a separate video stream. This would increase the network bandwidth used. E.g. five users would require five video streams, that typically will require five times the bandwidth. - Page 14 If the receivers of the video streams are suitable for using ‘multicast’ and the video streams will all have the same format, then it may be possible to use ‘multicast’. In this mode, the CODEC in the Illuminator HD chooses a ‘new UDP address’...
-
Page 15: Advanced Features
Illuminator HD Installation Manual V2.1.23 Page 15 6.2.3 Advanced Features The Advanced Features page, offers options to:- • Camera - Cannot be edited, shows label/name given to the camera. (See Video - Camera - page 12). A ‘Preset’ is a stored view. When a preset is defined, it will store the pan, tilt, zoom, focus and iris positions. Use the up, down left and right buttons to move the camera to the desired position and then use the zoom buttons to set the image as required. - Page 16 Tours A tour of presets is stored in the Illuminator HD as a list of tour points. Each tour point consists of a preset number, the dwell time for which the Illuminator HD will pause and the speed parameter that will be used to seek the preset.
-
Page 17: Camera
Use the pan preset offset to set the camera to 0°, this would be used to set the camera to North if using the pan compass option. Use the clear button to reset the pan or tilt offset settings. OK to program the new settings into the Illuminator HD. Cancel to abandon the changes to the advanced feature settings. 6.2.4 Camera •... - Page 18 Auto Focus/Iris on PTZ - Auto focus/iris will activate when PTZ is used, can be switched off. Default is • Fast Shutter - Select fast shutter if using the Illuminator HD camera on a ANPR system. Default is off. (See page 31 for table of options).
- Page 19 Auto Dimming - When selected the camera will reduce the lamp power, when looking in scenes where there is to much light. OK to program the new settings into the Illuminator HD. Cancel to abandon the changes to the camera settings.
-
Page 20: Ptz Zones
• List all Presets - Use to show all presets or programmed presets in drop down selection box. OK to apply the new settings into the Illuminator HD. Cancel to abandon the changes to the PTZ zones settings. © 360 Vision Technology Ltd. -
Page 21: Date/Time
Time Zone • Time Zone - Select time zone to suit the location of the camera. OK to apply the new settings into the Illuminator HD. Cancel to abandon the changes to the date/time settings. © 360 Vision Technology Ltd. -
Page 22: Network
(See Maintenance - SSL Key/Certificate - page 25) • HTTPS Port - Set required HTTPs port. Default is 443. OK to apply the new settings into the Illuminator HD. Cancel to abandon the changes to the network settings. © 360 Vision Technology Ltd. -
Page 23: Interfaces
Illuminator HD Installation Manual V2.1.23 Page 23 6.2.8 Interfaces Auxiliary Functions Allows the camera to be configured to use Onvif Auxiliary commands. Features available are:- • Dark Sensor Mono - Sets the camera to a mono image, when dark. •... -
Page 24: Add/Edit Users
The web page admin password is also the Onvif admin password. Care must be taken, when changing the admin password. There is no way of recovering the Illuminator HD admin password if forgotten. © 360 Vision Technology Ltd. -
Page 25: Maintenance
Illuminator HD Installation Manual V2.1.23 Page 25 6.4 Maintenance • Camera - Cannot be edited, shows label/name given to the camera. (See Video - Camera - page 12). Version • Firmware - Current firmware loaded onto the camera. • Hardware - Current mainboard software loaded onto the camera. - Page 26 Firmware Update - Browse to codec file and then click on update. The camera codec will then be updated. The Illuminator HD camera will re-boot once the update has been performed. DO NOT interfere with this process as it may stop the camera from working.
-
Page 27: Browser
Application - Download software for the standalone application. • Notes - Notes on how to install the desktop application. • OK to apply the new settings into the Illuminator HD. Cancel to abandon the changes to the maintenance settings. © 360 Vision Technology Ltd. -
Page 28: Network Settings Recovery
Illuminator HD from the network and control it locally using a network connection to a laptop so that the IP address can be set to a suitable setting before the Illuminator HD is reconnected to the main network. -
Page 29: Important - Care Of Painted Surfaces
When the Illuminator HD is installed in areas where there is a high risk of damage from birds or their droppings, additional precautions and measures should be used to keep the birds away from the Illuminator HD e.g. fit anti- bird spikes. -
Page 30: 1080P Stream Resolutions & Rtsp Links
Illuminator HD Installation Manual V2.1.23 Page 30 13 1080p Stream Resolutions & RTSP Links Resolution Resolution 720p (1280 x 720) 720p (1280 x 720) D1 (720 x 576) D1 (720 x 576) H.264 MPEG4 (rtsp://ipaddress/h264main) (rtsp://ipaddress/mpeg4main) SXVGA (1280 x 960) -
Page 31: 720P Stream Resolutions & Rtsp Links
Illuminator HD Installation Manual V2.1.23 Page 31 14 720p Stream Resolutions & RTSP Links Resolution Resolution 720p (1280 x 720) 720p (1280 x 720) H.264 MPEG4 (rtsp://ipaddress/h264main) (rtsp://ipaddress/mpeg4main) D1 (720 x 576) D1 (720 x 576) Resolution MJPEG 720p (1280 x 720) - Page 32 Illuminator HD Installation Manual V2.1.23 Page 32 © 360 Vision Technology Ltd.
Need help?
Do you have a question about the Illuminator HD and is the answer not in the manual?
Questions and answers