Table of Contents
Advertisement
Available languages
Available languages
Quick Links
Advertisement
Chapters
Table of Contents
Troubleshooting

Subscribe to Our Youtube Channel
Related Manuals for Gastrodomus GAC205CF


Summary of Contents for Gastrodomus GAC205CF
- Page 1 GAC205CF – GAC280CF – GAC370CF - GAC460CF - GAC560CF - GAC280CD - GAC200CF - GAC275CF - GAC420CF - GAC320CF Installation, operating and service instructions Manuale d’installazione uso e manutenzione Installations-, Bedienungs- und Wartungsanleitung...
-
Page 2: Table Of Contents
ENGLISH Thank you for buying this high quality appliance. This handbook is designed to help you through each step of owning your new appliance, from installation to use. Please read this handbook carefully before you start using your appliance. WARNING: When positioning the appliance, please check that the supply cord is not trapped or damaged. WARNING: Do not position extension sockets or charging transformers/power supplies close to the compressor as they could overheat. -
Page 3: Before Using Your Appliance
1 - Before Using Your Appliance 1.1 - Safety Instructions • After installation, make sure that the power cable is not trapped underneath the appliance. • Please read this booklet thoroughly before installing and switching on the appliance. • The manufacturer accepts no responsibility for incorrect installation and use. •... -
Page 4: Installation
1.3 - Installation lnstall and level the appliance on a floor able to take its weight and in a place suitable for its size and use. lnsert the plug into an appropriate socket. This appliance is already equipped with a Schuko plug. If the plug is not suitable for your socket, please call an authorized electrician for assistance;... -
Page 5: Control Panel Functions
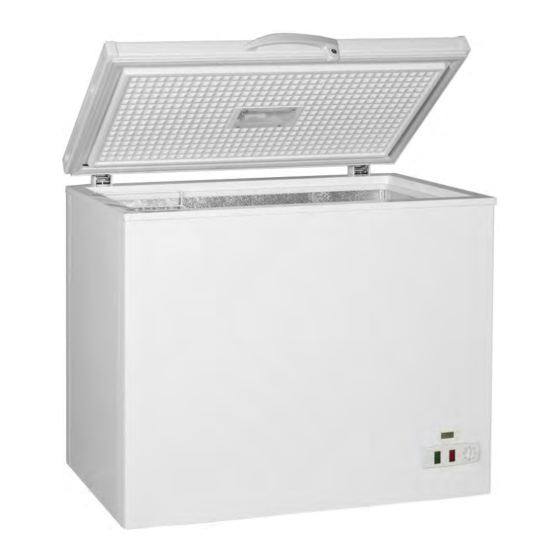
2.2 - Control Panel functions: Freezer mode (all models) Your refrigerator has one control for adjusting the temperature. The temperature control is the knob right end of the control panel (no. 6). The first time you turn the unit on, turn the temperature control knob a clockwise direction to the maximum setting "7" and keep it running for at least 4 hours before putting frozen food inside. -
Page 6: Troubleshooting
the freezer at the socket outlet and pull out the mains plug. All food should be removed and placed in another freezer. Containers full of warm water may be placed carefully in the freezer to speed up the defrosting. Do not use pointed or sharp edged objects such as knives, forks to remove the frost. -
Page 7: Troubleshooting Guide
4.1 - Troubleshooting guide Trouble Possibilities Check up Solutions Remarks The socket fuse is Check the fuse Replace the fuse broken The connection Repair or replace Call a technician Check the plug between plug and the plug or the Power is off and the socket socket is not good socket... - Page 8 ITALIANO Grazie per aver acquistato questo apparecchio di alta qualità. Questo manuale è stato progettato per aiutare l'utente attraverso ogni fase dell’installazione e del normale utilizzo dell’apparecchio. Si prega di leggere attentamente questo manuale prima di usare l'apparecchio. ATTENZIONE: Nel posizionare il congelatore, controllare che il cavo di alimentazione non sia incastrato o danneggiato.
-
Page 9: Prima Di Utilizzare L'apparecchio
1 – Prima di utilizzare l’apparecchio 1.1 – Informazioni sulla sicurezza • Dopo l'installazione, accertarsi che il cavo di alimentazione non sia bloccato sotto l'apparecchio. • Si prega di leggere questo manuale prima di installare e accendere l'apparecchio. • Il costruttore declina ogni responsabilità per malfunzionamenti dovuti ad errato uso ed installazione. •... -
Page 10: Installazione
1.3 - Installazione Installare e livellare l'apparecchio su un pavimento in grado di sostenere il peso e in un ambiente adatto alle sue dimensioni e l'uso. Inserire la spina in una presa appropriata. Questo apparecchio è già dotato di una spina Schuko. Se la spina non è adatta alla presa, chiamare un elettricista autorizzato per l'assistenza;... -
Page 11: Funzioni Del Pannello Di Controllo
2.2 – Funzioni del pannello di controllo Modalità congelatore (tutti i modelli) Il congelatore ha un comando per la regolazione della temperatura. Il controllo della temperatura è la manopola all’estremità destra del pannello di controllo (n. 6). La prima volta che si accende l'unità, ruotare la manopola di controllo della temperatura in senso orario sul valore massimo "7"... -
Page 12: Scongelamento E Pulizia
molto più fredda). 3 – Scongelamento e pulizia Effettuare lo scongelamento due volte l'anno o quando si forma uno strato di ghiaccio di circa 7 mm (1/4 ") sulle pareti interne. Per avviare la procedura di sbrinamento, portare il termostato sulla posizione “0” e scollegare la spina di alimentazione. -
Page 13: Guida A Problemi E Soluzioni
4.1 – Guida a problemi e soluzioni Problema Possibili cause Controllare Soluzione Note Il fusibile della Controllare il Sostituire il fusibile presa è bruciato fusibile Chiamare un tecnico o un Cattiva Controllare Riparare o sostituire elettricista Non c’è connessione tra spina e presa spina o presa spina e presa... - Page 14 - 14...
- Page 15 DEUTSCH Vielen Dank, dass Sie sich für dieses hochwertige Gerät entschieden haben. Dieses Handbuch soll Ihnen bei jedem Schritt der Installation und des normalen Gebrauchs des Gerätes helfen. Bitte lesen Sie diese Anleitung sorgfältig durch, bevor Sie das Gerät in Betrieb nehmen. ACHTUNG: Achten Sie beim Positionieren des Gefrierschranks darauf, dass das Netzkabel nicht eingeklemmt oder beschädigt ist.
-
Page 16: Vor Der Verwendung Des Geräts
1 – Vor der Verwendung des Geräts 1.1 – Sicherheitshinweise • Achten Sie nach der Installation darauf, dass das Netzkabel nicht unter dem Gerät verstopft ist. • Bitte lesen Sie dieses Handbuch, bevor Sie das Gerät installieren und einschalten. • Der Hersteller lehnt jede Verantwortung für Fehlfunktionen aufgrund von unsachgemäßer Verwendung und Installation ab. -
Page 17: Installation
1.3 - Installation Installieren und richten Sie das Gerät auf einem tragfähigen Boden und in einer Umgebung, die für seine Größe und Verwendung geeignet ist. Stecken Sie den Stecker in eine geeignete Steckdose. Dieses Gerät ist bereits mit einem Schukostecker ausgestattet. -
Page 18: Funktionen Des Bedienfeldes
2.2 – Funktionen des Bedienfeldes Gefriermodus (alle Modelle) Der Gefrierschrank verfügt über eine Steuerung zur Temperaturregelung. Der Temperaturregler ist der Knopf am rechten Ende des Bedienfeldes (Nr. 6). Wenn Sie das Gerät zum ersten Mal einschalten, drehen Sie den Temperaturregler im Uhrzeigersinn auf den Maximalwert "7"... -
Page 19: Auftauen Und Reinigen
3 – Auftauen und Reinigen Zweimal im Jahr auftauen oder wenn sich eine Eisschicht von etwa 7 mm (1/4") an den Innenwänden bildet. Um den Abtauvorgang zu starten, stellen Sie den Thermostat auf die Position "0" und ziehen Sie den Netzstecker. Alle Lebensmittel sollten entfernt und in einen anderen Gefrierschrank gelegt werden. -
Page 20: Leitfaden Für Probleme Und Lösungen
4.1 - Leitfaden für Probleme und Lösungen Problem Mögliche Ursachen Verifizieren Lösung Note Die Sicherung der Überprüfen Sie die Sicherung ersetzen Sicherung Sockel ist verbrannt. Rufen Sie Schlechte einen Es gibt Stecker und Stecker oder Buchse Verbindung Kompressor Techniker keine Buchse prüfen reparieren oder zwischen... - Page 21 Nivellieren Überprüfen Sie, ob Der Gefrierschrank ist nicht richtig Sie den Gefrierschrank nivelliert. Gefrierschr waagerecht steht. ank, indem Zu lautstark Sie bei Bedarf einige der folgenden Komponen einsetzen Dicken unter den Rädern Eine Gewächshausschraube eines Die Rebe hat lose Ziehen Sie Ventilators oder Kondensators hat die Schraube sich gelöst.
- Page 22 DICHIARAZIONE DI CONFORMITA' "CE" - DECLARATION OF CONFORMITY "CE" DÉCLARATION DE CONFORMITÉ "CE" - KONFORMITÄTSERKLÄRUNG "CE" Il sottoscritto, legale rappresentante della società, dichiara che l'apparecchiatura sotto specificata: The undersigned, legal representative of the company, declares that the below machine: Le soussigné, représentant legal de la société, declare que la machine ci-dessous est: Der Unterzeichnete, gesetzliche Vertreter der Firma erklärt, dass das unten angegebene Gerät: Codice / Code / Numerò...
Need help?
Do you have a question about the GAC205CF and is the answer not in the manual?
Questions and answers