Table of Contents
Advertisement
Available languages
Available languages
Quick Links
Advertisement
Table of Contents

Related Manuals for Gastrodomus GA600BTV


Summary of Contents for Gastrodomus GA600BTV
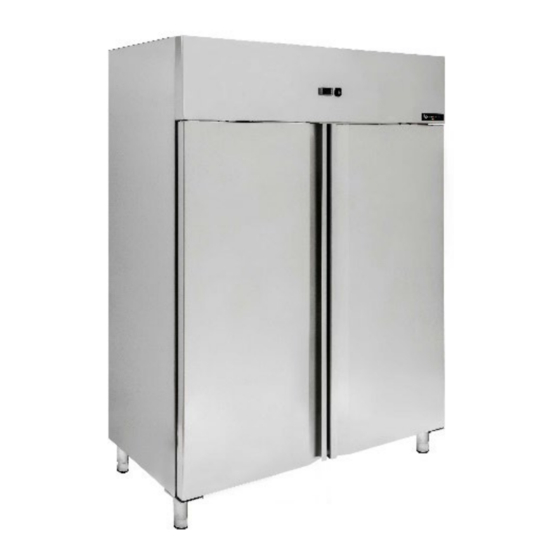
- Page 1 INSTALLAZIONE – USO – MANUTENZIONE INSTALLATION – USE – MAINTENANCE ENTRETIEN AUFSTELLUNG – ANWENDUNG – WARTUNG ARMADI REFRIGERATI VENTILATI VENTILATED REFRIGERATED CABINET VENTILIERTER KÜHLSCHRANK MODELLI-MODELLS-MODELLE GA600BTV-GA1200BTV-GA600DTV-GA1200DTV...
- Page 3 INDICE 1. Introduzione 2. Diritti e responsabilità del costruttore 3. Movimentazione ed immagazzinaggio 4. Messa in servizio 5. Caratteristiche tecniche 6. Uso 7. Manutenzione 8. Comportamento in caso di guasto 9. Attività a cura del personale specializzato 10. Smaltimento 11. Figure e tabelle 12.
-
Page 4: Messa In Servizio
1. INTRODUZIONE Questo apparecchio è stato realizzato negli interni, nell’estetica e nella componentistica secondo le esigenze specifiche dei nostri clienti, è inoltre stato controllato funzionalmente ed esteticamente in ogni sua parte prima dell’invio definitivo. Usate quindi l’apparecchio attendendovi a quanto qui sotto suggerito e rimarrà per lungo tempo al vostro servizio. -
Page 5: Caratteristiche Tecniche
all’accensione dell’apparecchio. L’apparecchio non deve essere installato in ambienti pericolosi, all’aria aperta o esposto a pioggia, lontano da fonti di calore (termosifoni, faretti ecc..), al riparo dai raggi solari e da correnti d’aria. L’aria deve circolare liberamente attraverso l’unità di condensa. Il mancato rispetto delle condizioni riportati, porta ad una riduzione della prestazione dell’apparecchio. - Page 6 Premere l’interruttore n° 1: sul display apparirà la temperatura presente nell’armadio al momento e si illumineranno il LED di funzionamento compressore ed il LED funzionamento ventilatore interno (in ritardo). In caso di interruzioni nell’erogazione dell’energia elettrica il compressore si riavvierà con un certo ritardo. Impostazione temperatura cella (fig.
-
Page 7: Manutenzione
7. MANUTENZIONE Pulizia periodica della cella e del condensatore Prima di iniziare la pulizia spegnere l’apparecchio e scollegare la spina dalla presa. Pulire almeno una volta alla settimana il vano interno seguendo le indicazioni (vedi Pulizia iniziale). Pulire il condensatore posto sopra l’armadio, dietro il pannello di comando, almeno una volta alla settimana. - Page 8 l’apparecchio sia ben livellato e che i piedini appoggino stabilmente sul pavimento. • Se dopo tutti questi controlli il malfunzionamento dovesse permanere è opportuno rivolgersi all’assistenza tecnica, indicando la sigla del modello ed il numero di matricola (ambedue rilevabili dalla targhetta dati tecnici) e gli eventuali codici di allarme comparsi sul display della centralina.
- Page 9 INDEX 1. Introduction 2. Rights and responsibilities of the manufacturer 3. Handling and storage 4. Commissioning 5. Technical characteristics 6. Use 7. Maintenance 8. Behaviour in case of failure 9. Activities carried out by specialized personnel 10. Disposal 11. Figures and tables 12.
-
Page 10: Handling And Storage
1. INTRODUCTION This appliance has been realized in the interiors, aesthetics and components according to the specific needs of our customers, it has also been checked functionally and aesthetically in every part before the final shipment. Therefore, please use the appliance according to what is suggested below and it will remain at your service for a long time. -
Page 11: Technical Characteristics
spotlights, etc.), protected from sunlight and drafts. The air must circulate freely through the condensation unit. Failure to comply with the above conditions leads to a reduction in the performance of the unit. Initial cleaning Clean the appliance properly before connecting it to the power supply. For internal parts use antibacterial detergents, for plastic parts it is sufficient to use damp cloths. -
Page 12: Maintenance
Room temperature setting (fig. 1) Press the SET button (left of the display) to read the set temperature. If you want to change this temperature: keep the SET button pressed (LED 1 flashes) press the ▲(UP) or the ▼(DOWN) button within 15 seconds to increase or decrease the temperature initially set until the new temperature is reached. -
Page 13: Behaviour In Case Of Failure
Inactivity of the device During periods of inactivity, unplug the plug from the socket, clean thoroughly as for a periodic cleaning and let the air circulate in the cell by covering the cabinet with a cloth cloth. 8. BEHAVIOUR IN CASE OF FAILURE If the unit does not work check that: the plug is correctly inserted into the socket;... - Page 14 9. ACTIVITIES CARRIED OUT BY SPECIALISED PERSONNEL Replacement of components Disconnect the plug from the mains before any maintenance work. 10. DISPOSAL The disposal of the device must be entrusted to specialist firms in accordance with local laws and authorities. The device consists of sheet steel structure;...
- Page 15 INDEX 1. Einführung 2. Rechte und Pflichten des Herstellers 3. Handhabung und Lagerung 4. Inbetriebnahme 5. Technische Merkmale 6. Verwenden Sie 7. Wartung 8. Verhalten im Fehlerfall 9. Von Fachpersonal durchgeführte Aktivitäten 10. Entsorgung 11. Abbildungen und Tabellen 12. Schaltpläne 13.
-
Page 16: Handhabung Und Lagerung
1. EINLEITUNG Dieses Gerät wurde in den Innenräumen, in der Ästhetik und in den Komponenten nach den spezifischen Bedürfnissen unserer Kunden realisiert und vor der endgültigen Auslieferung in jedem Teil funktionell und ästhetisch überprüft. Benutzen Sie das Gerät daher bitte entsprechend den unten aufgeführten Vorschlägen und es wird Ihnen lange Zeit zur Verfügung stehen. -
Page 17: Technische Merkmale
begrenzen, ist es ratsam, den Kunststoff langsam und in kleinen Stücken zu entfernen. Bewegen Sie das Gerät, indem Sie es nur vom unteren äußeren Boden anheben, um eine Beschädigung der Stützfüße und anderer Geräte zu vermeiden. Wenn das Gerät während der Handhabung horizontal aufgestellt wurde, warten Sie zwei Stunden, bevor Sie es einschalten. - Page 18 6. VERWENDUNG Antrieb Diese Schränke werden mit Hilfe von Schaltern und einer elektronischen Steuereinheit bedient. In den kombinierten Modellen sind die Kontrollen doppelt und unabhängig. Die dem Benutzer erlaubten Operationen sind Ein-/Ausschalten (Abb. 1) Schalter Nr. 1 drücken: Auf dem Display wird die momentan im Schrank herrschende Temperatur angezeigt, und die Betriebs-LED des Kompressors und die Betriebs-LED des internen Lüfters (verzögert) leuchten auf.
-
Page 19: Wartung
Auftauen Zeitpunkt des Auftauens (Abb.1) Das Steuergerät startet automatisch 4 Abtauzyklen innerhalb von 24 Stunden. Der Timer erkennt die Zeit ab dem Moment des ersten Starts. Um einen manuellen Abtauzyklus durchzuführen, drücken Sie einfach die Abtautaste (SBR) für 3 Sekunden, eine sofortige automatische Abtauung findet für die nächsten 6 Stunden statt. - Page 20 sich das Gerät nicht in der Nähe von Wärmequellen befindet oder seine Verflüssigereinheit schlecht • belüftet ist; die eingelagerten Lebensmittel oder andere Gegenstände das korrekte Schließen des Schrankes nicht • verhindern; • das Gerät nicht unter anormalen Bedingungen arbeitet (Einlegen von heißem, überschüssigem und/oder fehlplatziertem Essen).
- Page 21 Kältemittel, das nicht in der Umwelt verteilt werden darf. ALLE VERANTWORTLICHKEITEN FÜR DIE NICHTBEACHTUNG DER GELTENDEN ÖRTLICHEN GESETZE FALLEN AUF DEN EIGENTÜMER.
- Page 22 11. FIGURE E TABELLE - PICTURES AND TABLES - BILDER UND TABELLE...
Need help?
Do you have a question about the GA600BTV and is the answer not in the manual?
Questions and answers