Advertisement
Available languages
Available languages
Quick Links
Central Controller
Installation and Owner's Manual
MODEL NAME
40VCW317FQEE
Edition: 2020-09
Set temp.
Set temp.
Set temp.
c
C
C
o
o
o
24
24
24
c
Indoor temp.
21
o
Indoor temp. 21
Indoor temp. 21
C
C
o
o
Indoor humidity 32%RH
Indoor humidit y 32%RH
Indoor humidit y 32%RH
Menu
Mode
Mode
Menu
Menu
Mode
10:30
Thursday
AM
01.01.2015
Qty.online
Standby
Defrost Master
Outdoor temp. 2 C
o
Outdoor humidity 32%RH
Swing
Swing
Swing
Advertisement

Related Manuals for Carrier XCT7 40VCW317FQEE


Summary of Contents for Carrier XCT7 40VCW317FQEE
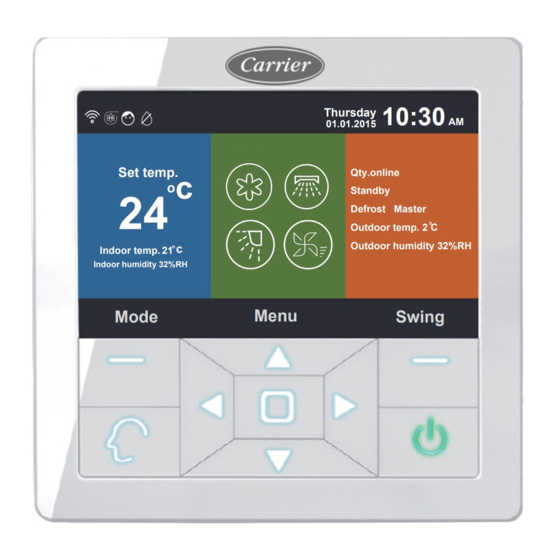
- Page 1 10:30 Thursday 01.01.2015 Set temp. Set temp. Set temp. Qty.online Standby Defrost Master Outdoor temp. 2 C Outdoor humidity 32%RH Indoor temp. Indoor temp. 21 Indoor temp. 21 Indoor humidit y 32%RH Indoor humidit y 32%RH Indoor humidity 32%RH Menu Mode Mode Menu...
- Page 2 CONTENT Parts and Functions..........1 Operation..............8 Wired Controller Wiring Instruction.....31...
- Page 3 Parts and Functions Interface Display 10:30 Monday Qty. online Defrost Set temp. Standby Operation Master Slave PM 2.5 Outdoor temp 22.5 o Indoor temp. 25.5 Outdoor relative hum 32% Indoor relative hum 32% Mode Menu Swing EXQUISITE DESIGN & EXQUISITE LIFE...
- Page 4 Parts and Functions Left Mode key in the main interface, return key in another interface. Intelligent key press it to go directly to the intelligent mode. Left/Right key, fan speed adjustment key, swing angle adjustment key in the main interface, direction adjustment key in another interface.
- Page 5 Parts and Functions Main Interface Display 10:30 Monday Qty. online Defrost Set temp. Standby Operation Master Slave PM 2.5 Outdoor temp 22.5 o Indoor temp. 25.5 Outdoor relative hum 32% Indoor relative hum 32% Swing Menu Mode Icon Instruction: Quiet function (indoor) Turbo function.
- Page 6 Parts and Functions Ventilation function Health function. Quiet function (outdoor) 10°C Heating function 10 c Electrical heating. Health airflow. Health airflow up. Health airflow down. LED on panel. Error code function, the icon will display in the main interface when the wired controller or the indoor unit linked to the controller shows an error.
- Page 7 Parts and Functions Schedule. Filter clean reminder. Energy Saving function. Motion sensing. Motion sensing follow. Motion sensing evade. Date, week and the clock display area. The format of the date 10:30 Monday can be changed through the time function. 20.11.11.03 Set temp.
- Page 8 Parts and Functions Mode Intelligent Cooling Heating The mode cycle depends on the mode setting in the basic setting function. Up/Down swing and Left/Right swing function. Fan speed. Different fan speed cycles can be set through the basic setting. Quality online The number of indoor units connected to the wired controller.
- Page 9 Operation Press the Menu key in the main interface to enter the menu interface. 10:30 Monday Menu Service help Time Extra Function Error code Schedule Installer Setting Sleep Swing Humidity Control Display Setting Return Enter Main Schedule Schedule options include segmented timing and customized timing. It can be selected through the displayed setting. The default is the segmented timing.
- Page 10 Operation Monday 10:30 Schedule Heat Cool Cool Heat (mon - fri) (mon - fri) (sta- sun) (sta - sun) Wake 6:00 am Leave 8:00 am Return 6:00 pm Sleep 10:00 pm Cancel Keep pressing the ‘Left/Right’ key to speed up the time adjustment. Random timing When flashes in the Schedule editing interface, press the Enter key to enter the interface.
- Page 11 Operation When selecting Intelligent mode, it will display 24°C(76°F), switch the power off, set the time 12:00, press Enable and weekday will the default. If the schedule that you are setting has been set before, the interface will prompt you that the schedule already exists, you need to cancel it or change the repeated parameters.
- Page 12 Operation Time When the time icon is flashing, press Enter to go to the time interface. 10:30 Time M o n d a y 2011.11.03 2014 Time setting year month Mon. hour minute week Date format 12-hour 24-hour setting Year/Month/Day Month/Day/Year Day/Month/year Return...
- Page 13 Operation If the setting of ‘Quiet (outdoor)’is ON, the ‘outdoor quiet’ function is activated. The “Quiet(outdoor)” setting can be scheduled by setting the time at which the Quiet mode will be active. If the time setting ON and OFF of ‘outdoor quiet’ is the same, then the ‘Quiet(outdoor)’ function will be OFF. If the ‘ON’...
- Page 14 Operation 10:30 Service&Help M o n d a y 2011.11.03 Password setting Password Password recovery Help to set child lock? Help How to set four-way cassette angle? How to inquire error code? How to clear filter? Return Enter Main Once the password recovery is set, the interface will prompt as follows. Press Cancel or Enter. 10:30 Service&Help M o n d a y...
- Page 15 Operation Swing Press the Enter key to enter the interface when Swing icon is flashing in the menu. Password is required. 10:30 Swing M o n d a y 2011.11.03 Four-way Type Up/Down Left/Right cassette Angle control Return Enter Main If a combination is not available, the information will be gray.
- Page 16 Operation Left/Right swing: Left/right swing can be adjusted as per the user's requirement. The circulation of 1→2→3→4→5→4→3→2→1 stands for automatic swing The default angle in different mode is as follows: Up/Down swing Intelligent Heating Cooling Angle Angle 1 5 Angle 1 Angle 1 Angle 1 Angle...
- Page 17 Operation Schedule Segmented timing and Customized timing can be set 10:30 Display Setting M o n d a y 2011.11.03 English Spanish French Language Italian Chinese Russian Temp. unit Schedule Segmented timing Random timing Return Enter Main Indoor temperature display If the function is switched ON the main interface will display the indoor temperature.
- Page 18 Operation Installer Setting Press enter key to enter the setting when the icon is flashing in the menu. Details The corresponding parameter information will be displayed in this function Up/ Down key to adjust unit number, Left/Right key to turn page. Some information is gray that can not be inquired. 10:30 Details M o n d a y...
- Page 19 Operation Address setting The default password is 841226. The communication address can be set through two ways, One through the wired controller set and the other through the wired controller and automatic competing set. Central address and communication address between indoor and outdoor unit can be adjusted according to the on ground situation 10:30 Address Setting M o n d a y...
- Page 20 Operation Mode selection Different mode combinations can be set according to each application 10:30 Basic Setting M o n d a y 2011.11.03 Auto Heat Dry Cool Fan Dry Cool Fan Heat Dry Cool Fan Mode selection Cool Heat Fan Auto By-pass Recovery Heat only Hot water...
- Page 21 Operation Ambient temperature revision The revision value is only valid for wired controller ambient temperature. Press enter key to make the arrows static and adjust the temperature using the Left/Right key 10:30 Basic Setting M o n d a y 2011.11.03 -3.5 Ambient...
- Page 22 Operation In basic setting interface, press Up/Down key to adjust unit number; press Left/Right key to move the cursor. Some functions are not available for some models and the information is gray. The energy saving default parameters are listed below: 74°F Lowest temperature limit of Cooling and Dry mode.
- Page 23 Operation 10:30 M o n d a y 2011.11.03 Type No overrun Temp. permitted hour Return Enter Main Running time The function records both continuous running time as well as total running time. When the bottom color of “Clear” changes into white, press the Enter key to clear the accumulative running time 10:30 M o n d a y Running Time...
- Page 24 Operation Vip priority choice The function is only available for some models. Special setting ESP grade can be set, the setting method is same to the instruction mentioned above. Parameter setting The function is only available for some models. EEPROM setting The function is only available for some models.
- Page 25 Wired Controller Wiring Instruction...
- Page 26 Wired Controller Wiring Instruction 11/16 (17.8) 7/16 (11.8) E16-BOTTOM-TOP(A) HZN#2-1 White Yellow Wired Controller Wiring Hold the front of the controller, push down the back cover to open the back cover of the controller. Put communication wire through the hole in the back cover. Fix the back cover.
- Page 27 Wired Controller Wiring Instruction Connect communication wire to CON4 port of wired controller. Lastly put the front cover of wired controller to back cover to complete the installation Note: The battery is non-removable and recharges while the unit is connected to power in order to save user settings if there is a power outage.
- Page 28 Wired Controller Wiring Instruction Communication Wiring Indoor 16 Indoor 1 Indoor 2 Indoor N Indoor 15 (master unit Wire controller Wire controller Wire controller Wire controller Wire controller A B C A B C A B C A B C A B C Control wiring of wire A B C...
- Page 29 Information according to Directive 2006/42/EC (Name of the manufacture) Carrier SCS (Address, city, country) Route de Thil - 01120 Montluel – France...
- Page 30 The manufacturer reserves the right to change any product specifications without notice.
- Page 31 Controller centrale Manuale di installazione e del proprietario NOME DEL MODELLO 40VCW317FQEE Edizione: 2020-09...
- Page 32 INDICE Parti e funzioni.............1 Funzionamento............8 Istruzioni di cablaggio del controller cablato....31...
- Page 33 Parti e funzioni Display interfaccia 10:30 10:30 Lunedì Monday Q.tà online Scongela- Imposta tem- Qty. online Defrost Set temp. peratura mento Standby Operation Standby Funzionamento Master Slave Principale Slave PM 2.5 PM 2.5 Outdoor temp 22.5 o Temp. interna Indoor temp. 25.5 Temp.
- Page 34 Parti e funzioni Tasto Left Tasto della modalità nell'interfaccia principale, tasto di invio in un'altra interfaccia. Premere il tasto intelligente per andare direttamente in modalità intelligente. Tasto sinistra/destra, tasto di regolazione della velocità di ventilazione, tasto di regolazione dell'angolo di oscillazione nell'interfaccia principale, tasto di regolazione della direzione in un'altra interfaccia.
- Page 35 Parti e funzioni Display interfaccia principale 10:30 Monday Qty.online Defrost Set temp. Standby Operation Master Slave PM 2.5 Outdoor temp 22.5 o Indoor temp. 25.5 Outdoor relative hum 32% Indoor relative hum 32% Swing Menu Mode Istruzione icona: Funzionamento silenzioso (interno) Funzionamento turbo.
- Page 36 Parti e funzioni Funzione di ventilazione Funzione "Health". Funzionamento silenzioso (esterno) Funzione di riscaldamento 10 °C 10 °C Riscaldamento elettrico. Flusso d'aria "health". Flusso d'aria "health" su. Flusso d'aria "health" giù. LED sul pannello. Funzione codice di errore, l'icona viene visualizzata nell'interfaccia principale quando il controller cablato o l'unità...
- Page 37 Parti e funzioni Programmazione. Promemoria pulizia del filtro. Funzione di risparmio energetico. Rilevamento movimento. Rilevamento movimento con funzionalità di indirizzamento verso la persona. Rilevamento movimento con funzionalità di elusione della persona. Area di visualizzazione orologio, data e settimana. Il formato della data 10:30 Monday può...
- Page 38 Parti e funzioni Modalità Intelligent Cooling Heating Il ciclo modalità dipende dall'impostazione della modalità nella funzione di impostazione base. Funzione di oscillazione sinistra/destra e oscillazione su/giù Velocità di ventilazione. Tramite l'impostazione di base è possibile impostare diversi cicli di velocità di ventilazione. Qualità...
- Page 39 Funzionamento Premere il tasto Menu nell'interfaccia principale per accedere all'interfaccia menu. 10:30 Monday Menu Error Code Time Extra Function Service help Schedule Installer Setting Sleep Swing Humidity Control Display Setting Return Enter Main Programmazione Le opzioni di programmazione includono la temporizzazione segmentata e la temporizzazione personalizzata. Ciò può essere selezionato attraverso l'impostazione visualizzata.
- Page 40 Funzionamento La freccia sinistra e quella destra lampeggiano di fianco all'orario di "risveglio", premere il tasto Invio per inter- rompere il lampeggiamento delle frecce. Continuare a premere il tasto Sinistra o Destra per regolare l'orario e poi premere il tasto per la conferma. I tasti con le quattro direzioni spostano la freccia quando lampeggiano. Premere il tasto "OK"...
- Page 41 Funzionamento Quando si seleziona la modalità intelligente, verrà visualizzato 24 °C (76 °F), procedere allo spegnimento, impostare come orario 12:00, premere Abilita e il giorno della settimana sarà quello predefinito. Se la programmazione che è stata impostata è stata già configurata in precedenza, l'interfaccia indicherà che la programmazione esiste già...
- Page 42 Funzionamento Orario Quando l'icona dell'orario lampeggia, premere Invio per andare all'interfaccia relativa all'orario. Per esempio, se la data predefinita visualizzata è il 12 dicembre 2014, l'orario è 12:00 e il giorno della settimana è venerdì, regolare l'impostazione oraria allo stesso modo dell'impostazione di programmazione. Il formato predefinito è...
- Page 43 Funzionamento Se l'impostazione di "Silenzioso (esterno)" è attiva, la funzione di "Silenzioso all'esterno" viene attivata. L'impostazione "Silenzioso (esterno)" può essere programmata mediante impostazione dell'orario al quale la modalità Silenzioso è attiva. Se l'impostazione oraria ON e OFF della funzione "silenzioso all'esterno" è la stessa, la funzione "Silenzioso (esterno)"...
- Page 44 Funzionamento 10:30 Service&Help M o n d a y 2011.11.03 Password setting Password Password recovery Help to set child lock? Help How to set four-way cassette angle? How to inquire error code? How to clear filter? Return Enter Main Una volta impostato il recupero della password, l'interfaccia indicherà quanto segue. Premere Annulla o Invio. 10:30 Service&Help M o n d a y...
- Page 45 Funzionamento Oscillazione Premere il tasto Invio per accedere all'interfaccia quando l'icona relativa al movimento lampeggia nel menu. È necessaria la password. 10:30 Swing M o n d a y 2011.11.03 Four-way Type Up/Down Left/Right cassette Angle control Return Enter Main Se non è...
- Page 46 Funzionamento Oscillazione Sinistra/Destra: l'oscillazione Sinistra/Destra può essere regolata in base alle esigenze dell'utente. La circolazione 1→2→3→4→5→4→3→2→1 indica l'oscillazione automatica L'angolo predefinito in una modalità diversa è quello che segue: Oscillazione Su/Giù Intelligente Riscaldamento Raffreddamento A secco Ventilatore Angolo Angolo 1 Angolo 5 Angolo 1 Angolo 1...
- Page 47 Funzionamento Programmazione È possibile impostare la temporizzazione segmentata e la temporizzazione personalizzata 10:30 Display Setting M o n d a y 2011.11.03 English Spanish French Language Italian Chinese Russian Temp. unit Schedule Segmented timing Random timing Return Enter Main Visualizzazione della temperatura interna Se la funzione è...
- Page 48 Funzionamento Impostazione installatore Premere il tasto Invio per accedere all'impostazione quando l'icona lampeggia nel menu. Dettagli Le informazioni corrispondenti del parametro saranno visualizzate in questa funzione relativa al tasto Su/Giù per rego- lare il numero di unità, mentre il tasto Sinistra/Destra serve per cambiare pagina. Alcune informazioni sono in grigio e non possono essere consultate.
- Page 49 Funzionamento Impostazione indirizzo La password predefinita è 841226. L'indirizzo di comunicazione può essere impostato in due modi: uno tramite il controller cablato e l'altro tramite il controller cablato e il settaggio automatico. L'indirizzo centrale e l'indirizzo di comunicazione tra l'unità intera e l'unità esterna possono essere regolati in base alla situazione effettiva. 10:30 Address Setting M o n d a y...
- Page 50 Funzionamento Selezione della modalità È possibile impostare diverse combinazioni di modalità in base a ciascuna applicazione. 10:30 Basic Setting M o n d a y 2011.11.03 Auto Heat Dry Cool Fan Dry Cool Fan Heat Dry Cool Fan Mode selection Cool Heat Fan Auto By-pass Recovery Heat only...
- Page 51 Funzionamento Revisione temperatura ambiente Il valore di revisione è valido solo per la temperatura ambiente del controller cablato. Premere il tasto di invio per rendere le frecce fisse e per regolare la temperatura utilizzando il tasto Sinistra/Destra. 10:30 Basic Setting M o n d a y 2011.11.03 -3.5...
- Page 52 Funzionamento Nell'interfaccia dell'impostazione di base, premere il tasto Su/Giù per regolare il numero di unità, premere il tasto Sini- stra/Destra per spostare il cursore. Alcune funzioni non sono disponibili per alcuni modelli, ed esse sono rappresentate come ombreggiate. I parametri predefiniti di risparmio energetico sono elencati di seguito: 74 °F Limite di temperatura più...
- Page 53 Funzionamento M o n d a y 10:30 2011.11.03 Type No overrun Temp. permitted hour Return Enter Main Tempo di funzionamento La funzione registra sia il tempo di funzionamento continuo nonché il tempo di funzionamento totale. Quando il colore di fondo di "Cancella" viene modificato in bianco, premere il tasto Invio per cancellare il tempo di funzionamento accumulativo.
- Page 54 Funzionamento Scelta prioritaria Vip La funzione è disponibile solo per alcuni modelli. Impostazione speciale È possibile impostare il grado ESP, il metodo di impostazione è lo stesso dell'istruzione menzionata sopra. Impostazione parametro La funzione è disponibile solo per alcuni modelli. Impostazione EEPROM La funzione è...
- Page 55 Istruzioni di cablaggio del controller cablato...
- Page 56 Istruzioni di cablaggio del controller cablato 11/16 (17,8) 7/16 (11,8) E16-FONDO-ALTO(A) HZN#2-1 Bianco Giallo Rosso Cablaggio del controller cablato Tenere la parte anteriore del controller, esercitare pressione verso il basso sulla copertura posteriore per aprire la copertura posteriore del controller. Far passare il filo di comunicazione attraverso il foro presente nella copertura posteriore.
- Page 57 Istruzioni di cablaggio del controller cablato Collegare il filo di comunicazione alla porta CON4 del controller cablato. Infine giustapporre la copertura anteriore del controller cablato alla copertura posteriore per completare l'installazione. Nota: La batteria non è removibile e si ricarica quando l'unità è collegata all'alimentazione allo scopo di salvare le impostazioni dell'utente in caso di interruzione dell'alimentazione.
- Page 58 Istruzioni di cablaggio del controller cablato Cablaggio comunicazione Interno 16 (unità principale) Interno 1 Interno 2 Interno N Interno 15 Controller cablato Controller cablato Controller cablato Controller cablato Controller cablato A B C A B C A B C A B C A B C Cablaggio di controllo del A B C...
- Page 59 Informazioni conformi alla direttiva 2006/42/CE (Nome del produttore) Carrier SCS (indirizzo, città, paese) Route de Thil - 01120 Montluel – Francia...
- Page 60 Il produttore si riserva il diritto di modificare le specifiche del prodotto senza preavviso.
- Page 61 10:30 Thursday 01.01.2015 Set temp. Set temp. Set temp. Qty.online Standby Defrost Master Outdoor temp. 2 C Outdoor humidity 32%RH Indoor temp. Indoor temp. 21 Indoor temp. 21 Indoor humidit y 32%RH Indoor humidit y 32%RH Indoor humidity 32%RH Menu Mode Mode Mode...
- Page 62 TABLE DES MATIÈRES Pièces et fonctions............1 Fonctionnement............8 Câblage de la commande filaire........31...
- Page 63 Pièces et fonctions Interface utilisateur Monday 10:30 Qty.online Defrost Set temp. Standby Operation Master Slave PM 2.5 Outdoor temp 22.5 o Indoor temp. 25.5 Outdoor relative hum 32% Indoor relative hum 32% Mode Menu Swing EXQUISITE DESIGN & EXQUISITE LIFE...
- Page 64 Pièces et fonctions Touches Left Touche mode sur la page principale, Retour sur d’autres pages Touche intelligente pour passer directement dans le mode intelligent Touche gauche/droite, réglage de vitesse du ventilateur et réglage de l’angle d’inclinaison du flux d’air sur la page principale ; réglage de direction sur d’autres pages Touche haut/bas et réglage de température sur la page principale Réglage de valeur et de direction sur d’autres pages Menu sur la page principale, Entrée sur d’autres pages...
- Page 65 Pièces et fonctions Affichage principal 10:30 Monday Qty.online Defrost Set temp. Standby Operation Master Slave PM 2.5 Outdoor temp 22.5 o Indoor temp. 25.5 Outdoor relative hum 32% Indoor relative hum 32% Swing Menu Mode Pictogramme : Fonction Quiet (silence) intérieur Fonction turbo Fonction sécurité...
- Page 66 Pièces et fonctions Fonction ventilation Fonction Health (air pur) Fonction Quiet (silence) de l’unité extérieure Fonction chauffage 10 °C 10 c Chauffage électrique Balayage Health (air pur) Flux haut Health (air pur) Flux bas Health (air pur) Voyant LED Fonction de code d’erreur : l’icône apparait sur la page principale lorsque la commande filaire ou l’unité...
- Page 67 Pièces et fonctions Schedule (programmation horaire) Rappel de nettoyage de filtre. Économie d’énergie Motion Sensing (détection de mouvement). Motion sensing follow (suivi de détection de mouvement) Motion sensing evade (sortie de détection de mouvement) Date, semaine et horloge. Il est possible de modifier le format de la date grâce à cette 10:30 Monday fonction...
- Page 68 Pièces et fonctions Modes Intelligent Cooling Heating La séquence des modes est modifiable dans la fonction de réglage de base. Swing (balayage) haut/bas et swing (balayage) gauche/droite. Vitesse du ventilateur. La séquence des vitesses de ventilateur est modifiable dans la fonction réglage de base. Quantité...
- Page 69 Fonctionnement Appuyez sur la touche Menu de la page principale pour accéder à la page du menu. 10:30 Monday Menu Time Extra Function Error code Service help Schedule Installer Setting Sleep Swing Humidity Control Display Setting Return Enter Main Schedule La fonction Schedule Programmer propose une programmation horaire par période ou personnalisée.
- Page 70 Mode opératoire Validez « OK » pour enregistrer le nouveau réglage, comme illustré ci-dessous. La valeur par défaut est mentionnée sur la figure ci-dessous. Vous pouvez accélérer le réglage de l’heure en appuyant longtemps sur les touches gauche ou droite. Monday 10:30 Schedule...
- Page 71 Fonctionnement Lorsque vous sélectionnez le mode Intelligent, 24 °C s’affiche. Coupez l’alimentation, réglez l’heure sur 12:00, appuyez sur Enable (activer) et weekday (jours de la semaine) sera défini par défaut. Si le minutage que vous souhaitez enregistrer a déjà été défini auparavant, le système vous indiquera que le minutage existe déjà...
- Page 72 Fonctionnement Date Lorsque l’icône Date et heure clignote, appuyez sur Entrée pour afficher les réglages. Par exemple, si la date par défaut affichée est le 12 décembre 2014, l’heure est 12:00 et le jour de la semaine est le vendredi, ajustez le réglage de la date et de l’heure de la même manière que le réglage du minutage. Le format par défaut est 12 heures et mois/jour/année.
- Page 73 Fonctionnement Si le réglage de « Quiet (extérieur) » est sur ON, la fonction silence extérieure est activée. Il est possible de programmer la fonction Quiet (silence) extérieur en définissant l’heure à partir de laquelle la fonction sera active. Si le réglage de l’heure de début (ON) et de fin (OFF) de Quiet extérieur est identique, la fonction sera désactivée.
- Page 74 Fonctionnement 10:30 Service&Help M o n d a y 2011.11.03 Password setting Password Password recovery Help to set child lock? Help How to set four-way cassette angle? How to inquire error code? How to clear filter? Return Enter Main Si vous choisissez de récupérer le mot de passe, vous accéderez au dialogue suivant : appuyez sur Annuler 10:30 Service&Help M o n d a y...
- Page 75 Fonctionnement Swing (balayage) Appuyez sur la touche Entrée pour accéder à la page des réglages lorsque l’icône Swing clignote dans le menu. Le mot de passe est obligatoire. 10:30 Swing M o n d a y 2011.11.03 Four-way Type Up/Down Left/Right cassette Angle...
- Page 76 Fonctionnement Balayage gauche/droite Il est possible de régler la fonction de balayage gauche/droite pour répondre aux besoins de l’utilisateur. Le défilement continu 1→2→3→4→5→4→3→2→1 correspond au balayage automatique. L’angle par défaut dans les différents modes est le suivant : Balayage haut/bas Intelligent Chauffage Refroidissement...
- Page 77 Fonctionnement Planifier Réglages de la programmation horaire par période ou personnalisée. 10:30 Display Setting M o n d a y 2011.11.03 English Spanish French Language Italian Chinese Russian Temp. unit Schedule Segmented timing Random timing Return Enter Main Affichage de la température intérieure Si la fonction est activée, la température intérieure s’affichera dans le menu principal.
- Page 78 Fonctionnement Réglages relatifs à l’installation Appuyez sur le bouton Entrée pour accéder aux réglages lorsque l’icône clignote dans le menu. Détails Utilisez les touches haut/bas pour sélectionner le numéro de l’unité et les touches gauche/droite pour passer à la page suivante/précédente. Les détails du paramètre sont affichés à l’écran. Les informations en gris ne sont pas consultables.
- Page 79 Fonctionnement Réglages des adresses Le mot de passe est 841226 par défaut. Il est possible de définir l’adresse de communication de deux manières différentes : l’une par le biais des réglages de la commande filaire et l’autre par le biais des réglages de la commande filaire et des fonctions automatiques concurrentes.
- Page 80 Fonctionnement Sélection du mode Il est possible de choisir différents modes en fonction de chaque utilisation. 10:30 Basic Setting M o n d a y 2011.11.03 Auto Heat Dry Cool Fan Dry Cool Fan Heat Dry Cool Fan Mode selection Cool Heat Fan Auto By-pass Recovery Heat only...
- Page 81 Fonctionnement Compensation de la température ambiante La valeur de compensation ne s’applique qu’à la température ambiante de la commande filaire. Appuyez sur le bouton Entrée pour arrêter le clignotement des flèches et réglez la température à l’aide des touches gauche/droite. Collecte de la température intérieure La température ambiante intérieure peut être lu à...
- Page 82 Fonctionnement Dans le menu des réglages de base, utilisez les touches haut/bas pour choisir le numéro de l’unité. Utilisez les touches gauche/droite pour déplacer le curseur. Des fonctions ne sont pas disponibles sur certains modèles : elles sont affichées en gris. ÉCONOMIE D’ÉNERGIE (ECO) Les paramètres par défaut du mode économie d’énergie sont les suivants : 23 °C : limite inférieure de température en modes refroidissement et déshumidification.
- Page 83 Fonctionnement 10:30 M o n d a y 2011.11.03 Type No overrun Temp. permitted hour Return Enter Main Durée de fonctionnement Cette fonction mesure la durée de fonctionnement en continu et le temps de fonctionnement total. Lorsque la couleur de la touche Clear devient blanche en bas de l’écran, appuyez sur la touche Entrée pour effacer la durée de fonctionnement cumulé.
- Page 84 Fonctionnement Choix priorité VIP Cette fonction n’est disponible que sur quelques modèles. Réglage spécial Cette fonction permet de régler la classe ESP. Réglages de paramètre Cette fonction n’est disponible que sur quelques modèles. Réglage EEPROM Cette fonction n’est disponible que sur quelques modèles. Détection de mouvement La fonction n’est disponible que sur certains modèles.
- Page 85 Câblage de la commande filaire...
- Page 86 Câblage de la commande filaire 11/16 (17,8) 7/16 (11,8) E16-DESSOUS-DESSUS (A) HZN#2-1 blanc jaune rouge Câblage de la commande filaire Maintenez l’avant de la commande filaire, appuyez sur le couvercle arrière pour ouvrir le boitier de la com- mande. Faites passer le câble de communication à travers le trou situé dans le couvercle arrière. Remontez le couvercle arrière.
- Page 87 Câblage de la commande filaire Raccordez le câble de communication au port CON4 de la commande filaire. Finalement, remontez le couvercle avant et le couvercle arrière pour terminer l’installation de la commande filaire. Remarque : La batterie n’est pas amovible. Elle se recharge lorsque l’appareil est raccordé à une alimentation électrique afin de pouvoir sauvegarder les paramètres utilisateur en cas de panne de courant.
- Page 88 Câblage de la commande filaire Câblage de communication Intérieur 16 Intérieur 1 Intérieur 2 Intérieur N Intérieur 15 (maître) Commande filaire Commande filaire Commande filaire Commande filaire Commande filaire A B C A B C A B C A B C A B C Câble de signal A B C...
- Page 89 Informations conformes à la directive 2006/42/CE (Nom du fabricant) Carrier SCS (Adresse, ville, pays) Route de Thil — 01120 Montluel — France...
- Page 90 Le fabricant se réserve le droit de modifier les spécifications du produit sans préavis.
- Page 91 10:30 Thursday 01.01.2015 Set temp. Set temp. Set temp. Qty.online Standby Defrost Master Outdoor temp. 2 C Outdoor humidity 32%RH Indoor temp. Indoor temp. 21 Indoor temp. 21 Indoor humidit y 32%RH Indoor humidit y 32%RH Indoor humidity 32%RH Menu Mode Mode Mode...
- Page 92 INHALT Teile und Funktionen............1 Bediener:................8 Verdrahtete Steuerung Verdrahtungsanleitung.....31...
- Page 93 Teile und Funktionen Benutzeroberfläche Display Monday 10:30 Qty.online Defrost Set temp. Standby Operation Master Slave PM 2.5 Outdoor temp 22.5 o Indoor temp. 25.5 Outdoor relative hum 32% Indoor relative hum 32% Mode Menu Swing EXQUISITE DESIGN & EXQUISITE LIFE...
- Page 94 Teile und Funktionen Taste Left Modus-Taste in der Hauptbenutzeroberfläche, Zurück-Taste in einer anderen Benutzerober- fläche. „Intelligente Taste“ drücken, um direkt in den intelligenten Modus zu wechseln. Links/Rechts-Taste, Lüfterdrehzahl-Einstelltaste, Swing-Winkel-Einstelltaste in der Hauptbenutzeroberfläche, Richtungs-Einstelltaste in einer anderen Benutzeroberfläche. Auf/Ab-Taste, Temp.-Einstelltaste in der Hauptbenutzeroberfläche, Umschaltrichtung und Werteinstelltaste in einer anderen Benutzeroberfläche.
- Page 95 Teile und Funktionen Anzeige der Hauptbenutzeroberfläche 10:30 Monday Set temp. Qty.online Defrost Standby Operation Master Slave PM 2.5 Outdoor temp 22.5 o Indoor temp. 25.5 Outdoor relative hum 32% Indoor relative hum 32% Menu Swing Mode Symbol Anweisung: Leise-Funktion (Innenraum) Turbo-Funktion.
- Page 96 Teile und Funktionen Lüftungsfunktion Gesundheits-Funktion. Leise-Funktion (außen) 10°C Heizfunktion 10 c Elektrisches Heizen. Gesunder Luftstrom. Gesunder Luftstrom nach oben. Gesunder Luftstrom nach unten. LED auf dem Bedienfeld. Fehlercodefunktion: das Symbol wird in der Hauptbenutzeroberfläche angezeigt, wenn der ver- drahtete Regler oder das mit dem Regler verbundene Innengerät einen Fehler aufweist.
- Page 97 Teile und Funktionen Ablaufplan. Erinnerung an die Filterreinigung. Energiesparende Funktion. Bewegungserkennung. Bewegungserkennung verfolgen Bewegungserkennung ausweichen. 10:30 Datum, Woche und der Anzeigebereich der Uhr. Datumsformat Monday kann über die Zeitfunktion geändert werden. 20.11.11.03 Set temp. Stellt die Temperatur von 60°F ~86°F (16°C~30°C) ein Innenraumtemperatur.
- Page 98 Teile und Funktionen Modus Intelligent Cooling Heating Der Moduszyklus ist abhängig von der Moduseinstellung in der Grundeinstellungsfunktion. Auf/Ab-Swing und Links/Rechts-Swing-Funktion. Lüftergeschwindigkeit. Über die Grundeinstellung können verschiedene Lüfterdrehzahlen eingestellt werden. Qualität online Die Anzahl der Innengeräte, die an den verdrahteten Steuerung angeschlossen sind.
- Page 99 Operation Drücken Sie die Menü-Taste in der Hauptbenutzeroberfläche, um die Menü-Benutzeroberfläche aufzurufen. 10:30 Monday Menu Service help Time Extra Function Error code Schedule Installer Setting Sleep Swing Humidity Control Display Setting Return Enter Main Ablaufplan Zu den Ablaufoptionen gehören die segmentierte Zeitsteuerung und benutzerdefinierte Zeitsteuerung. Sie kann über die angezeigte Einstellung ausgewählt werden.
- Page 100 Operation Monday 10:30 Schedule Heat Cool Cool Heat (mon - fri) (sat - sun (mon - fri) (sat - sun) Wake 6:00 am Leave 9:00 am Return 6:00 pm Sleep 10:00 pm Cancel Kundenspezifisches Timing Wenn es in der Benutzeroberfläche zur Ablaufeinstellung blinkt, drücken Sie die Eingabetaste, um auf die Benutzeroberfläche zuzugreifen.
- Page 101 Operation Wenn Sie den intelligenten Modus auswählen, wird 24°C(76°F) angezeigt, schalten Sie das Gerät aus, stellen Sie die Uhrzeit 12:00 ein, drücken Sie auf "Enable" (Aktivieren) und der Wochentag wird als Standard eingestellt. Wenn der Ablaufplan, den Sie einstellen, bereits zuvor eingestellt wurde, werden Sie von der Benutzeroberfläche darauf hingewiesen, dass der Ablaufplan bereits existiert und Sie ihn abbrechen oder die wiederholten Parameter ändern müssen.
- Page 102 Operation Zeit Wenn das Zeitsymbol blinkt, drücken Sie die Eingabetaste, um zur Zeit-Benutzeroberfläche zu gelangen. Wenn z. B. das angezeigte Standarddatum der 12. Dezember 2014 ist, die Uhrzeit 12:00 und der Wochentag ein Freitag, dann passen Sie die Zeiteinstellung auf die gleiche Weise an, wie bei der Ablaufplaneinstellung. Das Standardformat ist 12 Stunden und Monat/Tag/Jahr.
- Page 103 Operation Wenn die Einstellung von 'Leise (Außen)' auf EIN steht, wird die Funktion 'Außen Leise' aktiviert. Die Einstellung 'Leise (Außen)' kann zeitlich geplant werden, indem Sie die Zeit festlegen, zu der der Leise-Modus aktiv sein soll. Wenn die Zeiteinstellung EIN und AUS von 'Leise Außen' gleich ist, dann ist die Funktion 'Leise (Außen)‘ AUS.
- Page 104 Operation Service Hilfe Drücken Sie die Eingabetaste, um zur Service-Hilfeoberfläche zu gelangen, wenn das Symbol im Menü blinkt. Die Passwortfunktion umfasst die Einstellung und Wiederherstellung des Passworts, der Standardcode ist 841226. Wenn Sie das Passworts eingegeben haben, drücken Sie die Richtungstaste zum Abbrechen oder zur Eingabe.
- Page 105 Operation Swing Drücken Sie die Eingabetaste, um die Benutzeroberfläche aufzurufen, wenn das Symbol "Swing" im Menü blinkt. Das Passwort ist erforderlich. 10:30 Display Setting M o n d a y 2011.11.03 Four-way Type Up/Down Left/Right cassette Angle control Return Enter Main Wenn eine Kombination nicht verfügbar ist, wird die Information eingegraut dargestellt.
- Page 106 Operation Links/Rechts-Swing: Der Links/Rechts-Swing kann je nach Anforderung des Benutzers eingestellt werden. Der Umlauf von 1→2→3→4→5→4→3→2→1 steht für automatischen Swing. Der Standardwinkel in verschiedenen Modi ist wie folgt: Auf/Ab-Swing Intelligent Heizen Kühlen Trocken Lüfter Winkel Winkel 1 5 Winkel 1 Winkel 1 Winkel 1 Winkel Links/Rechts-Swing...
- Page 107 Operation Ablaufplan Segmentiertes Timing und benutzerdefiniertes Timing können eingestellt werden. 10:30 Display Setting M o n d a y 2011.11.03 English Spanish French Language Italian Chinese Russian Temp. unit Schedule Segmented timing Random timing Return Enter Main Anzeige der Innentemperatur Wenn die Funktion eingeschaltet ist, zeigt die Hauptbenutzeroberfläche die Innentemperatur an.
- Page 108 Operation Installateur-Einstellung Drücken Sie die Eingabetaste, um die Einstellung zu übernehmen, wenn das Symbol im Menü blinkt. Details Die entsprechenden Parameterinformationen werden in die er Funktion angezeigt, Auf/Ab-Taste zum Einstellen der Einheitennummer, Links/Rechts-Taste zum Blättern. Einige Informationen sind eingegraut und können nicht abgefragt werden.
- Page 109 Operation Adresseinstellung Das voreingestellte Kennwort lautet 841226. Die Kommunikationsadresse kann auf zwei Arten eingestellt werden: zum einen über die verdrahtete Steuerung und zum anderen über die verdrahtete Steuerung und die Autovervollständigung. Die Zentraladresse und die Kommunikationsadresse zwischen Innen- und Außengerät können entsprechend der Situation vor Ort eingestellt werden.
- Page 110 Operation Auswahl des Modus Verschiedene Moduskombinationen können je nach Anwendung eingestellt werden. 10:30 Basic Setting M o n d a y 2011.11.03 Auto Heat Dry Cool Fan Dry Cool Fan Heat Dry Cool Fan Mode selection Cool Heat Fan Auto By-pass Recovery Heat only Hot water Return...
- Page 111 Operation Revision der Umgebungstemperatur Der Revisionswert gilt nur für die verdrahtete Steuerung der Umgebungstemperatur. Drücken Sie die Eingabetaste, damit die Pfeile sich nicht länger bewegen und stellen Sie die Temperatur mit der Links/Rechts-Taste ein. 10:30 Basic Setting M o n d a y 2011.11.03 -3.5 Ambient...
- Page 112 Operation In der Grundeinstellungs-Benutzeroberfläche drücken Sie die Aufwärts-/Abwärtstaste, um die Einheitennummer einzus- tellen. Drücken Sie dabei die Links-/Rechtstaste, um den Cursor zu bewegen. Einige Funktionen sind bei bestimmten Modellen nicht verfügbar und sind eingegraut dargestellt. Die energiesparenden Standardparameter sind unten aufgeführt: 74°F Unterste Temperaturgrenze des Kühl- und Trockenmodus.
- Page 113 Operation 10:30 M o n d a y 2011.11.03 Type No overrun Temp. permitted hour Return Enter Main Laufzeit Die Funktion erfasst sowohl die Dauerlaufzeit als auch die Gesamtlaufzeit. Wenn die untere Farbe von "Klar" zu weiß wechselt, drücken Sie die Eingabetaste, um die kumulative Laufzeit zu löschen. 10:30 M o n d a y Running Time...
- Page 114 Operation Vip-Prioritätswahl Die Funktion ist nur bei einigen Modellen verfügbar. Spezielle Einstellung Der ESP-Grad kann eingestellt werden, die Einstellmethode ist dieselbe wie oben beschrieben. Einstellung der Parameter Die Funktion ist nur bei einigen Modellen verfügbar. EEPROM-Einstellungen Die Funktion ist nur bei einigen Modellen verfügbar. Bewegungserkennung Die Funktion ist für einige Modelle verfügbar.
- Page 115 Verdrahtete Steuerung Verdrahtungsanweisung...
- Page 116 Verdrahtete Steuerung Verdrahtungsanweisung 11/16 (17.8) 7/16 (11.8) E16-UNTEN-OBEN(A) HZN#2-1 Weiß Gelb Verdrahtete Steuerung Verdrahtung Halten Sie die Vorderseite der Steuerung, drücken Sie die hintere Abdeckung nach unten, um die hintere Abdeckung der Steuerung zu öffnen. Führen Sie das Kommunikationskabel durch das Loch in der hinteren Abdeckung. Befestigen Sie die hintere Abdeckung.
- Page 117 Verdrahtete Steuerung Verdrahtungsanweisung Schließen Sie das Kommunikationskabel an den Anschluss CON4 der verdrahteten Steuerung an. Setzen Sie abschließend die vordere Abdeckung der verdrahteten Steuerung auf die hintere Abdeckung, um die Installation abzuschließen. Hinweis: Der Akku ist nicht entnehmbar und wird aufgeladen, während das Gerät an die Stromversorgung angeschlossen ist. Die Benutzere- instellungen werden bei einem Stromausfall gespeichert.
- Page 118 Verdrahtete Steuerung Verdrahtungsanweisung Kommunikation Verdrahtung Innen 16 (Hauptgerät Innen 1 Innen 2 Innen N Innen 15 Verdrahtete Steuerung Verdrahtete Steuerung Verdrahtete Steuerung Verdrahtete Steuerung Verdrahtete Steuerung A B C A B C A B C A B C A B C Steuerverdrahtung der Leitung A B C Steuerung, polar...
- Page 119 Informationen gemäß Richtlinie 2006/42/EC (Name des Herstellers) Carrier SCS (Adresse, Ort, Land) Route de Thil - 01120 Montluel - Frankreich...
- Page 120 Der Hersteller behält sich das Recht vor, Produktspezifikationen ohne Vorankündigung zu ändern.
- Page 121 10:30 Thursday 01.01.2015 Set temp. Set temp. Set temp. Qty.online Standby Defrost Master Outdoor temp. 2 C Outdoor humidity 32%RH Indoor temp. Indoor temp. 21 Indoor temp. 21 Indoor humidit y 32%RH Indoor humidit y 32%RH Indoor humidity 32%RH Menu Mode Mode Mode...
- Page 122 CONTENIDOS Piezas y Funciones............1 Funcionamiento.............8 Instrucciones de cableado de controlador por cable ...31...
- Page 123 Piezas y Funciones Visualización de Interfaz Monday 10:30 Qty.online Defrost Set temp. Standby Operation Master Slave PM 2.5 Outdoor temp 22.5 o Indoor temp. 25.5 Outdoor relative hum 32% Indoor relative hum 32% Mode Menu Swing EXQUISITE DESIGN & EXQUISITE LIFE...
- Page 124 Piezas y Funciones Teclas Left Tecla de modo en la interfaz principal, tecla de retorno en otra interfaz. Tecla inteligente, presionarla para ir directamente al modo inteligente. Tecla izquierda/derecha, tecla de ajuste de la velocidad del ventilador, tecla de ajuste del ángulo de oscilación en la interfaz principal, tecla de ajuste de dirección en otra interfaz.
- Page 125 Piezas y Funciones Visualización de Interfaz Principal 10:30 Monday Qty.online Defrost Set temp. Standby Operation Master Slave PM 2.5 Outdoor temp 22.5 o Indoor temp. 25.5 Outdoor relative hum 32% Indoor relative hum 32% Swing Menu Mode Instrucciones de los iconos Función tranquila (interior) Función turbo.
- Page 126 Piezas y Funciones Función de ventilación Función salud. Función tranquilo (exterior) fuera Función de calefacción 10 °C 10 c Calefacción eléctrica. Caudal de aire sano. Caudal de aire sano hacia arriba. Caudal de aire sano hacia abajo. LED en panel. Función código de error, se mostrará...
- Page 127 Piezas y Funciones Programa. Recordatorio de limpieza de filtro. Función de ahorro de energía. Sensor de movimiento. Seguir sensor de movimiento. Eludir sensor de movimiento. Fecha, semana y área de visualización de reloj. Puede cambiar el formato 10:30 Monday de fecha 20.11.11.03 a través de la función tiempo.
- Page 128 Piezas y Funciones Modo Intelligent Cooling Heating El ciclo de modo depende de la configuración de modo en la función de configuración básica. Función oscilación arriba/abajo e izquierda/derecha. Velocidad de ventilador. Puede configurar diferentes ciclos de velocidad de ventilador a través de la configuración básica. Calidad online El número de unidades de interior conectadas al controlador por cable.
- Page 129 Funcionamiento Presionar la tecla menú en la interfaz principal para introducir la interfaz de menú. 10:30 Monday Menu Time Extra Function Error Code Service help Schedule Installer Setting Sleep Swing Humidity Control Display Setting Return Enter Main Programa Las opciones de programa incluyen la sincronización segmentada y la sincronización personalizada. Puede seleccio- narse a través de la configuración mostrada.
- Page 130 Funcionamiento Mantener presionada la tecla ‘Izquierda/Derecha’ para acelerar el ajuste del tiempo. Sincronización personalizada destella en la interfaz de edición de Programa, presionar la tecla Introducir para entrar en la interfaz.
- Page 131 Funcionamiento Al seleccionar el modo Inteligente, mostrará 24°C(76 °F), cerrar el interruptor, configurar la hora 12:00, presionar Habilitar y el día de la semana será el predeterminado. Si el programa que configura ya se ha configurado antes, la interfaz le indicará que el programa ya existe, tiene que cancelarlo o cambiar los parámetros repetidos.
- Page 132 Funcionamiento Tiempo Si el icono de tiempo destella, presione Introducir para ir a la interfaz de tiempo. Por ejemplo, si la fecha predeterminada mostrada es 12 de diciembre, 2014, la hora es 12:00PM y el día de la semana es viernes, ajuste la configuración de tiempo de la misma manera que la configuración de programa. El formato predeterminado es de 12 horas y Mes/Día/Año.
- Page 133 Funcionamiento Si la Configuración de ‘Tranquilo (exterior)’ está en ON, se activa la función ‘tranquilo exterior'. Puede programar el ajuste “Tranquilo(exterior)” configurando la hora a la que el modo Tranquilo se activará. Si el ajuste de hora ON y OFF de ‘tranquilo exterior’ es el mismo, la función ‘Tranquilo(exterior)’ está en OFF.
- Page 134 Funcionamiento Ayuda del servicio de asistencia Presionar la tecla Introducir para entrar en la interfaz de ayuda del servicio de asistencia cuando el icono destella en el menú. La función Contraseña incluye la configuración y recuperación de la contraseña, el código predeterminado es 841226.
- Page 135 Funcionamiento Swing Presionar la tecla Introducir para entrar en la interfaz de código de error si el icono destella en el menú. Se requ ere- contraseña. 10:30 Swing M o n d a y 2011.11.03 Four-way Type Up/Down Left/Right cassette Angle control Return...
- Page 136 Funcionamiento Oscilación Izquierda/Derecha Puede ajustar la oscilación Izquierda/Derecha según los requisitos del usuario. La circulación de 1→2→3→4→5→4→3→2→1 representa la oscilación automática El ángulo predeterminado en modos diferentes es el siguiente: Oscilación Arriba/Abajo Inteligente Calefacción Refrigeración En seco Ventilador Ángulo Ángulo 1 5 Ángulo 1 Ángulo 1 Ángulo...
- Page 137 Funcionamiento Programa Puede configurar la sincronización segmentada y la sincronización personalizada. Visualización de temperatura interior Si ACTIVA esta función, la interfaz principal mostrará la temperatura interior. Si DESACTIVA la función, la interfaz principal no mostrará la temperatura interior. Visualización de la humedad interior Solo disponible en algunos modelos.
- Page 138 Funcionamiento Configuración de instalador Presionar la tecla para introducir la configuración cuando el icono destella en el menú. Detalles Se mostrará la información del correspondiente parámetro en esta función, tecla Arriba/Abajo para ajustar el número de unidad, tecla Izquierda/Derecha para cambiar de página. La información resaltada en gris no se puede consultar.
- Page 139 Funcionamiento Configuración de dirección La contraseña predeterminada es 841226. Puede configurar la dirección de comunicación de dos maneras, una a través de la configuración del controlador por cable y la otra a través de la configuración automática del controlador por cable. Puede ajustar la dirección central y la dirección de comunicación entre unidad interior y unidad exterior dependiendo de la situación en el sitio.
- Page 140 Funcionamiento Selección de modo Puede configurar diferentes combinaciones de modo de acuerdo a cada aplicación. Protocolo nuevo/viejo El valor predeterminado es auto-adaptación. Se usa esta función para ajustes básicos. Se recomienda no dejarla en descanso o puede que el controlador no funcione normalmente. Memoria tras corte de alimentación eléctrica Si el ajuste de esta función está...
- Page 141 Funcionamiento Revisión de la temperatura ambiente El valor de revisión es únicamente válido para la temperatura ambiente de controlador por cable. Presionar la tecla Introducir para dejar las flechas estáticas y ajustar la temperatura usando la tecla Izquierda/ Derecha. Registro de la temperatura interior Puede leer la temperatura del entorno desde los controladores por cable de la unidad interior a través de este ajuste.
- Page 142 Funcionamiento En la interfaz de configuración básica, presionar la tecla Arriba/Abajo para ajustar el número de unidades; presionar la tecla Izquierda/Derecha para mover el cursor. Algunas funciones no están disponibles en algunos modelos y la información se resaltará en gris. Los parámetros predeterminados de ahorro de energía se enumeran debajo: 74°Límite de temperatura más baja de modo refrigeración en seco.
- Page 143 Funcionamiento Tiempo de funcionamiento La función registra el tiempo de funcionamiento continuado así como el tiempo total de funcionamiento. Cuando el color de la parte inferior de “Borrar” cambia a blanco, presionar la tecla Introducir para borrar el tiempo de funcionamiento acumulado.
- Page 144 Funcionamiento Elección de prioridad Vip Está función está solo disponible en algunos modelos. Configuración especial Puede configurar el grado ESP, el método de configuración es el mismo que el de las instrucciones mencionadas anteriormente. Configuración de parámetros Está función está solo disponible en algunos modelos. Configuración EEPROM Está...
- Page 145 Instrucciones de cableado de controlador por cable...
- Page 146 Instrucciones de cableado de controlador por cable 11/16 (17.8) 7/16 (11.8) E16-INFERIOR-SUPERIOR(A) HZN#2-1 Blanco Amarillo Rojo Cableado de controlador por cable Sostener la parte delantera del controlador, empujar hacia abajo para abrir la la tapa trasera del controlador. Pasar el cable de comunicación a través del orificio de la tapa trasera. Volver a poner la tapa trasera.
- Page 147 Instrucciones de cableado de controlador por cable Conectar el cable de comunicación al puerto CON4 del controlador por cable. Por último, acoplar la tapa delantera del controlador por cable a la tapa trasera para completar la instalación. Nota: La batería no se puede extraer y se recarga durante el tiempo que la unidad está conectada para guardar los ajustes del usuario en caso de corte de electricidad.
- Page 148 Instrucciones de cableado de controlador por cable Cableado de comunicación Interior 16 (unidad maestra Interior 1 Interior 2 Interior N Interior 15 Controlador por cable Controlador por cable Controlador por cable Controlador por cable Controlador por cable A B C A B C A B C A B C...
- Page 149 Información conforme a la Directiva 2006/42/EC (Nombre del fabricante) Carrier SCS (Dirección, ciudad, país) Route de Thil - 01120 Montluel – France...
- Page 150 El fabricante se reserva el derecho de modificar las especificaciones del producto sin previo aviso.
- Page 151 Controlador central Instalação e Manual do Proprietário NOME DO MODELO 40VCW317FQEE Edição: 2020-09...
- Page 152 CONTEÚDO Peças e Funções............1 Funcionamento............8 Instrução da fiação do controlador com fio.....31...
- Page 153 Peças e Funções Apresentação de interface...
- Page 154 Peças e Funções Tecla Left Tecla do modo na interface principal, tecla de retorno noutra interface. Tecla inteligente, prima-a para ir diretamente para o modo inteligente. Tecla esquerda/direita, tecla de ajuste de velocidade do ventilador, tecla de ajuste de ângulo de oscilação na interface principal, tecla de ajuste de direção noutra interface.
- Page 155 Peças e Funções Apresentação de interface principal 10:30 Monday Qty.online Defrost Set temp. Standby Operation Master Slave PM 2.5 Outdoor temp 22.5 o Indoor temp. 25.5 Outdoor relative hum 32% Indoor relative hum 32% Swing Menu Mode Instrução do ícone: Função silenciosa (interior) Função turbo.
- Page 156 Peças e Funções Função de ventilação. Função de estado de funcionamento. Função silenciosa (exterior). fora Função de aquecimento de 10 ºC. 10 c Aquecimento elétrico. Caudal de ar do estado de funcionamento. Caudal de ar do estado de funcionamento para cima. Caudal de ar do estado de funcionamento para baixo.
- Page 157 Peças e Funções Agendamento. Lembrete de limpeza de filtro. Função de poupança de energia. Sensor de movimento. Sensor de movimento de seguimento. Sensor de movimento de evasão. 10:30 Data, semana e área de apresentação do relógio. O formato da data Monday pode ser alterado através da função das horas.
- Page 158 Peças e Funções Modo Intelligent Cooling Heating O ciclo do modo depende da configuração do modo na função de ajuste básico. Função de oscilação para cima/para baixo e oscilação para a esquerda/ direita. Velocidade do ventilador. Podem ser definidos diferentes ciclos de velocidade do ventilador através do ajuste básico.
- Page 159 Funcionamento Prima a tecla de menu na interface principal para entrar na interface do menu. 10:30 Monday Menu Service help Time Extra Function Error Code Schedule Installer Setting Sleep Swing Humidity Control Display Setting Return Enter Main Agendamento As opções de agendamento incluem horário segmentado e horário personalizado. Pode ser selecionado através das definições apresentadas.
- Page 160 Funcionamento Continue a pressionar a tecla "Esquerda/Direita" para acelerar o ajuste das horas. Horário personalizado Quando piscar na interface de edição de agendamento, prima a tecla Enter para entrar na interface.
- Page 161 Funcionamento Ao selecionar o modo inteligente, irá apresentar 24 °C(76 °F), desligue a alimentação, defina as horas para 12:00, prima Ativar e dia da semana será a predefinição. Se o agendamento que definiu já tiver sido definido anteriormente, a interface irá avisá-lo de que o agendamento já...
- Page 162 Funcionamento Horas Quando o ícone das horas, prima Enter para ir para a interface das horas. 10:30 Time M o n d a y 2011.11.03 2014 Time setting year month Mon. hour minute week Date format 12-hour 24-hour setting Year/Month/Day Month/Day/Year Day/Month/year Return...
- Page 163 Funcionamento Se a definição de "Silencioso (exterior)" estiver LIGADA, a função "Silencioso exterior" é ativada. A definição "Silencioso(exterior)" pode ser agendada ao definir as horas em que o Modo silencioso será ativado. Se a definição das horas LIGAR e DESLIGAR do "silencioso exterior" for a mesma, a função "Silencioso (exterior)"...
- Page 164 Funcionamento Ajuda de manutenção Prima a tecla Enter para ir para a interface de ajuda de manutenção quando o ícone estiver a piscar no menu. A função de palavra-passe inclui a definição e recuperação da palavra-passe, o código predefinido é 841226. Quando terminar de introduzir a palavra-passe, prima a tecla de direção para cancelar ou introduzir.
- Page 165 Funcionamento Oscilação Prima a tecla Enter para entrar na interface quando o ícone de oscilação estiver a piscar no menu. É necessária uma palavra-passe. Se uma combinação não estiver disponível, a informação será apresentada a cinzento. Se nenhum modo de oscilação estiver definido, a tecla de oscilação será utilizada para ajustar a velocidade do ventilador.
- Page 166 Funcionamento Oscilação esquerda/direita: A oscilação esquerda/direita pode ser ajustada mediante os requisitos do utilizador. A circulação de 1→2→3→4→5→4→3→2→1 representa a oscilação automática O ângulo predefinido no modo diferente é o seguinte: Oscilação para cima/para baixo Inteligente Aquecimento Arrefecimento Seco Ventilador Ângulo Ângulo 1 5 Ângulo...
- Page 167 Funcionamento Agendamento O horário segmentado e o horário personalizado podem ser definidos. Apresentação de temperatura interior Se a função for LIGADA, a interface principal apresenta a temperatura interior. Se a função for DESLIGADA, a interface principal não irá apresentar a temperatura interior. Apresentação da humidade interior Está...
- Page 168 Funcionamento Definições de instalação Prima a tecla Enter para entrar nas definições quando o ícone de oscilação estiver a piscar no menu. Detalhes A informação do parâmetro correspondente será apresentado nesta função Tecla Para cima/Para baixar para ajustar o número da unidade, tecla Esquerda/Direita para virar a página. Algumas informações estão a cinzento e não podem ser investigadas.
- Page 169 Funcionamento Ajuste de endereço A palavra-passe predefinida é 841226. O endereço de comunicação pode ser definido de duas formas. A primeira, através da definição do controlador com fio e a outra através da definição do controlador com fio e de concorrência automática.
- Page 170 Funcionamento Seleção de modo Diferentes combinações de modos podem ser definidos em conformidade com cada aplicação. Protocolo novo/antigo A predefinição é a adaptação automática. A função é utilizada para as definições básicas. Recomenda-se não repousar ou o comando pode não funcionar normalmente. Memória de alimentação desligada Se a definição da função estiver ligada, o controlador com fio irá...
- Page 171 Funcionamento Revisão da temperatura ambiente O valor de revisão é válido apenas para a temperatura ambiente do controlador com fio. Prime a tecla Enter para tornar as setas estáticas e ajuste a temperatura utilizando a tecla esquerda/direita. Leitura de temperatura interior A temperatura ambiente pode ser lida a partir dos controladores com fio ou da unidade interior através desta defini- ção.
- Page 172 Funcionamento Na interface de ajuste básico, prima a tecla para cima/para baixo para ajustar o número da unidade; prima a tecla esquerda/direita para mover o cursor. Algumas funções não estão disponíveis para alguns modelos e a informação é mostrada a cinzento. Os parâmetros de predefinição de poupança de energia estão indicados abaixo: 74 °F Limite inferior da temperatura dos modos Arrefecimento e Seco.
- Page 173 Funcionamento Tempo de funcionamento A função regista o tempo de funcionamento contínuo e o tempo de funcionamento total. Quando a cor "transparente" da parte inferior mudar para branco, prima a tecla Enter para limpar o tempo de funcionamento acumulativo. 10:30 M o n d a y Running Time 2011.11.03...
- Page 174 Funcionamento Escolha prioritária Vip A função está disponível apenas para alguns modelos. Definição especial O grau ESP pode ser definido, o método de definição é o mesmo que na instrução mencionada acima. Definição de parâmetros A função está disponível apenas para alguns modelos. Definição EEPROM A função está...
- Page 175 Instrução da fiação do controlador com fio...
- Page 176 Instrução da fiação do controlador com fio 11/16 (17,8) 7/16 (11,8) E16-INFERIOR-SUPE- RIOR~ HZN#2-1 Branco Amarelo Vermelho Fiação do controlador com fio Segure a parte da frente do controlador, faça pressão na tampa traseira para abrir a tampa do controlador. Coloque o fio de comunicação através do orifício na tampa traseira.
- Page 177 Instrução da fiação do controlador com fio Ligue o fio de comunicação à porta CON4 do controlador com fio. Por fim, coloque a tampa frontal do controlador com fio à tampa traseira para completar a instalação. Nota: A bateria não pode ser removida e recarrega enquanto a unidade está ligada à alimentação de modo a guardar as definições do utilizador se houver um corte de energia.
- Page 178 Instrução da fiação do controlador com fio Fiação de comunicação Interior 16 (unidade mestre Interior 1 Interior 2 Interior N Interior 15 Controlador com fio Controlador com fio Controlador com fio Controlador com fio Controlador com fio A B C A B C A B C A B C...
- Page 179 Informações de acordo com a Diretiva 2006/42/EC (Nome do fabricante) Carrier SCS (Endereço, cidade, país) Route de Thil - 01120 Montluel – França...
- Page 180 O fabricante reserva-se o direito de alterar qualquer especificação de produtos sem aviso prévio.
Need help?
Do you have a question about the XCT7 40VCW317FQEE and is the answer not in the manual?
Questions and answers