Table of Contents
Advertisement
Quick Links
Advertisement
Table of Contents

Summary of Contents for Lantech QL-400
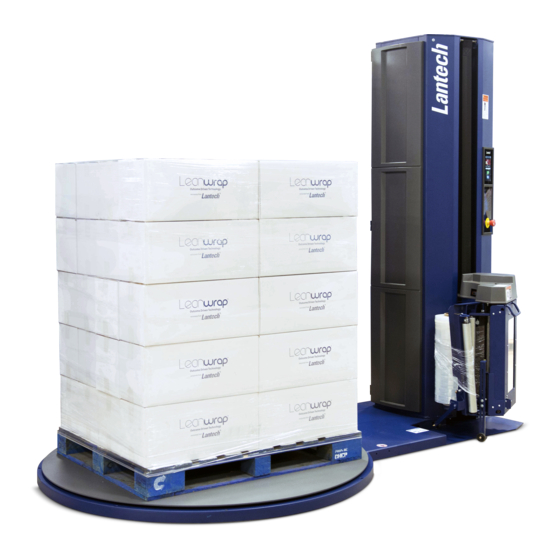
- Page 1 QL-400 Semi Automatic Stretch Wrap Machine Manual Serial Number: QM0056781...
-
Page 2: Table Of Contents
TABLE OF CONTENTS Introduction ............................. 5 Support ............................6 Specifications ........................... 7 Machine Specifications ......................... 8 Introduction to Load Guardian ....................10 Options ............................11 Safety .............................. 13 General Safety ..........................13 Personnel Safety .......................... 13 Lockout/Tagout Procedures ......................14 Safety and Environmental Controls .................... - Page 3 TABLE OF CONTENTS 6.5.7 Film Calibration ........................45 6.5.8 Wrap Apps Defaults ......................46 6.5.9 Options Defaults ......................... 46 6.5.10 System ..........................47 6.5.11 Service ..........................47 6.5.12 Personalization ........................48 6.5.13 User Access ......................... 48 6.5.14 Reports ..........................50 6.5.15 Help Menu ..........................
- Page 4 TABLE OF CONTENTS Pallet Grip® ..........................82 7.6.1 Tilting Roller ........................82 7.6.2 Groove Roller ........................83 Appendix ............................85 Glossary ............................85 Warranty ............................. 87 Wrap Problems ..........................88 8.3.1 Containment Force Variation ....................88 8.3.2 Product Crushes at the Edges of the Load ................88 8.3.3 Product Crushes at the Top of the Load ................
-
Page 5: Introduction
INTRODUCTION Introduction Section 1 – Introduction This manual tells the operator and maintenance personnel how to safely install and operate the machine. The function of the manual is to make sure that the operator and maintenance personnel have complete instructions. Section 2 –... -
Page 6: Support
LANTECH CHINA - SHANGHAI Phone Email Parts Parts LCH.Parts@Lantech.com +86 21 6221 5688 Service Service Hotline LCH.Service@Lantech.com +86 40 0877 1972 LANTECH NORTH & SOUTH AMERICA – LOUISVILLE KENTUCKY Phone Email Parts Parts tsg@lantech.com 502-815-9101 Service Service 502-267-8864 tsc@lantech.com 502-815-9103... -
Page 7: Specifications
SPECIFICATIONS Specifications All Lantech® machines have a serial number tag in 1 of these locations: On the Door of the Enclosure On the Electrical Enclosure Note: The “exposed” metal parts on all Stretch Wrap Machines have a heavy Rust Preventative applied before shipment. -
Page 8: Machine Specifications
SPECIFICATIONS Machine Specifications QL-400 General 2032 mm (80”) Wrap Height Dimensions 3023 mm L x 1702 mm W x 2337 mm H Standard Height (119" L x 67" W x 92" H) 2794 mm (110”) Wrap Height Dimensions 3023 mm L x 1702 mm W x 3099 mm H Extended Height (119"... - Page 9 SPECIFICATIONS Turntable 1651 mm (65”) Turntable Diameter Turntable Speed 15 rpm 70 mm (2 ¾”) Turntable Height 1219 mm (48”) Diameter Turntable Bearing Support 1 hp (.75 kW) 230/460 VAC 1800 rpm 3 Phase, 50/60 Hz TEFC Turntable Drive Motor - 40:1 Speed Reducer Film Delivery System (FDS) 1/2 hp (.37 kW) 230/460 VAC 1800 rpm TEFC FDS Lift Drive...
-
Page 10: Introduction To Load Guardian
SPECIFICATIONS Introduction to Load Guardian Why is Load Guardian important? Load Guardian is a control system that helps the Operator set the Wrap Profiles quickly and easily. Containment Force is what holds the load together and is the number of layers of film multiplied by the film tension. -
Page 11: Options
OPTIONS Options This section includes the options that are not on the standard machine. - Page 12 OPTIONS...
-
Page 13: Safety
SAFETY Safety This manual tells the operator and maintenance personnel how to safely install and operate the machine. This section includes: • General safety • Personnel safety • Lockout/Tagout Procedures • Safety & Environmental Controls • Warnings, Cautions and Notes •... -
Page 14: Lockout/Tagout Procedures
SAFETY Lockout/Tagout Procedures Lockout/Tagout Procedures Obey these procedures to prevent an injury from unexpected energizing, start-up, release of stored energy. This applies to local, regional, and federal controls, and includes the current controls for: • Australia – OSHA – Prevention of Unexpected Startup •... -
Page 15: Warnings, Cautions And Notes
SAFETY Warnings, Cautions and Notes Warnings, Cautions and Notes Warning Tells the operator that there is a hazard that can cause a serious injury. Caution Tells the operator that there is a hazard that can cause: • A minor injury •... -
Page 16: Pictograms
SAFETY Pictograms The pictograms tell personnel of possible dangerous areas around the machine. Obey all pictograms and safety decals. Some of the pictograms in the list below do not apply to your machine. Do Not Operate Without Guard in No Entry Position Maximum Capacity Do Not Step... - Page 17 SAFETY Do Not Walk on Conveyor Pull In Warning Hit is Possible From Above Obey the Safety Instructions Machine Can Fall Hit is Possible From The Side Fall Warning Do Not Reach Film Delivery System Warning Cut Warning Crush Warning...
-
Page 18: Residual Risk
SAFETY Residual Risk Residual Risk - There is a risk when you operate, repair this machine even when personnel obeys all safety requirements. Q Series®, S Series™, Lanringer and Ring Straddle Risk: There is a risk of shock when you perform a troubleshooting task with the power to the machine “On”. -
Page 19: Installation Instructions
INSTALLATION Installation Instructions Read the Installation section and do the steps in sequence. Note: Illustrations are for reference only. Note: Functions, descriptions and data can be different on your machine. Refer to Section 3 Options. Note: Make sure that only qualified personnel complete the steps for Installation, Maintenance and Troubleshooting. -
Page 20: Personnel, Equipment And Tools
INSTALLATION Personnel, Equipment and Tools Standard Height Personnel and Safety Equipment • 1 Forklift Operator • 1 Electrical/Mechanical Technician Equipment • Forklift with 2000 kg (4000 lb) capacity and 5 m (15’ ) lift • 1 Ladder Tools • Wrenches and Sockets (Metric and Standard) Extended Height (Mast Ships in Horizontal Position) Personnel and Safety Equipment •... -
Page 21: Installation
INSTALLATION Installation Standard Height - Mast is in the upright position Step 1 - Set the Machine in position 1. Remove the bolts, brackets and boards that hold the machine and components to the skid. Use a 9/16” socket to remove the lag bolts. 2. - Page 22 INSTALLATION Step 2 – Remove the FDS Shipping Bracket from the Mast 1. Remove the M10 nut that holds the bracket to the base. 2. Remove the M8 bolt and nut that hold the bracket to the FDS. FDS Shipping Bracket Step 3 –...
- Page 23 INSTALLATION Step 4 - Remove the wire ties from the FDS. Remove the wire ties from the FDS. Step 5 - Connect the power cord to the dedicated, grounded electrical supply. Note: The machine has a 3.6 m (12’) power cord with a 20-amp plug. Use a 20-amp receptacle. Do not use an extension cord.
- Page 24 INSTALLATION...
-
Page 25: Operator Instructions
WARNING Obey all safety decal instructions and warnings. WARNING Do not make a change to this machine without approval from Lantech. It can cause a safety hazard and cancel the warranty. WARNING Do not use this machine with hazardous materials. -
Page 26: Sequence Of Operation
OPERATOR INSTRUCTIONS Sequence of Operation The sequence starts with a load on the turntable. Move the Main Disconnect switch to the On position. Reset the E-stop. Push Reset. Refer to Section 6.5.2 and make a new a profile. Select a Profile. Push Film Assist. -
Page 27: Components
OPERATOR INSTRUCTIONS Components Mast Film Delivery System (FDS) Turntable Controls... - Page 28 OPERATOR INSTRUCTIONS Turntable Turntable Top Urethane Ring Drive Ring with Home Proximity Actuator Bearing Support Ring Center Bearing Motor and Belt Tensioner (Motor not Shown)
-
Page 29: Assemblies
OPERATOR INSTRUCTIONS Assemblies 6.3.1 FDS and Counterweight The FDS pre-stretches and applies the film The belt connects the counterweight and the FDS The counterweight balances the weight of the FDS. 6.3.2 FDS Lift Drive The drive raises and lowers the FDS during the wrap cycle. -
Page 30: Ez Thread Gate
OPERATOR INSTRUCTIONS 6.3.3 EZ Thread Gate The gate opens to 2 positions: To thread the film: • Release the latch to open the gate to thread the film. To get access to the Rollers and the Gate: • Lift the lever on the bottom right side of the gate for the access position... -
Page 31: Pallet Grip
OPERATOR INSTRUCTIONS 6.3.4 Pallet Grip Pallet Grip locks the load to the pallet. It includes a groove roller and a tilting roller. As the FDS lowers, Pallet Grip engages and makes a cable of film. The cable attaches below the top boards of the pallet to lock the load to the pallet. -
Page 32: Controls
OPERATOR INSTRUCTIONS Controls The Operator Controls are on the side of the mast. Main Disconnect This is a lockable switch that starts and stops the main power supply. The standard HMI is a touch screen. Reset (//) This blue illuminated button controls the power to the machine. The button illuminates and all functions are available to the operator. -
Page 33: Icon List
OPERATOR INSTRUCTIONS 6.4.1 Icon List Alarm Counter Home Alarm History Increase Back Loads per Hour Clone Log In Decrease Main Menu Diagnostics Manual Jog Dispenser Options Display Settings Personalization Edit Profile Production Counter Erase Production Reports Film Assist Profile Icon Film Calibration Profile Name Film Coverage... - Page 34 OPERATOR INSTRUCTIONS Service Visual Start Wrap Apps Defaults System Wrap Cycle Data System Information Wrap Height Turntable Home Wrap Problems User Access Wrap Quality...
-
Page 35: Operator Controls
OPERATOR INSTRUCTIONS Operator Controls The HMI shows the machine status, fault conditions and instructions. The list below includes the selections that can show on the HMI. Login Push this button to get access to the profiles and the settings. -
Page 36: Select A Ready-To-Wrap Profile
OPERATOR INSTRUCTIONS 6.5.1 Select a Ready-to-Wrap Profile There are 10 pre-programmed Profiles already set in your machine Put a load on the turntable and see if you can find your load in the Ready-to-Wrap Profile selection If you can, select the Profile If you cannot identify your load in the list, continue to 6.5.2 and Create a Profile Pre-programmed Profiles: Regular Light –... -
Page 37: Create A Profile
OPERATOR INSTRUCTIONS 6.5.2 Create a Profile Create a Profile Push this button to create a new profile. Select the Load Height The height of the load is less than 1016 mm (40”). Short Medium The height of the load is 1016 mm to 2032 mm (40”... - Page 38 OPERATOR INSTRUCTIONS Select the Shape of the Load Similar Size This selection is for loads with layers of the Layers same dimensions. This load type uses a higher Film Tension and fewer layers of film. Different Size This selection is for loads with layers of Layers different dimensions.
- Page 39 OPERATOR INSTRUCTIONS Select the Containment Force (CF) CF Range These loads include: 1- 2 kg - Paper towels/Tissues (2 - 5 lb) - Dust Cover Wrap - Empty Containers Medium These loads include: 2 - 3 kg - Short case goods/Cartons (5 - 7 lb) - Short trays/Displays - Beverage Cans/Light order pick...
- Page 40 OPERATOR INSTRUCTIONS Wrap Apps Use this menu to change, adjust the wrap sequence. You can add multiple Wrap Apps for the wrap sequence. The Wrap Apps include: • Corner Boards • Labels • One-way Wrap • Stack & Band • Stack & Wrap •...
- Page 41 OPERATOR INSTRUCTIONS Profile Color Select a Profile Color. 1. Select the color. 2. Select Save.
-
Page 42: Home Menu
OPERATOR INSTRUCTIONS 6.5.3 Home Menu When the power is On, the Home menu shows on the display. Start Push this button to start the wrap cycle. Initialize This sets the safety circuits and puts all components in the start position. Film Assist Push this button to release the film from the FDS for a preset time. -
Page 43: Manual Jog
OPERATOR INSTRUCTIONS 6.5.4 Manual Jog Manual Jog This screen gives access to the manual controls and settings for the machine Film Delivery System (FDS) Use the arrows to move the FDS in the up, down directions. Use the Speed control to increase, decrease the FDS travel speed. -
Page 44: Wrapper Settings
OPERATOR INSTRUCTIONS 6.5.6 Wrapper Settings Wrapper Settings Use this menu to change, adjust the settings. Film Delivery System Settings • Film Assist Time • Film Assist Tension • Film Break Time • Home Rotation on Film Break • FDS Position after a Film Break... -
Page 45: Film Calibration
OPERATOR INSTRUCTIONS Troubleshoot This module collects data and lets the Operator send a report for a Program fault. 6.5.7 Film Calibration Film Calibration Use this screen to calibrate the Containment Force. -
Page 46: Wrap Apps Defaults
OPERATOR INSTRUCTIONS 6.5.8 Wrap Apps Defaults Wrap Apps Defaults Use this menu to change, adjust the wrap sequence. You can add multiple Wrap Apps for the wrap sequence. The Wrap Apps include: • Cornerboards • Labels • One-way Wrap • Stack &... -
Page 47: System
OPERATOR INSTRUCTIONS 6.5.10 System System Use this menu to get access to the machine settings. The settings include: • Sounds • Color • Network Settings • Shift Setup • Language & Formats • Date & Time • Load Guardian Introduction •... -
Page 48: Personalization
OPERATOR INSTRUCTIONS 6.5.12 Personalization Personalization Use this menu to change, adjust the settings. The settings include: • Language & Formats • User Image • Display • Color 6.5.13 User Access User Access Use this screen to create, adjust the User settings. - Page 49 OPERATOR INSTRUCTIONS Profile Selection Gives permission to select a Profile Operation Gives permission to operate the machine Bypass Mode Gives permission to put the machine in Bypass Mode Film Settings Gives permission to set, adjust the film settings Settings Gives permission to set, adjust the settings Profile Management Gives permission to create, select, or edit Profiles...
-
Page 50: Reports
OPERATOR INSTRUCTIONS 6.5.14 Reports Reports This menu gives access to the machine production data. The data includes: • Cycle Data • Alarm History • Alarm Counter • Loads Per Hour • Production Reports • Production Counter • Profile Usage • Cycle Tension Cycle Data This screen shows:... - Page 51 OPERATOR INSTRUCTIONS Alarm History This screen shows the list of the faults and alarms that have occurred. Alarm Counter This screen shows the list of the alarms and the number of times that each alarm has occurred.
- Page 52 OPERATOR INSTRUCTIONS Loads Per Hour Production Reports This screen shows machine: • Loads Wrapped • Film Breaks • Stops (Operator) • Stops (Fault) • Available • Downtime...
- Page 53 OPERATOR INSTRUCTIONS Production Counter This screen shows machine: • Loads Wrapped • Film Breaks • Stops (Operator) • Stops (Fault) • Available • Downtime Profile Usage...
- Page 54 OPERATOR INSTRUCTIONS Cycle Tension...
-
Page 55: Help Menu
OPERATOR INSTRUCTIONS 6.5.15 Help Menu Help The Help screens give information and instructions on the functions and operation of the machine This menu includes: • Wrap Quality • Wrap Problems • Profile Details • Machine User Manual • CF Tool Manual •... - Page 56 OPERATOR INSTRUCTIONS Wrap Problems Wrap Problems This menu gives the possible causes and solutions for problems that can occur during the wrap cycle. The Wrap Problems include: • Excessive Film Breaks • Containment Force Variation • Excessive Film Use • Increase the Throughput •...
- Page 57 OPERATOR INSTRUCTIONS Profile Details This screen gives information and tips to create a load profile.
-
Page 58: Edit Profile
OPERATOR INSTRUCTIONS 6.5.16 Edit Profile Edit a Profile 1. Push More Profiles on the Home menu. 2. Select a profile. 3. Push Edit Profile. This gives access to the Profile Settings menu. Film Tension Increase, decrease the film tension for the top, the bottom and the middle of the load. - Page 59 OPERATOR INSTRUCTIONS Film Coverage Increase, decrease the top and the bottom wraps, the film overlap up, down. These adjustments are not available when Load Guardian is engaged. Select the Film Coverage mode: Protected by Load Guardian This controls the position of the film and the tension on the film to hold the set Containment Force.
- Page 60 OPERATOR INSTRUCTIONS Rotation Speed Increase, decrease the turntable rotation speed during the FDS up and down travel. Wrap Apps Use this menu to change, adjust the wrap sequence. You can add multiple Wrap Apps for the wrap sequence. The Wrap Apps include: •...
- Page 61 OPERATOR INSTRUCTIONS Options This screen shows the available options that the operator can engage, disengage. Name Change the name of the profile 1. Enter the new name of the profile. 2. Select Save.
- Page 62 OPERATOR INSTRUCTIONS Visual Change the color, icon for the profile. 1. Select the new color, icon. 2. Select Save. Clone Profile Use this screen to copy a profile.
- Page 63 OPERATOR INSTRUCTIONS Erase Erase the current profile. 1. Select the Profile. 2. Select Erase. Select Yes to erase the profile. Help This menu includes information and instructions for: • Wrap Quality • Wrap Problems • Profile Details • Machine User Manual •...
-
Page 64: Initialize The Machine
OPERATOR INSTRUCTIONS Initialize the Machine CAUTION Before you initialize the machine, read “How to Stop the Machine”. 6.6.1 Lockout/Tagout Procedures Obey these procedures to prevent an injury from unexpected energizing, start-up, release of stored energy. 1. Move the Main Disconnect switch to the Off position. 2. -
Page 65: Thread The Film
OPERATOR INSTRUCTIONS WARNING Obey all safety decal instructions and warnings. Thread the Film 1. Push the E-stop. 2. Refer to the illustration below and make sure that the film roll is in the correct position. Open the EZ Thread Gate Thread the film between the Mast and the Top Guard and between the Rollers Close the Gate The Tackifier is on this Side... -
Page 66: Operate The Machine
OPERATOR INSTRUCTIONS 11. Push Film Assist. Note: This is only available after you select a profile 12. Pull the film and attach it to the load, pallet. Step 6 Step 8 Operate the Machine Reset the E-stop. Push Reset. Select a profile. Push Film Assist. -
Page 67: Manual Override
OPERATOR INSTRUCTIONS 6.8.1 Manual Override Manual Override This screen shows the current wrap cycle. Adjust the settings to override the wrap profile. Note: These adjustments do not change the profile settings. Film Delivery System Use the arrows to move the FDS in the up, down directions. -
Page 68: Film Roll Is Empty
OPERATOR INSTRUCTIONS Film Roll is Empty Push the E-stop Replace the film roll. Thread the film. Reset the E-stop. Push Reset. Push Film Assist. Pull the film and attach it to the load. Push Start. If the button is pushed in the Film Break Recovery mode: •... -
Page 69: Maintenance
WARNING Obey all safety decal instructions and warnings. WARNING Do not make a change to this machine without approval from Lantech. It can cause a safety hazard and cancel the warranty. WARNING Obey all safety procedures. You must apply the power to the machine for some electrical adjustments. -
Page 70: Daily And Weekly Maintenance
MAINTENANCE Daily and Weekly Maintenance Daily and Weekly Maintenance • Tighten, replace loose fasteners. • Look for oil leaks. • Listen for unusual noise during operation. 7.1.1 Pallet Grip • Remove the debris from in and around the Pallet Grip. •... -
Page 71: Settings And Adjustments
MAINTENANCE Settings and Adjustments 7.3.1 FDS Up, Down Travel Adjust the Sensor for the FDS Up, Down Travel There are 2 proximity sensors to control the Up, Down travel of the FDS. The sensors are in the mast. 89 mm Open the door on the mast to get access to the sensors. -
Page 72: Belt Slack Switch
MAINTENANCE 7.3.2 Belt Slack Switch The Belt Slack switch senses a fault in the FDS down travel. The switch is on the bottom side of the top cap. Install the switch through the top door of the mast. -
Page 73: Home Proximity Sensor For The Turntable
MAINTENANCE 7.3.3 Home Proximity Sensor for the Turntable Home Proximity Sensor for the Turntable The turntable uses a proximity sensor to see when it is in the home position. The sensor is below the turntable top and sees an actuator tab on the drive ring. - Page 74 MAINTENANCE 9. Push Reset. 10. Turn the drive ring to the home position. 11. Replace the turntable top. 12. Apply an anti-seize compound to the M8 screws before you attach to the turntable top. 13. Torque to 24 N-m (18 lb-ft).
-
Page 75: Turntable Drive Belt
MAINTENANCE 7.3.4 Turntable Drive Belt Adjust the tension on the belt. 1. Remove the cover from the belt tensioner. 2. Make sure that the belt is installed correctly. 3. Loosen the 10 mm locknut until the plate moves freely. 4. Put a 3/8” torque wrench with a short extension into the 3/8”... -
Page 76: Load Height Sensor
MAINTENANCE 7.3.5 Load Height Sensor The load height sensor sees objects in its view. The sensor is on the FDS. • The sensor sees the height of the load. • The range for the sensor is factory set. CAUTION The Load Height Sensor is a Class 1 Laser Do not stare into the Laser Beam Variable Frequency Drives (VFD) The Variable Frequency Drives control the speed of the motors. -
Page 77: Standard Parts Replacement
MAINTENANCE Standard Parts Replacement 7.5.1 FDS Lift Belt Replace the FDS Lift Belt 1. Move the FDS to the correct height to install the shipping brackets. 2. Push the E-stop 3. Refer to the Installation Instructions and install the FDS shipping bracket and the counterweight brackets. - Page 78 MAINTENANCE 19. Wind the belt around the drum the same number of revolutions recorded in step 14. • This helps align the belt when you install it and attach it to the top cap. 20. Install the belt: a. Over the rollers at the top of the mast, and b.
-
Page 79: Fds Lift Drive
MAINTENANCE 7.5.2 FDS Lift Drive Replace the FDS Lift Drive 1. Move the FDS to the correct height to install the shipping brackets. 2. Push the E-stop. 3. Refer to the Installation Instructions and install the FDS shipping bracket and the counterweight brackets. 4. -
Page 80: Turntable Drive Belt
MAINTENANCE 7.5.3 Turntable Drive Belt Replace the Turntable Drive Belt 1. Push the E-stop. 2. Move the Main Disconnect switch to the Off position. 3. Obey the Lockout/Tagout procedures. 4. Install (2) 3/8-16 eyebolts into the holes on the turntable top. 5. -
Page 81: Turntable Drive
MAINTENANCE 7.5.4 Turntable Drive 1. Push the E-stop 2. Move the Main Disconnect switch to the Off position. 3. Obey the Lockout/Tagout procedures. 4. Open and remove the access door. 5. Remove the panels on the mast to get access to the drive. -
Page 82: Pallet Grip
MAINTENANCE Pallet Grip® 7.6.1 Tilting Roller The Tilting Roller moves the cable of film down on the pallet. • The Factory Setting is 61˚ 1. Adjust the actuator to increase, decrease the angle of the roller when it is engaged. 2. -
Page 83: Groove Roller
MAINTENANCE 7.6.2 Groove Roller The Groove Roller rolls the film into a cable. It sets the quantity of film that makes the cable. It sets the height of the cable on the pallet. • The Factory Setting is 219 mm (8 5/8”) Adjust the groove roller to increase, decrease the quantity of film that makes the cable. - Page 84 MAINTENANCE...
-
Page 85: Appendix
APPENDIX - GLOSSARY Appendix Glossary Warranty Glossary Banding Banding refers to the layers of film that the FDS applies to a set section of the load. Bottom Wrap The layers of film that the Film Delivery System applies to the bottom of the load. Containment Force The cumulative force on the load from the layers of film, measured at any point. - Page 86 APPENDIX - GLOSSARY ® Pallet Grip The trade name for a "Lock Your Load to the Pallet" system. It makes a cable of film that attaches and locks the load to the pallet Personal Protective PPE refers to protective clothing, goggles, other garments or equipment. It gives Equipment protection to personnel from injury, infection.
-
Page 87: Warranty
The machine is installed near joints in the floor The warranty stops if the machine moves to a new customer. Unless Lantech agrees in writing, this warranty does not include the requirements for federal, local, safety, environmental regulations and standards. -
Page 88: Wrap Problems
APPENDIX – HELP SCREENS Wrap Problems 8.3.1 Containment Force Variation Containment Force Variation Possible causes for differences between the Containment Force measurement and the Load Guardian reading: Problem The Containment Force value is incorrect. Solution Review the instructions and take a second reading. Make sure that the scale is calibrated. -
Page 89: Product Crushes At The Top Of The Load
APPENDIX – HELP SCREENS 8.3.3 Product Crushes at the Top of the Load Crushes Top of Load There can be damage to the top of the load even with the correct Containment Force. Problem The product is crushed at the top of the load Solution Decrease the Film Tension on the top of the load Solution Decrease the Film Coverage at the top of the load. -
Page 90: Excessive Film Use
APPENDIX – HELP SCREENS 8.3.5 Excessive Film Use Excessive Film Use The points below tell the operator how to decrease the amount of film used to wrap a load: 1. Increase the tension on the film which decreases the number of layers of film on the load. •... -
Page 91: Load Shifts In Shipment
APPENDIX – HELP SCREENS 8.3.7 Load Shifts in Shipment Load Shifts in Shipment Problem Your loads shift during shipment Solution Increase the Containment Force. • Select Film Coverage • Select Protected by Load Guardian • Adjust the Containment Force • Monitor for Load Damage. Solution Increase the Film Coverage where the load requires a higher Containment Force. -
Page 92: The Load Slides Off The Pallet
APPENDIX – HELP SCREENS 8.3.9 The Load Slides off the Pallet The Load Slides off the Pallet Problem The Load slides off the pallet during shipment Solution Make sure that Pallet Grip applies a cable of film below the top boards of the pallet. Solution If it applies the cable of film and the loads slide off the pallet: •... -
Page 93: Belt Slack Condition
APPENDIX – HELP SCREENS 8.3.11 Belt Slack Condition Common Causes for a Belt Slack Condition Problem Blockage in the path of the Film Delivery System (FDS) Solution Jog the FDS Up to remove the slack Problem Defective FDS Down Proximity Sensor Solution Examine, replace the sensor 8.3.12... -
Page 94: Wrap Quality
APPENDIX – HELP SCREENS Wrap Quality 8.4.1 What is Load Guardian®? What is Load Guardian? Load Guardian is a control system that helps the operator set the wrap profiles quickly and easily. • It monitors and adjusts to changes in tension on the film, and the number of layers of film •... -
Page 95: Find The Correct Pre-Stretch
APPENDIX – HELP SCREENS 8.4.4 Find the Correct Pre-stretch Find the Correct Pre-stretch The standard pre-stretch is 250%. This lets the operator use the highest film tension at the lowest cost without film breaks. • Pre-stretch kits, to a maximum of 300%, are available. Note: With some premium films you can use a higher pre-stretch and hold the film tension without film breaks. -
Page 96: Set, Adjust The Tension On The Film
APPENDIX – HELP SCREENS 8.4.6 Set, Adjust the Tension on the Film Set, Adjust the Tension on the Film Film Tension is an adjustable setting that controls the pressure applied to the load during the wrap cycle. To find the optimum setting for your product: 1. -
Page 97: Load Shape
APPENDIX – HELP SCREENS 8.5.2 Load Shape Load Shape The Shape of the Load is an important entry when you create the load profile. Straight or Uniform loads: • In most cases you can increase the film tension without film breaks. Uneven or Irregular loads: •... -
Page 98: Wrap Height
APPENDIX – HELP SCREENS 8.5.4 Wrap Height Wrap Height The Wrap Height selection sets the height that the film moves above the top of the load. Wrap above the top of the load to: • Hold the top layer of the load in position •... -
Page 99: Profile Colors And Save
APPENDIX – HELP SCREENS 8.5.7 Profile Colors and Save Profile Colors and Save Use the Profile Color to identify the specific load. Some operators can identify the load by the color more quickly than the name. To give the Profile a color, it is common to use: •... - Page 100 APPENDIX – HELP SCREENS...
-
Page 101: Parts Lists And Drawings
2. Find the part on the drawing and the item number for the part. 3. Use the item number to find the part on the parts list. Refer to the part number, description and quantity. Send your parts order to the local Lantech® Distributor. Refer to Section 1.1 for Lantech support.
Need help?
Do you have a question about the QL-400 and is the answer not in the manual?
Questions and answers