
Subscribe to Our Youtube Channel
Related Manuals for Digisol DG-HR1420


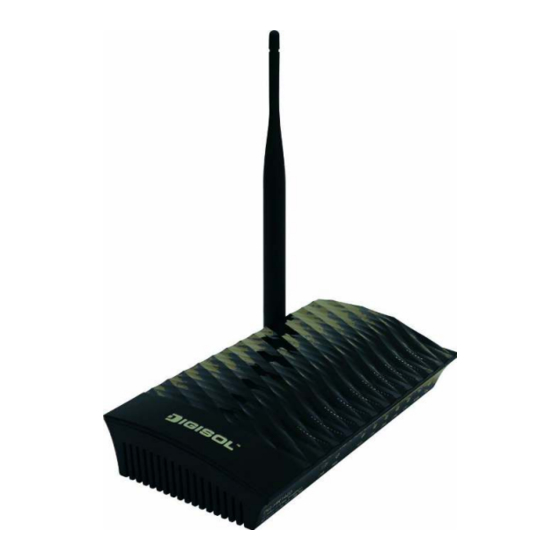
Summary of Contents for Digisol DG-HR1420
- Page 1 DG-HR1420 150Mbps WI-FI BROADBAND 3G HOME ROUTER WITH USB PORT User Manual V1.0 2014-09-23 As our products undergo continuous development the specifications are subject to change without prior notice...
- Page 2 Trademarks: DIGISOL™ is a trademark of Smartlink Network Systems Ltd. All other trademarks are the property of the respective manufacturers. Safety This equipment is designed with the utmost care for the safety of those who install and use it.
-
Page 3: Table Of Contents
DG-HR1420 User Manual INDEX 1. Product Introduction....................4 1-1 Introduction.....................4 1-2 Safety Information...................5 1-3 System Requirements..................6 1-4 Package Contents....................6 2 Get Familiar with your new wireless broadband router..........7 2-1 Front Panel..................... 7 2-2 Back Panel...................... 9 2-3 Hardware Installation................... 10 3. -
Page 4: Product Introduction
1-1 Introduction Thank you for purchasing DG-HR1420 150Mbps 802.11n Wireless Broadband Home Router! DG-HR1420 is the best choice for Small office / Home office users, all computers and network devices can share a single xDSL / cable modem internet connection at high speed. Easy install procedures allow computer users to setup a network environment in very short time - within minutes, even inexperienced users. -
Page 5: Safety Information
DG-HR1420 User Manual 1-2 Safety Information In order to keep the safety of users and your properties, please follow the safety instructions as mentioned below: This router is designed for indoor use only; DO NOT place this router outdoor. DO NOT place this router close to a hot or humid area, like kitchen or bathroom. -
Page 6: System Requirements
Before you start using this router, please check if there’s anything missing in the package, and contact your dealer of purchase to claim for missing items: DG-HR1420 Wireless Broadband Home Router Power adapter (5V DC, 1.5 A) Rubber feet (4 Nos.) ... -
Page 7: Get Familiar With Your New Wireless Broadband Router
DG-HR1420 User Manual 2 Get Familiar with your new wireless broadband router 2-1 Front Panel LED Name LED Status Indication Power (PWR) Router is switched on and correctly powered. WAN port is connected. WAN port is not connected. Blinking WAN activity (transferring or receiving data). - Page 8 DG-HR1420 User Manual Blinking LAN activity (transferring or receiving data). Wireless network is switched on. Wireless network is switched off. WLAN Blinking Wireless LAN activity (transferring or receiving data). A wireless device has been successfully added to the network by WPS function.
-
Page 9: Back Panel
DG-HR1420 User Manual 2-2 Back Panel Antenna (5dBi) Power On/Off button Power WPS/Wi-Fi Connector Reset WAN Port USB Port LAN Ports Interfaces Description This antenna is a 5dBi dipole antenna. Antenna Power on/off Press this button to power on/off the router. -
Page 10: Hardware Installation
DG-HR1420 User Manual 2-3 Hardware Installation Please follow the below mentioned instructions to build the network connection between your new WIRELESS router and your computers network devices: 1. Connect your xDSL / cable modem to the WAN port of the router by an Ethernet cable. - Page 11 DG-HR1420 User Manual 3. Connect the power adapter (5V DC / 1.5A) to the wall socket, and then connect it to the ‘Power’ socket of the router. 4. Please check all LEDs on the front panel. Power LED ‘PWR’ should be steadily ON, WAN and LAN LEDs should be ON.
-
Page 12: Quick Install Guide
DG-HR1420 User Manual 3. Quick Install Guide 3-1 Connecting to wireless broadband router by web browser After the network connection is setup, next step is to setup the router with proper network parameters, so it can work properly in your network environment. - Page 13 DG-HR1420 User Manual 3. Select "Internet Protocol (TCP/IP)" and click "Properties". 4. Select "Obtain an IP address automatically" or select "Use the following IP address". Select "Obtain an IP address automatically" and "Obtain DNS server address automatically". Click "OK".
- Page 14 DG-HR1420 User Manual Use the following IP address" B. “ IP Address: 192.168.1.XXX (XXX is a number from 2~254) Subnet Mask: 255.255.255.0 Gateway: 192.168.1.1 DNS Server: You need to input the DNS server address provided by your ISP. Otherwise, you can use the Router's default gateway as the DNS proxy server.
-
Page 15: Getting Started
DG-HR1420 User Manual 3-2 Getting Started Connecting the router’s management interface by web browser: After you assign an IP address to the computer, open the web browser, and type the IP address of the router in the address bar as ‘http://192.168.1.1’. - Page 16 DG-HR1420 User Manual NOTE: If you can’t see the web management interface, and you’re being prompted to input user name and password again, it means you did not input username and password correctly. Please retype user name and password again.
-
Page 17: Using Wizard
DG-HR1420 User Manual 3-3 Using Wizard This router provides a ‘Quick Setup Wizard’ procedure, which will help you to complete all required settings you need to access the Internet in very short time. Please follow the instructions mentioned below to complete the ‘Quick Setup’: Please go to Quick Setup menu by clicking on ‘Wizard’... - Page 18 DG-HR1420 User Manual Step 1 WAN Connection Setting: 1) If “DHCP Client” option is selected the following screen will appear. Here is the description of every setup item: Parameter Description Connection Mode of WAN connection. Mode WAN IP Settings Under DHCP Mode, the Router will obtain the IP address on WAN port.
- Page 19 DG-HR1420 User Manual 2) If “Static IP” is selected, the following screen will appear. Here is the description of every setup item: Parameter Description Connection Select the mode of WAN connection. Mode IP address Enter the IP address. Net mask Enter the net mask.
- Page 20 DG-HR1420 User Manual 3) If “PPPoE” is selected, the following screen will appear. Here is the description of every setup item: Parameter Description Connection Select the mode of WAN connection. Mode PPP Settings Enter the user name and password assigned by your Internet service provider here.
- Page 21 DG-HR1420 User Manual 4) 3G Router will support only compatible USB 3G Dongles and the support list can be downloaded from www.digisol.com or call 1800 209 3444 or email to helpdesk@smartlink.co.in Here is the description of every setup item: Parameter Description Enter the Pin –...
- Page 22 DG-HR1420 User Manual User Name Enter username – Check with 3G service provider. Password Enter password – Check with 3G service provider. After the settings are done click on “Next”. Step 2: Wireless Settings Here is the description of every setup item:...
- Page 23 DG-HR1420 User Manual Step 3: Save Settings Here is the description of every setup item: Parameter Description WAN Mode The selected WAN mode will appear here. IP Setting IP setting as configured will be displayed here. DNS Setting DNS Setting as configured will appear here.
-
Page 24: Using Setup
DG-HR1420 User Manual 3-4 Using Setup Step 1 Setup WAN Connection Type: Below given ‘WAN Connection Type’ screen will appear. Please choose the broadband (Internet connection) type you’re using in this page. There are three types of Internet connection DHCP, Static IP and PPPoE. - Page 25 DG-HR1420 User Manual NOTE: Some service providers use ‘DHCP’ (Dynamic Host Configuration Protocol) to assign IP address to your router. In this case, you can choose ‘Dynamic IP’ as Internet connection type. A) Setup procedure for ‘DHCP’: Select DHCP to obtain IP Address information automatically from your ISP.
- Page 26 DG-HR1420 User Manual B) Setup procedure for ‘Static IP’: Select Static IP Address if IP information is provided to you by your ISP. You will need to enter in the IP address, subnet mask, gateway address and DNS address provided to you by your ISP. Each IP address entered in the fields must be in the appropriate IP form, which are four octets separated by a dot (x.x.x.x).
- Page 27 DG-HR1420 User Manual C) Setup procedure for ‘PPPoE’: Choose PPPoE. (Point to Point Protocol over Ethernet) If your ISP uses a PPPoE connection it will provide you with a username and password. This option is typically used for DSL services. Below given screen will be displayed.
- Page 28 DG-HR1420 User Manual Step 2 Setup 3G Connection Type: This page is used to configure the parameters for your 3G network access.
- Page 29 DG-HR1420 User Manual Here is the description of every setup item: Parameter Description PIN Code Enter the Pin code – Check with 3G Service provider. Enter the APN - Check with 3G Service provider. Dial Number Enter the dial number e.g: *99#, #777 etc. as per ISP.
- Page 30 DG-HR1420 User Manual Step 3 Setup LAN: A) Below given ‘LAN’ screen will appear. Here is the description of every setup item: Parameter Description IP address Enter the LAN IP address. Subnet Mask Enter the subnet mask. Secondary IP Secondary IP address of any subnet can be added to manage the router.
- Page 31 DG-HR1420 User Manual B) DHCP MODE This page can be used to configure the DHCP mode i.e. DHCP relay or DHCP server. 1) Enable the DHCP server if you are using this device as DHCP server. This page lists the IP address pools available to host on your LAN. The device distributes numbers in the pool to host on your network as they request internet access.
- Page 32 DG-HR1420 User Manual D) LAN IPv6 This page is used to configure IPv6 LAN settings. User can set RA server work mode and LAN DHCPv6 server work mode. Here is the description of every setup item: Parameter Description Global Specify the LAN global ipv6 address, which may be assigned by Address ISP.
- Page 33 DG-HR1420 User Manual The minimum time allowed between sending unsolicited multicast Router Advertisements from the interface, in seconds. Min Interval Note: The Min Interval must not be less than 3 seconds and not greater than 0.75 * Max Interval. Specify the RA feature prefix mode: “Auto”: The RA prefix will use WAN dhcp-pd prefix.
- Page 34 DG-HR1420 User Manual Channel width Select any channel width from the pull-down list. Control sideband There are two bands upper and lower. The upper band comprises of channel numbers from 5 to 11. The lower band comprises of channel numbers from1 to 7.
- Page 35 DG-HR1420 User Manual When you finish with all settings, press ‘Apply changes’. Security Setup: This page allows you to set up the wireless security. Turning ON WEP or WPA by using encryption keys could prevent any unauthorized access to your wireless network.
- Page 36 DG-HR1420 User Manual Encryption options available: Here is the description of every setup item: Parameter Description Key length There are two types of WEP key lengths: 64-bit and 128-bit. Using’128-bit’ is safer than ‘64-bit’, but will reduce some data transfer performance.
- Page 37 DG-HR1420 User Manual length, and ‘Hex’ as key format, you’ll see the message at the right of ‘ Key Format ’ is Hex (10 characters), which means the length of WEP key is 10 characters. Default Tx key You can set the WEP key here.
- Page 38 DG-HR1420 User Manual WPA (TKIP) / WPA2 (TKIP) Here is the description of every setup item: Parameter Description Use 802.1x IEEE 802.1x is an authentication protocol. Every user must Authentication use a valid account to login to this wireless router before accessing the wireless LAN.
- Page 39 DG-HR1420 User Manual WPA (AES) / WPA2 (AES) Here is the description of every setup item: Parameter Description Use 802.1x IEEE 802.1x is an authentication protocol. Every user must Authentication use a valid account to login to this wireless router before accessing the wireless LAN.
- Page 40 DG-HR1420 User Manual WPA2 Mixed Here is the description of every setup item: Parameter Description Use 802.1x IEEE 802.1x is an authentication protocol. Every user must Authentication use a valid account to login to this wireless router before accessing the wireless LAN. The authentication is processed by a RADIUS server.
- Page 41 DG-HR1420 User Manual MBSSID: Here we provide several guest networks for your guests to use your router to surf the Internet temporary. You can configure your SSID, security options and so on. Guests can only access your router if you enable your guest network.
- Page 42 DG-HR1420 User Manual Access Control List: You can specify what kind of service should be enabled in WAN on this page. Packets available in the ACL list or from IP specified can enter the AP Router. Choose menu “Wireless→Access Control List”, below given screen will be displayed.
- Page 43 DG-HR1420 User Manual Advanced: Here is the description of every setup item: Parameter Description Fragment Threshold Used to fragment packets which help improve performance in the presence of radio frequency (RF) interference. RTS Threshold Determines the packet size of a transmission through the use of the router to help control traffic flow.
- Page 44 DG-HR1420 User Manual type. Broadcast SSID Decide if the wireless router will broadcast its own ESSID or not. You can hide the ESSID of your wireless router (set the option to ‘Disable’), so only people those who know the ESSID of your wireless router can get connected.
- Page 45 DG-HR1420 User Manual Through this process, you can easily add wireless clients to the network without the need for any specific configuration, such as SSID, security mode or password. Choose menu “Wireless→WPS”, below given screen will be displayed. WPS (Wi-Fi Protected Setup) is an easy way to connect to a wireless router.
- Page 46 DG-HR1420 User Manual Wireless Distribution System uses wireless media to communicate with other APs, like the Ethernet does. To do this, you must set these APs in the same channel and set MAC address of other APs which you want to communicate within the table and then enable the WDS.
- Page 47 DG-HR1420 User Manual Repeater This feature is used to configure the parameters for wireless repeater. Click “Site survey”. Wireless networks will be displayed in the list below. Select one network and click “Next”. Click on “Next”. The following screen will appear. Setup the wireless security.
-
Page 48: Advanced
DG-HR1420 User Manual Click on “Apply”. It is strongly recommend that you modify IP address of the local gateway to avoid IP address conflicts with the center of the AP. (ex. if IP address of AP is 192.168.1.1, you can modify IP address of the local gateway to 192.168.1.2). - Page 49 DG-HR1420 User Manual Here is the description of every setup item: Parameter Description Enable Select the check box to enable routing. Destination Enter the IP address of the destination device. Subnet Mask Enter the subnet mask of the destination device.
- Page 50 DG-HR1420 User Manual Enable the RIP if you are using this device as a RIP-enabled router to communicate with others using the Routing Information Protocol. Here is the description of every setup item: Field Description Select On. The router communicates with other RIP-enabled devices.
- Page 51 DG-HR1420 User Manual A Demilitarized Zone is used to provide Internet services without sacrificing unauthorized access to its local private network. Typically, the DMZ host contains devices accessible to Internet traffic, such as Web (HTTP) servers, FTP servers, SMTP (e-mail) servers and DNS servers.
- Page 52 DG-HR1420 User Manual Virtual Server The page allows you to configure virtual server, so others can access the server through the Gateway. Choose menu “Advanced→Virtual Server”, below given screen will be displayed. Here is the description of every setup item:...
- Page 53 DG-HR1420 User Manual This feature sets up NAT ALG and Pass-Through configuration. Application Layer Gateway (ALG) is a special function of this router. It includes many preset routing rules for numerous applications which require special support. With these supports, those applications which required special support will be able to work with NAT architecture.
- Page 54 DG-HR1420 User Manual NAT PORT TRIGGER Entries in this table are used to restrict certain types of data packets from your local network to Internet through the Gateway. Use of such filters can be helpful in securing or restricting your local network.
- Page 55 DG-HR1420 User Manual FTP ALG PORT This page is used to configure FTP Server ALG and FTP Client ALG ports. NAT IP MAPPING Entries in this table allow you to configure one IP pool for specified source IP address from LAN, so one packet whose source IP is in range of the specified address...
- Page 56 DG-HR1420 User Manual You can enable or disable IP QoS. Click enable and click “Add Rule”, the following screen will appear.
- Page 57 DG-HR1420 User Manual The following table describes the parameters and buttons of this page: Field Description IP QoS Select to enable or disable IP QoS function. You need to enable IP QoS if you want to configure the parameters of this page.
- Page 58 DG-HR1420 User Manual Port Mapping To manipulate a mapping group: 1. Select a group from the table. 2. Select interfaces from the available/grouped interface list and add it to the grouped/available interface list using the arrow buttons to manipulate the required mapping of the ports.
- Page 59 DG-HR1420 User Manual Others Bridge Setting This page is used to configure the bridge parameters. Here you can change the settings or view some information on the bridge and its attached ports. Client Limit This page is used to configure how many devices can access to Internet which limits...
- Page 60 DG-HR1420 User Manual Tunnel This page is used to configure v6inv4 tunnel or v4inv6 tunnel. The following table describes the parameters and buttons of this page: Description Parameters Enable Enable or disable the DS-Lite tunnel. Interface Select current wan interface used as tunnel interface.
- Page 61 DG-HR1420 User Manual Others Here you can set other miscellaneous advanced settings. Half Bridge when enabled, the PPPoE (PPPoA)’s connection type will set to Continuous.
-
Page 62: Service
DG-HR1420 User Manual 3-6 Service IGMP IGMP proxy enables the system to issue IGMP host messages on behalf of hosts that the system discovered through standard IGMP interfaces. The system acts as a proxy for its hosts when you enable it by doing the following:... - Page 63 DG-HR1420 User Manual MLD Proxy and Snooping can be configured here. Here is the description of every setup item: Parameter Description MLD Snooping With MLD snooping, IPv6 multicast data is selectively forwarded to a list of ports that want to receive the data, instead of being flooded to all ports.
- Page 64 DG-HR1420 User Manual UPnP This page is used to configure UPnP. The system acts as a daemon when you enable UPnP. This page is used to configure the DNS server IP addresses for DNS Relay.
- Page 65 DG-HR1420 User Manual IPv6 DNS This page is used to configure the DNS server ipv6 addresses. DDNS This page is used to configure the Dynamic DNS address from DynDNS.org, TZO, PHDNS or NO-IP. Here you can Add/Remove to configure Dynamic DNS.
- Page 66 DG-HR1420 User Manual FTP Server Check start to start the FTP server. USB Storage This page is used to configure USB storage Enable or Disable. When enable USB storage plug hard disk disk port, browse/upload/download disk files by FTP (eg:"ftp://192.168.1.1").
- Page 67 DG-HR1420 User Manual Firewall MAC Filtering Entries in this table are used to restrict certain types of data packets from your local network to Internet through the Gateway. Use of such filters can be helpful in securing or restricting your local network.
- Page 68 DG-HR1420 User Manual IP/Port Filter Entries in this table are used to restrict certain types of data packets from your local network to Internet through the Gateway. Use of such filters can be helpful in securing or restricting your local network.
- Page 69 DG-HR1420 User Manual IPv6/Port Filter Entries in this table are used to restrict certain types of ipv6 data packets from your local network to Internet through the Gateway. Use of such filters can be helpful in securing or restricting your local network.
- Page 70 DG-HR1420 User Manual You can specify which services are accessible form LAN or WAN side. Entries in this ACL table are used to permit certain types of data packets from your local network or Internet network to the Gateway. Using of such access control can be helpful in securing or restricting the Gateway...
- Page 71 DG-HR1420 User Manual IPv6 ACL You can specify which services are accessible form LAN or WAN side. Entries in this ACL table are used to permit certain types of data packets from your local network or Internet network to the Gateway.
- Page 72 DG-HR1420 User Manual A "denial-of-service" (DoS) attack is characterized by an explicit attempt by hackers to prevent legitimate users of a service from using that service. Denial of Service (DoS) is a common attack measure, by transmitting a great amount...
-
Page 73: Maintenance
DG-HR1420 User Manual 3-7 Maintenance Firmware Update This page allows you to upgrade the Router firmware to new version. Please note, do not power off the device during the upload because it may crash the system. Backup/Restore Once the router is configured you can save the configuration settings to a configuration file on your hard drive. - Page 74 DG-HR1420 User Manual Password This page is used to add user account to access the web server of Router. Empty user name or password is not allowed. Reboot This page is used to reboot your system or restore to default setting.
- Page 75 DG-HR1420 User Manual Time This page is used to configure the system time and Network Time Protocol (NTP) server. Here you can change the settings or view some information on the system time and NTP parameters. This page is used to display the system event log table. By checking Error or Notice (or both) will set the log flag.
- Page 76 DG-HR1420 User Manual Diagnostics A) Ping The following table describes the parameters and buttons of this page: Field Description Host Enter the valid IP address or domain name. Ping Click it to start to Ping. B) Ping6 The following table describes the parameters and button of this page:...
- Page 77 DG-HR1420 User Manual C) Traceroute Diagnostic Click Traceroute in the left pane, and the following page appears. By Traceroute Diagnostic, you can track the route path of information flow from your computer to the other side host. Here is the description of every setup item:...
- Page 78 DG-HR1420 User Manual D) Traceroute6 E) Diag-Test The Router is capable of testing your WAN connection. The individual tests are listed below. If a test displays a fail status, click "Run Diagnostic Test" button again to make sure the fail status is consistent.
-
Page 79: Appendix
DG-HR1420 User Manual 4. Appendix Hardware Specifications Flash: 2MB SDRAM: 16MB 1 USB 2.0 port Antenna: One fixed 5 dBi antenna WPS/WLAN Push Button Factory reset button Network Ports 1 * 10/100Mbps UTP WAN Port 4 * 10/100Mbps UTP LAN Ports ... - Page 80 DG-HR1420 User Manual Environmental Specifications Operating temperature: 0 to 40°C Storage Temperature: -40 to 70°C Operating Humidity: 10 % to 90 % Storage Humidity: 5% to 95% Power Supply 5V DC, 1.5 A Switching Power Adapter...
-
Page 81: Glossary
DG-HR1420 User Manual 5. Glossary Every non-router IP device needs to configure a default Default Gateway (Router): gateway IP address. When the device sends out an IP packet, if the destination is not on the same network, the device has to send the packet to its default gateway, which will then send it to the destination. - Page 82 DG-HR1420 User Manual A network mask is also a 32-bit binary pattern, and consists of consecutive leading 1’s followed by consecutive trailing 0’s, such as 11111111.11111111.11111111.00000000. Therefore sometimes a network mask can also be described simply as “x” number of leading 1’s.
- Page 83 DG-HR1420 User Manual Port Application Protocol Number Telnet SMTP POP3 H.323 1720 SNMP SNMP Trap HTTP PPTP 1723 PC Anywhere 5631 PC Anywhere 5632 : (Point-to-Point Protocol over Ethernet.) Point-to-Point Protocol is a secure PPPoE data transmission method originally created for dial-up connections; PPPoE is for Ethernet connections.
- Page 84 DG-HR1420 User Manual Transmission Control Protocol/Internet Protocol (TCP/IP) and TCP/IP, UDP: Unreliable Datagram Protocol (UDP). TCP/IP is the standard protocol for data transmission over the Internet. Both TCP and UDP are transport layer protocols. TCP performs proper error detection and error recovery, and thus is reliable. UDP on the other hand is not reliable.
Need help?
Do you have a question about the DG-HR1420 and is the answer not in the manual?
Questions and answers