
Related Manuals for Clarke DEVIL 370SPC


Summary of Contents for Clarke DEVIL 370SPC
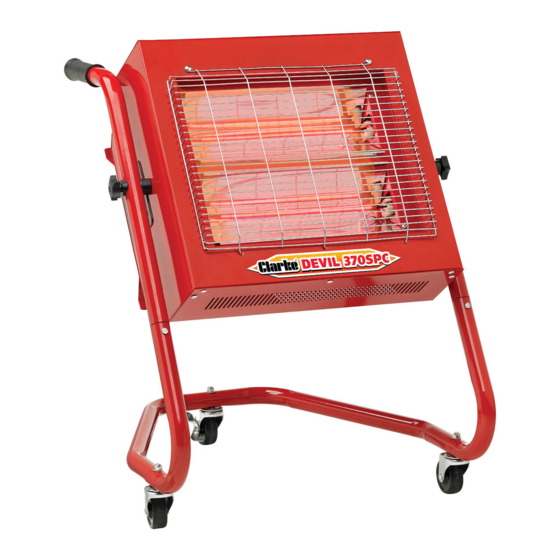
- Page 1 DEVIL QUARTZ HALOGEN HEATER MODEL NO: DEVIL 370SPC PART NO: 6926013 OPERATING & MAINTENANCE INSTRUCTIONS ORIGINAL INSTRUCTIONS GC1119 ISS3...
-
Page 2: Specifications
INTRODUCTION Thank you for purchasing this CLARKE Quartz Halogen Heater. Before attempting to use this product, please read this manual thoroughly and follow the instructions carefully. In doing so you will ensure the safety of yourself and that of others around you, and you can look forward to your purchase giving you long and satisfactory service. - Page 3 THE FOLLOWING TABLE ADDRESSES THE INFORMATION REQUIREMENTS OF REG.2015/1188 Item Symbol Value Unit Heat output Measured seasonal space heating energy efficiency Nominal heat output Minimum heat output (indicative) Maximum continuous heat output Auxiliary electricity consumption At nominal heat output At minimum heat output In standby mode Type of heat input for electric storage local heaters only Manual heat charge control with integrated thermostat...
-
Page 4: General Safety Rules
GENERAL SAFETY RULES 1. These heaters are for INDOOR USE ONLY. 2. DO NOT expose the heater or power cable to rain or wet conditions. Any water entering the heater will increase the risk of electric shock. DO NOT use this heater in a bathroom, shower room or any other wet environment. 3. -
Page 5: Service And Repairs
7. Check the heater for damage before use. DO NOT use if the heater tubes are damaged or broken. Any damage should be properly repaired or the part replaced. If in doubt, DO NOT use. Consult your local Clarke dealer. SERVICE & REPAIRS 1. -
Page 6: Electrical Connections
ELECTRICAL CONNECTIONS WARNING: READ THESE ELECTRICAL SAFETY INSTRUCTIONS THOROUGHLY BEFORE CONNECTING THE PRODUCT TO THE POWER SUPPLY. The 230v models are provided with a 13 amp BS 1363 plug, fitted with a 13amp fuse and MUST be connected to a standard, 230 Volt (50Hz) electrical supply, preferably through a suitably fused isolator switch. -
Page 7: Unpacking And Assembly
UNPACKING AND ASSEMBLY UNPACKING When unpacking, please check contents against the following list and advise your dealer immediately if any parts are missing. 1 x Heater x Lower frame 2 x Handles 2 x Halogen tubes 1 x Fixings pack 1 x Remote control unit ASSEMBLY 1. -
Page 8: Using The Remote Control
OPERATION WARNING: FOR SAFE OPERATION OF THIS HEATER IT IS ESSENTIAL TO READ THESE INSTRUCTIONS BEFORE USE. USING THE REMOTE CONTROL All operations must be done using the remote control. • 2 x AAA batteries are required and are installed as shown by the diagram found inside the remote control unit. -
Page 9: Programming The Timer
NOTE: The angle of tilt MUST NOT exceed 45 degrees downwards, as this could lead to the heater over-heating. NEVER position the heater pointing downwards. 4. Switch on the power at the primary switch. • The neon indicator will illuminate. 5. - Page 10 • SUN will flash repeatedly. 3. Use the left and right arrow buttons to choose a day. 4. Press the TIME button to go to the next step. • The first 2 digits (HOUR) of the time display will flash. 5.
-
Page 11: Setting Further Programs
• The programs will be displayed as 01, 02 and 03. • The first two digits of the clock will flash and the word ON will be displayed. 4. Use the + and - arrow keys to select the starting hour and press the WEEK TIMER button to confirm. -
Page 12: Cleaning And Maintenance
3. Ensure heating tubes are clear of dust (use compressed air to clean if possible. (ALWAYS wear a dust mask if performing this operation) 4. Refer to your CLARKE dealer if internal repairs are required. 5. When storing the heater, allow it to cool down, then place it in its packing box for storage in a dry, ventilated place. -
Page 13: Fault Finding
Fuse blown. Replace if necessary and investigate the cause. If fuse blow repeatedly, consult your Clarke dealer. No power at socket Insert plug into a suitable outlet. socket. Tilt safety switch is Ensure unit is upright. If disabling unit. -
Page 14: Parts Diagram
PARTS DIAGRAM Description Description Castor (standard) Securing knob Castor with brake Control panel assembly Ceramic end cap PCB control unit (not shown) Halogen Tube Bolt/locknut Wire Guard ON/OFF switch (power) Power cable ON/OFF switches (lamps) Handle Tilt safety switch (not shown) Side frame/handles Lower frame Inner/outer plastic spacers... -
Page 15: Declaration Of Conformity
DECLARATION OF CONFORMITY Parts & Service: 020 8988 7400 / E-mail: Parts@clarkeinternational.com or Service@clarkeinternational.com...
Need help?
Do you have a question about the DEVIL 370SPC and is the answer not in the manual?
Questions and answers