
Related Manuals for Clarke CONTRACTOR DEVIL 351C


Summary of Contents for Clarke CONTRACTOR DEVIL 351C
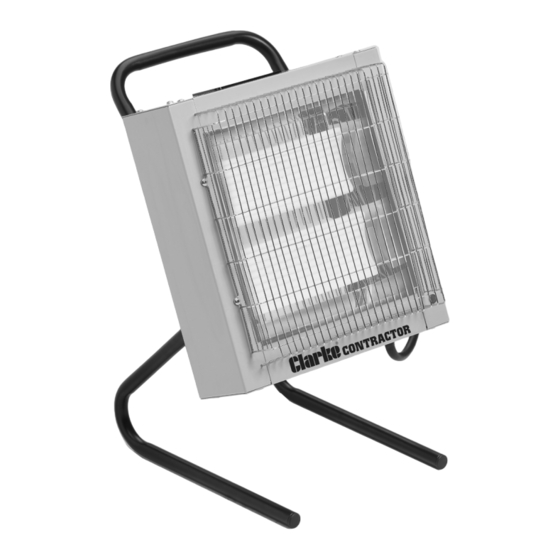
- Page 1 CERAMIC HEATER MODEL NO: DEVIL 351C PART NO: 6920256 OPERATING & MAINTENANCE INSTRUCTIONS ORIGINAL INSTRUCTIONS GC08/22...
-
Page 2: Specifications
Max Heat Output 2.4W (1.2 per element) Please note that the details and specifications contained herein, are correct at the time of going to print. However, CLARKE International reserve the right to change specifications at any time without prior notice. GUARANTEE This product is guaranteed against faulty manufacture for a period of 12 months from the date of purchase. - Page 3 THE FOLLOWING TABLE ADDRESSES THE INFORMATION REQUIREMENTS OF REG.2015/1188 Item Symbol Value Unit Heat output Measured seasonal space heating energy efficiency Nominal heat output Minimum heat output (indicative) Maximum continuous heat output Auxiliary electricity consumption At nominal heat output At minimum heat output In standby mode 0.001 Type of heat input for electric storage local heaters only...
-
Page 4: General Safety Rules
GENERAL SAFETY RULES Please keep these instructions in a safe place for future reference. 1. These heaters are for INDOOR USE ONLY in well insulated spaces. 2. DO NOT expose the heater or power cable to rain or wet conditions. Any water entering the heater will increase the risk of electric shock. -
Page 5: Environmental Recycling Policy
7. Check the heater for damage before use. Any damage should be properly repaired or the part replaced. If in doubt, DO NOT use. Consult your local CLARKE dealer. SERVICE & REPAIRS 1. If necessary, have your heater repaired by a qualified person using identical replacement parts. -
Page 6: Electrical Connections
ELECTRICAL CONNECTIONS This 110V heater is fitted with a 32 amp, three pin industrial plug to EN 60309 and MUST be connected to a 110 volt, 1 phase 50 Hz supply through a suitably fused isolator switch. On no account must a 230V, 13 amp (BS1363) plug be used. -
Page 7: Unpacking And Assembly
UNPACKING AND ASSEMBLY Before assembling, please check contents against the following list and advise your dealer immediately if any parts are missing. • 1 x Heater • 2 x Legs • 1 x Handle • 1 x Remote Controller (batteries not included) •... -
Page 8: Using The Remote Control
OPERATION WARNING: FOR SAFE OPERATION OF THIS HEATER IT IS ESSENTIAL TO READ THESE INSTRUCTIONS BEFORE USE. WARNING: PLEASE NOTE THAT THE HEATING ELEMENTS OF THIS PRODUCT DO NOT GLOW WHILST IN OPERATION. ANY PICTURES SHOWING THIS IN ADVERTISING MATERIAL ARE FOR ILLUSTRATION ONLY. USING THE REMOTE CONTROL All operations must be done using the remote control. - Page 9 3. Press to turn on the upper heating lamp and the screen will show P1. 4. Press to select the mode from P1-P6, referring to the different temperature settings. Only the upper element is working Both elements are working • During mode P2-P5 the upper element is working all the time and the lower element will be turned off automatically according to the set temperature.
- Page 10 SETTING THE SHUTDOWN TIMER 1. Press to set the shutdown timer. The time on the screen flickers with initial status 00:00. 2. Press to set the time to turn the heater off. • It increases/decreases 1 hour per press. 3. Press when you finish setting and the heater will be in the countdown mode.
-
Page 11: Cleaning And Maintenance
DO NOT use abrasive cleaners. Take care that no moisture enters the heater. 3. Refer to your CLARKE dealer if internal maintenance is required. 4. When storing the heater, allow it to cool down before storing it in a dry, well ventilated place. -
Page 12: Fault Finding
Fuse blown. Replace if necessary and investigate the cause. If the fuse blows repeatedly, consult your CLARKE dealer. No power at socket Insert the plug into a outlet. suitable socket. Tilt safety switch is Ensure heater is upright. -
Page 13: Component Parts
Remote Control Unit A selection of suitable extension leads & plugs is available from your nearest CLARKE dealer, for further information, contact your nearest dealer, or telephone CLARKE International Sales department on 01992 565300. Parts & Service: 020 8988 7400 / E-mail: Parts@clarkeinternational.com or Service@clarkeinternational.com... -
Page 14: Declarations Of Conformity
DECLARATIONS OF CONFORMITY Parts & Service: 020 8988 7400 / E-mail: Parts@clarkeinternational.com or Service@clarkeinternational.com... - Page 15 DECLARATIONS OF CONFORMITY Parts & Service: 020 8988 7400 / E-mail: Parts@clarkeinternational.com or Service@clarkeinternational.com...
Need help?
Do you have a question about the CONTRACTOR DEVIL 351C and is the answer not in the manual?
Questions and answers