
Related Manuals for INVENTOR CB-WUI-20L


Summary of Contents for INVENTOR CB-WUI-20L
- Page 1 DEHUMIDIFIER • USER’S MANUAL • ΕΓΧΕΙΡΙΔΙΟ ΧΡΗΣΗΣ MODEL: CB-WUI-20L ENGLISH | ΕΛΛΗΝΙΚΑ...
- Page 3 LANGUAGES ENGLISH ......................3 ΕΛΛΗΝΙΚΑ ......................35...
-
Page 4: Table Of Contents
TABLE OF CONTENTS 1. SAFETY & WARNING INSTRUCTIONS .................5 2. ELECTRICAL INFORMATION ....................6 3. SOCIABLE REMARKS ENVIRONMENTAL PROTECTION ............6 4. SAFETY PRECAUTIONS ......................7 5. WARNINGS (for using R290 refrigerant only) ............... 10 6. STEPS BEFORE USE ......................16 7. GETTING TO KNOW YOUR DEHUMIDIFIER ..............20 8. -
Page 5: Safety & Warning Instructions
1. SAFETY & WARNING INSTRUCTIONS No children under the age of 8 should be permitted to operate this electric device. Be certain, that children, handicapped people, or people with the lack of knowledge and experience, must be supervised, depending the situation, by persons responsible for their well-being and do not undertake procedures such as the cleaning or the maintenance of this device. -
Page 6: Electrical Information
• Upon first use, and for proper calibration, please allow unit to operate continuously for 24 hours. 2. ELECTRICAL INFORMATION The nameplate, with all the electrical and technical data of this appliance, is located on the rear panel. The appliance should be installed in accordance with national wiring regulations. Be sure the device is grounded properly. -
Page 7: Safety Precautions
4. SAFETY PRECAUTIONS Read Safety Precautions before operation and installation To prevent injury to the user or other people and property damage, the following instructions must be followed. Incorrect operation due to ignoring of instructions may cause harm or damage. The seriousness is classified by the following indications. - Page 8 CAUTION Do not use the unit in small spaces Do not place the device in areas where water may splash onto the unit. It may cause an electric shock or fire. Place the unit on a leveled and sturdy section of the floor. Do not cover the air intake or exhaust openings.
- Page 9 • Do not operate your appliance in a wet room such as a bathroom or laundry room. • Do not use this product for functions other than those described in this instruction manual • Contact the authorised installer for installation of this unit. •...
-
Page 10: Warnings (For Using R290 Refrigerant Only)
5. WARNINGS (for using R290 refrigerant only) -Do not use any other means other than the recommended to expedite the defrosting process or to perform a cleaning of the unit, other than those recommended by the manufacturer. - This device should never be stored in an area in combination with other ignition sources (for example: a gas appliance an electrical heater, open flames etc.) - Do not attempt to penetrate the unit with a tool or try to burn - Be extra cautious as refrigerant gas may be odorless. - Page 11 Description of displayed Symbols (*Only applicable to units with R290 Refrigerant) WARNING This symbol indicates the use of a flammable refrigerant. If any leakage occurs, or if exposed to an external ignition source, a fire risk is possible. CAUTION This symbol indicates that the user’s manual should be read carefully. CAUTION This symbol indicates that a professional service technician should handle this unit with reference to the user’s manual CAUTION This symbol indicates the presence of a user’s or installation manual...
- Page 12 6. No ignition sources No person carrying out work in relation to a refrigeration system which involves exposing any pipe work that contains or has contained flammable refrigerant shall use any sources of ignition in such a manner that it may lead to the risk of fire or explosion. All possible ignition sources, including cigarette smoking, should be kept sufficiently far away from the site of installation, repairing, removing and disposal, during which flammable refrigerant can possibly be released to the surrounding space.
- Page 13 NOTE The use of silicon sealant may inhibit the effectiveness of some types of leak detection equipment. Intrinsically safe components do not have to be isolated prior to working on them. 8. Repair to intrinsically safe components Do not apply any permanent inductive or capacitance loads to the circuit without ensuring that this will not exceed the permissible voltage and current permitted for the equipment in use.
- Page 14 work to take place. This operation is absolutely vital if brazing operations on the pipe-work are to take place. Ensure that the outlet for the vacuum pump is not close to any ignition sources and there is ventilation available. 13. Charging procedures In addition to conventional charging procedures, the following requirements shall be followed.
- Page 15 The recovery equipment shall be in good working order with a set with a set of instructions concerning the equipment that is at hand and shall be suitable for the recovery of flammable refrigerants. In addition, a set of calibrated weighing scales shall be available and in good working order. Hoses shall be complete with leak-free disconnect couplings and good condition.
-
Page 16: Steps Before Use
6. STEPS BEFORE USE User's manual Dehumidifier Drain hose with Compressor Please refer to the electronic For warranty warranty instructions, in the purposes, please last page (English section) of note the SN this manual. (serial number). The SN SN: D2002255780115715200209 is labeled opposite the device. - Page 17 Installation tips 1) Remove the dehumidifier from the package. 2) Hold the handle and lift the dehumidifier up, pull out the power cord, and rotate 90° clockwise. 3) Place the dehumidifier into the water tank gently making sure that the 2 labels are aligning until it clicks in place.
- Page 18 6) Do not block or restrict the airflow around the unit. Make sure the air inlet exhaust grills are not obstructed. Allow 20cm of clearance around the unit and 40cm above 7) Place the unit in an area where the temperature levels will not fall below 5ºC (41ºF).
- Page 19 Caster installation and disassembly instructions You will find inside the gift box 4 casters. The casters should be placed on the bottom of the water tank following the below installation instructions: Installation: 1. Use a screwdriver to pop up the plastic blocks located on the four corners of the bottom of the water tank.
-
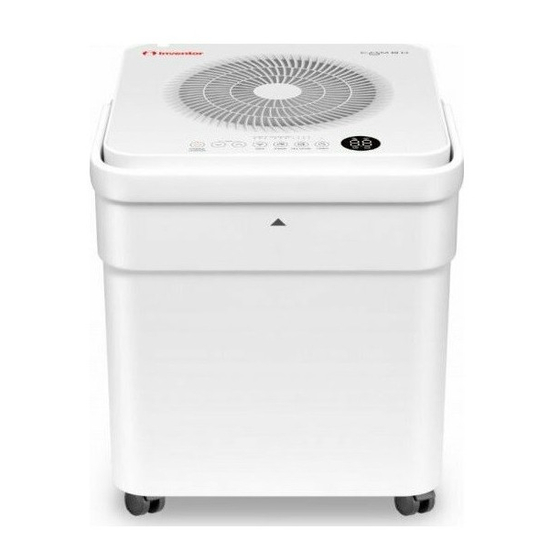
Page 20: Getting To Know Your Dehumidifier
7. GETTING TO KNOW YOUR DEHUMIDIFIER Air Intake Grill Air Outlet Casters Water Tank Handles Control Panel Power Cord Drain Hose Outlet Air Inlet Grill Filters... -
Page 21: Control Panel • Functions
8. CONTROL PANEL • FUNCTIONS POWER By pressing the “POWER” button the dehumidifier turns on or off. The “Power” button and Display will turn on or off. • When the set humidity is reached, the Energy Savings function is automatically activated during which the digital control display of the device may show increased humidity levels. - Page 22 • For drying clothes: place the dehumidifier in a small room and set nearby the clothes rack. Keep doors shut and allow the dehumidifier to dry the clothes. • For optimal results manual wringing of the clothes is suggested. • Allow 30-50cm distance from the moist clothes. •...
- Page 23 Press the FAN button to select among the Low, Med or High fan speed. A light indicator will illuminate separately for each fan speed selected. • Low fan speed: When activated the indicator marked “Lo” is turned on. Select the low fan speed for quite operation in order to enjoy ideal conditions.
- Page 24 Wi-Fi By long pressing for 3 second the power button ( ) the wireless connection will initiate. While this function is selected the indication ‘’AP’’ will appear on the led display. If pairing between the router and the unit is successful after a period of 8 minutes, the unit will exit Wi-Fi connection mode and the unit will enter all previously set functions.
- Page 25 FILL LEVEL The dehumidifier offers you the opportunity to select the maximum water level inside the water tank. Press the fill level button to control the water tank capacity based on your daily needs. There are four level capacity options in this dehumidifier, indicated by numbers 1, 2, 3 and 4 on the control panel.
-
Page 26: Water Tank & Drain Hose
9. WATER TANK & DRAIN HOSE There are two ways to remove collected water. Before proceeding ensure that you have switched off and unplugged the unit. 1. Usage of the water When unit is OFF and the tank of the dehumidifier is full, the display will read P2. Additionally, when the unit is on and the tank is full, the compressor stops operation followed by the fan a few minutes later. - Page 27 • The dehumidifier should be placed on a flat surface in an upright position. • Lead the water hose towards a suitable drainage facility and be certain that the water flows naturally. For correct drainage, make sure the hose stays below the level of the drain hose outlet.
-
Page 28: Maintenance & Cleaning
10. MAINTENANCE & CLEANING Before performing any maintenance or cleaning of the dehumidifier, make sure that it is unplugged. Cleaning the air filter: Use warm and soapy water to rinse the filter of the dehumidifier. • Do not use abrasive cleaning agents or solvents; use a brush or vacuum attachments for cleaning •... -
Page 29: Storage
Cleaning the grille and case: The air intake and outlet grilles get soiled easily. Use a vacuum attachment or brush to clean. Do not splash water directly onto the main unit. Doing so may cause an electrical shock, cause the insulation to deteriorate, or cause the unit to rust. Do not use bleach or abrasives to clean the grille and the case. -
Page 30: Frequently Asked Questions & Troubleshooting
12. FREQUENTLY ASKED QUESTIONS & TROUBLESHOOTING Are the For about the first month of use, the dehumidifier operates dehumidifiers intensively. This will gradually decrease within time, since costly? the dehumidifier will have been calibrated in its working environment. Condensed households may sometime be significantly expensive to heat. - Page 31 How much time is The exact time needed to dry clothes depend on many needed to dry my factors, the room's temperature and size, the humidity level, clothes? the moisture of the clothes etc., so there is no standard time since of these variable factors mentioned above To shorten the time period, place the dehumidifier in a small room with all doors and windows shut.
- Page 32 All house exits (windows doors etc) where the dehumidifier is operating, should be shut. Room temperature is below the advised operational range. There is a kerosene heater or other heating type, giving off water vapor in the room. The room that the device is placed is bigger than suggested. The unit makes a loud noise when operating The air filter is clogged.
- Page 33 All the pictures in the manual are for explanatory purposes only. The actual shape of the unit you purchased may be slightly different, but the operations and functions are the same. The company may not be held responsible for any misprinted information. The design and the specifications of the product for reasons, such as product improvement, are subject to change without any prior notice.
- Page 34 Additional Details Additional Details STEP 5 Inventor warranty is now valid! Subscribe to Inventor's Newsletter e to Inventor's Newsletter With the current warranty card you accept the terms and conditions. urrent warranty card you accept the terms and conditions.
- Page 35 ΠΕΡΙΕΧΌΜΕΝΑ 1. ΌΔΗΓΙΕΣ ΑΣΦΑΛΕΙΑΣ ....................... 36 2. ΗΛΕΚΤΡΌΛΌΓΙΚΑ ΧΑΡΑΚΤΗΡΙΣΤΙΚΑ ................37 3. ΓΕΝΙΚΕΣ ΠΑΡΑΤΗΡΗΣΕΙΣ – ΑΠΌΡΡΙΨΗ ΣΥΣΚΕΥΗΣ ............37 4. ΜΕΤΡΑ ΑΣΦΑΛΕΙΑΣ ......................38 5. ΠΡΌΕΙΔΌΠΌΙΗΣΕΙΣ (αφορά ψυκτικό υγρό τύπου R290) ..........41 6. ΣΥΜΒΌΥΛΕΣ ΠΡΙΝ ΤΗ ΧΡΗΣΗ ..................47 7.
-
Page 36: Όδηγιεσ Ασφαλειασ
1. ΌΔΗΓΙΕΣ ΑΣΦΑΛΕΙΑΣ Παρακαλούμε ΜΗΝ ΕΠΙΤΡΕΠΕΤΕ σε παιδιά κάτω των 8 ετών να χρησιμοποιούν αυτή τη συ- σκευή. Βεβαιωθείτε ότι τα παιδιά, άτομα με αναπηρία (ΑμεΑ) ή έλλειψη γνώσης και εμπειρίας, επιβλέπονται, ανάλογα με την περίπτωση, από άτομα υπεύθυνα για την ασφάλειά τους και δεν... -
Page 37: Ηλεκτρόλόγικα Χαρακτηριστικα
• Κατά τη πρώτη χρήση του αφυγραντήρα και για τη σωστή λειτουργία, επιτρέψτε στη συσκευή να λειτουργήσει συνεχόμενα για 24 ώρες. 2. ΗΛΕΚΤΡΌΛΌΓΙΚΑ ΧΑΡΑΚΤΗΡΙΣΤΙΚΑ Η ετικέτα των τεχνικών και ηλεκτρολογικών χαρακτηριστικών του αφυγραντήρα, βρίσκεται στο πίσω μέρος της συσκευής. Η συσκευή πρέπει να εγκατασταθεί σύμφωνα με τους εθνικούς ηλεκτρολογικούς κανονισμούς. Βεβαιωθείτε... -
Page 38: Μετρα Ασφαλειασ
4. ΜΕΤΡΑ ΑΣΦΑΛΕΙΑΣ Διαβάστε τα μέτρα ασφαλείας πριν από τη λειτουργία και την εγκατάσταση του μηχανήματος. Για να αποφύγετε τραυματισμό του χρήστη ή άλλων ανθρώπων και υλικές ζημιές, πρέπει να ακολουθήσετε τις παρακάτω οδηγίες. Η εσφαλμένη λειτουργία λόγω παραβίασης των οδηγιών... - Page 39 Μη βγάζετε τον κάδο νερού έξω κατά τη λειτουργία. Μπορεί να προκαλέσει την πλήρη προστασία του κάδου της μονάδας και να επιφέρει ηλεκτροπληξία. Μην χρησιμοποιείτε καλώδια επέκτασης. ΠΡΌΣΌΧΗ Μη χρησιμοποιείτε τη μονάδα σε μικρούς χώρους Τοποθετήστε τη μονάδα σε ένα επίπεδο τμήμα του δαπέδου. Μην...
- Page 40 • Η συσκευή με ηλεκτρικό θερμαντήρα θα έχει χώρο τουλάχιστον 1 μέτρου από τα εύφλεκτα υλικά. • Επικοινωνήστε με τον εξουσιοδοτημένο τεχνικό για επισκευή ή συντήρηση αυτής της μονάδας. • Μη χρησιμοποιείτε την πρίζα εάν είναι χαλαρή ή έχει καταστραφεί. •...
-
Page 41: Πρόειδόπόιησεισ (Αφορά Ψυκτικό Υγρό Τύπου R290)
5. ΠΡΌΕΙΔΌΠΌΙΗΣΕΙΣ (αφορά ψυκτικό υγρό τύπου R290) - Μην χρησιμοποιείτε μέσα επιτάχυνσης της διαδικασίας απόψυξης ή για να καθαρίσετε τη μονάδα, πέραν εκείνων που συνιστώνται από τον κατασκευαστή. - Η συσκευή θα πρέπει να αποθηκεύεται σε δωμάτιο χωρίς την ύπαρξη πηγών ανάφλεξης (για παράδειγμα: ανοικτές... - Page 42 Προειδοποιήσεις (αφορά ψυκτικό υγρό τύπου R290) 1. Μεταφορά εξοπλισμού που περιέχει εύφλεκτα ψυκτικά μέσα Καθορίζεται από τις τοπικές διατάξεις. 2. Σήμανση του εξοπλισμού με σύμβολα Δείτε τους τοπικούς κανονισμούς 3. Απόρριψη συσκευών που περιέχουν εύφλεκτα ψυκτικά μέσα Δείτε παρακαλώ τις ανάλογες εθνικές διατάξεις. 4.
- Page 43 7. Αεριζόμενη περιοχή Βεβαιωθείτε ότι η περιοχή είναι ανοιχτή ή ότι αερίζεται επαρκώς προτού ανοιχθεί το σύστημα στο περιβάλλον ή διεξαχθεί οποιουδήποτε εργασία που απαιτεί υψηλές θερμοκρασίες. Ο ίδιος βαθμός αερισμού πρέπει να συνεχίσει να παρέχεται κατά τη διάρκεια διεξαγωγής της εργασίας. Ο...
- Page 44 8. Επισκευή των ασφαλών εξαρτημάτων Μην εφαρμόζετε μόνιμα επαγωγικά ή χωρητικά φορτία στο κύκλωμα, χωρίς να διασφαλίζετε πρώτα ότι δεν θα υπερβείτε την επιτρεπόμενη τάση και το ρεύμα λειτουργίας που ορίζει ο εξοπλισμός που χρησιμοποιείται. Τα εγγενώς ασφαλή εξαρτήματα είναι οι μόνοι τύποι που μπορούν να αντέξουν σε περιβάλλον εύφλεκτης...
- Page 45 άζωτο απαλλαγμένο από οξυγόνο και συνεχίζοντας να αναπληρώσει έως ότου επιτευχθεί η πίεση λειτουργίας. Στη συνέχεια απαιτείται εξαερισμός προς την ατμόσφαιρα, και, τέλος, το τράβηγμα προς τα κάτω σε ένα κενό. Αυτή η διαδικασία θα πρέπει να επαναλαμβάνεται μέχρις ότου να μην υπάρχει καθόλου ψυκτικό στο σύστημα. Όταν πραγματοποιείται την τελευταία αφαίρεση...
- Page 46 16. Αποκατάσταση Κατά την αφαίρεση του ψυκτικού μέσου από ένα σύστημα, είτε για τη συντήρηση ή αποσυναρμολόγηση, συνιστάται ελεγχόμενη διαδικασία ώστε όλα τα ψυκτικά υγρά να απομακρυνθούν με ασφαλή τρόπο. Κατά τη μεταφορά του ψυκτικού υγρού σε φιάλες, βεβαιωθείτε ότι χρησιμοποιούνται μόνο κατάλληλες φιάλες ανάκτησης ψυκτικού υγρού. Βεβαιωθείτε...
-
Page 47: Συμβόυλεσ Πριν Τη Χρηση
6. ΣΥΜΒΌΥΛΕΣ ΠΡΙΝ ΤΗ ΧΡΗΣΗ Εγχειρίδιο Χρήσης Αγωγός Αφυγραντήρας Aποστράγγισης με Συμπιεστή Στη τελευταία σελίδα (ελληνικό Για την υποβολή της μέρος) αυτού του εντύπου θα βρείτε εγγύησης θα οδηγίες σχετικά με την υποβολή της πρέπει να εγγύησης. συμπληρώσετε τον Σειριακό Αριθμό... - Page 48 Συμβουλές 1) Αφαιρέστε τον αφυγραντήρα από τη συσκευασία. 2) Κρατήστε τη λαβή και σηκώστε τον αφυγραντήρα προς τα πάνω και περιστρέψτε 90 ° δεξιόστροφα. 3) Τοποθετήστε τον αφυγραντήρα στη δεξαμενή νερού και σιγουρευτείτε ότι οι ετικέτες με τα βέλη ευθυγραμμίζονται ώστε η συσκευή...
- Page 49 6) Μην φράζετε και μην εμποδίζετε την κυκλοφορία του αέρα γύρω από τον αφυγραντήρα. Βεβαιωθείτε ότι η είσοδος και η έξοδος του αέρα πραγματοποιείται αβίαστα και επιτρέψτε απόσταση 20cm περιμετρικά της συσκευής και 40cm από το επάνω μέρος της. 7)Τοποθετήστε τη μονάδα σε μια περιοχή...
- Page 50 Όδηγίες εγκατάστασης και αποσυναρμολόγησης για τα ροδάκια μεταφοράς Mέσα στη συσκευασία θα βρείτε 4 ροδάκια τα οποία θα πρέπει να τοποθετηθούν στο κάτω μέρος του δοχείου νερού ακολουθώντας τις παρακάτω οδηγίες εγκατάστασης: Εγκατάσταση: 1. Χρησιμοποιήστε ένα κατσαβίδι για να ανοίξετε τα πλαστικά προστατευτικά που βρίσκονται στις...
-
Page 51: Γνωριζόντασ Τόν Αφυγραντηρα
7. ΓΝΩΡΙΖΌΝΤΑΣ ΤΌΝ ΑΦΥΓΡΑΝΤΗΡΑ Είσοδος Αέρα Εξαγωγή Αέρα Ροδάκια Δοχείο Νερού Λαβές Μεταφοράς Πάνελ Χειρισμού Καλώδιο Ρεύματος Συνεχής Αποστράγγιση Είσοδος Αέρα Φίλτρα... -
Page 52: Πανελ Χειρισμόυ • Λειτόυργιεσ
8. ΠΑΝΕΛ ΧΕΙΡΙΣΜΌΥ • ΛΕΙΤΌΥΡΓΙΕΣ POWER Πιέστε το πλήκτρο “Power” για να ενεργοποιήσετε ή απενεργοποιήσετε τον αφυγραντήρα. Το πλήκτρο “Power” και η οθόνη θα ανάψουν. • Όταν επιτευχθεί η επιθυμητή υγρασία, ενεργοποιείται αυτόματα η λειτουργία Εξοικονόμησης ενέργειας κατά την διάρκεια της οποίας, η οθόνη της συσκευής ενδέχεται... - Page 53 σκεται πάνω από 45% RH (Σχετική Υγρασία), ο αφυγραντήρας θα λειτουργεί σε TURBO τα- χύτητα ανεμιστήρα για 1 ώρα έως ότου ελέγξει ξανά την υγρασία του δωματίου. Ο μέγιστος χρόνος λειτουργίας υπό συνθήκη “MODE” ορίζεται στις 10 ώρες και μπορεί να μειωθεί ανά- λογα...
- Page 54 ΠΛΗΚΤΡΑ Πλήκτρα ρύθμισης της Υγρασίας Πιέστε τα αντίστοιχα πλήκτρα (˄) ή (˅) για να ρυθμίσετε το επιθυμητό επίπεδο υγρα- σίας με εύρος 35%RH (Σχετική Υγρασία) έως 85%RH (Σχετική Υγρασία) με μεταβολή 5% κάθε φορά που πιέζεται ένα από τα δύο πλήκτρα. •...
- Page 55 TIMER Πιέστε το πλήκτρο “Timer” για να ενεργοποιήσετε την Αυτόματη Εκκίνηση ή Αυτόματη Απε- νεργοποίηση του αφυγραντήρα, σε συνδυασμό με τα πλήκτρα ( ˄ ) και ( ˅ ). Η ένδειξη “Timer” και η οθόνη θα ανάψουν. Όταν ο αφυγραντήρας είναι ενεργοποιημένος, πιέστε το πλήκτρο “Timer” ώστε να ενεργο- ποιήσετε...
- Page 56 Κατά τη διάρκεια της εγκατάστασης της εφαρμογής INVmate II και της σύνδεσης, βεβαιωθείτε πως ο αφυγραντήρας ειναι ενεργοποιημένος. ΛΕΙΤΌΥΡΓΙΑ ΧΩΡΙΣ ΔΌΧΕΙΌ ΝΕΡΌΥ Λειτουργία χωρίς το δοχείου νερού: Επιλέγοντας αυτη τη λειτουργία ο αφυγραντήρας μπορεί να λειτουργεί χωρίς το δοχείο νερού, χρησιμοποιώντας τον εξοπλισμό για τη συνεχή αποστράγγιση.
- Page 57 Αυτόματη Απόψυξη Σ ε περίπτωση που σχηματιστεί πάγος επάνω στο στοιχείο, ο συμπιεστής θα σταματήσει να λειτουργεί, ενώ ο ανεμιστήρας θα συνεχίσει τη λειτουργία του μέχρι να εξαφανιστεί ο πάγος. • Με τη λειτουργία αυτή εξασφαλίζεται τόσο η ασφαλής και σωστή λειτουργία του αφυ- γραντήρα, όσο...
-
Page 58: Δόχειό Νερόυ & Αγωγόσ Απόστραγγισησ
9. ΔΌΧΕΙΌ ΝΕΡΌΥ & ΑΓΩΓΌΣ ΑΠΌΣΤΡΑΓΓΙΣΗΣ Υπάρχουν δυο τρόποι απομάκρυνσης του νερού που συλλέγεται. Προτού αδειάσετε το δο- χείο νερού, βεβαιωθείτε ότι έχετε απενεργοποιήσει και αποσυνδέσει τη μονάδα από το ρεύμα. 1. Χρήση του Δοχείου Νερού Όταν ο αφυγραντήρας είναι απενεργοποιημένος και το δοχείο νερού γεμάτο, η οθόνη θα εμ- φανίσει... - Page 59 • Βεβαιωθείτε ότι ο αφυγραντήρας είναι τοποθετημένος σε επίπεδη επιφάνεια. • Όταν οδηγείτε τον αγωγό αποστράγγισης στο σιφόνι, βεβαιωθείτε ότι ο αγωγός δεν ξεπερνά το ύψος του σημείου εξόδου αποστράγγισης και δεν συμπιέζεται. Εξασφαλίστε τη φυσική ροή του νερού κατά την απομάκρυνσή του. Προσοχή: Δεν...
-
Page 60: Συντηρηση & Φρόντιδα
10. ΣΥΝΤΗΡΗΣΗ & ΦΡΌΝΤΙΔΑ Προτού προβείτε στη συντήρηση ή τον καθαρισμό του αφυγραντήρα, βεβαιωθείτε ότι έχε- τε απενεργοποιήσει και αποσυνδέσει τη συσκευή από το ρεύμα. Καθαρισμός φίλτρων: Χρησιμοποιείστε ζεστό νερό και σαπούνι για να ξεπλύνετε τα φίλτρα του αφυγραντήρα. • Μην χρησιμοποιείτε λευκαντικά ή στιλβωτικά μέσα. Χρησιμοποιήστε μαλακό καθαρό πα- νί... -
Page 61: Απόθηκευση Συσκευησ
Καθαρισμός των γρίλιων: Οι γρίλιες εισαγωγής και εξαγωγής αέρα λερώνονται εύκολα. Χρησιμοποιήστε μια σκούπα ή μια βούρτσα για τις καθαρίσετε. Μην ρίχνετε νερό απευθείας στην κύρια μονάδα. Κάτι τέ- τοιο μπορεί να προκαλέσει ηλεκτροπληξία, να προκαλέσει φθορά της μόνωσης ή να προκα- λέσει... -
Page 62: Απαντησεισ Σε Συχνα Ερωτηματα & Αντιμετωπιση Πρόβληματων
12. ΑΠΑΝΤΗΣΕΙΣ ΣΕ ΣΥΧΝΑ ΕΡΩΤΗΜΑΤΑ & ΑΝΤΙΜΕΤΩΠΙΣΗ ΠΡΌΒΛΗΜΑΤΩΝ Όι αφυγραντήρες είναι Τον πρώτο μήνα που θα λειτουργήσετε τον αφυγραντήρα, ενεργοβόρες συσκευές? θα παρατηρήσετε την έντονη λειτουργία του. Με το πέρασμα των ημερών αυτό θα ελαττωθεί καθώς θα έχει μειωθεί το επίπεδο υγρασίας στο χώρο. Στις οικιακές εφαρμογές... - Page 63 Πόσος χρόνος Ο απαραίτητος χρόνος για το στέγνωμα των ρούχων απαιτείται για το εξαρτάται από πολλούς παράγοντες, όπως τη θερμοκρασία στέγνωμα των ρούχων? του δωματίου, το επίπεδο της υγρασίας, την υγρασία των ρούχων κλπ., επομένως δεν μπορεί να προσδιοριστεί με ακρίβεια.
- Page 64 Ελέγξτε ότι όλες οι πόρτες και τα παράθυρα στο χώρο είναι κλειστά. Η θερμοκρασία του δωματίου είναι χαμηλότερη από το προτεινόμενο εύρος λειτουργίας. Υπάρχουν θερμαντικές συσκευές στο χώρο ή συσκευές που παράγουν υδρατμούς. Ο χώρος που τοποθετείτε τη συσκευή είναι μεγαλύτερος από αυτόν που προτείνεται. Το...
- Page 65 Όλες οι εικόνες στο παρόν εγχειρίδιο εξυπηρετούν επεξηγηματικούς σκοπούς. Το προϊόν που προμηθευτήκατε μπορεί να εμφανίζει ορισμένες διαφορές ως προς το σχήμα, ωστόσο οι λειτουργίες και τα χαρακτηριστικά παραμένουν ίδια. Η εταιρεία δεν φέρει ευθύνη για τυχόν τυπογραφικά λάθη. Ο σχεδιασμός και οι προδιαγραφές...
- Page 66 Παρακαλούμε ελέγξτε και τον φάκελο με τα Ανεπιθύμητα εισερχόμενα. Διεύθυνση email* mail* κατοχύρωσης στο email σας ΒΗΜΑ 5 Έχετε υποβάλει επιτυχώς την εγγύηση του προϊόντος Inventor! Να εγγραφώ στο newsletter της Inventor στο newsletter της Inventor * Απαραίτητο πεδίο εδίο...
- Page 68 DEHUMIDIFIER V:1.0.062021 INVENTOR A.G. S.A. Manufacturer: 24th km National Road Athens - Lamia & 2 Thoukididou Str., Ag.Stefanos, 14565 Tel.: +30 211 300 3300, Fax: +30 211 300 3333 - www.inventor.ac...
Need help?
Do you have a question about the CB-WUI-20L and is the answer not in the manual?
Questions and answers