
Related Manuals for INVENTOR SD-IONINV-20L


Summary of Contents for INVENTOR SD-IONINV-20L
- Page 1 DEHUMIDIFIER - AIR PURIFIER • USER’S MANUAL • ΕΓΧΕΙΡΙΔΙΟ ΧΡΗΣΗΣ • MANUALUL UTILIZATORULUI MODEL: SD-IONINV-20L ENGLISH | ΕΛΛΗΝΙΚΑ | ROMANIAN...
- Page 2 LANGUAGES ENGLISH ......................3 ΕΛΛΗΝΙΚΑ ..................... 33 ROMANA ...................... 65...
-
Page 3: Table Of Contents
6. GETTING TO KNOW YOUR DEHUMIDIFIER ..............10 7. CONTROL PANEL • FUNCTIONS .................. 11 8. ΑUTOMATIC MODES ....................17 9. PAIR THE DEHUMIDIFIER WITH THE INVENTOR CONTROL APPLICATION ....18 10. WATER TANK & DRAIN HOSE ..................20 11. MAINTENANCE & CLEANING..................22 12. -
Page 4: Safety & Warning Instructions
1. SAFETY & WARNING INSTRUCTIONS For your continued safety and to reduce the risk of injury or Electric shock, please follow all the safety warnings list below. Please be certain the power supply is 220-240V/50Hz. To avoid possible electric shock, this device should not be placed near a window or in a bathroom. - Page 5 If the supply cord is damaged, it must be replaced by the manufacturer, its service agent or similarly qualified persons to avoid a hazard. Never attempt to dismantle, repair or modify the device. Do not attempt to repair, dismantle or modify this appliance. Contact your authorized service technician for repair or maintenance of this device.
-
Page 6: Electrical Information
2. ELECTRICAL INFORMATION The nameplate with all the electrical and technical data of this appliance, is located on the οpposite site of the unit. The appliance should be installed in accordance with national wiring regulations. Be sure the device is grounded properly. Proper grounding is important as it minimizes the chance of electric shock or fire. -
Page 7: Additional Warnings For Appliances With R290 Refrigerant
4. ADDITIONAL WARNINGS FOR APPLIANCES WITH R290 REFRIGERANT (refer to the nameplate for the type of refrigerant used) REFER TO THE USER'S MANUAL PRIOR TO USING THIS APPLIANCE. R290 refrigerant complies with European environmental directives. Do not penetrate in any way or burn. The maintenance and repairs that require the assistance of qualified personnel should be carried out under the supervision of inflammable refrigerant specialists. -
Page 8: Steps Before Use
5. STEPS BEFORE USE User's manual Dehumidifier - Air Purifier with Compressor Drain hose Please refer to the electronic warranty instructions, in the last page (English section) of this manual. SN: D2002255780115715200209 For warranty purposes, please note the SN (serial number) placed on the device. SN: D2002255780115715200209... - Page 9 Installation tips 1) Do not block or restrict the airflow around the unit. Make sure the air inlet exhaust grills are not obstructed. Allow 30cm of clearance around the unit and 40cm above. 2) Place the unit in an area where the temperature levels will not fall bellow 5ºC (41ºF) There is a possibility the coils will collect frost...
-
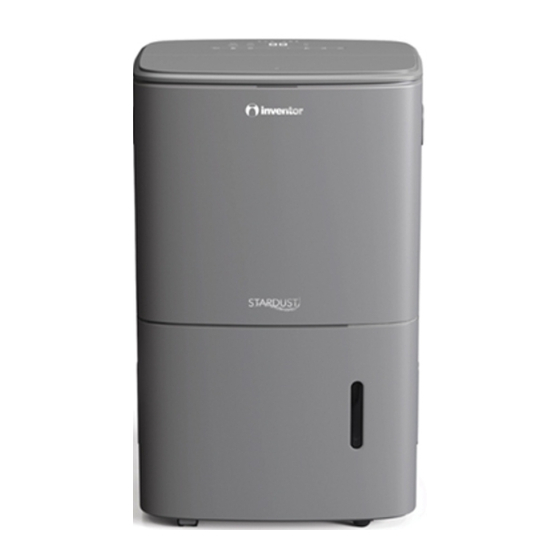
Page 10: Getting To Know Your Dehumidifier
6. GETTING TO KNOW YOUR DEHUMIDIFIER Air quality Air Quality indicator Sensor Removable water tank Water tank handle Casters Control Panel Intake Grill Air outlet Handle (both sides) Drain hose outlet HEPA Filter Air Filter Power Cord Power cord strap - For storage usage... -
Page 11: Control Panel • Functions
7. CONTROL PANEL • FUNCTIONS POWER By pressing the "POWER" button the dehumidifier/air purifier turns ON or OFF. Once powered, the digital display is active indicating the current settings. OPERATION By pressing the "Operation" button you can select the function of the unit between the following options: Complete , Purifier and Dryer. - Page 12 30% and the timer is automatically set to 8 hours of operation. You can change or deactivate the timer setting from the control panel or via the APP Inventor Control. The digital monitor indicates the time set, until deactivation . The dryer function is an ideal option for drying clothes.
- Page 13 During Sleep Mode: • The unit will dimer the buttons of the control panel to 30% and will turn off the display and the air quality light indicators to provide a more relaxing environment. • Neither the desired humidity nor the fan speed can be adjusted. (+ &...
- Page 14 FAN SPEED By pressing the “ ” button, under the operation of Air Purifier the fan speed can be set to: Minimum / Medium / Maximum. By pressing the “ ” button, under the operation of Complete Function, the fan air speed can be set to: Minimum / Medium / Maximum •...
- Page 15 ON-DISPLAY INDICATORS WI-FI The appliance is equipped with Wi-Fi , allowing you to operate the dehumidifier remotely through the app Inventor Control. Once the connection is established, the indicator will illuminate on the control panel. IONIZER Press the "MODE" and "FUNCTION"...
- Page 16 HEPA FILTER replacement reminder The HEPA FILTER replacement reminder will appear on the digital panel of the device, once 4,320 operational hours have been completed. • When this indication appears , the HEPA filter should be replaced with a new one.
-
Page 17: Αutomatic Modes
8. ΑUTOMATIC MODES AUTO-RESTART In the event of a power failure the device has an Auto Restart function. Once power is restored, the dehumidifier will restart automatically at the preselected settings prior to the power failure. • In case of power failure or when the power plug is removed from the socket, the unit will operate under the preselected settings prior to the disconnection. -
Page 18: Pair The Dehumidifier With The Inventor Control Application
AES. Position the dehumidifier as close as possible to the router during the pairing process. Step 1: Download and install the “Inventor Control” application from the Google Play Store or IOS App Store. Step 2: Select “Register” to create a new Step 3: To add the device, select “My... - Page 19 Power off the router, the dehumidifier, and the device (tablet or mobile) and allow 5 minutes. Restart the pairing process from Step 2. If the pairing is not successful, repeat the process with a different smart device (tablet or mobile). Contact Inventor’s After Sales Dept.
-
Page 20: Water Tank & Drain Hose
10. WATER TANK & DRAIN HOSE There are two ways to remove collected water. Before proceeding ensure that you have switched off and unplugged the unit. 1. Usage of the water tank When the unit is OFF and the tank of the dehumidifier is full, the full indicator will be lit. Additionally, when the unit is on and the tank is full, the indicator will be flashing, and the unit will automatically stop operating. - Page 21 Caution: water hose should never be bend or twisted! When the continuous drainage feature is not being used, remove the drain hose from the drain hose outlet and re-install the rubber cap.
-
Page 22: Maintenance & Cleaning
11. MAINTENANCE & CLEANING Maintenance & Cleaning of the air filter The air filter of the unit collects dust contained in the air. The buildup of dust reduces the efficiency of the unit. To prevent the dust from clogging up the unit always use it with the air filter in place. -
Page 23: Storage
12. STORAGE When unit is inactive for an extended period of time, please make sure you follow the instructions below, for the appropriate storage of your appliance: • Turn unit off allowing one day before storage. • Remove drain hose (if attached). •... - Page 24 Why does When the desired humidity level is reached, there is a condensation possibility of partial humidity formation on windows. This persist on occurs due to the temperature variation between the windows even with window and the external weather conditions. dehumidifier’s use? •...
- Page 25 The unit does not start Make sure the dehumidifier’s plug is placed completely into the socket. Check the house fuse/circuit breaker box. Check whether the power cord is damaged. Check the water bucket, if it is full, empty it. Check if the dehumidifier has reached its preset level. Make sure the water bucket is positioned properly.
-
Page 26: Instruction For Repairing Appliances Containing Refrigerant R290
In the event of any of the above-mentioned errors, all buttons are unavailable, except for the “POWER” button so that the device can be turned off. After powering off, unplug the device for 10minutes to reset. When device is turned back on check if the error persists. In case the error persists, the unit should remain turned off and unplugged. - Page 27 6. Ventilated area Ensure that the area is in the open or that it is adequately ventilated before breaking into the system or conducting any hot work. A degree of ventilation shall continue during the period that the work is carried out. The ventilation should safely disperse any released refrigerant and preferably expel it externally into the atmosphere.
- Page 28 11. Cabling Check that cabling will not be subject to wear, corrosion, excessive pressure, vibration, sharp edges or any other adverse environmental effects. The check shall also take into account the effects of aging or continual leaks. A halide torch (or any other detector using a naked flame) shall not be used 12.
- Page 29 refrigerant contained in them. -Cylinders shall be kept upright. -Ensure that the refrigeration system is earthed prior to charging the system with refrigerant. -label the system when charging is complete (if not already) -Extreme care shall be taken not to overfill the refrigeration system. Prior to recharging the system is shall be pressure tested with OFN.
- Page 30 In addition, a set of calibrated weighing scales shall be available and in good working order. Hoses shall be complete with leak-free disconnect couplings and good condition. Before using the recovery machine, check that it is in satisfactory working order, has been properly maintained and that any associated electrical components are sealed to prevent ignition in the event of a refrigerant release.
- Page 31 All the pictures in the manual are for explanatory purposes only. The actual shape of the unit you purchased may be slightly different, but the operations and functions are the same. The company may not be held responsible for any misprinted information. The design and the specifications of the product for reasons, such as product improvement, are subject to change without any prior notice.
- Page 32 STEP 5 Additional Details Additional Details Inventor warranty is now valid! Subscribe to Inventor's Newsletter e to Inventor's Newsletter With the current warranty card you accept the terms and conditions. current warranty card you accept the terms and conditions.
- Page 33 6. ΓΝΩΡΙΖΌΝΤΑΣ ΤΌΝ ΑΦΥΓΡΑΝΤΗΡΑ ................40 7. ΠΑΝΕΛ ΧΕΙΡΙΣΜΌΥ • ΛΕΙΤΌΥΡΓΙΕΣ ................41 8. ΑΥΤΌΜΑΤΑ ΠΡΌΓΡΑΜΜΑΤΑ ..................48 9. ΣΥΝΔΕΣΤΕ ΤΌΝ ΑΦΥΓΡΑΝΤΗΡΑ ΣΑΣ ΜΕ ΤΗΝ ΕΦΑΡΜΌΓΗ INVENTOR CONTROL .. 50 10. ΔΌΧΕΙΌ ΝΕΡΌΥ & ΑΓΩΓΌΣ ΑΠΌΣΤΡΑΓΓΙΣΗΣ ............52 11. ΣΥΝΤΗΡΗΣΗ & ΦΡΌΝΤΙΔΑ ..................54 12.
-
Page 34: Όδηγιεσ Ασφαλειασ
1. ΌΔΗΓΙΕΣ ΑΣΦΑΛΕΙΑΣ Για την συνεχή σας ασφάλεια και την μείωση του κινδύνου τραυματισμού ή ηλεκτροπληξίας, παρακαλώ ακολουθήστε όλες τις προειδοποιήσεις ασφαλείας της παρακάτω λίστας. Παρακαλώ βεβαιωθείτε ότι η παροχή ηλεκτρικού ρεύματος είναι ισχύος 220-240V/50Hz. Για την προστασία σας από ηλεκτροπληξία, μην τοποθετείτε την συσκευή κοντά σε παράθυρο... - Page 35 Αποσυνδέστε τον αφυγραντήρα, σε περίπτωση που ακούγονται ασυνήθιστοι θόρυβοι ή εξέρχονται μυρωδιές και καπνός. Αν το καλώδιο παροχής ρεύματος είναι κατεστραμμένο, θα πρέπει να αντικατασταθεί άμε- σα από τον κατασκευαστή, το σέρβις ή άλλον αδειοδοτημένο τεχνικό, ώστε να αποφευχθούν πιθανά ατυχήματα. Μην...
-
Page 36: Ηλεκτρόλόγικα Χαρακτηριστικα
2. ΗΛΕΚΤΡΌΛΌΓΙΚΑ ΧΑΡΑΚΤΗΡΙΣΤΙΚΑ Η ετικέτα των τεχνικών και ηλεκτρολογικών χαρακτηριστικών του αφυγραντήρα, βρίσκεται στο πίσω μέρος της συσκευής. Η συσκευή πρέπει να εγκατασταθεί σύμφωνα με τους εθνικούς ηλεκτρολογικούς κανονισμούς. Βεβαιωθείτε ότι η συσκευή είναι σωστά γειωμένη για την αποφυγή ηλεκτροπληξίας και πυρ- καγιάς. -
Page 37: Πρόσθετεσ Πρόειδόπόιησεισ Για Συσκευεσ Με Ψυκτικό Μεσό R290
4. ΠΡΌΣΘΕΤΕΣ ΠΡΌΕΙΔΌΠΌΙΗΣΕΙΣ ΓΙΑ ΣΥΣΚΕΥΕΣ ΜΕ ΨΥΚΤΙΚΌ ΜΕΣΌ R290 (παρακαλώ ανατρέξτε στην ετικέτα της συσκευής για τον τύπο του χρησιμοποιούμενο ψυκτικού μέσου) ΔΙΑΒΑΣΤΕ ΠΡΟΣΕΚΤΙΚΑ ΤΟΝ ΟΔΗΓΟ ΠΡΙΝ ΤΗ ΧΡΗΣΗ ΤΗΣ ΣΥΣΚΕΥΗΣ. To ψυκτικό μέσο R290 συμμορφώνεται με τις Ευρωπαϊκές περιβαλλοντικές οδηγίες. Μην... -
Page 38: Συμβόυλεσ Πριν Τη Χρηση
5. ΣΥΜΒΌΥΛΕΣ ΠΡΙΝ ΤΗ ΧΡΗΣΗ Εγχειρίδιο Χρήσης Αφυγραντήρας Αγωγός - Καθαριστής Αέρα με Συμπιεστή Aποστράγγισης Στη τελευταία σελίδα (ελληνικό μέρος) αυτού του εντύπου θα βρείτε οδηγίες σχετικά με την υποβολή της εγγύησης. SN: D2002255780115715200209 Για την υποβολή της εγγύησης θα πρέπει να... - Page 39 Συμβουλές Εγκατάστασης 1) Μην φράζετε και μην εμποδίζετε την κυκλοφορία του αέρα γύρω από τον αφυγραντήρα. Βεβαιωθείτε ότι η είσοδος και η έξοδος του αέρα πραγματοποιείται αβίαστα και επιτρέψτε απόσταση 30cm περιμετρικά της συσκευής και 40cm από το επάνω μέρος της. 2)Τοποθετήστε...
-
Page 40: Γνωριζόντασ Τόν Αφυγραντηρα
6. ΓΝΩΡΙΖΌΝΤΑΣ ΤΌΝ ΑΦΥΓΡΑΝΤΗΡΑ Δείκτης Ποιότητας Αέρα Αποσπώμενο Δοχείο Νερού Λαβή Δοχείου Πάνελ Νερού Ροδάκια Χειρισμού Είσοδος Αέρα Έξοδος Αέρα Δείκτης Ποιότητας Λαβές Στήριξη καλωδίου Αέρα Μεταφοράς τροφοδοσίας – για αποθηκευτικούς λόγους Συνεχής Αποστράγγιση Φίλτρο Φίλτρο HEPA Καλώδιο Ρεύματος... -
Page 41: Πανελ Χειρισμόυ • Λειτόυργιεσ
7. ΠΑΝΕΛ ΧΕΙΡΙΣΜΌΥ • ΛΕΙΤΌΥΡΓΙΕΣ POWER Πατώντας το πλήκτρο "POWER" ο αφυγραντήρας και καθαριστής αέρα ενεργοποιείται ή απενεργοποιείται. Όταν ενεργοποιηθεί, η οθόνη φωτίζεται και απεικονίζει την τρέχουσα λειτουργία. OPERATION Πιέζοντας το πλήκτρο Operation μπορείτε να επιλέξετε μία απο τις παρακάτω λειτουργίες: Complete, Purifier και... - Page 42 Στην λειτουργία Αφυγραντήρα και Καθαριστή Αέρα (Complete) η φωτεινή χρωματική ένδειξη για τη ποιότητα του αέρα παραμένει ενεργοποιημένη. - Dryer Πατήστε το πλήκτρο Operation για τρεις φορές για να ενεργοποιήσετε τη λειτουργία στεγνώματος ρούχων (Dryer). Στο πρόγραμμα στεγνώματος ρούχων η συσκευή λειτουργεί σε...
- Page 43 Στη λειτουργία ύπνου: • Η μονάδα θα μειώσει την ένταση των φωτεινών ενδείξεων του πάνελ στο 30% και θα απενεργοποιήσει την οθόνη και τη λυχνία του αισθητήρα ποιότητας αέρα προκειμένου να απολαμβάνετε ένα πιο ξεκούραστο περιβάλλον. • Δεν υπάρχει η δυνατότητα ρύθμισης του επιπέδου υγρασίας και της ταχύτητας...
- Page 44 μονάδα ή ρυθμίστε το χρονοδιακόπτη στο "0.0". ΕΝΔΕΙΞΕΙΣ ΌΘΌΝΗΣ WI-Fi Η συσκευή είναι εξοπλισμένη με Wi-Fi, επιτρέποντάς σας να ρυθμίζετε τον αφυγραντήρα απομακρυσμένα μέσω της εφαρμογής Inventor Control. Μόλις η σύνδεση οριστικοποιηθεί , η ένδειξη " " θα μείνει μόνιμα αναμένη. IONIZER Πατήστε...
- Page 45 CHILD LOCK Πατώντας τα πλήκτρα "Power & Mode" & συνεχόμενα για 5 δευτερόλεπτα, ενεργοποιείτε/απενεργοποιείτε την λειτουργία του παιδικού κλειδώματος "Child Lock". Το σύμβολο εμφανίζεται σταθερά στην οθόνη της συσκευής υποδηλώνοντας ότι το παιδικό κλείδωμα είναι ενεργοποιημένο. • Κατά τη διάρκεια του παιδικού κλειδώματος, κανένα απο...
- Page 46 Η τακτική αντικατάσταση του φίλτρου HEPA, εξασφαλίζει καθαρό αέρα στο χώρο. O περιοδικός καθαρισμός του φίλτρου HEPA κάθε 30 ημέρες, μπορεί να εφαρμοστεί με την χρήση ηλεκτρικής σκούπας. DF - AUTO DEFROST Όταν η συσκευή χρησιμοποιείται σε χαμηλές θερμοκρασίες περιβάλλοντος, είναι πιθανή η...
-
Page 47: Αυτόματα Πρόγραμματα
8. ΑΥΤΌΜΑΤΑ ΠΡΌΓΡΑΜΜΑΤΑ ΑΥΤΌΜΑΤΗ ΕΠΑΝΕΚΚΙΝΗΣΗ Σε περίπτωση διακοπής ρεύματος, η συσκευή διαθέτει λειτουργία αυτόματης επανεκκίνησης. Μόλις αποκατασταθεί η παροχή ρεύματος, ο αφυγραντήρας θα επανεκκινήσει αυτόματα στις προεπιλεγμένες ρυθμίσεις πριν από τη διακοπή ρεύματος. Σε περίπτωση διακοπής ρεύματος, ή όταν αποσυνδεθεί από την πρίζα, η συσκευή... -
Page 48: Συνδεστε Τόν Αφυγραντηρα Σασ Με Την Εφαρμόγη Inventor Control
Τοποθετήστε τον αφυγραντήρα όσο πιο κοντά γίνεται στο router κατά την διάρκεια της σύζευξης. Βήμα 1: Κατεβάστε και εγκαταστήστε την εφαρμογή Inventor Control από το Google Play Store ή το IOS APP Store. Βήμα 2: Επιλέξτε “Register” για την δημιουργία... - Page 49 Απενεργοποιήστε το router, τον αφυγραντήρα και την συσκευή (tablet ή κινητό) για 5 λεπτά. Επαναλάβετε τη διαδικασία σύζευξης από το Βήμα 2. Εάν η σύζευξη δεν είναι επιτυχής, επαναλάβετε τη διαδικασία με διαφορετική συσκευή (tablet ή κινητό). Επικοινωνήστε με το τμήμα Αfter Sales της Inventor.
-
Page 50: Δόχειό Νερόυ & Αγωγόσ Απόστραγγισησ
10. ΔΌΧΕΙΌ ΝΕΡΌΥ & ΑΓΩΓΌΣ ΑΠΌΣΤΡΑΓΓΙΣΗΣ Υπάρχουν δυο τρόποι απομάκρυνσης του νερού που συλλέγεται. Προτού αδειάσετε το δο- χείο νερού, βεβαιωθείτε ότι έχετε απενεργοποιήσει και αποσυνδέσει τη μονάδα από το ρεύμα. 1. Χρήση του Δοχείου Νερού Όταν η συσκευή είναι απενεργοποιημένη και το δοχείο νερού του αφυγραντήρα είναι γεμάτο, θα... - Page 51 Προσοχή: Δεν πρέπει να τεντώνετε ή να λυγίζετε τον αγωγό αποστράγγισης! Όταν δεν γίνεται χρήση της συνεχούς αποστράγγισης, αφαιρέστε τον αγωγό από τη συσκευή και κλείστε πάλι την υποδοχή με το λαστιχένιο πώμα.
-
Page 52: Συντηρηση & Φρόντιδα
11. ΣΥΝΤΗΡΗΣΗ & ΦΡΌΝΤΙΔΑ Συντήρηση και καθαρισμός του φίλτρου αέρα. Το φίλτρο αέρα της συσκευής συλλέγει την σκόνη που υπάρχει στον αέρα. Η συσσώρευση σκόνης μειώνει την απόδοσης της συσκευής. Για να αποφύγετε τo φράξιμο της συσκευής από τη σκόνη, χρησιμοποιήστε τη συσκευή πάντα με το φίλτρο αέρα στη θέση του. Προτείνεται... -
Page 53: Απόθηκευση Συσκευησ
Για να αποφευχθεί αυτό, προτείνεται να χρησιμοποιείτε ,μία φορά το μήνα, ηλεκτρική σκούπα με μαλακή βούρτσα για να απομακρύνετε τη σκόνη που μπορεί να συσσωρευτεί στον αισθητήρα. ΜΗΝ ΧΡΗΣΙΜΌΠΌΙΕΙΤΕ ΤΌΝ ΑΦΥΓΡΑΝΤΗΡΑ ΧΩΡΙΣ ΤΌ ΦΙΛΤΡΌ 12. ΑΠΌΘΗΚΕΥΣΗ ΣΥΣΚΕΥΗΣ Όταν δεν σκοπεύετε να χρησιμοποιήσετε τον αφυγραντήρα για μεγάλο χρονικό διάστημα, παρακαλούμε... - Page 54 Ποιο είναι το ιδανικό Το προτεινόμενο επίπεδο υγρασίας στο χώρο βρίσκεται επίπεδο υγρασίας στον μεταξύ 45% με 55%. Αυτό το επίπεδο σχετικής υγρασίας, χώρο? εξασφαλίζει απόλυτη άνεση και υγιεινή ατμόσφαιρα σε εσάς και την οικογένειά σας, εμποδίζοντας την ανάπτυξη αλλεργιών ή ασθενειών και συνεισφέρει στην σωστή διατήρηση...
- Page 55 Ό αφυγραντήρας Ο αφυγραντήρας μπορεί να μας βοηθήσει με την καλύτερη απόδοση της θέρμανσης στο χώρο μας και όχι με το μπορεί να μας να παράγει θερμότητα. Στην ουσία με την χρήση του βοηθήσει στη αφυγραντήρα απομακρύνεται η υγρασία και ο αέρας στον θέρμανση...
-
Page 56: Όδηγιεσ Επισκευησ Συσκευων Πόυ Περιεχόυν Ψυκτικό Μεσό R290
E3- Βλάβη αισθητήρα PM2.5 E4- Βλάβη DC Motor E5- Βλάβη αισθητήρα υγρασίας E6- Αποτυχία επικοινωνίας E7- Βλάβη θερμοστάτη απόψυξης E8- Διαρροή ψυκτικού υγρού Συντήρηση του αφυγραντήρα. Η σωστή συντήρηση του αφυγραντήρα από εξειδικευμένο τεχνικό, σας διασφαλίζει την ξέγνοιαστη χρήση του αλλά και τη σταθερή απόδοσή του όπως την πρώτη μέρα που τον αγοράσατε. - Page 57 πιθανά εύφλεκτων σημείων. Βεβαιωθείτε ότι ο εξοπλισμός ανίχνευσης διαρροών που χρησιμοποιείται είναι κατάλληλος για χρήση σε εύφλεκτα ψυκτικά μέσα, δηλαδή, μη επιβλαβής, κατάλληλα σφραγισμένος ή εγγενώς ασφαλής. 4. Παρουσία πυροσβεστήρα Εάν πρέπει να διεξαχθεί οποιαδήποτε εργασία στον εξοπλισμό ψύξης ή σε οποιαδήποτε συναφή...
- Page 58 - Έλεγχος πυκνωτών: Οι πυκνωτές απορρίπτονται, με ασφαλή τρόπο για να αποφευχθεί τυχόν παραγωγή σπινθήρων. - Δεν πρέπει να υπάρχουν εκτεθειμένα ηλεκτρικά εξαρτήματα και καλωδιώσεις κατά τη φόρτιση, την ανάκτηση ή τον καθαρισμό του συστήματος. 9. Επισκευές σε σφραγισμένα εξαρτήματα Πριν...
- Page 59 με τα περισσότερα ψυκτικά μέσα, όμως η χρήση απορρυπαντικών/απολυμαντικών που περιέχουν χλώριο πρέπει να αποφεύγεται καθώς το χλώριο μπορεί να αντιδράσει με το ψυκτικό μέσο και να διαβρώσει τις σωληνώσεις του χαλκού. Εάν υπάρχει υποψία διαρροής, όλες οι φλόγες στον περιβάλλοντα χώρο, θα πρέπει να σβήσουν.
- Page 60 16. Θέστε εκτός λειτουργίας Πριν από τη διεξαγωγή αυτής της διαδικασίας, είναι σημαντικό ο τεχνικός να είναι πλήρως εξοικειωμένος με τα στοιχεία και τον εξοπλισμό. Θα πρέπει όλα τα ψυκτικά υγρά να ανακτώνται με ασφάλεια. Πριν από την εργασία θα πρέπει να εξετάσετε δείγμα λαδιού και...
- Page 61 ώστε να αποφευχθεί ο κίνδυνος ανάφλεξης σε περίπτωση διαρροής ψυκτικού υγρού. Συμβουλευτείτε τον κατασκευαστή σε περίπτωση που χρειάζεστε επιπλέον πληροφορίες. Το ανακτημένο ψυκτικό θα πρέπει να επιστρέφεται στον προμηθευτή σε σωστή φιάλη ανάκτησης η οποία θα φέρει την σχετική σήμανση Μεταφοράς Αποβλήτων. Μην αναμιγνύετε...
- Page 62 Παρακαλούμε ελέγξτε και τον φάκελο με τα Ανεπιθύμητα εισερχόμενα. Διεύθυνση email* mail* κατοχύρωσης στο email σας ΒΗΜΑ 5 Έχετε υποβάλει επιτυχώς την εγγύηση του προϊόντος Inventor! Να εγγραφώ στο newsletter της Inventor στο newsletter της Inventor * Απαραίτητο πεδίο πεδίο...
- Page 64 6. PREZENTAREA APARATULUI ..................72 7. PANOUL DE CONTROL • FUNCTII ................73 8. MODURI AUTOMATE ....................79 9. ASOCIEREA APARATULUI CU APLICATIA “INVENTOR CONTROL ......80 10. REZERVOR DE APA & FURTUNUL DE SCURGERE ............82 11. INTRETINERE SI CURATARE ..................84 12.
-
Page 65: Avertismente Si Instructiuni De Siguranta
1. AVERTISMENTE SI INSTRUCTIUNI DE SIGURANTA Pentru siguranta dumneavoastra continua si pentru a reduce riscul de ranire sau electrocutare, va rugam sa urmati toate avertismentele de siguranta de mai jos. Asigurati-va ca sursa de alimentare este 220-240V/50Hz. Pentru a evita electrocutarea, acest dispozitiv nu trebuie plasat langa o fereastra sau intr- o baie. - Page 66 va fi folosit pentru o perioada lunga de timp. Goliti intotdeauna rezervorul de apa inainte de a depozita unitatea. Daca unitatea este inclinata sau rasturnata, deconectati imediat cablul de alimentare. Asigurati-va ca unitatea este complet uscata inainte de a relua functionarea acesteia. Deconectati dispozitivul daca apar sunete anormale, mirosuri sau fum.
-
Page 67: Informatii Cu Privire La Partea Electrica
2. INFORMATII CU PRIVIRE LA PARTEA ELECTRICA Placuta de identificare cu toate datele electrice si tehnice ale acestui aparat se afla in partea din spate a al unitatii. Aparatul trebuie instalat in conformitate cu reglementarile nationale cu privire la cablaje. Asigurati-va ca dispozitivul este impamantat corespunzator. - Page 68 4. INFORMATII SUPLIMENTARE CU PRIVIRE LA APARATELE CARE FOLOSESC REFRIGERANT R290 (a se face referire la placuta de identificare pentru tipul de utilizare a agentului frigorific) CONSULTATI MANUALUL UTILIZATORULUI INAINTE DE A UTILIZA ACEST APARAT. Agentul de regrigerare R290 respecta directivele europene de mediu. Nu perforati in niciun fel si nu folositi flacara in preajma aparatului.
-
Page 69: Inainte De Utilizare
5. PASI INAINTE DE UTILIZARE Manualul de utilizare Dezumidificator – Purificator aer cu compressor Furtun de scurgere Va rugam sa consultati certificatul de garantie, in ultima pagina (sectiunea in limba romana) a acestui manual. SN: D2002255780115715200209 In scopuri de garantie, va rugam sa retineti SN (serial number) plasat pe dispozitiv. - Page 70 Sfaturi de instalare 1) Nu blocati sau restrictionati fluxul de aer din jurul unitatii. Asigurati-va ca grilele de evacuare a aerului nu sunt obturate. Lasati un spatiu liber de 30 cm in jurul unitatii si 40 cm deasupra 2) Asezati unitatea intr-o zona in care nivelurile de temperatura nu vor scadea sub 5ºC (41ºF).
-
Page 71: Prezentarea Aparatului
6. PREZENTAREA APARATULUI Senzor Indicator calitate aer de calitate Maner a aerului Rezervor de apa detasabil Rezervor de apa detasabil Roti Panou control Grila admisie a aerului Iesire Maner (in ambele parti) Furtun de scurgere a apei Filtru Grila HEPA admisie Cablu de Curea snur... -
Page 72: Panoul De Control • Functii
7. PANOUL DE CONTROL • FUNCTII PUTERE Prin apasarea butonului „POWER'' butonul, dezumidificatorul/purificatorul de aer poate fi pornit sau oprit.. Odata alimentat, afisajul digital este activ indicand setarile curente. OPERATION Prin apasarea butonului „Operation” puteti selecta functionarea unitatii dintre urmatoarele optiuni: Complet, Purificator de aer si Uscare. - Complete Apasati butonul de operare o data si selectati functia Complete. - Page 73 30%, iar temporizatorul este setat automat la 8 ore de functionare. Puteti modifica sau dezactiva setarea temporizatorului din panoul de control sau prin intermediul aplicatiei Inventor Control. Monitorul digital indica ora setata, pana la dezactivare.
- Page 74 In modul Sleep: • Unitatea va reduce la 30% luminozitatea butoanelor panoului de control si va opri afisajul si indicatoarele luminoase pentru calitatea aerului pentru a oferi un mediu mai relaxant. • Nici umiditatea dorita si nici viteza ventilatorului nu pot fi reglate in timpul activarii acestui mod.
- Page 75 VITEZA VENTILATORULUI Prin apasarea butonului “ ” sub functionarea ca purificator de aer, viteza ventilatorului poate fi setata la: Minim / Mediu / Maxim. Prin apasarea butonului “ ” sub functionarea functiei Complete, viteza aerului ventilatorului poate fi setata la: Minim / Mediu / Maxim •...
- Page 76 INDICATORI PE AFISAJ WI-FI Aparatul este echipat cu Wi-Fi, permitandu-va sa operati dezumidificatorul de la distanta prin aplicatia Inventor Control. Odata stabilita conexiunea, indicatorul se va aprinde pe panoul de control. IONIZATOR Apasati „MODE” si "OPERATION'' butoane continuu timp de 5 secunde, pentru a porni sau opri ionizatorul.
- Page 77 Inlocuirea la timp a filtrului HEPA va garanta performante optime, aer curat si sanatos. Curatarea periodica a filtrului HEPA la fiecare 30 de zile, poate fi aplicata cu ajutorul unui aspirator. DF - DEZGHEZARE AUTOMATA Cand aceasta unitate functioneaza la temperaturi foarte scazute, se poate acumula gheata la interior.
-
Page 78: Moduri Automate
8. MODURI AUTOMATE AUTORESTART In cazul unei pene de curent, dispozitivul are o functie de repornire automata. Odata ce alimentarea este restabilita, dezumidificatorul va reporni automat la setarile preselectate inainte de intreruperea curentului. • In caz de pana de curent sau cand stecherul este scos din priza, unitatea va functiona in conformitate cu setarile preselectate inainte de deconectare. -
Page 79: Asocierea Aparatului Cu Aplicatia "Inventor Control
Verificati daca parola Wi-Fi este criptata WPA2-PSK si ca tipul de autorizare este setat la AES. Pozitionati dezumidificatorul cat mai aproape de router in timpul procesului de asociere. Pasul 1: Descarcati si instalati aplicatia „Inventor Control” din Google Play Store sau IOS App Store. Pasul 2: Selectati „Inregistrare” pentru a Pasul 3: Pentru a adauga dispozitivul, crea un cont nou sau „Conectati-va cu contul... - Page 80 Opriti routerul, dezumidificatorul si dispozitivul (tableta sau mobilul) si asteptati 5 minute. Reporniti procesul de asociere de la pasul 2. Daca asocierea nu are succes, repetati procesul cu un alt dispozitiv inteligent diferit (tableta sau mobil). Contactati departamentul after-sales Inventor.
- Page 81 10. REZERVORUL PENTRU APA & FURTUNUL DE SCURGERE Exista doua moduri de a elimina apa colectata. Inainte de a continua, asigurati-va ca ati oprit si deconectat aparatul de la energia electrica. 1. Utilizarea rezervorului de apa Cand unitatea este OPRITA si rezervorul dezumidificatorului este plin, indicatorul de plin se va aprinde.
- Page 82 Atentie: furtunul nu trebuie sa fie indoit sau rasucit Cand functia de drenare continua nu este utilizata, scoateti furtunul de scurgere din orificiul de evacuare a furtunului de scurgere si inchideti cu ajutorul dopului de cauciuc.
-
Page 83: Intretinere Si Curatare
11. INTRETINERE SI CURATARE Intretinerea si curatarea filtrului de aer Filtrul de aer al unitatii colecteaza praful din aer. Acumularea de praf reduce eficienta unitatii. Pentru a preveni infundarea unitatii din cauza prafului, utilizati-l intotdeauna cu filtrul de aer la locul lui. Se recomanda curatarea filtrului de aer la fiecare 2 saptamani. -
Page 84: Depozitare
12. DEPOZITARE Cand unitatea este inactiva pentru o perioada lunga de timp, asigurati-va ca urmati instructiunile de mai jos, pentru depozitarea corespunzatoare a aparatului: • Opriti unitatea, cu o zi inainte de depozitare. • Scoateti furtunul de scurgere (daca este atasat). •... - Page 85 De ce Cand se atinge nivelul de umiditate dorit, exista posibilitatea condensarea formarii partiale de umiditate pe ferestre. Acest lucru se se persista chiar si intampla din cauza variatiei de temperatura intre fereastra si cu utilizarea conditiile meteorologice externe. dezumidificator- Operarea dezumidificatorului ar trebui sa reduca semnificativ ului? formarea condensului pe ferestre.
- Page 86 Verificati daca cablul de alimentare este deteriorat. Verificati rezervorul de apa, daca este plin, goliti-l. Verificati daca dezumidificatorul a atins nivelul prestabilit. Asigurati-va ca rezervorul de apa este pozitionat corect. Temperatura camerei este mai mica sau mai mare decat intervalul operational recomandat. Verificati daca nivelul de umiditate a fost setat la nivel inalt.
-
Page 87: Iinstructiuni De Reparatie A Aparatelor Ce Contin Refrigerant R290
14. INSTRUCTIUNI DE REPARATIE A APARATELOR CE CONTIN REFRIGERANT R290 1. Verificari in zona Inainte de inceperea lucrarilor la sistemele care contin agenti frigorifici inflamabili, sunt necesare verificari de siguranta pentru a se asigura ca riscul de aprindere este minimizat. Pentru repararea sistemului de refrigerare, trebuie respectate urmatoarele masuri de precautie inainte de a efectua lucrari in sistem. - Page 88 Urmatoarea verificare se aplica instalatiilor care utilizeaza agenti frigorifici inflamabili: • dimensiunea incarcaturii este in concordanta cu dimensiunea incaperii in care sunt instalate piesele care contin agent frigorific; • masinile si orificiile de ventilatie functioneaza corespunzator si nu sunt obstructionate; 8.
- Page 89 13. Metode de detectare a scurgerilor Urmatoarele metode de detectare a scurgerilor sunt considerate acceptabile pentru sistemele care contin agenti frigorifici inflamabili. Detectoarele electronice de scurgeri vor fi utilizate pentru a detecta agenti frigorifici inflamabili, dar sensibilitatea poate sa nu fie adecvata sau poate necesita recalibrare. (Echipamentul de detectare trebuie calibrat intr-o zona fara agent frigorific.) Asigurati-va ca detectorul nu este o sursa potentiala de aprindere si este potrivit pentru agentul frigorific utilizat.
- Page 90 Inainte de a efectua aceasta procedura, este esential ca tehnicianul sa cunoasca complet echipamentul si toate detaliile acestuia. Se recomanda o buna practica ca toti agentii frigorifici sa fie recuperati in siguranta. Inainte de indeplinirea sarcinii, trebuie prelevata o proba de ulei si agent frigorific in cazul in care este necesara analiza de caz inainte de reutilizarea agentului frigorific recuperat.
- Page 91 Agentul frigorific recuperat trebuie returnat furnizorului de agent frigorific in cilindrul de recuperare corect. Nu amestecati agenti frigorifici in unitatile de recuperare si mai ales nu in butelii. Daca compresoarele sau uleiurile de compresor trebuie indepartate, asigurati-va ca au fost evacuate la un nivel acceptabil pentru a va asigura ca agentul frigorific inflamabil nu ramane in interior.
- Page 92 Spam. Odata ce garantia a fost activata, veti primi un email de confirmare PASUL 5 Ati activat cu succes Garantia Inventor! a Newsletter-ul Inventor Abonati-va la Newsletter-ul Inventor...
- Page 93 DEHUMIDIFIER - AIR PURIFIER V:1.0.072023 INVENTOR A.G. S.A. Manufacturer: 24th km National Road Athens - Lamia & 2 Thoukididou Str., Ag.Stefanos, 14565 Tel.: +30 211 300 3300, Fax: +30 211 300 3333 - www.inventor.ac...
Need help?
Do you have a question about the SD-IONINV-20L and is the answer not in the manual?
Questions and answers