
Related Manuals for INVENTOR RS-WUI-08L


Summary of Contents for INVENTOR RS-WUI-08L
- Page 1 DEHUMIDIFIER • USER’S MANUAL • ΕΓΧΕΙΡΙΔΙΟ ΧΡΗΣΗΣ • MANUAL UTILIZATORULUI MODEL: RS-WUI-08L ENGLISH | ΕΛΛΗΝΙΚΑ | ROMANA...
- Page 2 LANGUAGES ENGLISH ......................3 ΕΛΛΗΝΙΚΑ ....................20 ROMANA .....................37...
-
Page 3: Table Of Contents
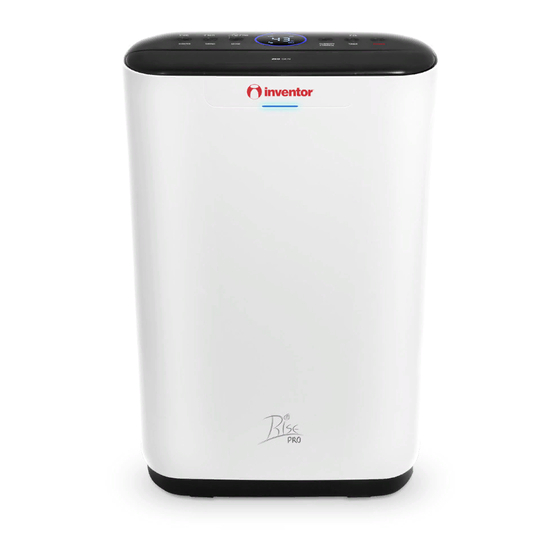
Dear Consumer, Congratulations on your choice! What distinguishes, Rise Pro dehumidifier from the rest of Inventor's dehumidifiers series, is the unique design and the upgraded desiccant technology, that guarantee efficiency in facing humidity problems. Enjoy the ideal conditions inside your space and a healthy environment as a result of the ionizer and the ultraviolet technology that eliminate all harmful substances. -
Page 4: Safety & Warning Instructions
1. SAFETY & WARNING INSTRUCTIONS No children under the age of 8 should be permitted to operate this electric device. Be certain, that children, handicapped people, or people with the lack of knowledge and experience, must be supervised, depending the situation, by persons responsible for their well-being and do not undertake procedures such as the cleaning or the mainte- nance of this device. -
Page 5: Electrical Information
2. ELECTRICAL INFORMATION The nameplate, with all the electrical and technical data of this appliance, is located on the rear panel. The appliance should be installed in accordance with national wiring regulations. Be sure the device is grounded properly. Proper grounding is important as it mini- mizes the chance of electric shock or fire. -
Page 6: Steps Before Use
4. STEPS BEFORE USE User's manual Desiccant Drain hose dehumidifier Please refer to the electronic warranty instructions, in the last page (English section) of this manual For warranty purposes, please note the SN (serial number). Please find it on the side of the device... - Page 7 Installation tips 1) Do not block or restrict the airflow around the unit. Make sure the air inlet exhaust grills are not obstructed. Allow 30cm of clearance around the unit. 2) Ensure the filter is clean. 3) Place unit in vertical operating position and allow 2 hours before initial use in order to avoid malfunctions.
-
Page 8: Getting To Know Your Dehumidifier
5. GETTING TO KNOW YOUR DEHUMIDIFIER Louver Air outlet Handle Control Panel Humidity light indicator Air Intake Grill Removable water tank Power Cord Water level indicator... -
Page 9: Control Panel • Functions
6. CONTROL PANEL • FUNCTIONS POWER Press “POWER” button to turn the dehumidifier on or off. • After turning the dehumidifier OFF, the fan continues to operate for a small period of time approximately 10 minutes, so as to protect the inner components. During this operation DO NOT unplug the device. - Page 10 • Under Child Lock: All control buttons are deactivated and the unit will make a beeping sound each time a button is pressed. • In case of a power failure the child lock setting will be automatically deactivated. HUMIDITY CONTROL Humidity Set Control Button.
- Page 11 ECO Mode - Under ECO mode the dehumidifier is operating in low fan speed to reach the set humidity level. In this mode the consumption is reduced to half. The number (1) will appear on the led display to indicate your mode choice. When the set humidity is reached, the Energy Savings function is automatically activated.
- Page 12 Long press the ‘’SWING LOUVER’’ button for 3 seconds to active the Wi-Fi pairing process. The indicator ** ** will appear on the led display. You can operate the dehumidifier remotely using the application Inventor Control. MUTE MODE Long press the ‘’ SWING LOUVER’’ and ‘’TIMER’’ buttons for 3 seconds to mute and unmute the sound of the buttons of the control panel.
-
Page 13: Water Tank & Drain Hose
ON-DISPLAY INDICATORS P2- FULL WATER TANK When the water tank is full, removed or not placed correctly, the indication P2 will appear on the digital display followed by a beeping sound. While the indicator P2 is on the dehumidifier will be on stand-by until water tank is placed correctly or emptied. P3 –... - Page 14 • When you remove the tank, do not touch any parts inside the unit, as you may damage the device. • Be sure to gently place the tank into the dehumidifier. • Do not drink or use the collected water from the device.
-
Page 15: Maintenance & Cleaning
8. MAINTENANCE & CLEANING Before performing any maintenance or cleaning of the dehumidifier, make sure that it is unplugged. Cleaning the filter: Use water and mild detergent to clean the dehumidifier. • Do not use abrasive cleaning agents or solvents; use a brush or vacuum attachments for cleaning •... -
Page 16: Frequently Asked Questions & Trouble Shooting
10. FREQUENTLY ASKED QUESTIONS & TROUBLE Does the Zeolite need No there is no need for replacement. The Zeolite is regenerated within the dehumidifier and this will last replacing? for many years. Are dehumidifiers For the first month upon its initial operation, the dehumidifier operates at its maximum in order to expensive to run? calibrate in its working environment. - Page 17 Why there is still When the room reaches the preferred humidity level, there is a possibility of humidity appearance condensation from the on windows. This happens due to the temperature windows, even by using difference of the room’s and external ambient the dehumidifier? temperature.
- Page 18 All house exits (windows doors etc) where the dehumidifier is operating, should be shut. Room temperature is below the advised operational range. There is a kerosene heater or something giving off water vapor in the room. The room that the device is placed is bigger than suggested. The humidity level is too high.
- Page 19 þ in - please also check your spam folder. sent to your email STEP 5 Inventor warranty is now valid! to Inventor's Newsletter Subscribe to Inventor's Newsletter * Required field...
- Page 20 ΠΕΡΙΕΧΌΜΕΝΑ 1. ΌΔΗΓΙΕΣ ΑΣΦΑΛΕΙΑΣ ................... 21 2. ΗΛΕΚΤΡΌΛΌΓΙΚΑ ΧΑΡΑΚΤΗΡΙΣΤΙΚΑ ..............22 3. ΓΕΝΙΚΕΣ ΠΑΡΑΤΗΡΗΣΕΙΣ – ΑΠΌΡΡΙΨΗ ΣΥΣΚΕΥΗΣ ..........22 4. ΣΥΜΒΌΥΛΕΣ ΠΡΙΝ ΤΗ ΧΡΗΣΗ ................23 5. ΓΝΩΡΙΖΌΝΤΑΣ ΤΌΝ ΑΦΥΓΡΑΝΤΗΡΑ ..............25 6. ΠΑΝΕΛ ΧΕΙΡΙΣΜΌΥ • ΛΕΙΤΌΥΡΓΙΕΣ ..............26 7. ΔΌΧΕΙΌ ΝΕΡΌΥ & ΑΓΩΓΌΣ ΑΠΌΣΤΡΑΓΓΙΣΗΣ............. 30 8.
-
Page 21: Όδηγιεσ Ασφαλειασ
1. ΌΔΗΓΙΕΣ ΑΣΦΑΛΕΙΑΣ Παρακαλούμε ΜΗΝ ΕΠΙΤΡΕΠΕΤΕ σε παιδιά κάτω των 8 ετών να χρησιμοποιούν αυτή τη συ- σκευή. Βεβαιωθείτε ότι τα παιδιά, άτομα με αναπηρία (ΑμεΑ) ή έλλειψη γνώσης και εμπειρί- ας, επιβλέπονται, ανάλογα με την περίπτωση, από άτομα υπεύθυνα για την ασφάλειά τους και... -
Page 22: Ηλεκτρόλόγικα Χαρακτηριστικα
2. ΗΛΕΚΤΡΌΛΌΓΙΚΑ ΧΑΡΑΚΤΗΡΙΣΤΙΚΑ Η ετικέτα των τεχνικών και ηλεκτρολογικών χαρακτηριστικών του αφυγραντήρα, βρίσκε- ται στο πλαϊνό μέρος της συσκευής. Η συσκευή πρέπει να εγκατασταθεί σύμφωνα με τους εθνικούς ηλεκτρολογικούς κανο- νισμούς. Βεβαιωθείτε ότι η συσκευή είναι σωστά γειωμένη για την αποφυγή ηλεκτροπληξίας και πυρκαγιάς. -
Page 23: Συμβόυλεσ Πριν Τη Χρηση
4. ΣΥΜΒΌΥΛΕΣ ΠΡΙΝ ΤΗ ΧΡΗΣΗ Εγχειρίδιο Χρήσης Αφυγραντήρας Αγωγός Aποστράγγισης με Ζεόλιθο Στη τελευταία σελίδα (ελληνικό μέρος) αυτού του εντύπου θα βρείτε οδηγίες σχετικά με την υποβολή της εγγύησης Για την υποβολή της εγγύησης θα πρέπει να συμπληρώσετε τον Σειριακό Αριθμό... - Page 24 Συμβουλές Εγκατάστασης 1) Μην φράζετε και μην εμποδίζετε την κυκλοφορία του αέρα γύρω από τον αφυγραντήρα. Βεβαιωθείτε ότι η είσοδος και η έξοδος του αέρα πραγματοποιείται αβίαστα και εξασφαλίστε 30cm ελεύθερου χώρου περιμετρικά της συσκευής. 2) Βεβαιωθείτε ότι το φίλτρο είναι...
-
Page 25: Γνωριζόντασ Τόν Αφυγραντηρα
5. ΓΝΩΡΙΖΌΝΤΑΣ ΤΌΝ ΑΦΥΓΡΑΝΤΗΡΑ Περσίδα Εξαγωγή Αέρα Λαβή Μεταφοράς Πάνελ Χειρισμού Φωτεινή Ένδειξη Υγρασίας Είσοδος Αέρα Αποσπώμενο Δοχείο Νερού Καλώδιο Ρεύματος Ένδειξη Στάθμης Νερού... -
Page 26: Πανελ Χειρισμόυ • Λειτόυργιεσ
6. ΠΑΝΕΛ ΧΕΙΡΙΣΜΌΥ • ΛΕΙΤΌΥΡΓΙΕΣ POWER Πιέστε το πλήκτρο “POWER” για να ενεργοποιήσετε ή απενεργοποιήσετε τον αφυγραντήρα. • Αφότου απενεργοποιήσετε τον αφυγραντήρα, ο ανεμιστήρας θα συνεχίζει να περιστρέφεται για μικρό χρονικό διάστημα περίπου 10 λεπτών, ώστε να προφυλάξει τα εσωτερικά στοιχεία της συσκευής. Κατά τη λειτουργία του ΜΗΝ αποσυνδέετε... - Page 27 • Στη λειτουργία παιδικού κλειδώματος όλες τα πλήκτρα είναι απενεργοποιημέ- να ενώ ο αφυγραντήρας θα κάνει θόρυβο κάθε φορά που θα προσπαθείτε να πι- έσετε κάποιο πλήκτρο. • Σε περίπτωση διακοπής ρεύματος η ρύθμιση του παιδικού κλειδώματος θα απενεργοποιηθεί αυτόματα. HUMIDITY CONTROL Πλήκτρο...
- Page 28 ECO Mode - Στη λειτουργία ECO ο αφυγραντήρας θα λειτουργεί στη χαμηλή ταχύτητα του ανεμιστήρα μέχρι να φτάσει το επιθυμητό επίπεδο υγρασίας που έχετε ορίσει για το χώρο. Σε αυτή τη λειτουργία η κατανάλωση θα μειωθεί στο μισό. Η ένδειξη 1 θα εμφανιστεί στην οθόνη...
- Page 29 ασύρματη λειτουργία του αφυγραντήρα. Η ένδειξη ** ** θα εμφανιστεί στην οθόνη. Μπορείτε να λειτουργείτε τον αφυγραντήρα απομακρυσμένα μέσω της εφαρμογής Inventor Control. MUTE MODE Πιέστε τα πλήκτρα ‘’SWING LOUVER’’ και ‘’TIMER’’ για 3 δευτερόλεπτα για να ενεργοποιή- σετε ή απενεργοποιήσετε τη σίγαση των πλήκτρων του control panel.
-
Page 30: Δόχειό Νερόυ & Αγωγόσ Απόστραγγισησ
ΕΝΔΕΙΞΕΙΣ P2 - ΓΕΜΑΤΌΥ ΔΌΧΕΙΌΥ ΝΕΡΌΥ Η ένδειξη ''P2'' θα εμφανιστεί στην οθόνη όταν δοχείο νερού γεμίσει, αφαιρεθεί ή μετακινηθεί και θα ακολουθήσει ηχητική ειδοποίηση. Όσο η ένδειξη P2 είναι ενεργοποιημένη ο αφυγραντήρας θα παραμένει σε κατάσταση αναμονής μέχρι να αδειάσετε ή... - Page 31 Όταν αφαιρείτε το δοχείο, μην ακουμπάτε τα εσωτερικά μέρη του αφυγραντήρα, καθώς μπορεί να προκαλέσετε βλάβη στη συσκευή. • Τοποθετήστε με ασφάλεια και χωρίς πίεση το δοχείο στη συσκευή. • Μην πίνετε το νερό που συλλέγεται και μην το χρησιμοποιείτε για...
-
Page 32: Συντηρηση & Φρόντιδα
8. ΣΥΝΤΗΡΗΣΗ & ΦΡΌΝΤΙΔΑ Προτού προβείτε στη συντήρηση ή τον καθαρισμό του αφυγραντήρα, βεβαιωθείτε ότι έχε- τε απενεργοποιήσει και αποσυνδέσει τη συσκευή από το ρεύμα. Καθαρισμός φίλτρου: Χρησιμοποιήστε νερό ή ουδέτερο απορρυπαντικό για να καθαρίσετε τη συσκευή. • Μην χρησιμοποιείτε λευκαντικά ή στιλβωτικά μέσα. Χρησιμοποιήστε μαλακό, καθαρό πα- νί... -
Page 33: Απαντησεισ Σε Συχνα Ερωτηματα & Αντιμετωπιση Πρόβληματων
10. ΑΠΑΝΤΗΣΕΙΣ ΣΕ ΣΥΧΝΑ ΕΡΩΤΗΜΑΤΑ & ΑΝΤΙΜΕΤΩΠΙΣΗ ΠΡΌΒΛΗΜΑΤΩΝ Απαιτείται Όχι, ο Ζεόλιθος δεν χρειάζεται αντικατάσταση. Ο Ζεόλιθος αντικατάσταση αναγεννάτε μέσα στον αφυγραντήρα κάτι που εξασφαλίζει του Ζεόλιθου? τον μεγάλο κύκλο ζωής του. Όι αφυγραντήρες Τον πρώτο μήνα που θα λειτουργήσετε τον αφυγραντήρα, είναι... - Page 34 διατήρηση του χώρου σας, όσον αφορά τα χρώματα των επίπλων, τις γυψοσανίδες και κάθε άλλο εξοπλισμό που είναι επιρρεπής στις καταστροφικές επιπτώσεις της υψηλής υγρασίας. Γιατί συνεχίζει Όταν στο χώρο επιτευχθεί η επιθυμητή σχετική υγρασία, να εμφανίζεται υπάρχει περίπτωση να συνεχίζει να εμφανίζεται υγρασία στα...
- Page 35 Βεβαιωθείτε ότι κουρτίνες και έπιπλα δεν εμποδίζουν και δεν φράζουν την εισαγωγή και εξαγωγή του αέρα. Ελέγξτε εάν έχετε ρυθμίσει αρκετά χαμηλά το επιθυμητό επίπεδο υγρασίας. Βεβαιωθείτε ότι έχετε καθαρίσει το φίλτρο αέρα όπως συνιστάται. Σκόνες και χνούδια που συγκεντρώνονται στο φίλτρο, μειώνουν την απόδοση της συσκευής. Ελέγξτε...
- Page 36 Διεύθυνση email* κατοχύρωσης στο email σας ΒΗΜΑ 5 ώ στο newsletter της Inventor Έχετε υποβάλει επιτυχώς την εγγύηση του προϊόντος Inventor! Να εγγραφώ στο newsletter της Inventor ο πεδίο * Απαραίτητο πεδίο ας τη φόρμα εγγύησης αποδέχεστε τους όρους και τις προϋποθέσεις.
- Page 37 Stimate consumator, Felicitari pentru alegere! Ceea ce distinge, dezumidificatorul Rise Pro de restul seriei de dezumidificatoare Inventor, este designul unic si tehnologia desicantului imbunatatita, care garanteaza eficienta in confruntarea cu probleme de umiditate. Bucurati-va de conditiile ideale din interiorul caminului dvs.
-
Page 38: Informatii Si Avertizari Cu Privire La Siguranta
1. INFORMATII SI AVERTIZARI CU PRIVIRE LA SIGURANTA Nu recomandam utilizarea acestui produs de catre copii cu varsta sub 8 ani. Copii, per- soanele care sufera de handicapuri sau persoanele fara cunostinte sau experienta vor fi supravegheate, in functie de situatie si nu li se va permite sa efectueze lucrari de cura- tare sau mentenanta. -
Page 39: Informatii Cu Privire La Partea Electrica
2. INFORMATII CU PRIVIRE LA PARTEA ELECTRICA Datele tehncie si electrice ale acestui aparat sunt inscrise pe placuta de identificare situata pe spatele aparatului. Aparatul va fi instalat respectand normele si reglementarile locale cu privire la ca- blaje. Asigurati-va ca aparatul este impamantat corect. Impamantarea este importanta, aceasta reducand riscul socurilor electrice si a incendiilor. -
Page 40: Inainte De Folosire
4. INAINTE DE FOLOSIRE Manualul utilizatorului Dezumidificator Furtun scurgere Mai multe informatii despre inregistrarea electronica a garantiei dumneavoastra, veti gasi pe ultima pagina a acestui manual. Pentru inregistrarea electronica a garantiei, trebuie sa ne transmiteti seria aparatului (Serial Number). Aceasta serie o veti gasi pe partea laterala a aparatului. - Page 41 Sfaturi de instalare 1) Nu blocati si nu obturati fluxul de aer. Asigurati- va ca grilele de admisie/ evacuare a aerului nu sunt acoperite. Asigurati un spatiu liber de cel putin 30cm in jurul aparatului. 2) Asiturati-va ca filtrul este curat 3) Inainte de a-l folosi, mentineti aparatul in pozitie vertical pentru cel...
-
Page 42: Prezentarea Aparatului
5. PREZENTAREA APARATULUI Panoul de ghidare a fluxului de aer Grila evacuare aer Handle Panou de control Indicatorul luminos al umiditatii Grila admisie Rezervor de apa detasabil Cablu de alimentare Indicator nivel apa... -
Page 43: Panoul De Control • Functii
6. PANOU DE CONTROL • FUNCTII POWER Apasati butonul „POWER” pentru a porni sau opri dezumidificatorul. • Dupa oprirea dezumidificatorului, ventilatorul va continua sa functioneze, pentru o perioada mica de timp aproximativ 10 minute, pentru a proteja componentele interioare. In timpul acestei operatiuni NU deconectati dispozitivul. - Page 44 • Sub Child Lock: Toate butoanele de control sunt dezactivate si unitatea va emite un sunet de fiecare data cand este apasat un buton. • In caz de pana de curent, setarea blocarii pentru copii va fi dezactivata automat. HUMIDITY CONTROL Butonul de control al setarii umiditatii.
- Page 45 Mod ECO - In modul ECO, dezumidificatorul functioneaza cu viteza redusa a ventilatorului pentru a atinge nivelul de umiditate setat. In acest mod, consumul de energie este redus la jumatate. Numarul (1) va aparea pe afisaj pentru a indica modul. Cand se atinge umiditatea setata, functia de economisire a energiei este activata automat.
- Page 46 Apasati lung butonul „SWING LOUVER” timp de 3 secunde pentru a activa procesul de asociere Wi-Fi. Indicatorul ** ** va aparea pe afisaj. Puteti utiliza dezumidificatorul de la distanta folosind aplicatia Inventor Control. MODUL FARA SUNET Apasati continuu butoanele „SWING LOUVER” si „TIMER” timp de 3 secunde pentru a dezactiva si dezactiva sunetul butoanelor panoului de control.
-
Page 47: Rezervorul Pentru Apa & Furtunul De Scurgere
INDICATORI AFISAJ P2- REZERVOR DE APA COMPLET Cand rezervorul de apa este plin, scos sau nu este asezat corect, pe afisajul digital va aparea simbolul P2 urmata de un sunet sonor. In timp ce simbolul P2 este pe dezumidificator, acesta va fi in stand-by pana cand rezervorul de apa este plasat corect sau golit. P3 - Memento de curatare a filtrului Cand filtrul de aer necesita intretinere, pe afisajul digital va aparea simbolul P3. - Page 48 - La inlaturarea rezervorului, nu atingeti partile componente din interiorul aparatului. - Introduceti usor rezervorul in interiorul aparatului. - Nu beti si nu folositi in nici un fel apa colectata. - Uscati in totalitate rezervorul de apa inainte de a-l reintroduce in aparat.
-
Page 49: Curatare Si Intretinere
8. CURATARE SI INTRETINERE Inainte de a incepe orice lucrare de curatare sau intretinere, asigurati-va ca aparatul este scos din priza. Curatarea filtrului Folositi apa si detergent delicat pentru a curata aparatul. • Nu folositi susbstante de curatare abrazive sau solventi; folositi o aspiratorul cu pe- rie pentru curatare;... -
Page 50: Intrebari Frecvente Si Sfaturi De Depanare
10. INTREBARI FRECVENTE SI SFATURI DE DEPANARE Zeolitul trebuie Nu, nu va fi nevoie sa il inlocuiti. Zeolitul se inlocuit? regenereaza in interiorul dezumidificatorului si acesta va putea fi folosit pentru o perioada lunga. Sunt costisitoare Va veti convinge de faptul ca unui dezumidificator dezumidificatoarele? ii trebuie aproximativ 1 luna pentru a intra in functionare normala. - Page 51 Am folosit Umiditatea poate aparea pe geam din cauza diferentei dezumidificatorul intre temperatura exterioara si cea interioara. Continuati sa insa condensul folositi dezumidificatorul iar cand temperatura exterioara tot apare pe creste, condensul va disparea. ferestre. Dezumidificatorul Aparatul functioneaza cu ajutorul unei rezistente care nu este folosit incalzeste desciantul, rezultand o crestere cu maxim 10 pentru incalzire.
- Page 52 Suprafata incaperii este mai mare decat cea pentru care este recomandata aparatul. Nivelul setat al umiditatii este foarte ridicat. Aparatul scoate zgomote puternice in timpul functionarii. Filtrul este infundat Unitatea nu este in pozitie verticala. Suprafata podelei nu este plana. In timpul folosirii furtunului pentru drenaj continuu, gasiti apa in rezervor.
- Page 53 Spam. Odata ce garantia a fost activata, veti primi un email de confirmare Abonati-va la Newsletter-ul Inventor PASUL 5 Ati activat cu succes Garantia Inventor! * Camp obligatoriu Newsletter-ul Inventor Cu acest certificat de garantie acceptati Termenii si Conditiile.
- Page 56 DEHUMIDIFIER v 1.4...
Need help?
Do you have a question about the RS-WUI-08L and is the answer not in the manual?
Questions and answers