
Subscribe to Our Youtube Channel
Related Manuals for Colortrac L24e


Summary of Contents for Colortrac L24e
- Page 1 L24e / L36e Large Format Scanner User Manual V1.03 June 2017 Version 1.03 Global Scanning UK Ltd © 2017...
-
Page 2: Table Of Contents
Contents Warnings ..............................5 Declaration of Conformity ........................6 Scanner Overview ........................... 6 Main Features ............................. 6 Scanner - Identification of parts ......................7 Unpacking ............................... 8 Box contents............................9 Fitting the scanner to the printer ......................10 Using the scanner on a desktop ......................12 Connecting the scanner ........................ - Page 3 Scan to PC ............................43 Copy – Network Mode = Standard ....................47 Copy – Network Mode = Plus ......................50 Copy & Archive ..........................54 Operation: Function Settings ........................ 58 Operation: Saving your preferred Function Settings as power on Defaults ........64 Application notes ..........................
- Page 4 Glossary of Terms..........................88 Icon Guide L4e / L36e – Function Settings: ................... 89 Icon Guide L4e / L36e – Scanner Settings: .................... 90 Version 1.03 Global Scanning UK Ltd © 2017...
-
Page 5: Warnings
Warnings Do not drop the scanner. The scanner contains components that could be damaged by severe shock. Beware of trapping fingers when opening or closing the scanner. Beware of exposed electrical connectors if the covers are removed. No user serviceable parts inside. -
Page 6: Declaration Of Conformity
• Single linear document hold-up flap to help smooth out creases. • Face-up scanner with imaging width: L24e = 24” (610mm) or L36e = 36” (914mm). • Maximum document width: L24e = 26” (660mm) or L36e = 38” (965mm). •... -
Page 7: Scanner - Identification Of Parts
Scanner - Identification of parts • Document Return Guides, Paper Tray, Document size guide Paper tray catch Paper Guides Paper tray catch • USB stick slot, User Interface (UI) – LCD touch screen. Power switch. Power Ethernet connector. • A pair of Magnetic Document Edge Guides are supplied and can be positioned on the paper tray to help align and position a document. -
Page 8: Unpacking
Unpacking • With the scanner box on the floor, or a suitable large table, remove the top of the cardboard box. • Remove the Calibration target and keep it in a safe place for future use. (It is protected inside a cardboard sleeve inside a sealed plastic bag). -
Page 9: Box Contents
PC Software & L24e/L36e Documentation Scanner Quick Start Guide Calibration Screw Target Hexagon Socket Head M4x35 Paper Edge Guides Desktop Feet (Pair) (Pair) Document 1 for L24e Return Guide(s) 3 for L36e Version 1.03 Global Scanning UK Ltd © 2017... -
Page 10: Fitting The Scanner To The Printer
Fitting the scanner to the printer • Install the scanner mounting brackets on the printer. (Supported printers: iPF 670/671/770/771). Repeat the following steps for both sides of the printer. o Remove the screw using the 3mm hex tool supplied. Left side: Right side: o Remove the 2 covers. - Page 11 Fit 1 document return guide to the rear of the scanner in the centre. For the L36e, fit additional document return guides either side. (The L24e has 1 document return guides. The L36e has 3 in total). Version 1.03 Global Scanning UK Ltd © 2017...
-
Page 12: Using The Scanner On A Desktop
Using the scanner on a desktop • To use the scanner on a desktop, fit the two feet. These include rubber pads to prevent the scanner sliding and allow the scanner to be tilted back for cleaning, without damaging the Document Return Guides or the cables. -
Page 13: Connecting The Scanner
Connecting the scanner • Connect the Ethernet cable to the rear of the scanner. o The scanner controller communicates with the printer over the network. (The printer must be installed on the network, on-line and ready for the system to be able to Copy). If the printer is NOT on the network, use a direct Ethernet cable connection from the scanner to the printer, but this is not the preferred connection as the system will not be able to Scan to PC. -
Page 14: Operation
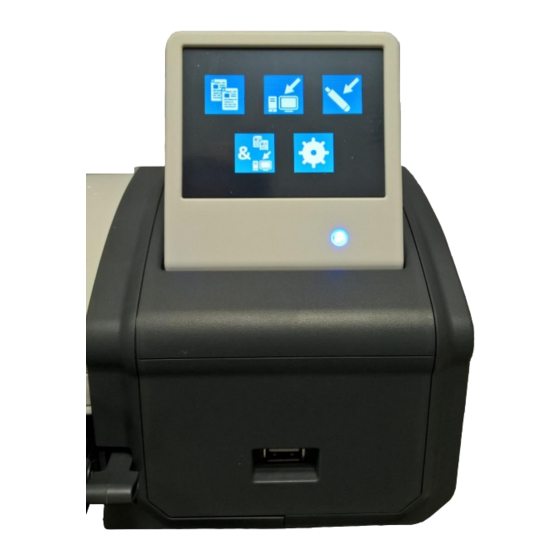
Operation Power • The scanner is powered on/off by the power switch on the right-hand end. • When powered on, the amber LED will illuminate and after a few seconds, it turns blue and the LCD displays various icons. (If the LED remains amber, check the paper tray is closed correctly). Power on. - Page 15 Function Page (Copy) Eject, Function Settings, Start Function Function (Copy) Settings Power on factory default Function Settings: Colour mode, Standard Quality, Auto-size, Portrait, Brightness=0, Black Point(BP)=1, White Point(WP)=1, Crop off, 100% Copy scale, 1 Copy, File Type, iPFX, PCX. The defaults can be changed to your preferred Function Settings: Functionality –...
-
Page 16: Sleep Mode
Sleep mode • The scanner complies with the Energy Star standard, so will enter sleep mode after 15 minutes of no use to save electricity. (The time cannot be changed or the feature disabled). • When in sleep mode, the scanner consumes very little power. It will flash the Blue LED every 10 seconds. -
Page 17: Configuring The Language Of The Scanner
Configuring the language of the scanner • Turn on the power switch on the side of the scanner. • From the Home Page, select Scanner Settings. Scroll to the left and select Language. • Select Language. English Text (Sets Network Mode = Plus) Japanese Text (Sets Network Mode = Standard) Version 1.03 Global Scanning UK Ltd ©... -
Page 18: Configuring The Network Mode Of The Scanner
Configuring the Network Mode of the scanner • From the Home Page, select Scanner Settings. Scroll and select Network Mode. Version 1.03 Global Scanning UK Ltd © 2017... - Page 19 • Select Network Mode. Plus Mode (Default for English language). Uses the ScanApp Le to add functionality & productivity. The ScanApp Le acts as a print spooler for Copy mode, and is used to compress the scan data for JPG, PDF and Multipage PDF file formats. If there is more than 1 PC running the ScanApp Le, the preferred Plus PC can be set in Configuring PCs.
-
Page 20: Configuring The Network Connection Of The Scanner
Configuring the network connection of the scanner DHCP • From the Home Page, select Scanner Settings. • Scroll and select the scanner Network Icon, then DHCP. o After selecting DHCP, the scanner will request an IP address from the server and then display it automatically. -
Page 21: Static Ip Address
Static IP Address • A static IP address and subnet mask should be entered and configured by your network administrator or IT support provider. • From the Home Page, select Scanner Settings. • Scroll and select the scanner Network Icon. •... - Page 22 o Select IP or Mask to enter the required values. Use the Delete Key, to remove the current address, and type in the new address including all “0s”. Press the Enter key to save. Cancel - Back up 1 level. Cancel number entry and exit this menu. Home.
-
Page 23: Scanapp Le Installation
ScanApp Le Installation • Identify network connected PCs on which to install the ScanApp Le. The PC needs to be on and the ScanApp Le running to allow the scanner to Scan to PC. Insert the CD into the selected PC and the installation will automatically start. Note: You can install the ScanApp Le on many PCs. - Page 24 • Wait for the program to install, then select Finish. • Browse to the Documents folder on the CD. This folder contains the L24e/L36e User Manuals and software release notes. Please read and / or print the documents. Version 1.03...
- Page 25 • The ScanApp Le will run as a Windows® Tray App and will start automatically every time the PC is started. The ScanApp Le interface window can be displayed by selecting the Show Hidden Icons in the bottom right hand corner of the PC screen. You can right click the icon and click Restore to Open the ScanApp Le window.
-
Page 26: Scanapp Le Operation
Start the ScanApp Le. o The hostname of the PC running the ScanApp Le is displayed (in this example GS-UK-WS- 0010). The hostname is displayed on the L24e/L36e scanner when it searches for the PCs running this software. o The IP address of the PC running the ScanApp Le is displayed along with its (in this case 192.168.1.138). - Page 27 Scanner Information. Lists all available L24e / L36e scanners on the subnet. Select the scanner you wish to review. Select it Version 1.03 Global Scanning UK Ltd © 2017...
- Page 28 Refresh. If the scanner is not listed, ensure it is powered on and connected to the network, then press the Refresh button to refresh the list of connected scanners. Download a text file with scanner information including all allocated PC numbers and printer numbers.
-
Page 29: Scanapp Le Error Messages
ScanApp Le Error Messages Message User Action Please Connect to a Supported The ScanApp Le will needs at least one of the supported Printer. printers to be present on the network and checks periodically for the printer. This will not normally affect use of the system, but on occasion you may see this message. -
Page 30: Configuring The Scanner's Devices
Configuring the scanner’s devices • The scanner can select a different printer for copying, or PC for scanning, for each individual operation. By default, the scanner will auto search for available devices on a per Copy/Scan basis. The scanner can auto search for up to a maximum of 15 printers or 15 PCs on the subnet. - Page 31 • Select “Auto” followed by “tick” to start the search for available printers on the network. • Wait while the scanner searches for available supported iPF printers. It will then list the available printers by model and their Serial Number. The Green Dot indicates it is online.
- Page 32 • Go back up to the Printer Setup menu to define printer numbers. Select “2”, then from the list, select the printer you wish to be assigned #2. • Go back up to the Printer Setup menu to define printer numbers. Select “3”, then from the list, select the printer you wish to be assigned #3.
-
Page 33: Configuring The Pcs
Configuring the PCs • To define the PCs, we must first search for available devices on the network and assign them number. The PC can then be selected by this number. • From the Home Page, select Scanner Settings. • Scroll and select PC#. - Page 34 • Please wait while the scanner searches for available PC with the ScanApp Le running. It will then list the available PCs by their PC name. The Green Dot indicates it is online. A red dot indicates it is offline. •...
- Page 35 • Go back up to the PC Setup menu to define PC numbers. Select “2”, then from the list, select the PC you wish to be assigned #2. In this example, we have 2 available PCs running the ScanApp Le and we have set as follows: •...
-
Page 36: Operation
Operation Loading documents into the scanner • Caution: The scanner’s scan glass will be permanently damaged if you try to scan documents that contain staples, paper clips or other similar objects. Avoid scanning documents with sticky tape or Post-It notes as the glue can adhere to the scan glass resulting in image quality issues. •... -
Page 37: Opening/Closing The Scanner
The document can be ejected to the rear of the scanner by pressing the eject button, which is available from the Copy, Scan to USB, Scan to PC or Copy & Archive pages. Eject • If a document has jammed, open the scanner and remove the document by hand. The jammed document can be removed from the front or back of the scanner as preferred. -
Page 38: Scan To Usb: Tiff
USB. No PC is required. • Insert a USB memory stick in to the L24e / L36e scanner. The USB stick must have been formatted as FAT32 and have a maximum capacity no greater than 128GB. Do not use a USB extension cable. - Page 39 • Leave the remaining Scan to USB Settings at default: Colour mode, Standard Resolution, Auto-size. Brightness=0, BP=1, WP=1, Crop off. • Press the Green button to start the function. Cancel: Pressing the Red Stop button will stop the scanner immediately. The document will be scanned to internal memory and the document will be ejected.
-
Page 40: Scan To Usb Plus Mode: Pdf, Jpg, M-Pdf
Configuring the Network Mode of the scanner • Insert a USB memory stick in to the L24e / L36e scanner. The USB stick must have been formatted as FAT32 and have a maximum capacity no greater than 128GB. Do not use a USB extension cable. - Page 41 • Select USB Scan Settings and select file type required: PDF, JPG, M-PDF • Leave the remaining Scan to USB Settings at default: Colour mode, Standard Resolution, Auto-size. Brightness=0, BP=1, WP=1, Crop off. • Press the Green button to start the function. Note: If a Plus PC has not been assigned, the scanner will search for available PCs running the ScanApp Le during the Scan to USB process.
- Page 42 When all the pages have been added, press the red stop button to close the file. • The document will be scanned directly to the ScanApp Le via Ethernet and the document will be ejected. The ScanApp Le compresses and coverts the file type. The data is then written back to the USB stick at the scanner.
-
Page 43: Scan To Pc
Scan to PC • Ensure the ScanApp Le is running on the PC to which you wish to send the scan file. Configuring the PCs • Ensure ScanApp Le is has been configured with the scan folder of your choice. ScanApp Le Operation •... - Page 44 The PC to be used for Scanning to PC is shown on the Scan to PC page. This example shows the current PC selected as PCX. This means the scanner will complete an Auto PC search and prompt the user to select the PC before completing each scan. •...
- Page 45 • Leave the remaining Scan to PC Settings at default: Colour mode, Standard Resolution, Auto-size. Brightness=0, BP=1, WP=1, Crop off. • Press the Green button to start the function. Cancel: Pressing the Red Stop button will stop the scanner immediately. •...
- Page 46 • The document will be scanned directly to the ScanApp Le via Ethernet and the document will be ejected. Wait for the scan data to complete the transfer to the PC and the hour glass to disappear. • On the PC, the ScanApp Le will show Scan Completed. The scan file will be saved in the Scan Directory set in the ScanApp Le.
-
Page 47: Copy - Network Mode = Standard
Copy – Network Mode = Standard • Standard mode. The scan data is stored internally on the scanner, then sent to the printer to prevent the scanner exceeding the data rate capability of the network. No PC is required. • Configuring the Network Mode of the scanner •... - Page 48 • To change the iPF# select the Copy Settings. Scroll to iPF#, and press it. Select the iPF# you wish to use and select it. Note: The Serial Number of the assigned PC# is displayed at the top of the screen. If the Serial Number is displayed in Red, then that Printer is not available.
- Page 49 • Press the Green button to start the function. Cancel: Pressing the Red Stop button will stop the scanner immediately. • The document will be scanned to internal memory and the document will be ejected. The scanner will then transfer the scan data to the printer. Wait for the scan data to complete the transfer to the printer.
-
Page 50: Copy - Network Mode = Plus
Copy – Network Mode = Plus • Plus mode. The scan data is transferred directly to the PC while scanning to make the scanner available for the next job sooner. The ScanApp Le then sends print data to the printer. Configuring the Network Mode of the scanner •... - Page 51 • To change the iPF# select the Copy Settings. Scroll to iPF#, and press it. Select the iPF# you wish to use and select it. Note: The Serial Number of the assigned PC# is displayed at the top of the screen. If the Serial Number is displayed in Red, then that Printer is not available.
- Page 52 • Press the Green button to start the function. Cancel: Pressing the Red Stop button will stop the scanner immediately. • The document will be scanned directly to the ScanApp Le via Ethernet and the document will be ejected. Wait for the scan data to complete the transfer to the Plus PC and the hour glass to disappear.
- Page 53 • Collect your copy from the printer. Version 1.03 Global Scanning UK Ltd © 2017...
-
Page 54: Copy & Archive
Copy & Archive • Select the appropriate Network Mode. See Configuring the Network Mode of the scanner Network Mode = Plus. The scan data is transferred directly to the PC while scanning to make the scanner available for the next job sooner. The ScanApp Le then sends print data to the printer and saves the scan file. - Page 55 • The printer to be used is shown on the Copy & Archive page. This example shows the current printer selected as iPFX, so the scanner will complete an Auto Printer search and prompt the user to select the Printer before completing each scan. Also, the current PC selected is PCX, so the scanner will complete an Auto PC search and prompt the user to select the PC before completing each scan.
- Page 56 Note: The Hostname of the assigned PC# is displayed at the top of the screen. If the Hostname is displayed in Red, then that PC is not on or the ScanApp Le is running. The status of the connection is updated only when you enter the menu. •...
- Page 57 • The document will be scanned and then ejected. The scan data will be sent to the ScanApp Le via Ethernet. Wait for the scan data to complete the transfer to the Plus PC and the hour glass to disappear. The scanner is now ready for the next job. •...
-
Page 58: Operation: Function Settings
Operation: Function Settings • On the scanner UI, select the function you wish to use. Copy Scan to PC Scan to USB Copy & Archive (= Copy plus Scan to PC in a single function) o From the function page, select the Setting to be changed. Select the new value you wish to use (Not all the Function Settings are available for all functions). - Page 59 M-PDF = Multi-Page PDF: Keep inserting pages to add to the document. When all the pages have been added, press the red stop button to close the file. • Colour mode Default = Colour Colour, Greyscale, Black and White • Quality Mode Default = Standard Standard,...
- Page 60 • Original document size Default = Auto Auto size. This will detect the size of the document as it is loaded. Alternatively select to scan a Fixed Size independent of what size paper is loaded. ISO sizes ANSI sizes ARCH sizes Dimensions ANSI Dimensions...
- Page 61 • Copy scale factor (Copy, Copy & Archive only) Default = 100% Adjust Copy size by percentage Reduction No change Enlargement Adjust Copy size by selecting input and output standard ISO page sizes. Input Size = Output Size = Adjust Copy size by selecting input and output standard ANSI page sizes. Input Size = Output Size = Adjust Copy size by selecting input and output standard ARCH page sizes.
- Page 62 Example of Copy Scale Factor: Select the Paper size system: ISO, ANSI or ARCH Select the input Paper size, followed by the output paper size. (E.g. From A4 to A3) Go back up to Copy page, that will show the % scale factor that will be used based on your choice of “From –...
- Page 63 • White Point. Increase to clean up a dirty background. Makes the whites whiter. Default = 1 0 to +6 • Black Point. Increase to darken the shadow areas of the image. Makes the blacks blacker. Default = 1 0 to +6 •...
-
Page 64: Operation: Saving Your Preferred Function Settings As Power On Defaults
• PC# (Scan to PC, Copy & Archive only) Select the PC you would like the Scan to PC function to communicate with. Default = PCX. Auto search & select the PC for each Scan to PC operation. Operation: Saving your preferred Function Settings as power on Defaults •... -
Page 65: Application Notes
Application notes Tightly curled documents • Prior to scanning, flatten the document as best as possible. • During the scan process, guide the document as it feeds through the scanner to prevent the original re-entering the scanner. If the original is allowed to re-enter the scanner, it will result in a paper jam and possible damage the original document. -
Page 66: Document Carrier Sheets
Document Carrier Sheets • Delicate documents: Old, fragile documents could be damaged further when feeding through a scanner. To avoid such problems, these delicate documents can be placed inside a document carrier sheet before scanning to provide protection. • Documents Carrier Sheets can also be useful when scanning o Transparent documents to improve light reflection and provide a more even image. -
Page 67: Eliminating Clipped Copies
Eliminating clipped copies • If you scan a 594mm original as fixed size A1, then the image is 594mm wide. • The printer has a 3mm margin either side that it cannot print within. That means on a 594mm roll, only 588mm can be printed on. Therefore, copying a 594mm original scan onto the 588mm printable width of the paper will mean the image is shifted 3mm to the side and 6mm (2 x 3mm) is clipped from the far side. -
Page 68: Scanner Settings
Scanner Settings • From the Home Page, select Scanner Settings. • Scroll left or right and select the Setting to be changed, then select the new value to be used. • Information. There is nothing to adjust. • Save Current Function Settings as Default. Functionality –... - Page 69 • Calibration. See Calibration • Stitch adjustment. See Stitch Adjustment • Scan Length. See Scan Length Adjustment • Standard / Plus mode. See Configuring the Network Mode of the scanner Plus Mode (Default when in English language) Standard Mode (Default when in Japanese language) •...
-
Page 70: Saving Scanner Settings
• Network Settings. See Configuring the network connection of the scanner o Automatic IP Settings DHCP o Manual IP Settings Static IP Address IP Address, Subnet Mask • Select Language. See Configuring the language of the scanner English Text (Sets Network Mode = Plus) Japanese Text (Sets Network Mode = Standard) •... -
Page 71: Maintenance
Consumables • Parts that wear according to operator usage are deemed consumables and can be purchased from your supplier. Those L24e / L36e scanner parts considered to be consumables are: o Scan Glass Sub. o Paper Hold Up flap. o Calibration/Stitch Target. -
Page 72: Calibration
Calibration • Remove the document return guides to prevent the calibration target getting stuck during forward/rewind motion required for calibration. • Clean the scanner. • Insert the calibration target (it must be clean and in good condition) into the centre of the scanner face up, black end first. - Page 73 • Scroll and select Calibration (Normalise). • Select the Tick icon and the calibration target will be scanned back & forth until complete. Please wait until the scanner returns to the Home screen. This process will take a few minutes. Return the calibration target to its protective cover for safe keeping.
-
Page 74: Stitch Adjustment
Stitch Adjustment • Remove all the document return guides to prevent the calibration target getting stuck during forward/rewind motion required for calibration. • Clean the scanner. • Insert the calibration target (it must be clean and in good condition) into the scanner face up, black end first. - Page 75 • Scroll and select Auto Stitch. • Select the Tick icon and the calibration target will be scanned back & forth until complete. Please wait until the scanner returns to the Home screen. This process will take a few minutes. Return the calibration target to its protective cover for safe keeping.
-
Page 76: Scan Length Adjustment
Scan Length Adjustment • To correct the length of scans or copies, Copy a document and measure the length of the drawing on both the original and the copy. The copy should be within 0.2% of the original. So, for a 500mm drawing, the acceptable range is 499mm to 501mm. To adjust the copy length: o Insert a document into the approximate centre of the scanner, face up. - Page 77 o Measure the length of the drawing on both the original and the copy. Calculate the adjustment figure by dividing the length of the original by the length of the copy. Adjustment figure = Original drawing length = 885mm = 0.9910 Copied drawing length 893mm Original...
- Page 78 o Scroll and select Scan Length Adjustment. o Use the Delete Key, to remove the current value, and type in the adjustment figure. Press the Enter key to save. Version 1.03 Global Scanning UK Ltd © 2017...
-
Page 79: Loading Firmware
Loading Firmware • Locate the firmware zipped file and a USB stick, which must have been formatted as FAT32 with a maximum capacity no greater than 128GB. • On a PC, use Windows Explorer® to extract the firmware zipped files to the root of a USB memory stick. - Page 80 o Scroll and select Load Firmware. o Select the Tick icon and the scanner will start to load firmware and will indicate progress. o DO NOT SWITCH OFF the scanner during the firmware loading process as this can cause permanent damage to the scanner. The UI will display the percentage complete while it loads the firmware into the scanner.
-
Page 81: Troubleshooting
Troubleshooting Error Codes Error Symbol Message User Actions Code Scanner open Close the scanner No Document loaded Load a document Invalid Model Power cycle. If problem persists, call service. Power cycle. If problem persists, Calibrate. Calibration required If problem persists, Stitch. If problem persists, call service. -
Page 82: Operation Errors
Operation errors Document does not feed correctly. • The document is not fed straight into the scanner. Hold the original document with two hands and feed into the scanner until you feel equal resistance on both sides from the feed rollers. If the document is not straight, open the scanner to remove the original, close the scanner and try again. -
Page 83: No Copy Output
DHCP), then the problem lies with the network configuration. For further information regarding network configurations, please contact your local network administrator. Supported Configurations • Multiple L24e or L36e scanners, PCs running the ScanApp Le and iPF67x/77x printers are supported on a single network. Version 1.03 Global Scanning UK Ltd © 2017... -
Page 84: Image Quality
Image Quality • The following scanned image shows possible image errors and the actions required to resolve them. Vertical lines = Dirt on Scan Colour variation over approximately 8” glass or poor calibration – (200mm) sections, or vertical streaks within these sections –... -
Page 85: Incorrect Scan Or Copy Length
• Calibrating the scanner will remove the streaking and clean up the white background. Calibration adjusts the optical sensitivity of each pixel in the sensor to give the correct levels of black and white. Calibration • Auto-stitch the scanner to align broken lines. Auto-stitch adjusts the electronic alignment of each segments of the scan sensor for both front to back and left to right alignment to avoid “stitch errors”... -
Page 86: Specifications
Specifications L 24e, L 36e Name Models (All regions) L24e / L36e MFP scanner is ONLY able to print to iPF670/671/770/771 Scan Technology SingleSensor with multiple dual sided LED illumination Illumination L24e: 64 LEDs, L36e: 96 LEDs Optical Resolution (dpi) 600dpi. - Page 87 • 4GB RAM • SATA 6.0Gbit/sec USB3 on the motherboard and SATA 6.0Gbit 7,200 rpm HDD controller. Only L24e and L36e scanner models are supported by the ScanApp Le. ScanApp Le Software Scanning cannot be started remotely.
- Page 88 Glossary of Terms 128GB 128 Giga Bytes. Size of memory. ANSI America National Standards Institute. Standard paper sizes definition. ARCH Architectural paper sizes. Standard paper sizes definition. Adjusts the electronic alignment of each segments of the scan sensor for Auto-stitch both front to back and left to right alignment to avoid “stitch errors”...
- Page 89 Copy, Scan to PC, Scan to USB, Copy & Archive Icon Guide L24e / L36e – Function Settings: • Colour mode: Colour, Greyscale, Black and White • Quality Mode: Standard, High, Best • Document size: Auto ISO sizes ANSI sizes ARCH sizes •...
- Page 90 Icon Guide L24e / L36e – Scanner Settings: • Scanner information. • Save current Function Settings as default. • Restore factory default Function Settings. • Load Firmware. • Calibration. • Stitch adjustment. • Scan length adjustment. • Network Mode: Standard, Plus mode.
Need help?
Do you have a question about the L24e and is the answer not in the manual?
Questions and answers