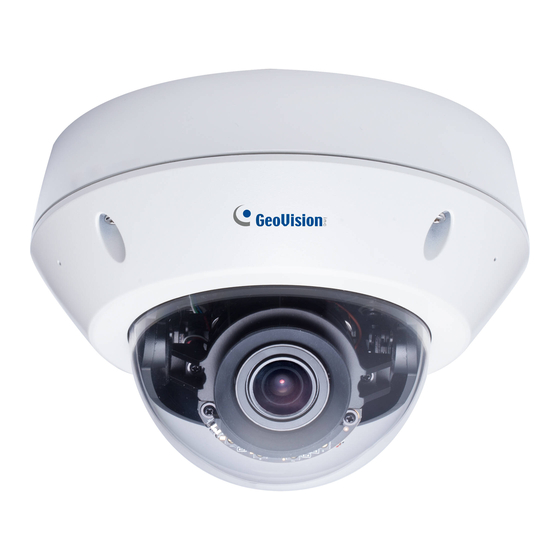
GeoVision GV-VD8700 Quick Start Manual
Gv-face recognition camera
Hide thumbs
Also See for GV-VD8700:
- User manual (104 pages) ,
- Quick start manual (34 pages) ,
- User manual (106 pages)

Related Manuals for GeoVision GV-VD8700


Summary of Contents for GeoVision GV-VD8700
- Page 1 Quick Start Guide GV-Face Recognition Camera GV-VD8700 GV-FD8700-FR Before attempting to connect or operate this product, VD8700V110-QG-A please read these instructions carefully and save this manual for future use.
- Page 2 GeoVision. Every effort has been made to ensure that the information in this manual is accurate. GeoVision, Inc. makes no expressed or implied warranty of any kind and assumes no responsibility for errors or omissions. No liability is assumed for incidental or consequential damages arising from the use of the information or products contained herein.
-
Page 3: Table Of Contents
Note for Connecting to GV-VMS / DVR / NVR........ii Note for Recording ................iii Note for Installing Camera Outdoor............iv 1. Introduction ................……...1 1.1 Packing List ....................1 1.1.1 GV-VD8700 ....................1 1.1.2 GV-FD8700-FR..................1 1.2 Optional Accessories ................... 2 1.3 Overview ..................... 3 1.4 Installation Flowchart................... 5 Installation ....................... -
Page 4: Note For Connecting To Gv-Vms / Dvr / Nvr
Note for Connecting to GV-VMS / DVR / NVR The camera is designed to work with and record on GV-DVR / NVR / VMS, a video management system. Once the camera is connected to the GV-DVR / NVR / VMS, the resolution set on the GV-DVR / NVR / VMS will override the resolution set on the camera’s Web interface. -
Page 5: Note For Recording
Note for Recording 1. By default, the recording function is disabled. Configure the function in the camera’s Web interface to record alarm events to the memory card inserted in the camera upon disconnection from GV-DVR / NVR / VMS. See 4.4.3 Tools, GV-Face Recognition Camera User’s Manual for details. -
Page 6: Note For Installing Camera Outdoor
Note for Installing Camera Outdoor When installing the camera outdoor, be sure that: The camera is set up above the junction box to prevent water from entering the camera along the cables. Any PoE, power, audio and I/O cables are waterproofed using waterproof silicon rubber or the like. -
Page 7: Introduction
Welcome to the GV-Face Recognition Camera Quick Start Guide. In the following sections, you will learn the basic installations and configurations. For a detailed user manual, see GV-Face Recognition Camera User’s Manual. 1.1 Packing List 1.1.1 GV-VD8700 Torx Wrench GV-VD8700 Camera ... -
Page 8: Optional Accessories
(NC) independently as per your requirement. Metal PG21 Conduit The metal PG21 conduit connector allows you to run the Connector (only for wires through a 3/4” conduit pipe. GV-VD8700) Power Adapter Contact our sales representatives for the countries and areas supported. -
Page 9: Overview
1.3 Overview... - Page 10 Introduction Name Description The power LED (top) turns on when the power is on and turns off when there is no power supply. The LED Indicators status LED (bottom) turns on when the system operates normally and turns off when an error occurs. Audio Out Currently not functional.
-
Page 11: Installation Flowchart
1.4 Installation Flowchart See the flowchart for a clear idea of the installation process before proceeding to Chapter 2 Installation. Refer to the relevant sections in the User’s Manual if needed. -
Page 12: Installation
You can also install the camera on ceilings, wall corners (concave or convex), and poles. For details on these installations, see GV-Mount Accessories Installation Guide. 2.1 GV-VD8700 The camera is designed for outdoors. With the standard package, you can install the camera on the ceiling. - Page 13 Optionally remove the cables that attach the built-in microphone to the camera to assist with installation. Cables for built-in microphone Remove the back plate with the supplied torx wrench and remove the safety lock with a Philips screwdriver. Keep the removed screw for later use. Safety lock Thread wires into the camera.
- Page 14 Installation Unplug the conduit connector inside the housing and disintegrate the connector. You should have 3 parts: Thread the audio wires and I/O wires through the conduit entry and then through parts 1, 2, and 3 of the conduit connector. Tip: To make the threading easier, it is recommended to thread the wires in the order described in Step 4-C.
- Page 15 IMPORTANT: Use the supplied ruler and leave at least 14 cm of I/O wires and 10 cm of audio wires between their connectors on the camera and the conduit connector. The plugs are used to prevent water from entering the camera housing. Keep the unused holes plugged and save the removed plugs for future use.
- Page 16 Installation Install the Ethernet cable. Rotate to remove the indicated cap and the plug inside. Thread an Ethernet cable (the end with no RJ-45 connector) and the optional power adapter wires from the back panel through the conduit connector. IMPORTANT: Use the supplied ruler and leave about 14 cm of the Ethernet cable between the connector on the camera and the conduit connector.
- Page 17 Connect the wires to the camera. For details, see Chapter 3 Connecting the Camera. Tip: Unscrew the indicated screws and lift the camera to help you connect the wires and insert the memory card. Sort out the wires at the back. You can have the wires come out from positions A and B or from C.
- Page 18 Installation Secure the back plate to the ceiling. Paste the sticker to the ceiling. The arrow on the sticker indicates the direction that the camera faces. Drill 4 holes for screws. The recommended ones are indicated as ‘1’. Insert the screw anchors to the 4 holes. Drill holes A &...
- Page 19 11. Adjust the angle, focus and zoom of the camera. Pan Adjustment Tilt Adjustment Rotational Adjustment Zoom Adjustment Focus Adjustment Loosen the screw Loosen the screw 12. Replace the silica gel bag, organize the wires and secure the camera cover with the torx wrench.
-
Page 20: Gv-Fd8700-Fr
Access the live view. For details, see Chapter 4 Accessing the Camera. Loosen the tile screw, pan screw or rotational screw. Adjust the angles based on the live view as needed, and tighten the screws again. See Step 11, 2.1 GV-VD8700 for illustrations. - Page 21 Remove the indicated part in the housing cover when necessary. Place the housing cover back and tighten the three screws to secure it.
-
Page 22: Connecting The Camera
3. Connecting the Camera Use a standard network cable to connect the camera to your network. Optionally connect an external microphone. Connect power using one of the following methods: Plug the power adapter to the power port. Use the Power over Ethernet (PoE) function and the power will be provided over the network cable. -
Page 23: Accessing The Camera
4. Accessing the Camera 4.1 System Requirements To access the Web interface of the camera, make sure the connected network is stable and use one of the following Web browsers: Microsoft Internet Explorer 11 or later Google Chrome Note: When using Google Chrome browser, only H.264 video codec is supported and there has a live view delay of 2~5 seconds. - Page 24 Accessing the Camera Find the camera with its Mac Address, click on its IP address and select Web Page. On the login page, type the default ID and password admin and click Apply. Note: The default ID and Password are no longer supported in the latest version. For the first-time user, after entering admin in both ID and password fields, you will be requested to change the login credentials.
-
Page 25: Setting Up For Face Recognition
5. Setting up for Face Recognition Face recognition works best when the camera is properly aligned with the face of the recognition target. Make sure you meet the criteria below when installing the camera so the camera can capture a clear frontal face image of the recognition target: 5.1 Ideal Camera Position Less Ideal Installation Scenario Recommended Installation Scenario... - Page 26 Setting up for Face Recognition Focus: A large depth of field not only ensures an appropriate image size for the faces of the recognition targets, but also allows them to stay in focus for a longer period of time, thereby increasing the recognition accuracy. Calibrate the lens at the telephoto end for effective recognition at its optimal recognition distance of 4 m (13.12 ft).
-
Page 27: Adjusting Illumination
5.2 Adjusting Illumination After installing the camera properly, it is required to adjust the environment’s lighting since the recognition process may vary depending on the illumination. Follow the guidelines below to set up the environment’s lighting according to Daytime recognition needs. Less Ideal Installation Scenario Recommended Installation Scenario Insufficient Lighting... -
Page 28: Enrolling Face Data
Setting up for Face Recognition 5.3 Enrolling Face Data After the camera and the environment’s lighting are set, it is required to create the face data by adding photos of the persons to be recognized into the Face Database of the camera. - Page 29 Fill out the following information: Name: Type a desired name for the person. Organization: Type a desired organization name for the person. Group: Select from a list of three groups in which the person shall be categorized under. The three groups include VIP, Normal, Unwelcomed. ...
-
Page 30: Photo Requirements
Setting up for Face Recognition 5.3.1 Photo Requirements For face recognition to work, it is required for the photos to meet the following criteria: Each photo should consist of only one face. The file size of the photo cannot exceed 350 KB. ... -
Page 31: Upgrading System Firmware
6. Upgrading System Firmware GeoVision periodically releases updated firmware on the GeoVision website: To load the new firmware into the camera, follow the instructions below. On the top bar, go to System Settings. In Tools under Management, select Firmware Upgrade. -
Page 32: Restoring To Factory Default
7. Restoring to Factory Default If for any reason the camera is not responding correctly, you can reset it to its factory default setting by using its Web interface or pressing the Default button on the camera. 7.1 Using the Web Interface After logging on to the Web interface, go to System Settings.
Need help?
Do you have a question about the GV-VD8700 and is the answer not in the manual?
Questions and answers