
Related Manuals for Epever UP2000-HM6021


Summary of Contents for Epever UP2000-HM6021
- Page 1 Inverter/Charger User Manual UP2000-HM6021 / UP2000-HM6022 UP3000-HM5041 / UP3000-HM5042 UP3000-HM8041 / UP5000-HM8042 UP3000-HM10021 / UP3000-HM10022...
-
Page 2: Table Of Contents
Contents Safety Instructions ................... 1 1 General Information................4 1.1 Overview ..........................4 1.2 Identification of parts ........................ 5 1.3 Naming rules ..........................8 1.4 Connection diagram ......................... 8 2 Installation Instructions ................. 9 2.1 General installation notes ......................9 2.2 Before installation ........................ -
Page 3: Safety Instructions
Safety Instructions Please reserve this manual for future review. This manual contains all the instructions for safety, installation, and operation of the UPower-Hi series inverter/charger (below referred to as the inverter/charger). 1. Explanation of symbols Please read related literature accompanying the following symbols to enable users to use the product efficiently and ensure personal and property safety. - Page 4 3. Professional and technical personnel is allowed to do Install the inverter/charger to a specified location; Conduct trial operations for the inverter/charger; Operate and maintain the inverter/charger. 4. Safety cautions before installation When you receive the inverter/charger, check whether there is any damage that occurred in transportation.
- Page 5 temperature would be very high. Please do not touch it. When the inverter/charger is working, please do not open the inverter/charger cabinet to operate. When eliminating the faults or disconnecting the DC input, turning off the inverter/charger's switch, then carry out the operation after the LCD screen is completely OFF.
-
Page 6: General Information
1 General Information 1.1 Overview UPower-Hi, an upgrade hybrid inverter charger, supports utility charging, oil generator charging, solar charging, utility output, inverter output, and energy management. The DSP chip in the product with an advanced control algorithm brings high response speed and high conversion efficiency. In addition, this product adopts an industrial design to ensure high reliability and features multiple charging and output modes. -
Page 7: Identification Of Parts
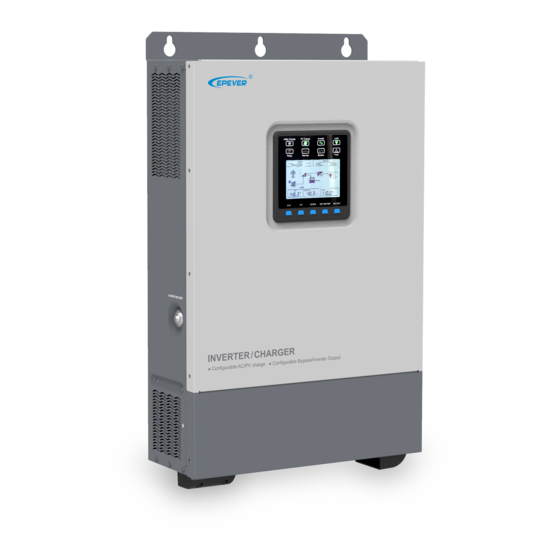
Self-learning SOC display function Multiple LED indicators to dynamic display the status AC OUT button to control the AC output directly 4.2 inch LCD to monitor and modify system parameters Remote temperature compensation for batteries ... - Page 8 ❶ ❿ Utility input terminal RTS interface ② Dry contact interface ❷ ⓫ AC output terminal ❸ ⓬ Terminal covers RBVS interface ❹ ⓭ Mounting holes (4 Total) Cable hole ❺ Battery negative input terminal RS485 interface(DB9 female, with ⓮ ③...
- Page 9 Definition Definition 5VDC RS-485-A 5VDC RS-485-A RS-485-B RS-485-B Please refer to the "BMS Lithium Battery Protocols & Fixed ID Table" or contact our technical supporters for the currently supported BMS manufacturers and the BMS CAUTION parameters. ② Dry contact interface ...
-
Page 10: Naming Rules
12VDC RS-485-A RS-485-B GND2(12VDC power ground) GND1(5VDC power ground) 5VDC 1.3 Naming rules 1.4 Connection diagram No battery mode... -
Page 11: Installation Instructions
Battery mode Supported battery types:AGM、GEL、FLD、LFP8/LFP15/LFP16、LNCM7/LNCM14 AC loads shall be determined according to the output power of the inverter/charger. The load exceeding the maximum output power may damage the inverter/charger. WARNING For different battery types, confirm the relevant parameters before power on. ... -
Page 12: Before Installation
Included accessories 1pcs(Details refer to the "Accessories list" file shipped with the inverter/charger.) 2.2.2 Prepare modules Battery Recommended wire size of the battery and the circuit breaker is as below. Model Battery wire size Circuit breaker Ring terminal UP2000-HM6021 20mm /4AWG 2P—125A RNB38-8S UP2000-HM6022 20mm /4AWG 2P—125A RNB38-8S... - Page 13 Step4: Pass the exposed wire through the ring terminal, and secure the wire firmly with a wire clamp. AC Load Recommended wire size of the AC load and the circuit breaker is as below. Model Load wire size Circuit breaker Torque UP2000-HM6021 /9AWG 2P—40A 1.2N.M UP2000-HM6022 3.4mm /12AWG 2P—16A 1.2N.M...
- Page 14 PV module's specifications. When the PV modules are connected in series, the total ISC equals any PV module's ISC. When the PV modules are connected in parallel, the total ISC equals all PV modules' ISC. Please refer to the table below: Model PV wire size Circuit breaker UP2000-HM6021 /9AWG 2P—40A UP2000-HM6022 /11AWG 2P—25A...
-
Page 15: Determine The Installation Position
Utility input Recommended wire size of the utility input and the circuit breaker is as below. Model Utility wire size Circuit breaker Torque UP2000-HM6021 /9AWG 2P—40A 1.2N.M UP2000-HM6022 3.4mm /12AWG 2P—16A 1.2N.M UP3000-HM5041 /9AWG 2P—40A 1.2N.M UP3000-HM5042 /11AWG 2P—25A 1.2N.M... -
Page 16: Install The Inverter/Charger
Step3: Rotate the direction of mounting plate 1 and plate 2, install them again. 2.4 Install the inverter/charger Risk of explosion! Never install the inverter/charger in a sealed enclose with flooded batteries! Do not install the inverter/charger in a confined area where the battery gas WARNING can accumulate. -
Page 17: Wiring
Step5: Remove the inverter/charger and drill an M10 hole according to the position determined in step4. Step6: Insert the screw of the M8 bolt and the steel pipe into the M10 hole. Step7: Install the inverter/charger and secure the nuts with a sleeve. 2.5 Wiring Remove the terminal cover Remove covers of the AC output /AC input/utility input terminal with a screwdriver, as shown below:... - Page 18 Connect the battery A circuit breaker must be installed on the battery side. For selection, please refer to chapter "2.2.2 Prepare modules ". WARNING When wiring the battery, please do not close the circuit breaker and ensure that the leads of "+" and "-" poles are connected correctly. ...
- Page 19 We do not assume any responsibility for the unnecessary danger when the ground terminal is not connected correctly. Silk-screen Abbreviation Name Color LINE Live wire Brown/black Neutral Neutral line Blue — Ground line Yellowish-green Connect the PV modules Risk of electric shock! When wiring the PV modules, please do not close the circuit breaker and ensure that the leads of "+"...
- Page 20 Silk-screen Abbreviation Name Color LINE Live wire Brown/black Neutral Neutral line Blue Connect accessories RBVS interface Function: This interface can be connected to the battery voltage sampling wire to detect the battery voltage accurately. The sampling distance is no longer than 20 meters. ...
- Page 21 Dry contact interface Function: The dry contact interface can turn on/off the generator and is connected parallel with the generator's switch. Working principle: When the battery voltage reaches the dry contact ON voltage(DON), the dry contact is connected. Its coil is energized.
- Page 22 BMS-Link connection port(RJ45) Function: Through a BMS-Link converter, different lithium battery manufacturers' BMS protocols can be converted into our company's standard BMS protocol. In addition, it realizes the communication between the inverter/charger and the BMS. Needs: (Included)CC-RS485-RS485-350mm(Connect the inverter/charger to the BMS-Link converter) (Optional)RS485 communication cable(Connect the lithium battery to the BMS-Link converter.
-
Page 23: Operating The Inverter/Charger
Function: For base UPower-Hi products, its DB9 interface provides 0.2A/5V power supply and can be connected to a WiFi module or PC. For RTU-type UPower-Hi products, its DB9 interface provides 0.2A/12V power supply and can be connected to RTU, WiFi module, or PC. Install the cover and secure the screws. -
Page 24: Interface
generally works when the indicator is ON solid. Ensure that the battery connection is correct and the battery circuit breaker is turned on first. And then, close the PV array and utility circuit breakers after the inverter/charger running normally. Again, we won't assume any responsibility for not WARNING following the operation. -
Page 25: Button
Remote control load off by cloud Slowly flashing (0.5Hz) platform or phone APP No remote control Inverter supplies power Green Slowly flashing (0.5Hz) Utility supplies power Device normal On solid Device fault 3.2 Button Button Operation Instruction Click(<50ms) Exit the current interface Long press(>2.5s) Clear the faults 1. -
Page 26: Lcd
3.3 LCD Symbol definition Symbol Definition Symbol Definition Utility connected and PV connected and charging charging 1. Utility disconnected 1. PV disconnected 2. Utility connected, but 2. PV connected, but the no charge voltage is low Load ON Load OFF ①... - Page 27 When the battery voltage reaches the low voltage disconnect voltage or reaches the float charging voltage, the inverter/charger calibrates the battery capacity for the first time. When the battery goes from the over-discharged state to the fully-charged state, the inverter/charger calibrates the battery capacity again.
-
Page 28: Operating Mode
3.4 Operating mode Abbreviation Abbreviation Illustration PV power Load power LOAD Battery voltage Low voltage reconnect voltage Low voltage disconnect voltage Auxiliary module OFF voltage Auxiliary module ON voltage Max charging current Battery mode Only solar energy can charge the battery, no matter utility is Solar available or not. - Page 29 the load as a supplement. Input source: Solar (only solar energy charges the battery) Output source: Inverter Priority ① Both PV and utility are available When PV power is higher than load power, it charges the battery and supplies extra power to the load.
- Page 30 ③ PV power is not available, and the utility is available. The battery supplies the load alone. When the battery voltage goes lower than or equal to the LVD point, the utility supplies load. ④ Both PV power and utility are not available. Before the battery voltage drops to the LVD point, the battery supplies the load.
- Page 31 When PV power is lower than or equal to load power, PV stops charging the battery. Instead, it supplies the load together with the battery. When the battery voltage goes lower than or equal to the LVD point, only PV charges the battery. ③...
- Page 32 When PV power is lower than or equal to load power, PV stops charging the battery. Instead, it supplies the load together with the battery. When the battery voltage goes lower than or equal to AON and has not been charged to AOF, the below interfaces show different conditions.
- Page 33 When the battery voltage goes lower than or equal to the LVD point, only PV charges the battery. ③ PV power is not available, and the utility is available. The battery supplies the load alone. The battery voltage goes lower than or equal to AON. Simultaneously, it has not been charged to AOF.
- Page 34 When the battery voltage goes lower than or equal to AON and has not been charged to AOF, the below interfaces show different conditions. When PV power is lower than or equal to MCC* V , the utility supplies the load alone and charges the battery together with the PV.
- Page 35 ③ PV power is not available, and the utility is available. The utility supplies the load alone. The battery voltage goes lower than or equal to AON. Simultaneously, it has not been charged to AOF. Instead, the utility supplies the load and charges the battery. ④...
- Page 36 load. When PV power is lower than or equal to load power, PV stops charging the battery. Instead, it supplies the load together with the battery. When the battery voltage goes lower than or equal to the LVD point, only PV charges the battery. ③...
- Page 37 The PV open-circuit voltage V Max. PV input power curve as below: Min. PV Max. PV Model working Max. PV open-circuit voltage input power voltage 250V(At minimum temperature) UP2000-HM6021 2000W 220V(25℃) 450V(At minimum temperature) UP2000-HM6022 2500W 395V(25℃) 250V(At minimum temperature) UP3000-HM5041 3000W...
-
Page 38: Settings
450V(At minimum temperature) UP3000-HM5042 4000W 395V(25℃) 250V(At minimum temperature) UP3000-HM8041 4000W 220V(25℃) 250V(At minimum temperature) UP3000-HM10021 3000W 220V(25℃) 450V(At minimum temperature) UP3000-HM10022 4000W 395V(25℃) 500V(At minimum temperature) UP5000-HM8042 120V 4000W 440V(25℃) 3.5 Settings Standard interface for common users Operations: Step1:In the real-time interface, long press the SET/ENTER button to enter the standard interface. Step2:Press the UP/DOWN button to select the setting item. - Page 39 AGM(Default) LFP8 LFP15 Battery type LFP16 LNCM7 LNCM14 AGM/GEL/FLD/LFP/LNCM+U Important: USER battery type can be combined with other battery types and set corresponding parameters. Solar priority(Default) Charging mode Utility & solar Solar Utility priority(Default) Output mode...
- Page 40 Inverter priority ℃(Default) Temperature unit ℉ 30S(Default) LCD backlight time 100S(on solid) ON(Default) Buzzer alarm switch User define for the 24V system: 21.6~32.0V AGM(Default)/GEL/FLD: 21.6V Step size: long press for 1V, LFP8: 25.5V short press for 0.1V Low voltage LCNM7: 25.5V disconnect voltage User define for the 48V system:...
- Page 41 Step size: long press for 1V, AGM(Default)/GEL/FLD: 50.0V LFP15: 48.8V short press for 0.1V LFP16: 52.0V LCNM14: 52.0V When the output mode is inverter priority, and the battery voltage is lower than the low voltage disconnect voltage (configurable), the utility supplies the load. CAUTION Advanced interface for engineers Operations:...
- Page 42 FLD: 29.6V LFP8: 28.2V LCNM7: 28.9V AGM(Default): 58.4V GEL: -- FLD: 59.2V LFP15: 53.0V LFP16: 56.5V LCNM14: 57.8V AGM(Default): 28.8V User define for the 24V system: 21.6~32.0V GEL: 28.4V Step size: long press for 1V,short press for 0.1V FLD: 29.2V LFP8: 28.2V Boost LCNM7: 28.9V...
- Page 43 AGM(Default)/GEL/FLD: 27.6V voltage LFP8: 27.2V LCNM7: 28.2V User define for the 48V system: 43.2~64.0V AGM(Default)/GEL/FLD: 55.2V Step size: long press for 1V,short press for 0.1V LFP15: 51.0V LFP16: 54.4V LCNM14: 56.4V User define for the 24V system: 21.6~32.0V AGM(Default)/GEL/FLD: 30.0V Step size: long press for 1V,short press for 0.1V LFP8: 28.5V Over...
- Page 44 NOTE: The difference between AOF and AON should AGM(Default)/GEL/FLD: 56.0V be larger than or equal to 1V, or else the setting LFP15: 50.0V cannot be saved. LFP16: 53.3V LCNM14: 54.0V User define for the 24V system: 21.6~32.0V Step size: long press for 1V,short press for 0.1V NOTE: The difference between AOF and AON should AGM(Default)/GEL/FLD: 24.0V be larger than or equal to 0.5V, or else the setting...
- Page 45 UP2000-HM6021/UP2000-HM6022: 60A(Default) User define: 5~60A UP3000-HM10021/UP3000-HM10022: 100A(Default) User define: 5~100A UP3000-HM8041/UP5000-HM8042: 80A(默认) User define: 5~80A Step size: long press for 50A,short press for 5A UP2000-HM6021/UP2000-HM6022/UP5000-HM 8042: 60A(Default) User define: 2~60A Max. utility UP3000-HM5041/UP3000-HM5042/UP3000-HM charging 8041: 40A(Default) User define: 2~40A...
- Page 46 prohibits charge temperatu temperatu 0℃(Default) User define:-40~0℃ prohibits Step size: 5℃ discharge temperatu 110VAC(Default for devices of 100V output voltage) 120VAC Output voltage 220VAC(Default for devices of 200V output level voltage) 230VAC Output 50Hz(Default) frequency detecting the utility input, the output frequency 60Hz...
- Page 47 dischargin g the lithium battery when the temperatu re is too low) User define for the 24V system: 21.6~32.0V AGM(Default)/GEL/FLD: 30.0V Step size: long press for 1V,short press for 0.1V LFP8: 28.5V LCNM7: 29.4V Charging limit voltage User define for the 48V system: 43.2~64.0V AGM(Default)/GEL/FLD: 60.0V Step size: long press for 1V,short press for 0.1V LFP15: 53.5V...
-
Page 48: Battery Voltage Customized Logic
Step size: long press for 10V,short press for 1V disconnec 176.0V(Default for the 220V system ) User tion define: 90VAC~190VAC voltage Step size: long press for 10V,short press for 1V UP2000-HM6021/UP2000-HM6022: Battery 200A(Default) User define: 10~200A discharge UP3000-HM5041/UP3000-HM5042/UP3000-HM 8041: 150A(Default) User define:10~150A current... - Page 49 Low Voltage Reconnect Voltage > Low Voltage Disconnect Voltage ≥ Discharging Limit Voltage(21.2V) Under Voltage Warning Reconnect Voltage-0.5V ≥ Under Voltage Warning Voltage ≥ Discharging Limit Voltage(21.2V) Boost Reconnect Charging voltage > Low Voltage Disconnect Voltage In the 48V input voltage system, the following rules must be followed when modifying the parameter values in the user battery type for a Lead-acid battery.
-
Page 50: Battery Discharge Current Limit
Low Voltage Reconnect Voltage>Low Voltage Disconnect Voltage ≥ Discharging Limit Voltage(42.4V) Under Voltage Warning Reconnect Voltage-1V ≥Under Voltage Warning Voltage≥ Discharging Limit Voltage(42.4V) Boost Reconnect Charging Voltage> Low Voltage Reconnect Voltage The lithium battery's voltage parameters must be set according to the voltage parameters of BMS. -
Page 51: Protections
4 Protections Protection Instruction When the charging current of the PV array exceeds its rated current, it will be charged at the rated current. PV limit NOTE: When the charging current exceeds the PV array's rated current, ensure the PV current open-circuit voltage no exceed the "maximum PV open-circuit voltage."... -
Page 52: Troubleshooting
Continuance The first time delay for 5s, the second Recover three times time delay for 10s, the third time delay for 15s Inverter/char The inverter/charger will stop charging/discharging when the internal temperature is too high and will resume overheating charging/discharging when the temperature is recovered to normal. 5 Troubleshooting 5.1 Error codes Fault... -
Page 53: Solutions
Write EEPROM error Heat sink over temperature Battery low temperature Communication fault alarm Utility fast Utility over voltage Alarm On Solid flashing Utility fast Utility low voltage flashing Utility frequency Utility fast Alarm On Solid abnormal flashing PV charge PV over voltage Alarm On Solid fast flashing... -
Page 54: Maintenance
6 Maintenance The following inspections and maintenance tasks are recommended at least two times per year for the best performance. Make sure the inverter/charger is firmly installed in a clean and dry ambient. Make sure no block on airflow around the inverter/charger. Clear up any dirt and fragments on the radiator. -
Page 55: Specifications
7 Specifications Item UP2000-HM6021 UP3000-HM10021 UP3000-HM5041 UP3000-HM8041 Rated battery voltage 24VDC 48VDC Battery input voltage 21.6~32VDC 43.2~64VDC Max. battery charging 100A current Inverter output Continuous output power 2000W 3000W 3000W 3000W Max. surge power(3S) 4000W 6000W 6000W 6000W Output voltage range... - Page 56 Max. PV open circuit 250V , 220V voltage MPPT voltage range 60~200V 2000W 3000W 3000W 4000W Max. PV input power (Note: For the curve of Max. PV input power Vs. PV open-circuit voltage, see chapter 3.4 Operating mode for details.) Max.
- Page 57 Item UP2000-HM6022 UP3000-HM10022 UP3000-HM5042 UP5000-HM8042 Rated battery voltage 24VDC 48VDC Battery input voltage 21.6~32VDC 43.2~64VDC Max. battery charging 100A current Inverter output Continuous output 2000W 3000W 3000W 5000W power Max. surge power(3S) 4000W 6000W 6000W 8000W Output voltage range 220VAC(-6%~+3%), 230VAC(-10%~+3%) Output frequency 50/60±0.2% Output wave...
- Page 58 Solar charging 500V Max. PV open circuit 450V , 395V voltage 440V MPPT voltage range 80~350V 120~400V 2500W 4000W 4000W 4000W Max. PV input power (Note: For the curve of Max. PV input power Vs. PV open-circuit voltage, see chapter 3.4 Operating mode for details.) Max.
-
Page 59: Appendix 1 Disclaimers
At minimum operating environment temperature At 25℃ environment temperature Environment Parameters Enclosure IP30 Relative humidity < 95% (N.C.) -20℃~50℃ Environment temperature -25℃~60℃ Storage temperature <5000m(If the altitude exceeds 1000 meters, the actual output power is reduced according to IEC62040.) Altitude 8 Appendix 1 Disclaimers The warranty does not apply to the following conditions:... - Page 60 HUIZHOU EPEVER TECHNOLOGY CO., LTD. Beijing Tel: +86-10-82894896/82894112 Huizhou Tel: +86-752-3889706 E-mail: info@epever.com Website: www.epever.com...
Need help?
Do you have a question about the UP2000-HM6021 and is the answer not in the manual?
Questions and answers