Table of Contents
Advertisement
Advertisement
Table of Contents

Related Manuals for Flexim PIOX R721


Summary of Contents for Flexim PIOX R721
- Page 1 Operating instruction PIOX R721/R500 UMPIOX_R721V1-3EN...
- Page 2 PIOX is a registered trademark of FLEXIM GmbH. FLEXIM GmbH Boxberger Straße 4 12681 Berlin Germany Tel.: +49 (30) 936 67 660 Fax: +49 (30) 936 67 680 E-mail: info@flexim.com www.flexim.com Operating instruction for PIOX R721/R500 UMPIOX_R721V1-3EN, 2021-09-01 Article number: 25177 Copyright (©) FLEXIM GmbH 2021...
-
Page 3: Table Of Contents
PIOX R721 Table of contents Table of contents Introduction ................7 Safety instructions . - Page 4 Table of contents PIOX R721 Measurement ................51 Parameter input .
- Page 5 PIOX R721 Table of contents Calibration ................90 Settings .
- Page 6 Table of contents PIOX R721 2021-09-01, UMPIOX_F72xV1-3EN...
-
Page 7: Introduction
PIOX R721 Introduction This operating instruction has been written for users operating the process refractometer PIOX R721. It contains important information about the measuring equipment, how to handle it correctly, and how to avoid damages. Read the safety instructions carefully. Make sure you have read and understood the operating instruction before using the measuring equipment. -
Page 8: Safety Instructions
The measuring equipment has to be checked for proper condition and operational safety before each use. If troubles or damages have occurred during installation or operation of the measuring equipment, please inform FLEXIM. It is not allowed to make unauthorized modifications or alterations to the measuring equipment. -
Page 9: Not Intended Use
• With the exceptions stated in chapter 10, the measuring equipment is maintenance-free. Any components and spare parts may only be replaced by FLEXIM. The operator shall carry out periodic checks for changes or damages that can present a danger. For further information, contact FLEXIM. -
Page 10: Safety Instructions For Transport
→ Wear the required personal protective equipment. → Observe the applicable rules. • If you detect a transport damage when unpacking the delivery, please contact the supplier or FLEXIM immediately. • The transmitter is a sensitive electronic measuring instrument. Avoid shocks or impacts. -
Page 11: General Principles
3 General principles PIOX R721 3.1 Measurement principle General principles Measurement principle Terms and abbreviations term/abbreviation explanation analyte components of a mixture which are to be chemically analyzed matrix components of a mixture which are not to be chemically analyzed... - Page 12 3 General principles 3.1 Measurement principle PIOX R721 Fig. 3.1: Path of light beam within the sensor 1 – sensor electronics 2 – LED 3 – slit images 4 – image sensor 5 – measuring prism 6 – temperature probe 7 –...
- Page 13 3 General principles PIOX R721 3.1 Measurement principle Determination of the concentration The concentration is determined with the refractive index. The refractive index depends on the temperature and concentration of the fluid. This relationship between temperature, refractive index and concentration is depicted with a function. The coefficients and the function are stored in a fluid data set.
-
Page 14: Diagnostic Values
3 General principles 3.2 Diagnostic values PIOX R721 Diagnostic values Amplitude The amplitude (unit: %) is the ratio of max. values of the signals to the product of LED lightness and exposure time of the image sensor. At delivery, the amplification with water is normalized to 100 %. -
Page 15: Product Description
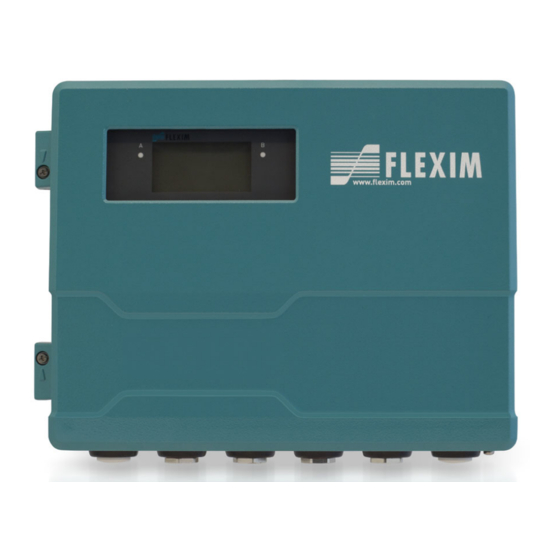
4 Product description PIOX R721 4.1 Handling concept Product description The transmitter and sensor are the main components of the process refractometer. Both are interconnected with the supplied cable. Fig. 4.1: Measuring setup 1 – sensor 2 – transmitter 3 – process connection (example) 4 –... - Page 16 4 Product description 4.1 Handling concept PIOX R721 Fig. 4.2: Command panel of the transmitter NEXT DISP SNAP DISP 3x Q FAST MODE 1 – LCD display (backlit) 2 – keyboard Tab. 4.1: Description of the menu menu description input of sensor and fluid parameters...
-
Page 17: Display
4 Product description PIOX R721 4.2 Display Display Structure Fig. 4.3: Menu item of the menu Parameters 1 – menu 2 – menu item currently edited 3 – area for scroll lists or input fields Tab. 4.2: Navigation horizontal scroll list... -
Page 18: Keyboard
4 Product description 4.3 Keyboard PIOX R721 Keyboard The keyboard has 15 keys, including 3 function keys: ENTER, and C. Some keys have multiple functions. They can be used to enter data or to navigate through scroll lists. Tab. 4.3:... -
Page 19: Transport And Storage
The measuring equipment must be packaged properly for transport. For weight indications, see technical specification. • Use, if possible, the original packaging by FLEXIM or an equivalent cardboard box. • Position the transmitter, sensors and accessories in the middle of the cardboard box. -
Page 20: Mounting
6 Mounting PIOX R721 Mounting Danger! Risk of explosion when using the measuring equipment in explosive atmospheres This may result in personal or material damage or dangerous situations. → Observe the "Safety instructions for the use in explosive atmospheres", see document SIPIOX_R721. -
Page 21: Transmitter
6 Mounting PIOX R721 6.1 Transmitter Transmitter 6.1.1 Opening and closing the housing 6.1.1.1 Opening Caution! Possible danger by opening the equipment at improper ambient conditions Open the transmitter in safe ambient conditions only (e.g., air humidity < 90 %, no conductive pollution, no explosive atmosphere). - Page 22 6 Mounting 6.1 Transmitter PIOX R721 Transmitter with aluminum housing • Close the housing cover pressing it slightly upwards on the side of the screws. • Hand-tight all screws of the transmitter housing. Fig. 6.2: Transmitter 1 – screws 6.1.2...
- Page 23 6 Mounting PIOX R721 6.1 Transmitter Transmitter with aluminum housing • Fix the wall mount (2) with 3 countersunk-head screws (3) firmly to the wall. • Attach the transmitter (1) to the lower hooks (7) of the wall mount. • Fix the transmitter to the wall mount by locking the stop bolt (4) into the destined hole and by firmly tightening the screw (5).
- Page 24 6 Mounting 6.1 Transmitter PIOX R721 6.1.2.2 Pipe mounting Notice! The pipe has to be sufficiently stable to withstand the pressure exerted by the transmitter and the shackles. Transmitter with stainless steel housing Installation on a 2'' pipe • Position the transmitter and the shackle (1) on the pipe.
- Page 25 6 Mounting PIOX R721 6.1 Transmitter Transmitter with aluminum housing Notice! For the mounting on pipes the pipe mounting kit, consisting of 2 band clamps, 2 countersunk-head screws and 2 washers, is needed. The distance of the band clamps has to be identical to the distance of the holes on the wall mount.
-
Page 26: Sensor
6 Mounting 6.2 Sensor PIOX R721 Sensor Mounting 6.2.1 Sensor design The sensor consists of a sensor head with wetted parts (measuring prism, window, temperature probe) and the sensor housing containing the electronic components. The junction box is situated at the rear part of the sensor housing. - Page 27 6 Mounting PIOX R721 6.2 Sensor 6.2.2 Mounting of the sensor 6.2.2.1 Selection of the measuring point Caution! Warning of severe injuries from hot or cold components Touching hot or cold components can lead to severe injuries (e.g., thermal damage).
- Page 28 6 Mounting 6.2 Sensor PIOX R721 Tab. 6.1: Sensor positioning on a horizontal pipe (basic presentation) Horizontal pipe Diffuser If possible, install the sensor in the pipe segment with the smaller pipe diameter (if the flow direction is as indicated).
- Page 29 6 Mounting PIOX R721 6.2 Sensor Tab. 6.1: Sensor positioning on a horizontal pipe (basic presentation) Horizontal pipe Orientation of the sensor head, in case it is laterally installed Install the sensor head in such way that the flow direction of the fluid is parallel to the edge of the measuring prism and the temperature probe points downward.
- Page 30 6 Mounting 6.2 Sensor PIOX R721 Tab. 6.1: Sensor positioning on a horizontal pipe (basic presentation) Horizontal pipe Orientation of the sensor head, in case it is installed at the bottom of the pipe Install the sensor head in such way that the flow direction of the fluid is parallel to the edge of the measuring prism. If the sensor is correctly installed, the arrows on the sensor housing are aligned along the pipe.
- Page 31 6 Mounting PIOX R721 6.2 Sensor 6.2.2.3 Installation of the sensor (chemistry design) The sensor is installed into a standardized flange using the supplied process connection or directly flanged into a T-piece as a long version. 6.2.2.4 Installation of the sensor (hygienic design) The sensor can be connected to the standardized clamp flange connection Varivent type N or TriClamp 3".
-
Page 32: Connection
7 Connection 7.1 Sensor PIOX R721 Connection Danger! Risk of explosion when using the measuring equipment in explosive atmospheres This may result in personal or material damage or dangerous situations. → Observe the "Safety instructions for the use in explosive atmospheres", see document SIPIOX_R721. - Page 33 7 Connection PIOX R721 7.1 Sensor 7.1.1 Connection of the cable to the sensor Important! The degree of protection of the transmitter is only ensured if all cables are tightly fitted using cable glands and the housing is firmly screwed.
- Page 34 7 Connection 7.1 Sensor PIOX R721 Fig. 7.2: Preparation of the sensor cable 70 mm 8 mm sensor 1 – cap nut 2 – compression part 3 – basic part 4 – gasket ring side of the basic part 5 – external shield •...
- Page 35 7 Connection PIOX R721 7.1 Sensor 7.1.2 Connection of the sensor cable to the transmitter Important! The degree of protection of the transmitter is only ensured if all cables are tightly fitted using cable glands and the housing is firmly screwed.
-
Page 36: Power Supply
7 Connection 7.2 Power supply PIOX R721 Power supply Connection The installation of the power supply is carried out by the operator. The operator has to provide an overcurrent protector (fuse or similar device) disconnecting all energizing wires in case of an inadmissible high current consumption. The impedance of the protective earth has to be low ohmic in order not to allow touch voltage pass the permissible limit. - Page 37 7 Connection PIOX R721 7.2 Power supply Tab. 7.4: Terminal assignment terminal connection AC connection DC earth earth N(-) neutral L(+) phase 100...230 V AC, 50...60 Hz fuse 1 A, time-lag 1.6 A, time-lag 7.2.1 Cable connection Transmitter with stainless steel housing •...
-
Page 38: Outputs
7 Connection 7.3 Outputs PIOX R721 Transmitter with aluminum housing • Remove the blind plug to connect the cable to the transmitter. • Prepare the cable with a cable gland. The used cable has to have a wire cross-section of 0.25…2.5 mm². - Page 39 7 Connection PIOX R721 7.3 Outputs Tab. 7.5: Output circuits output transmitter external circuit remark internal circuit connection active current output/HART current output = 24 V < 500 Ω HART = 24 V < 500 Ω passive current output/HART current output = 8…30 V...
- Page 40 7 Connection 7.3 Outputs PIOX R721 Tab. 7.5: Output circuits output transmitter external circuit remark internal circuit connection digital output circuit 1 = 5…30 V < 100 mA [kΩ] = U [mA] circuit 2 The number, type and connections of the outputs depend on the order.
-
Page 41: Inputs
7 Connection PIOX R721 7.4 Inputs Inputs Important! The max. permissible voltage between the inputs and against PE is 60 V DC (permanent). Fig. 7.10: Connection of the transmitter inputs NEXT DISP SNAP DISP 3x Q FAST MODE 7.4.1 Current input An active (self-powered) or a passive (external powered) current source can be connected to the current inputs of the transmitter. - Page 42 7 Connection 7.4 Inputs PIOX R721 Connection of a passive current source Important! The terminals Txa and TxB must not be connected. Important! Observe the correct polarity in order to avoid damaging the current source. A permanent short circuit can lead to the destruction of the current input.
-
Page 43: Service Interfaces
7 Connection PIOX R721 7.5 Service interfaces Service interfaces Connection 7.5.1 USB interface The transmitter can be connected directly to the PC via USB interface. • Connect the USB cable to the USB interface of the transmitter and the PC. - Page 44 7 Connection 7.5 Service interfaces PIOX R721 Fig. 7.13: Cable gland 1 – cap nut 2 – compression part 3 – basic part 4 – sealing ring (only for cable gland M20, not for cable gland 1/2 NPS) 5 – housing wall 6 –...
- Page 45 7 Connection PIOX R721 7.5 Service interfaces Fig. 7.15: Cable gland 1 – cap nut 2 – compression part 3 – basic part • Push the cable through the cap nut, compression part and basic part of the cable gland.
-
Page 46: Start-Up
8 Start-up PIOX R721 Start-up Danger! Risk of explosion when using the measuring equipment in explosive atmospheres This may result in personal or material damage or dangerous situations. → Observe the "Safety instructions for the use in explosive atmospheres", see document SIPIOX_R721. -
Page 47: Start-Up Settings
8 Start-up PIOX R721 8.1 Start-up settings Start-up settings When starting up the transmitter for the first time, the following settings are required: • language • time/date • unit of measurement These displays will only be indicated when the transmitter is switched on for the first time or after an initialization. -
Page 48: Status Indications
8 Start-up 8.3 Status indications PIOX R721 Status indications The operation state is indicated by LEDs. Fig. 8.1: Command panel of the transmitter NEXT DISP SNAP DISP 3x Q FAST MODE 1 – LED sensor 2 – LED sensor (not used) 3 –... -
Page 49: Initialization
8 Start-up PIOX R721 8.5 Initialization Initialization During an initialization (INIT) of the transmitter, all settings are reset to the factory settings. Proceed as follows to execute an initialization: • When switching on a transmitter: keep and C pressed. • During the operation of the transmitter: press , C and ENTER simultaneously. -
Page 50: Information Regarding The Transmitter
8 Start-up 8.7 Information regarding the transmitter PIOX R721 Information regarding the transmitter Miscellaneous\System settings\Transmitter info • Select the menu item Transmitter info. • Press ENTER. • Press to scroll through the list. • Press to return to the menu item System settings. -
Page 51: Measurement
9 Measurement PIOX R721 Measurement Danger! Risk of explosion when using the measuring equipment in explosive atmospheres This may result in personal or material damage or dangerous situations. → Observe the "Safety instructions for the use in explosive atmospheres", see document SIPIOX_R721. -
Page 52: Parameter Input
9 Measurement 9.1 Parameter input PIOX R721 Parameter input Notice! Avoid a simultaneous parameter entry via the keyboard and the USB, LAN or process interface. The parameter records received via these interfaces will overwrite the current transmitter parameterization. • Select the menu Parameters. - Page 53 9 Measurement PIOX R721 9.1 Parameter input 9.1.3 Input of fluid parameters The fluid parameters are entered for the selected measuring point. Notice! Customized fluids which are not included in the fluid scroll list can be read via the program FluxDiag. These fluids are displayed in the fluid scroll list with an asterisk.
- Page 54 Selection of the physical quantity for analysis A model, describing a substance system consisting of analyte and matrix, was developed in the FLEXIM laboratory. This model enables the calculation of the physical quantity for analysis from the measured refractive index and the fluid tem- perature.
-
Page 55: Measurement Settings
9 Measurement PIOX R721 9.2 Measurement settings Parameters\Select analysis quant.\...\Show range info The valid range of the physical quantity for analysis, the temperature, the density and the refractive index can be displayed. • Select Yes to display the valid range. -
Page 56: Units Of Measurement
9 Measurement 9.3 Units of measurement PIOX R721 Units of measurement Miscellaneous\Unit of measurement • Select the menu item Miscellaneous\Unit of measurement. The following units of measurement for the physical quantities can be selected: – Temperature – Pressure – Sound speed –... -
Page 57: Display Of Parameters
9 Measurement PIOX R721 9.6 Display of parameters Display of parameters The parameters can be displayed during the measurement. • Press during the measurement. The measurement is running in the background. The symbol is displayed in the status indication. The menu Show measurement is displayed. -
Page 58: Troubleshooting
10 Troubleshooting PIOX R721 Troubleshooting Danger! Risk of explosion when using the measuring equipment in explosive atmospheres This may result in personal or material damage or dangerous situations. → Observe the "Safety instructions for the use in explosive atmospheres", see document SIPIOX_R721. -
Page 59: Problems With The Measurement
The signal is lost during the measurement. • If there is no measuring signal after the pipe had been run empty and refilled, contact FLEXIM. • Make sure the pipe is filled with the fluid and the sensor head is completely submerged into the fluid. The sensor can only measure within the fluid otherwise the measurement becomes invalid. -
Page 60: Maintenance And Cleaning
11 Maintenance and cleaning PIOX R721 Maintenance and cleaning Danger! Risk of explosion when using the measuring equipment in explosive atmospheres This may result in personal or material damage or dangerous situations. → Observe the "Safety instructions for the use in explosive atmospheres", see document SIPIOX_R721. -
Page 61: Maintenance
11 Maintenance and cleaning PIOX R721 11.1 Maintenance 11.1 Maintenance The transmitter and the sensor are practically maintenance-free. In order to ensure security, the following maintenance intervals are recommended: Tab. 11.1: Recommended maintenance intervals item maintenance step interval measure transmitter •... -
Page 62: Firmware Update
11 Maintenance and cleaning 11.3 Firmware update PIOX R721 11.3 Firmware update A firmware update is carried out with FluxDiagReader or FluxDiag (option). • For the connection of the transmitter to a PC, see section 7.5. • For the operation of FluxDiagReader or FluxDiag see the help functions of these programs. -
Page 63: Dismounting And Disposal
12 Dismounting and disposal PIOX R721 Dismounting and disposal Danger! Risk of explosion when using the measuring equipment in explosive atmospheres This may result in personal or material damage or dangerous situations. → Observe the "Safety instructions for the use in explosive atmospheres", see document SIPIOX_R721. -
Page 64: Dismounting
Avoiding environmental damage by correct disposal of components Depending on the material, the corresponding parts have to be disposed of in residual or special waste or recycled. FLEXIM accepts the return of the components. For further information, contact FLEXIM. 2021-09-01, UMPIOX_F72xV1-3EN... -
Page 65: Outputs
13 Outputs PIOX R721 13.1 Analog output Outputs Outputs Select an output Enable the output Source item Output Measured values Status values Event values see annex A 13.1 Analog output If the transmitter is equipped with outputs, they have to be configured. In principle, the measured value, the status value or an event value can be transmitted via the different outputs. - Page 66 13 Outputs 13.1 Analog output PIOX R721 Tab. 13.1: Configuration of the outputs source item list item output Refractometer Symmetry diagnostic values Amplification Amplitude Quality Transducer Sensor humidity sensor values Transducer temp. Analysis Mass fraction physical quantities for analysis selected in the menu Parameters...
- Page 67 13 Outputs PIOX R721 13.1 Analog output 13.1.3 Output of a measured value Source item Values Output range measuring range Output info Test signal Test mea. range see annex A Output range • Select the list item Values in the menu item Source item.
- Page 68 13 Outputs 13.1 Analog output PIOX R721 Tab. 13.3: Examples for the error output (output range: 4...20 mA) list item output signal Minimum (4.0 mA) I [mA] Last value I [mA] Maximum (20.0 mA) I [mA] Other value I [mA] error value = 3.5 mA...
- Page 69 13 Outputs PIOX R721 13.1 Analog output Measuring range The measuring range is defined. Outputs\...\Start of meas. range • Enter the lowest expected measured value. The unit of measurement of the source item will be displayed. Start of meas. range is the value assigned to the value Output MIN of the output range.
- Page 70 13 Outputs 13.1 Analog output PIOX R721 13.1.4 Output of a status value/event value • Select the list item Status in the menu item Source item. • Press ENTER. Source item Output range Status Outputs\...\Output range Output range • Select a list item.
-
Page 71: Digital Output
13 Outputs PIOX R721 13.2 Digital output Outputs\...\Test mea. range • Select Yes to test the assignment of the measured value to the output signal. Select No to display the next menu item. • Press ENTER. Outputs\...\Enter test value • Select a list item as test value. - Page 72 13 Outputs 13.2 Digital output PIOX R721 Assignment of a source item Outputs\...\Source item Depending on the selected source item, status or event values can be output. Tab. 13.4: Output of status values and event values source item status value...
- Page 73 13 Outputs PIOX R721 13.2 Digital output Output function test The function of the output can now be tested. • Connect a multimeter to the output. Outputs\...\B1 Test signal • Select Yes to test the output. Select No to display the next menu item.
- Page 74 13 Outputs 13.2 Digital output PIOX R721 Tab. 13.7: Output function test – measuring range list item switching function test value description Status OK Status OK • binary output is energized (status value) • measured value has to be low ohmic Status error •...
-
Page 75: Inputs
14 Inputs PIOX R721 14.1 Configuration of an input Inputs The inputs are configured in the menu Inputs. 14.1 Configuration of an input Inputs → Current Ix → Voltage Ux → Temperature Tx see annex A If the transmitter is equipped with inputs, they have to be configured. - Page 76 14 Inputs 14.1 Configuration of an input PIOX R721 Notice! The entered correction values for each temperature input will be stored and displayed when the temperature correction is activated again. The temperature correction will be added automatically to the measured temperature. The temperature correction is used e.g., if the characteristic curves of the two temperature probes differ considerably from each other or a known and...
- Page 77 14 Inputs PIOX R721 14.1 Configuration of an input 14.1.3 Definition of a switching condition A switching condition can be defined. Inputs\...\Trigger value • Select Yes if a switching condition is to be defined. Select No to display the next menu item.
-
Page 78: Assignment Of An Input
14 Inputs 14.2 Assignment of an input PIOX R721 14.1.5 Function test of the input The function of the installed input can now be tested. Analog input • Connect the signal source to the input. Inputs\...\I1 Test signal • Select Yes to test the input signal. Select No to display the next menu item. -
Page 79: Data Logger
15 Data logger PIOX R721 15.1 Configuration of the data logger Data logger The transmitter has a data logger which stores the measured values during the measurement. Data logger Notice! Configuration In order to store measured data, the data logger has Enable logger to be configured. - Page 80 15 Data logger 15.1 Configuration of the data logger PIOX R721 Example actual time: 09:06 am setting: Full 10 minutes The storing starts at 09:10 am. Notice! Make sure that the date and time settings of all transmitters are synchronized.
- Page 81 15 Data logger PIOX R721 15.1 Configuration of the data logger Storage rate Data logger\Configuration\Storage rate If a starting time for storing the measured values is defined, a storage rate has to be entered. The storage rate indicates the interval how often the measured values are transmitted or stored.
-
Page 82: Deletion Of The Data Logger
15 Data logger 15.2 Deletion of the data logger PIOX R721 Further parameters for storing It can be defined whether the following parameters are to be stored together with the measured values. Tab. 15.1: Parameters for storing display description of the parameters Store diagnost. -
Page 83: Information Regarding The Data Logger
15 Data logger PIOX R721 15.3 Information regarding the data logger 15.3 Information regarding the data logger Data logger\Data logger info • Select the menu item Data logger info. • Press ENTER. The following information regarding the data logger is displayed:... -
Page 84: Data Transmission
16 Data transmission 16.1 Service interfaces PIOX R721 Data transmission The data is transmit via the service interfaces or the process interface (optional) of the transmitter. 16.1 Service interfaces By means of the program FluxDiagReader it is possible to transmit via service interfaces (USB, LAN) data to the PC. -
Page 85: Event Trigger
17 Event trigger PIOX R721 Event trigger It is possible to configure max. 4 independent event trigger R1, R2, R3, R4. Event trigger The event triggers can be used, e.g., to: – output information about the running measurement Select Rx –... - Page 86 17 Event trigger PIOX R721 Tab. 17.1: Source items source item list item output Refractive index Refractive index measured refractive index in the fluid Refractive index (Δ) Norm. refrac. index Afterwards the properties of the event trigger are defined. Tab. 17.2: Properties of the event trigger...
- Page 87 17 Event trigger PIOX R721 Definition of trigger limits Event trigger\Rx Enable\Source item\...\Trigger value It is important to enter the limits, at which the event trigger has to toggle. • Enter the upper limit MAX (x>limit). • Press ENTER. • Enter the lower limit MIN (x<limit).
-
Page 88: Apparent Switching Delay
17 Event trigger 17.1 Apparent switching delay PIOX R721 17.1 Apparent switching delay The measured values will be displayed rounded according to the set number of decimal places. The limits, however, will be compared to the non-rounded measured values. This might cause an apparent switching delay when the measured value changes marginally (less than the displayed decimal places). -
Page 89: Event Protocol
17 Event trigger PIOX R721 17.5 Event protocol Example R1 = 17.5 Event protocol If an error occurs, an error message will be displayed in the first line indicating the symbol . The error message can be displayed via the menu item Event log. -
Page 90: Calibration
18 Calibration PIOX R721 Calibration Correction values can be entered: • • for the values calculated by the transmitter (e.g., percentage by mass) • for scale values (z.B. Brix scale). Correction values for the values calculated by the transmitter The correction value is added to the value calculated by the transmitter. -
Page 91: Settings
19 Settings PIOX R721 19.1 Dialogs and menus Settings 19.1 Dialogs and menus Miscellaneous\Dialogs/Menus • Select the menu item Miscellaneous\Dialogs/Menus. • Press ENTER. Measuring point number Miscellaneous\Dialogs/Menus\Measuring point no. • Select the menu item Measuring point no.. • Select Number if the measuring point is to be identified only by numbers. Select Text if the measuring point is to be identified only by characters. -
Page 92: Working With Parameter Records
19 Settings 19.2 Working with parameter records PIOX R721 19.2 Working with parameter records 19.2.1 Introduction Working with parameter records will make repeated measurement tasks easier and faster. Setup settings of the transmitter are stored in the parameter records. Depending on which measuring task has to be carried out, it is possible to load the corresponding parameter record and use it for the measurement. -
Page 93: Contrast Settings
19 Settings PIOX R721 19.3 Contrast settings 19.2.4 Deletion of parameter records Miscellaneous\Param. record memo.\Delete param. record • Select the menu item Delete param. record. • Press ENTER. • Select the parameter record to be deleted. • Press ENTER. 19.3... -
Page 94: Key Lock
19 Settings 19.5 Key lock PIOX R721 19.5 Key lock An ongoing measurement can be protected from an inadvertent intervention by means of a key lock. Defining a program code for the key lock Miscellaneous\System settings\Key lock • Select the menu item Key lock. -
Page 95: Annex
Annex PIOX R721 A Menu structure Annex Menu structure Main menu Parameters Start measurement Inputs Outputs Event trigger Transducer Measurement Enable Enable → Configure inputs → Assign inputs Measuring point no. Source item Source item Fluid → Refractometer → Refractometer →... - Page 96 Annex A Menu structure PIOX R721 Parameter input Parameters Connected transd. Measuring point no. Fluid Scale → Brix → API Fluid temp. Select analysis quant. → Mass fraction → Volume fraction → Analyte concentr. → Matrix concentration → Density → Norm. density →...
- Page 97 Annex PIOX R721 A Menu structure Measurement start Main menu Start measurement Measurement started Stop measurement Show measurement Display parameters Read-only mode UMPIOX_R721V1-3EN, 2021-09-01...
- Page 98 Annex A Menu structure PIOX R721 Configuration of inputs Inputs Configure inputs → Temperature → Current → Voltage → Binary Temperature Tx Enable Pt100/Pt1000 Temperature offset → Temperature Trigger value Function → Within range → MAX (x>limit) → Out of range →...
- Page 99 Annex PIOX R721 A Menu structure Configuration of inputs Inputs Current Configure inputs Ix Enable → Temperature → Current → Voltage → Binary Source item Customized Current → Temperature → Pressure → Density Input name → Kin. viscosity → Dyn. viscosity →...
- Page 100 Annex A Menu structure PIOX R721 Configuration of inputs Inputs Voltage Configure inputs Ux Enable → Temperature → Current → Voltage → Binary Source item Customized Voltage → Temperature → Pressure → Density Input name → Kin. viscosity → Dyn. viscosity →...
- Page 101 Annex PIOX R721 A Menu structure Configuration of outputs Outputs Miscellaneous Current output → Current → Voltage → Digital output Active Passive … Enable Source item Refractive index Refractometer Analysis Fluid properties Miscellaneous Event trigger → Amplitude → Refractive index →...
- Page 102 Annex A Menu structure PIOX R721 Event triggers Event trigger Select Rx Rx Enable Source item Refractive index Refractometer Analysis Fluid properties Miscellaneous Function → MAX (x>limit) → MIN (x<limit) → Within range → Out of range → ERR (x=fail)
- Page 103 Annex PIOX R721 A Menu structure Data logger Data logger Configuration Delete meas. values Data logger info Enable logger Start storing → Activated → Ringbuffer → Logger full → Meas. val. Series → Occup. Logger Event-based → Immediately → Full 5 minutes →...
- Page 104 Annex A Menu structure PIOX R721 Calibration Calibration Scale offset Result offset value value 2021-09-01, UMPIOX_R721V1-3EN...
- Page 105 Annex PIOX R721 A Menu structure Event-based storing of measured values Trigger Condition Inputs Event trigger Configure inputs Select RX Temperature Current Voltage Binary Enable Rx Enable Enable Enable Enable Source item Pt100/Pt1000 Source item Source item Negate input Function →...
-
Page 106: B Start-Up Protocol
Annex B Start-up protocol PIOX R721 Start-up protocol Start-up device sensor PIOX R500- ser. no.: transmitter PIOX R721 ser. no.: measuring point (designation): process fluid solvent physical quantity concentration operating point: range: other components fluid temperature ambient temperature pressure settings and measured values in the transmitter:... - Page 107 Annex PIOX R721 B Start-up protocol outputs type source item min. max. output range abs/sign error terminal value value [mA] [mA] P1+, P1- P2+, P2- P3+, P3- P4+, P4- type source item trigger trigger trigger trigger hold terminal condition value...
-
Page 108: C Maintenance Protocol
The sensor head is intact: no: contact FLEXIM • Check all gaskets. If the gaskets are swollen or brittle and cracked, send the sensor to FLEXIM to replace the gaskets. The gaskets are intact: no: send the sensor to FLEXIM for repair... - Page 109 Annex PIOX R721 C Maintenance protocol measured values: one representative measured value for each typical process state at the measuring point (e.g., operating point, CIP) process physical reference humidity ampli- ampifica- symme- fluid state quantity value tude tion determined with (e.g., lab refractometer, type)
-
Page 110: D Conformity Declarations
Annex D Conformity declarations PIOX R721 Conformity declarations 2021-09-01, UMPIOX_F72xV1-3EN...
Need help?
Do you have a question about the PIOX R721 and is the answer not in the manual?
Questions and answers