Table of Contents
Advertisement
Quick Links
Advertisement
Table of Contents

Related Manuals for BEYES ApexPilot G2


Summary of Contents for BEYES ApexPilot G2
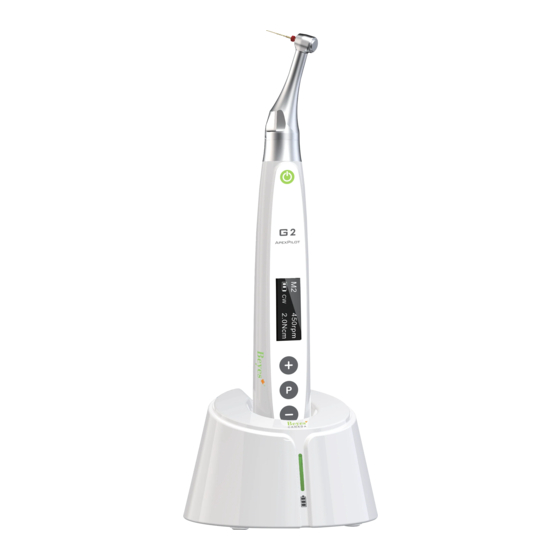
- Page 1 Cordless Endo Motor Instruction for Use...
-
Page 2: Table Of Contents
1.2.1 This device can be used for preparation and enlargement of root canals. 1.2.2 This device should only be operated by licensed dental professionals ApexPilot G2 is mainly used for Endodontic treatments. It can be used as an endo motor for preparation and enlargement of root canals. - Page 3 1.4 Package includes Motor handpiece Contra angle Charging base Nozzle Power adapter • O-ring • Silicon cover • Mini 8P cable • Instruction manual Diagram of components and control buttons...
-
Page 4: Warning And Safety
2. Warning and safety Warning • First read this instruction manual before operating this device • This device should only be operated by licensed dental professionals • Do not directly or indirectly place this device near heat source. • Operate and store this device in reliable environment. • This device requires special precautions regarding electromagnetic compatibility (EMC) and must be in strict accordance with the EMC information for installation and use. Do not use this equipment especially in the vicinity of fluorescent lamps,... -
Page 5: Installation
3. Installation 3.1 Battery Handpiece has built-in lithium battery. Battery charges wirelessly through the base. • Plug in power adapter and connect it to the charging base • Seat handpiece on the charging base • Blue light will be flashing while device is charging • Blue light will stay on when fully charged 3.2 Contra angle • The contra angle adopts precision gear transmission, and the transmission ratio is 6:1. - Page 6 3.3 File Installation of file 1. Insert file into the chuck 2. Push button 3. Rotate file to fit the latch groove and slip in 4. Release push button to lock file 5. Pull file to ensure security Note: Only use files with shanks that meet the ISO standard. (ISO standard: Ø2.334 – 2.350 mm) Warning Insert and remove file without holding the push button may damage the chuck of contra angle. Removal of file 1. Press and hold the push button 2. Pull out the file Warning • Stop motor before plugging and pulling out the file. • Removing files without holding the push button will damage the chuck of contra angle. • Use caution when inserting and removing files to avoid injury to fingers...
-
Page 7: Operation
4. Operation 4.1 Start and stop operation Press Main to turn on device to Standby screen Warning: In custom setting, all parameters should follow the file requirement for proper operation. Press Main to start motor Operating screen Motor runs with set speed and torque Moving bars from bottom up shows the file torque. - Page 8 4.2 Store setting on M0-9 M0-M9 is a memory program to store Operation mode and associated parameter. Standby screen Press “+”/”-“ to change screen among M0-9 Press “P” to show operating mode and available parameter. Operating Mode Blinking is the current mode and ready to change Press “+”/”-“...
- Page 9 4.3 Store setting with build-in file system Standby screen Press “+”/”-“ to change screen passing M0 or M9 The screen shows file name and size instead of M0-9 Keep pressing “+”/”-“ to show 5 storage locations. Select the location to make change Press and hold “P” to enter file list File list Press “+”/”-“ to scroll and select the file Press “P”...
- Page 10 4.4 Set handpiece functions Turn off device Hold “P” and press Main to enter function setting Software version (unchangeable) Screen show Auto Power Off in 2 sec Auto Power Off Press “+”/”-“ to change between 3 to 30 min Press “P” to accept and go to next setting or Press Main to accept and exit Auto Standby Scr Press “+”/”-“...
-
Page 11: Screen Display
Beeper Volume Press “+”/”-“ to change volume between 0 (mute) and 3 (loudest) Press “P” to accept and go to next setting or Press Main to accept and exit Restore Defaults Press “+”/”-“ to switch between ON and OFF Press “P” to accept and go to next setting Restore Defaults or Press Main to accept and exit If set ON, screen show OK and device reset... - Page 12 5.2 Mode setting screen There are 4 operation modes. Mode Clockwise Counterclockwise Reciprocating Adaptive Torque Reverse Motor Clockwise Counterclockwise Clockwise and Clockwise direction only only counterclockwise If torque with set angle exceed set limit, reciprocating Applied Rotary Special Reciprocating Reciprocating file path rotary inject calcium...
- Page 13 Setting Speed: Forward angle: 100-500 F º @step50 60-400 @step10 Torque limit: 2.0Ncm Torque limit: Reverse angle: 2.0 2.2 2.4 2.5 Rº (default 90 º , 3.0 3.5 <= F º) 4.0 4.5 20-400 @step10 Note For injecting Recommend the Reverse calcium hydroxide difference angle cannot...
-
Page 14: Automatic Reverse Function
5.3 File setting screen Standby screen File list Default file size List of available file for List of file size for selection selected file. Parameters are pre-set 5.4 Operating Screen When motor is running, screen will show the set speed and set torque. The moving bars indicate the actual torque on the file during operation. -
Page 15: Apex Locator
7. Apex Locator ApexPilot G2 can be connected to Beyes Accurator A2, apex locator. During operation, as file reaches canal nerve, apex locator alarm will go off and G2 can stop or reverse motor according to defined setting. Connecting to Accurator A2 Connect A2 and G2 with USB cable from package ApexPilot G2 shows connected when Accurator A2 is on and connected. - Page 16 As file reaches the apical foramen, the indicator will show full bars and “00”. Note: Indicator and number do not represent the actual length the file from the apical foramen When working with Accurator A2, ApexPilot G2 motor will respond differently according to the setting. Apical Action Apical Action OFF – motor stays same operating mode Reverse – motor turns CCW...
- Page 17 Apical Slow Down Apical Slow Down Motor speed slow down when apex alarm goes off Apical Slow Down Table shows G2 responses to apex alarm for different mode and settings. Mode Aprical Auto Auto Apical Motor Status Action Start Stop Slow Initial Apex alarm...
- Page 18 stop √ stop Stop Stop √ √ stop stop in 1 sec CCW double beeping √ CCW double beeping low speed √ Stop √ √ stop in 1 sec double beeping √ Reverse double beeping Stop √ √ double stop in 1 sec beeping Stop √...
- Page 19 √ Stop √ √ stop in 1 sec CCW double beeping √ CCW double Reverse beeping Stop √ √ CCW double beeping stop in 1 sec Stop √ Stop Stop Stop √ √ Stop stop in 1 sec √ on (Blank) off * on/off...
-
Page 20: Troubleshooting
8. Troubleshooting Failure Possible cause Solutions Continuous beeping The continuous beeping Stop the motor after starting the motor indicates that the motor handpiece and change handpiece handpiece is under CCW the operating mode to mode. CW Mode. Contra angle calibration Calibration failure caused Clean the contra angle, failure... - Page 21 6.2.7 The user is responsible for the sterility of the product for the first cycle and each further usage as well as for the usage of damaged or dirty instruments where applicable after sterility. 6.2.8 The water quality has to be convenient to the local regulations especially for the last rinsing step or with a washer-disinfector. 6.2.9 Do not sterilize the motor handpiece, the AC adapter or the base.
-
Page 22: Storage, Maintenance And Transportation
Sterilization Steam - Use only autoclaves that are matching sterilization at the requirements of EN 13060, EN 285. 134°C, 2.0bar- - Use a validated sterilization procedure 2.3bar(0.20Mpa- according to ISO 17665. 0.23MPa), for 4 - Respect the maintenance procedure minutes. of the autoclave device given by the manufacturer. -
Page 23: Environmental Protection
10.3 Lubrication of contra angle Use the oil injection nozzle in the package The contra angle needs to be lubricated after cleaning and disinfection, but before sterilization. 1. Screw injecting nozzle into jet of oil bottle. (Around 1 to 3 circles) 2. Plug nozzle into the end part of contra angle 3. Spray oil into the contra angle for 2-3 secs until the oil flows out of contra angle head 4. Purge excess oil from the end part of contra angle using air or keep contra angle in a vertical position for gravity draining. -
Page 24: Statement
14.1 SCOPE OF WARRANTY BEYES Dental Canada Inc. warrants to the original retail purchaser that it will be at BEYES option to repair or replace components of the dental products manufactured by BEYES (except for components not warranted under 'Exclusions') that are defective in material or workmanship under normal use and service. BEYES’... - Page 25 12. Products that would otherwise by covered under Sections 1 and 2 of this limited warranty, but are acquired: (i) from a person or entity that is not BEYES or one of its authorized dealers; or (ii) from a BEYES dealer that is not authorized to sell the...
-
Page 26: Technical Specification
15. Technical Specification Technical parameters Device Classification Class II Type B IPX0 Applied part Contra angle Power supply Class II Input 100V-240V 50Hz/60Hz Output DC5V/1A Battery capacity 3.7V 2000mAh Wireless charging Freq 112 – 205kHz max RF output power 9.46dBuA/m@3m Torque 0.4 – 5 Ncm Speed 100 – 1200 rpm Environmental parameters Working Storage Temperature +5°C~+40°C... -
Page 27: Emc-Declaration Of Conformity
Technical Description Concerning Electromagnetic Emission Table 1: Declaration - electromagnetic emissions Guidance and manufacturer’s declaration - electromagnetic emissions The model ApexPilot G2 is intended for use in the electromagnetic environment specified below. The customer or the user of the model ApexPilot G2 should assure that it is used in such an environment. - Page 28 Technical Description Concerning Electromagnetic Immunity Table 2: Guidance & Declaration - electromagnetic immunity Guidance & Declaration — electromagnetic immunity The model ApexPilot G2 is intended for use in the electromagnetic environment specified below. The customer or the user of the model ApexPilot G2 should assure that It is used in such an environment.
- Page 29 Table 3: Guidance & Declaration - electromagnetic immunity concerning Conducted RF & Radiated RF Guidance & Declaration - Electromagnetic immunity The model ApexPilot G2 is intended for use in.the electromagnetic environment specified below. The customer or the user of the models ApexPilot G2 should assure that it is used in such an environment.
- Page 30 TV broadcast cannot be predicted theoretically with accuracy. To assess the electromagnetic environment due to fixed RF transmitters, an electromagnetic site survey should be considered. If the measured field strength in the location in which the model ApexPilot G2 is used exceeds the applicable RF compliance level above, the model ApexPilot G2 should be observed to verify normal operation. If abnormal performance is observed, additional measures may be necessary, such as reorienting or relocating the model ApexPilot G2.
- Page 32 Federal law restricts this device to sale by or on the order of a dentist, physician, or any other practitioner licensed by the law of the states in which he or she practices to use or order the use of this device. Beyes Dental Canada Inc. Lotus NL B.V.
Need help?
Do you have a question about the ApexPilot G2 and is the answer not in the manual?
Questions and answers