Table of Contents
Advertisement
Quick Links
Advertisement
Table of Contents

Related Manuals for BEYES ApexPilot


Summary of Contents for BEYES ApexPilot
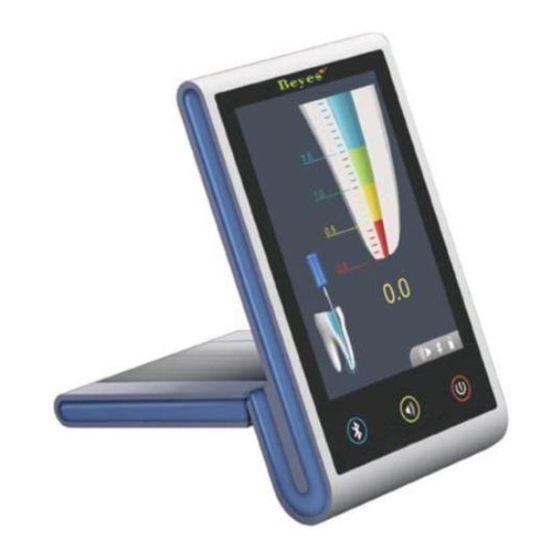
- Page 1 ApexPilot Apex Locator Instruction for Use...
- Page 2 Thank you very much for choosing ApexPilot locator In order to give full play to the function of the equipment, correct operation, and safe maintenance, please read this manual carefully before operating, keep this manual for reference at any time.
-
Page 3: Table Of Contents
Table of Contents 1. Product Introduction .................P4-5 1.1 Product introduction 1.2 Model and dimensions 1.3 Components 1.4 Application scope 1.5 Contraindication 1.6 Main technical specifications 2. Function introduction ................P6-9 2.1 Interface display introduction 2.2 Key Function 2.3 Bluetooth Function 2.4 Gyroscope 2.5 Charging and USB introduction 3. -
Page 4: Product Introduction
• Built in non removable battery; • Angle adjustable, easy to adjust the angle of view. 1.2 Model and dimensions Model: ApexPilot Code: AL2040 dimensions: 110mm(length)×65mm(width)×20mm(height) weight: 185g 1.3 Components 1.3.1 Picture of main unit... -
Page 5: Application Scope
1.3.2 Main accessories Power Adapter USB line (ALP 107) (ALP 108) Picture 2 (a) Picture 2 (b) Measuring line File holder Lip hook (ALP 109) (ALP 002) (ALP 003) Picture 3 (a) Picture 3 (b) Picture 3 (c) 1.4 Application scope The product is used for the measurement of root canal length. -
Page 6: Function Introduction
2. Function introduction Picture 4 (b) Picture 4 (a) 2.1 Interface display introduction 2.1.1 Icon introduction Mute Woof Mediant Bluetooth is starting or is being initialized Bluetooth normal open Bluetooth open when charging Bluetooth has been built to connect Battery power status indicator: 0%, 25%, 50%, 75%, 100% Battery charging status display Demo mode, this icon will appear when the device is in demo mode Connection test, when the measurement line short circuit this icon will... - Page 7 2.1.2 Testing interface introduction Picture 5(a) shows root canal file in the dynamic operation of teeth in the solution. When not examined, no root canal file; after detected data, the corresponding schematic diagram will display according to the different position in the file teeth; When the tip of the root canal file arrived near the root of tooth, tooth solution of plane map will display the Picture 5 (a)
-
Page 8: Key Function
Bluetooth signal to the apex locator to display. 2.3.1 Bluetooth link for the first time • Device: 1 pc apex locator (ApexPilot), 1 pc endo motor (ApexPilot All-in-one). • Environment: make sure no other Bluetooth signal interference within 5 meters, (please turn off the phone Bluetooth) •... -
Page 9: Gyroscope
2.3.2 Connect again After the apex locator or the Bluetooth is turned off, if you need to connect the Bluetooth of same device, turn on the Bluetooth, No need to initialize the Bluetooth again. There’s no relationship with the turn on sequence. For the device has been connected, turn on Bluetooth again and will only be able to connect to the last connected Bluetooth slave device;... -
Page 10: Installation
3. Installation 3.1 Connect the measurement line 3.1.1 Insert the plug of the measuring line into the right side USB socket of the unit. Notice • Please be careful to use the device, keep it stable avoid hit. • Measurement can’t be proceeded without the complete Insertion of the plug. 3.1.2 Insert the file clip and lip hook respectively into the two socket of the measuring line (Pic 7). -
Page 11: Demo Function
3.2 Demo function The demo function is used to demonstrate the movement of the root canal needle during the real measurement, specific operation is as follows: • When the device is off, press the power key for more than 2 seconds, icon will appear on the upper left corner of the screen. -
Page 12: Usage Requirement
4.1.3 When just put in the file into the root canal, the number showed on the screen may appear larger or direct show ”OVER”, continue pushing toward the file slowly, display return to normal. 4.1.4 To prevent the measurement error caused by the contact of the liquid , the gums and adjacent root canal. - Page 13 4.2.7 The acute inflammation surrounding the apex has been gone and the infected material has been cleaned. It is also necessary to get rid of the pulp and necrosis tissue. 4.2.8 The following cases are not suited for a normal measurement: •...
-
Page 14: Instruction
Sometimes, the results of the Apex Locator and X-Rays do not meet each other, which is neither because the machine is not normal, nor the photo is incorrect taken. The actual position of the apical foramen is different from the anatomical one it is very common that the apical slightly to the side of the root canal crowns. - Page 15 Notice • When grip the root canal with a needle file, please grip the upper of the metal part (near the root canal at the needle handle). If you grip the lower partb(blade or moving part), it will wear the metal part of the file folder and the resin part. (Pic 19) •...
-
Page 16: Trouble Shooting
5. Trouble shooting Problem Check points Responses If ok: connect the charging wire to check if Check if the appearance it’s power on, if not in 2 seconds, please No Power is damaged? remove the charging line immediately. If no: don’t do this. If Bluetooth is connected, the screen will display the data received from Bluetooth, Check if the Bluetooth is... - Page 17 Problem Check points Responses Is the lip hook Make sure the lip hook making good making good contact contact with oral mucosa. with oral mucosa? Blood, saliva or chemical solutions that Is blood or saliva overflow and leak onto the crown or neck overflowing from the can cause an electrical shortage.
-
Page 18: Cleaning And Disinfection
Problem Check points Responses Foramen through absorption and an Display not Is there a lesion at the accurate measurement cannot be steady while apex? obtained. measuring: the measurement Is the file holder broken Replace or clean the file holder. result is rather or dirty? long or shorter;... -
Page 19: Storage, Maintenance And Transportation
7. Storage, maintenance and transportation 7.1 Storage 7.1.1 The product should be handled with care, away from the source, and stored in a dry ventilated place. 7.1.2 Not mixed with toxic, corrosive, flammable and explosive materials. 7.1.3 The product should be stored in a space where the relative humidity is not exceed 80%, atmospheric pressure is 70kPa, and the temperature is -10 C~ +50 7.2 Maintenance... -
Page 20: After Service
9. After service From the date this equipment has been sold out, based on the warranty card we will repair this equipment free of charge if there's quality problem. Please refer to the warranty card. 10. Symbol instruction This conforms to CE European Directive of “Medical equipment directive 93/42/EEC”. -
Page 21: Emc Declaration
Guidance and manufacturer’s declaration — Electromagnetic emissions The ApexPilot is intended for use in the electromagnetic environment specified below. The customer or the user of the ApexPilot shouId assure that is used in such an environment. Emission test Conformity Emission test... - Page 22 11.2 Guidance and manufacturer statement - Electromagnetic Immunity Guidance and manufacturer statement - Electromagnetic Immunity The ApexPilot is intended for use in the electromagnetic environment specified below. The customer or the user of the ApexPilot shouId assure that is used in such an environment. Electromagnetic Immunity test...
- Page 23 Guidance and manufacturer statement - Electromagnetic Immunity The ApexPilot is intended for use in the electromagnetic environment specified below. The customer or the user of the ApexPilot shouId assure that is used in such an environment. IEC60601 test Electromagnetic Immunity test...
- Page 24 11.3 Determine the function of the basic performance This product is used for the measurement of the length of apical teeth. 11.4 The equipment is not provided for use only in the shielding place, for the non life support equipment Recommended separation distance between Portable and mobile RF communications equipment and apex locator The apex locator is intended for use in an electromagnetic environment in which radiated RF...
- Page 25 Notice The apex locator has special tips in EMC, must be installed and used in accordance with the electromagnetic compatibility specification. Portable and mobile RF communications equipment may affect the use of apex locator. Make sure to use the cable produced or designed by manufacturer and installed in accordance with Chinese installation procedures for the cable connection.
-
Page 26: Warranty Statement
12.1. SCOPE OF WARRANTY BEYES Dental Canada Inc. ('BEYES') warrants to the original retail purchaser that it will be at BEYES option to repair or replace components of the dental products manufactured by BEYES (except for components not warranted under 'Exclusions') that are defective in material or workmanship under normal use and service. - Page 27 (12) Products that would otherwise by covered under Sections 1 and 2 of this limited warranty, but are acquired: (i) from a person or entity that is not BEYES or one of its authorized dealers; or (ii) from a BEYES dealer that is not authorized to sell the product...
- Page 28 Federal law restricts this device to sale by or on the order of a dentist, physician, or any other practitioner licensed by the law of the states in which he or she practices to use or order the use of this device. Beyes Dental Canada Inc is not responsible for any typographical errors.
Need help?
Do you have a question about the ApexPilot and is the answer not in the manual?
Questions and answers