Nibe VVM S320 Installer Manual
Indoor module
Hide thumbs
Also See for VVM S320:
- Installer manual (80 pages) ,
- User manual (20 pages) ,
- Technical information (16 pages)
Table of Contents
Advertisement
Quick Links
Advertisement
Table of Contents

Related Manuals for Nibe VVM S320


Summary of Contents for Nibe VVM S320
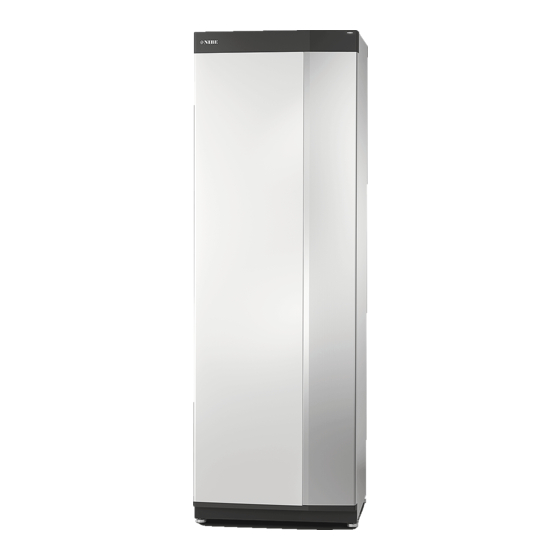
- Page 1 Installer manual Indoor module NIBE VVM S320 IHB EN 2327-1 631794...
- Page 2 Here, you can find information about product name, the product's temperature. serial number, the version of the software and service. When there is new software to download, you can do it here (provided that VVM S320 is connected to myUplink).
-
Page 3: Table Of Contents
Item register General Connections Contact information Settings 6 Commissioning and adjusting Preparations Filling and venting Start-up and inspection Setting the cooling/heating curve 7 myUplink Specification Connection Range of services 8 Control - Introduction Display unit NIBE VVM S320 Table of Contents... -
Page 4: Important Information
Explanation of symbols that may be present in this manual. The serial number can be found at the bottom right on NOTE VVM S320, in the display on the home screen "Product overview" and on the type plate (PZ1). This symbol indicates danger to person or machine. -
Page 5: Inspection Of The Installation
Cold and hot water Shut off valves Mixing valve Safety valve Electrical connections Connected communication Circuit fuses Fuses property Outside sensor Room sensor Current sensor Safety breaker Earth circuit-breaker Setting emergency mode Miscellaneous Docked to NIBE VVM S320 Chapter 1 | Important information... -
Page 6: Compatible Outdoor Modules
Part no. 064 220 Part no. 064 219 S2125-12 1x230 V S2125-12 3x400 V Part no. 064 218 Part no. 064 217 NIBE SPLIT HBS 05 AMS 10-12 HBS 05-12 Part no. 064 110 Part no. 067 480 NIBE SPLIT HBS 20... -
Page 7: Delivery And Handling
INSTALLATION AREA Leave a free space of 800 mm in front of the product. All VVM S320 should be transported and stored vertically in a service on VVM S320 can be carried out from the front. dry place. 10 – 25 However, the VVM S320 can be carefully laid on its back when being moved into the building. -
Page 8: Supplied Components
Current sensor Label for external control voltage for the control sys- 1 Only VVM S320 3x400 V. 2 Only applies to Germany, Austria, Switzerland and Italy. This compression ring coupling must be used instead of the factory- fitted plug, if you want to connect hot water circulation to XL5. -
Page 9: Handling Panels
Remove the screw in the hole next to the on/off button (SF1). Pull the panel's top edge towards you and lift diagonally upwards to remove it from the frame. 3. Check the display is straight. Adjust if necessary. NIBE VVM S320 Chapter 2 | Delivery and handling... - Page 10 Remove the screws from the upper and lower edges. OPEN VENT COVER Twist the panel slightly outwards. 3. Move the panel outwards and backwards. 4. Assembly takes place in the reverse order. Chapter 2 | Delivery and handling NIBE VVM S320...
-
Page 11: Indoor Module's Design
Indoor module's design General QM13 QM11 QM22 BT63 QM20 QN10 NIBE VVM S320 Chapter 3 | Indoor module's design... - Page 12 Non-return valve, cold water Overflow cup 1 Not included in VVM S320 R 3x400 V NL. 2 Not included in VVM S320 R 3x400 V NL, VVM S320 E 3x400 V DK or VVM S320 R EM 3x230 V. Sensors etc.
-
Page 13: Distribution Boxes
Distribution boxes FQ10 FQ10-S2 ELECTRICAL COMPONENTS Base card Electrical anode board FQ10 Temperature limiter FQ10-S2 Reset button for temperature limiter 1 Only VVM S320 with enamelled vessel. NIBE VVM S320 Chapter 3 | Indoor module's design... -
Page 14: Pipe Connections
(DOT), the highest recommended temperatures are 55 °C on the supply Air/water heat Minimum flow Minimum re- Minimum re- line and 45 °C on the return line, but VVM S320 can handle pump duringdefrost- commended commended pipe dimen- pipe dimen- up to 70 °C. - Page 15 SYSTEM VOLUME SYSTEM DIAGRAM VVM S320 is equipped with an expan- VVM S320 consists of a water heater with charge coil, ex- sion vessel (CM1). pansion vessel, immersion heater, circulation pumps, buffer vessel and control system. VVM S320 connects to the cli- The volume of the expansion vessel mate system.
-
Page 16: Dimensions And Pipe Connections
Dimensions and pipe Connecting to air/water heat connections pump NIBE recommends installing VVM S320 as close to the heat pump as possible to obtain the optimum comfort. You can find a list of compatible air/water heat pumps in section "Compatible outdoor modules". -
Page 17: Use Without Heat Pump
Install as follows: Climate system • shut-off valve A climate system is a system that regulates the indoor temperature with the help of the control system in VVM S320 • non-return valve and, for example, radiators, underfloor heating, underfloor •... - Page 18 The water heater’s flow is connected after VVM S320. HOT WATER CIRCULATION A circulation pump can be controlled by VVM S320 to circu- late the hot water. The circulating water must have a tem- perature that prevents bacterial growth and scalding, and national standards must be satisfied.
-
Page 19: Electrical Connections
"C". See section "Technical specifications" for fuse size. MINIATURE CIRCUIT-BREAKER • Use a screened cable for communication with the heat The operating circuit in VVM S320 and some of its internal pump. components are fused internally by a miniature circuit breaker (FC1). •... - Page 20 89 °C and it is reset manually. Resetting The temperature limiter (FQ10) is accessed behind the front cover. Reset the temperature limiter by pressing its button (FQ10-S2). Chapter 5 | Electrical connections NIBE VVM S320...
-
Page 21: Connections
"Selectable inputs". During service, all supply circuits must be discon- nected. Remove the bridges from terminal block X5. Control voltage (230 V ~ 50Hz) connects to AA2:X5:N, X5:L and X6-2 (PE). NIBE VVM S320 Chapter 5 | Electrical connections... - Page 22 X30 on the base board (AA2). also cause problems. VVM S320 operates without room sensor, but if you want to read the home’s indoor temperature from the display on VVM S320, the room sensor must be fitted. Connect the room sensor to terminal block X28:13 and AA2-X29:GND.
- Page 23 Connect the current sensors to a multi-core cable in an enclosure directly adjacent to the electrical distribution unit. The multi-core cable between the enclosure and VVM S320 must have a cable area of at least 0.5 mm². Incoming electricity Electrical distribution unit...
- Page 24 Connect the shielded network cable to the display. Route the network cable to the top of VVM S320. 3. Follow the flow meter’s cable out at the rear. Chapter 5 | Electrical connections...
- Page 25 Selectable outputs A selectable output is AA2-X27. The output is a potential-free switching relay. If VVM S320 is switched off or in emergency mode, the relay is in C-NC position. AA2-X27 VVM S320 External Caution The relay output may be subjected to a max load of 2 A at resistive load (230 V~).
- Page 26 External blocking of functions and +10. Setting the value for the change is performed in menu 1.30.3 - "External adjustment". An external switch function can be connected to VVM S320 for blocking various functions. The switch must be potential- •...
-
Page 27: Settings
3 x 230 V (maximum electrical power, connected on delivery 9 kW) Electricaladdi- Max (A) L1 Max (A) L2 Max (A) L3 tion (kW) 15.1 23.0 17.4 23.0 26.4 19.0 1 Factory setting NIBE VVM S320 Chapter 5 | Electrical connections... - Page 28 You can activate the emergency mode both when VVM S320 is running and when it is switched off. To activate when VVM S320 is running: press and hold the on/off button (SF1) for 2 seconds and select "emergency mode" from the shutdown menu.
-
Page 29: Commissioning And Adjusting
NOTE 3. Keep topping up and venting until all air has been re- Do not start VVM S320 if there is a risk that the moved and the pressure is correct. water in the system has frozen. Caution Check the miniature circuit-breaker (FC1) . -
Page 30: Start-Up And Inspection
Start VVM S320 by pressing the on/off button (SF1). English 3. Follow the instructions in the display’s start guide. If the start guide does not start when you start the VVM S320, you can start it manually in menu 7.7. Option / setting See the section "Control –... -
Page 31: Setting The Cooling/Heating Curve
Go to menu 7.3.2 - "Installed heat pump" and deactivate energy-efficient operation. Based on these curves, the heat pump.. VVM S320 determines the temperature of the water to the climate system (the supply temperature) and thus the indoor temperature. Caution... - Page 32 Caution With underfloor heating systems, the maximum supply temperature is normally set between 35 and 45 °C. Caution Must be restricted with underfloor cooling Min. supply temp. cooling to prevent condensation. Chapter 6 | Commissioning and adjusting NIBE VVM S320...
-
Page 33: Myuplink
Visit myuplink.com for more information. Specification You need the following in order for myUplink to be able to communicate with your VVM S320: • wireless network or network cable • Internet connection •... -
Page 34: Control - Introduction
For hard switch off: press and hold the on/off button for 5 seconds. To activate emergency mode when VVM S320 is switched off: press and hold the on/off button (SF1) for 5 seconds. THE STATUS LAMP (Deactivate the emergency mode by pressing once.) -
Page 35: Navigation
Navigation FACTORY SETTING Factory set values are marked with *. VVM S320 has a touchscreen where you simply navigate by pressing and dragging with your finger. SELECT Most options and functions are activated by lightly pressing on the display with your finger. - Page 36 Current temperature The drop-down menu shows the current status for Set temperature VVM S320, what is in operation and what VVM S320 is doing Works to set temperature at the moment. The functions that are in operation are highlighted with a frame.
-
Page 37: Climate Systems And Zones
This example shows a property with two climate systems (1 and 2, two separate floors) divided into four zones (1-4, four My system different rooms). Temperature and demand-controlled Connection ventilation can be controlled individually for each zone (ac- cessory required). NIBE VVM S320 Chapter 8 | Control - Introduction... -
Page 38: Control - Menus
Some outdoor units require cooling to be activated in menu 7.3.2.1. Accessories for the indoor unit are needed to run cooling, 4-pipe. Chapter 9 | Control – Menus NIBE VVM S320... - Page 39 The room sensors are grouped by zone. temperature. It is from this heating curve that VVM S320 Here, you select the zone to which a sensor will belong. It is determines the temperature of the water to the climate possible to connect multiple room sensors to each zone.
- Page 40 It is from these curves that Cooling VVM S320 determines the temperature of the water to the Setting range 7 – 30 °C heating system, the supply temperature, and consequently Alarm, room sensor during cooling the indoor temperature.
- Page 41 "-2" and "change in curve" is increased until the desired room temperature is maintained. Caution Wait 24 hours before making a new setting, so that the room temperature has time to stabilise. NIBE VVM S320 Chapter 9 | Control – Menus...
-
Page 42: Menu 2 - Hot Water
Here, you can select the length of time between increases When the time has run out, VVM S320 returns to the set in the hot water temperature. The time can be set between demand mode. - Page 43 NOTE Hot water circulation is activated in menu 7.4 "Selectable in/outputs" or via accessory. NIBE VVM S320 Chapter 9 | Control – Menus...
-
Page 44: Menu 3 - Info
Setting range: 1 – 24 months Here, you can see a diagram showing how much energy VVM S320 supplies and consumes. You can select which parts of the installation will be included in the log. It is also possible to activate display of indoor and/or outdoor tem- perature. -
Page 45: Menu 4 - My System
You can deselect this function when you do not Alternative: Heating wish to have the cooling running. The operating mode for VVM S320 is normally set to "Auto". Caution It is also possible to select operating mode "Add. heat only". - Page 46 Alternative: on/off Factor Setting range: 0 – 10 You can select whether you want VVM S320 to adjust the indoor climate based on the weather forecast here. You can set factor for outdoor temperature. The higher the value, the greater the effect from the weather forecast.
- Page 47 Control method Setting options: Price per kWh / CO2 NOTE If Smart Energy Source™ is activated, VVM S320 prioritises This option locks after 24 hours, restart of display how/to what extent each docked energy source will be used. or program updating. Afterwards, it is not possible...
- Page 48 All settings that are available to the user (including advanced menus) can be reset to default values here. Caution After the factory setting, personal settings such as the heating curve must be reset. Chapter 9 | Control – Menus NIBE VVM S320...
-
Page 49: Menu 5 - Connection
All settings made since opening the menu can be reset by selecting "Reset". MENU 5.4 – WIRELESS UNITS In this menu you connect wireless units, and manage set- tings for connected units. NIBE VVM S320 Chapter 9 | Control – Menus... -
Page 50: Menu 6 - Scheduling
If a room sensor is not activated, the desired offset of the heating curve is set. One step is usually enough to change the room temperature by one degree, but in some cases several steps may be required. Chapter 9 | Control – Menus NIBE VVM S320... -
Page 51: Menu 7 - Service
1 Consult the accessory’s Installer Manual. MENU 7.1 - OPERATING SETTINGS Make operating settings for the system here. MENU 7.1.1 - HOT WATER This menu contains advanced settings for hot water opera- tion. NIBE VVM S320 Chapter 9 | Control – Menus... - Page 52 Auto: The heating medium pump runs according to the Minimum permitted speed: Here, you can restrict the pump current operating mode for VVM S320. speed to ensure that the heating medium pump is not al- Intermittent: The heating medium pump starts approx. 20 lowed to operate at a lower speed in auto mode than the set seconds before and stops 20 seconds after the compressor.
- Page 53 Alternative: on/off difference additional heat can never exceed max difference compressor Select how you want the VVM S320 to alert you that there Max diff compressor: If the current supply temperature ex- is an alarm in the display here. ceeds the calculated supply line by the set value, the degree The different alternatives are that VVM S320 stops produ- minute value is set to 1.
- Page 54 Auto: In auto mode, VVM S320 optimises operating times between different requirements. MENU 7.1.8.2 - EMERGENCY MODE Manual: You select how long the installation will work with Immersion heater output each demand, if there are several demands at the same time.
- Page 55 Time betw. cooling and heating: Here, you can set how long MENU 7.2.1 - ADD/REMOVE ACCESSORIES VVM S320 will wait before it returns to heating mode when Here, you tell VVM S320 which accessories are installed. the cooling demand has ceased or vice versa.
- Page 56 MENU 7.7 - START GUIDE minutes in the same way as during normal heating operation, When VVM S320 is started for the first time, the start guide but for the supply temperatures that are set for the respect- is automatically activated. From this menu, you can start it ive period.
- Page 57 MENU 7.9.3 - BLACK BOX Via this menu, it is possible to export all logs (Change log, Extended alarm log) to USB. Connect a USB memory and select the log(s) you want to export. NIBE VVM S320 Chapter 9 | Control – Menus...
-
Page 58: Service
You can activate the emergency mode both when VVM S320 5.306 1.752 is running and when it is switched off. 3.583 1.426 To activate when VVM S320 is running: press and hold the 2.467 1.136 on/off button (SF1) for 2 seconds and select "emergency 1.739 0.891 mode"... - Page 59 Restore settings: Here, you upload all menu settings from the USB memory stick. Here you can choose how current measurement values from VVM S320 should be saved onto a log file on the USB Caution memory. Resetting of menu settings from the USB memory Set the desired interval between loggings.
- Page 60 From this menu, you can save your energy logs to a USB memory. MODBUS TCP/IP VVM S320 has built-in support for Modbus TCP/IP, which is activated in menu 7.5.9 - "Modbus TCP/IP". TCP/IP settings are set in menu 5.2 - "Network settings".
-
Page 61: Disturbances In Comfort
Disturbances in comfort Troubleshooting In most cases, VVM S320 notes a malfunction (a malfunction can lead to disruption in comfort) and indicates this with If the operational interference is not shown in the display alarms, and instructions for action, in the display. - Page 62 "Stop heating" in mand. menu 7.1.10.2 - "Auto mode setting". – VVM S320 does not call on heating, hot water or cooling. – If mode "Manual" is selected, select "Heating". If this is •...
-
Page 63: Accessories
Part no. 067 314 BASE EXTENSION EF 45 This accessory can be used to create a larger area under VVM S320. ENERGY MEASUREMENT KIT EMK 500 Part no. 067 152 This accessory is installed externally and used to measure the... - Page 64 Part no. 080 330 TOP CABINET TOC 30 Top cabinet, which conceals any pipes/ventilation ducts. Height 245 mm Height 345 mm Part no. 067 517 Part no. 067 518 Height 385-635 mm Part no. 067 519 Chapter 12 | Accessories NIBE VVM S320...
-
Page 65: Technical Data
Technical data Dimensions NIBE VVM S320 Chapter 13 | Technical data... -
Page 66: Technical Specifications
Part number, 3x400V (E) DK 069 197 Part number, 3x400V (Rf) NL 069 233 Part number, 3x230V (Rf) EM 069 201 Part number, 1x230V (Rf) 069 198 With feet removed, the height is approx. 1,940 mm. Chapter 13 | Technical data NIBE VVM S320... -
Page 67: Electrical Circuit Diagram
Electrical circuit diagram 1X230 V NIBE VVM S320 Chapter 13 | Technical data... - Page 68 Chapter 13 | Technical data NIBE VVM S320...
- Page 69 NIBE VVM S320 Chapter 13 | Technical data...
- Page 70 Chapter 13 | Technical data NIBE VVM S320...
- Page 71 3X230 V NIBE VVM S320 Chapter 13 | Technical data...
- Page 72 Chapter 13 | Technical data NIBE VVM S320...
- Page 73 NIBE VVM S320 Chapter 13 | Technical data...
- Page 74 Chapter 13 | Technical data NIBE VVM S320...
- Page 75 3X400 V NIBE VVM S320 Chapter 13 | Technical data...
- Page 76 Chapter 13 | Technical data NIBE VVM S320...
- Page 77 NIBE VVM S320 Chapter 13 | Technical data...
- Page 78 Chapter 13 | Technical data NIBE VVM S320...
-
Page 79: Item Register
Draining the hot water heater, 58 Manage alarm, 61 Electrical addition - maximum output, 27 Marking, 4 Power steps of the immersion heater, 27 Menu 1 - Indoor climate, 38 Electrical circuit diagram, 67 Menu 2 - Hot water, 42 NIBE VVM S320 Item register... - Page 80 Emergency mode, 28 Setting the cooling/heating curve, 31 Standby mode, 28, 58 Start guide, 30 Start-up and inspection, 30 Pump speed, 31 Supplied components, 8 Supply voltage, 21 Symbol key, 15 Symbols, 4 System diagram, 15 Item register NIBE VVM S320...
-
Page 83: Contact Information
Tel: +48 (0)85 66 28 490 Hannabadsvägen 5, 285 21 Markaryd Tel. +41 (0)58 252 21 00 biawar.com.pl Tel: +46 (0)433-27 30 00 info@nibe.ch info@nibe.se nibe.ch nibe.se For countries not mentioned in this list, contact NIBE Sweden or check nibe.eu for more information. - Page 84 WS release date: 2023-07-03 08:47 Publish date: 2023-08-28 14:39 This is a publication from NIBE Energy Systems. All product illustrations, facts and data are based on the available information at the time of the publication’s approval. NIBE Energy Systems makes reservations for any factual or printing errors in this publication.
Need help?
Do you have a question about the VVM S320 and is the answer not in the manual?
Questions and answers
How do I activate the freeze protection on NIBE VVM S320 R EM?