Ricoh Ri 2000 Quick Installation Manual
Hide thumbs
Also See for Ri 2000:
- User manual (257 pages) ,
- Additional manual (15 pages) ,
- How to update firmware (11 pages)
Table of Contents
Advertisement
Quick Links
Advertisement
Chapters
Table of Contents

Related Manuals for Ricoh Ri 2000


Summary of Contents for Ricoh Ri 2000
- Page 1 Safety Information and Quick Installation Guide Read this manual carefully before you use this machine and keep it handy for future reference. For safe and correct use, be sure to read “Safety Information for This Machine” in this manual before using the machine.
-
Page 3: Table Of Contents
TABLE OF CONTENTS TABLE OF CONTENTS ..........................1 Introduction ..............................3 Before You Begin............................3 How to Read the Manuals ..........................3 Disclaimer ..............................3 Notes ................................ 3 1. Safety Information ............................4 Safety Symbols for This Machine ........................4 Safety Information for This Machine ........................ - Page 4 Using ink cartridges ..........................30 Agitating a New White Cartridge ........................ 31 Disposing a Depleted Ink Cartridge ......................31 Handling the Waste Ink Bottle ........................32 About waste ink ............................32 Disposing the Waste Ink Cartridge ......................32 4. Installing ColorGATE Productionserver ....................... 33 System Requirement .............................
-
Page 5: Introduction
Introduction This manual contains detailed instructions and notes on the operation and use of this machine. For your safety and benefit, read this manual carefully before using the machine. Keep this manual in a handy place for quick reference. Before You Begin... Only appropriately trained users should operate the machine. -
Page 6: Safety Information
1. Safety Information Safety Symbols for This Machine The meanings of the safety symbols for this machine are as follows: Prohibition Caution Warning; Pinch Point Caution, risk of electric shock Caution, risk of having hands or arms caught Keep out of reach of children Prohibition of disassembly General mandatory action sign Wear eye protection... - Page 7 Do not touch Caution, hot surface...
-
Page 8: Safety Information For This Machine
Safety Information for This Machine Safety during Operation In this manual, the following important symbols are used. Indicates a potentially hazardous situation which, if instructions are not followed, may result in death or serious injury. Indicates a potentially hazardous situation which, if instructions are not followed, may result in minor or moderate injury or damage to property. -
Page 9: Handling Power Cord And Power Plugs
• Keep people other than operators away from the machine. Otherwise, their hands or fingers may be caught in the gap and injury may result. • Use at an altitude of 2,500 m or less. There is a possibility of electric shock, electric leakage, fire if it is used in an environment exceeding 2,500 m altitude. -
Page 10: Handling The Main Machine
Be sure to disconnect the plug from the wall outlet at least once a year and check for the following: • There are burn marks on the plug. • • The prongs on the plug are deformed. • The power cord's inner wires are exposed, broken, etc. The power cord's coating has a crack or dent. -
Page 11: Handling The Machine's Interior
• If a metal object, water or some other fluid gets inside the machine, you must turn off its power immediately. After turning off the power, be sure to unplug the machine. Then contact your service representative and report the problem. Do not use the machine. Doing so may result in fire or electric shock. -
Page 12: Handling The Consumables
(SDS). Download the SDS from the following website: https://www.ricoh.com/environment/msds/ Place ink, cleaning solution, and pretreatment liquid in a cool, well-ventilated place out of the reach of • children. -
Page 13: Adjustment
• Do not disassemble a cartridge containing ink, cleaning solution, or pretreatment liquid. Doing so may leave ink stains or cleaning solution on your hands and fingers. • When shaking a cartridge containing ink, cleaning solution, or pretreatment liquid, be careful about safety of your surroundings and ink stains. - Page 14 • If the waste ink gets into contact with your eyes, wash them immediately with running water. Consult a doctor if necessary. Keep the waste ink bottle out of reach of children. • Keep waste ink, containers for ink, cleaning solutions, pretreatment liquids, and components that •...
-
Page 15: Safety Labels Of This Machine
Safety Labels of This Machine This section explains the machine’s safety information labels. Positions of WARNING and CAUTION labels This machine has labels for WARNING and CAUTION at the positions shown below. For safety, please follow the instructions and handle the machine as indicated. Front Be careful your hands or any other part of your body is not caught with the carriage. -
Page 16: Goggles And Gloves
Goggles and gloves 1-5: Be sure to wear commercially available goggles and gloves. Caution, hot surface 1-5: Caution, hot surface. -
Page 17: Head Cleaning Jig
Head Cleaning JIG Be careful your hands or any other part of your body is not caught with the carriage. Waste ink bottle Keep the waste ink bottle out of reach of children. Symbols for Power Switch Symbols for power switch that are used for this machine are as follows: : POWER ON •... -
Page 18: Information For This Machine
Responsible party: Ricoh USA, Inc. Address: 300 Eagleview Boulevard, Suite 200 Exton, PA 19341, U.S.A. Telephone number: 610-296-8000 Product Name: Garment Printer Model Number: RICOH Ri 2000 Note to Users in California (USA): Perchlorate Material - special handling may apply. See: •... -
Page 19: Quick Installation Guide
3. Quick Installation Guide Checking the Contents of the Product The following contents are packaged with the product. Make sure all of these contents are included. RICOH Ri 2000 Power cord Ethernet cable Waste ink Bottle Waste ink tubes (2) -
Page 20: Guide To Components
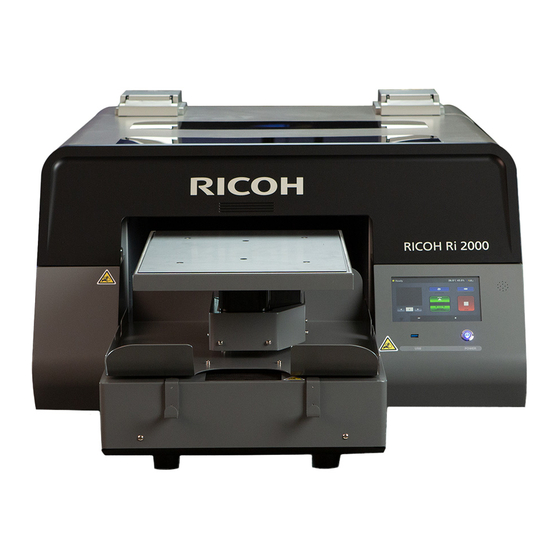
Guide to Components Front and Right View Front cover Platen Touch panel White ink cartridges Color ink cartridges Sub power button USB-A port (3.0) Rear View Ethernet port Waste ink bottle connector Main power switch Power connector... -
Page 21: Installing The Machine
Installing the Machine Preparation Do not use flammable sprays or solvents in the vicinity of this machine. Also, avoid placing these items • in the vicinity of this machine. Doing so may result in fire or electric shock. • Do not place vases, plant pots, cups, toiletries, medicines, small metal objects, or containers holding water or any other liquids, on or close to this machine. - Page 22 Reliable Power source/outlet. Consider using a UPS if your area’s power is unreliable. • Electronic hygrometer/thermometer (to monitor the relative humidity of the room the printer is operating • in). Keep it near the printer at all times 15°C to 32°C (59°F to 90 °F). •...
-
Page 23: Unpacking
Unpacking The machine weights around 140 kg (308 lb.). • • Six or more people are required to lift the printer. When moving the printer, lift it slowly so that you do not strain yourself. Lifting the printer forcibly or handling it roughly to drop it will risk injury. 1. -
Page 24: Installing The Waste Ink Bottle And Ink Cartridges
Installing the Waste Ink Bottle and Ink Cartridges 1. Thread the tube through until it stops at the position of the stopper on the inner side of the waste ink bottle cap. Waste ink bottle cap Waste ink tube 2. Close the lid. The waste ink bottle shown in the picture above might be slightly different than the actual waste ink bottle included with the product. - Page 25 4. Secure the waste ink bottle in an upright position with tape. The waste ink bottle shown in the picture above might be slightly different than the actual waste ink bottle included with the product. IMPORTANT! Install the waste ink bottle vertically. If installed horizontally, the waste ink inside could leak out.
- Page 26 5. Agitating new white cartridges For details about agitating a new white cartridge, see page 31, “Agitating a New White Cartridge”. 6. Insert the ink cartridges. IMPORTANT! When installing the ink cartridges, do not touch the inside of the machine. ...
-
Page 27: Turning On The Power
Turning On the Power • Do not use any power sources other than those that match the specifications shown in this manual. Doing so may result in fire or electric shock. Do not use any frequencies other than those that match the specifications shown. Doing so may result •... - Page 28 2. Turn ON the main power switch. 3. Hold down the sub power button for more than 2 seconds. 4. After booting, the printer will perform initial ink charging if the ink is not charged. Initial ink charging performs both white and color at the same time, and it takes about 20 minutes.
-
Page 29: Attaching The Platen
Once the initial ink charge is completed, the printer shows "Ready" in the upper left-hand corner of the touch screen. After completing the initial ink charging, proceed to the next step. Attaching the Platen 1. Attach the platen. The two protrusions on the back of the platen should be set correctly into the holes in the platen base. -
Page 30: Network Connection
Network Connection 1. Insert the ethernet cable into the Ethernet port. 2. Configure the network settings. For details about configuring such settings, see the User Manual. -
Page 31: Handling The Ink Cartridge
(SDS). Download the SDS from the following website: https://www.ricoh.com/environment/msds/ Place ink, cleaning solution, and pretreatment liquid in a cool, well-ventilated place out of the reach of • children. -
Page 32: About Ink Cartridges
• When shaking a cartridge containing ink, cleaning solution, or pretreatment liquid, be careful about safety of your surroundings and ink stains. Otherwise, injury or stains on household items may result. Do not hit or drop it when agitating. It may cause injury, cartridge damage, or ink leakage. •... -
Page 33: Agitating A New White Cartridge
Agitating a New White Cartridge Please agitate the white ink before attaching a new white cartridge in the printer. IMPORTANT! Do not shake the cartridge too fast or too hard. The agitating method should follow the following: • Hold the cartridge as shown in Figure 1. Shake the cartridge in the direction of the left and right rotation as shown in Figure 1. -
Page 34: Handling The Waste Ink Bottle
Handling the Waste Ink Bottle • If the waste ink gets into contact with your eyes, wash them immediately with running water. Consult a doctor if necessary. Keep the waste ink bottle out of reach of children. • Keep waste ink, containers for ink, cleaning solutions, pretreatment liquids, and components that •... -
Page 35: Installing Colorgate Productionserver
4. Installing ColorGATE Productionserver This machine uses ColorGATE Productionserver for printing. ColorGATE Productionserver must be installed on your PC. Follow the steps below to install ColorGATE Productionserver. -
Page 36: System Requirement
System Requirement Operating systems (64-Bit): · Microsoft Windows 8.1 (Pro, Enterprise) · Microsoft Windows 10 (Pro, Enterprise) · Microsoft Windows Server 2012 · Microsoft Windows Server 2016 · Microsoft Windows Server 2019 · (Apple macOS with Parallels Desktop) Minimum hardware requirements: ·... -
Page 37: Printer Setup
Printer Setup The setting of IP address for the machine The setting method of IP address for this machine are two patterns. Case1: For connecting directly to the printer from a PC that is not parts of a network. Case2: For DHCP setup Case1: For connecting directly to the printer from a PC that is not parts of a network. - Page 38 2. Press [OPTION]. 3. Press [IP ADDRESS]. 4. Enter the new IP address and subnet mask. 5. Press [CHANGE].
- Page 39 Case2: For DHCP setup 1. Press the Setting tab on the touch panel of this machine. 2. Press [OPTION]. 3. Press [IP ADDRESS]. 4. Press [ENABLE] to add the printer to an existing network. Check the assigned IP ADDRESS.
-
Page 40: Usage Of Colorgate Productionserver
Usage of ColorGATE Productionserver Register as a user on the ColorGATE Service & Support website NOTE - ColorGATE Service & Support website is available in English and German. ColorGATE Productionserver20 or later works only on Windows 64bit environment. Please check the ColorGATE Web page for the detailed operating environment. - Page 41 4. Click [Download], and then click [MIM packages / Profile targets]. 5. Click [MIM-Packages (Profiles and Linearizations)]. 6. Click [Production Profiles]. 7. Click [Ricoh]. 8. Click [Ricoh Ri 2000]. 9. Click [Download] of “PS_Ricoh_Ri_2000_Combi-MIM.cmp”, and then save the file in your local The file name is subject to change.
- Page 42 10. Click [Download], and then click [Software updates]. 11. Click [Update V**.*******] of “PRODUCTIONSERVER”. The latest version name is entered in ********. 12. Click [Download] for “PS**SetupV**.**.****.exe”, and then save the file in your local PC. The latest version name is entered in ********. 13.
-
Page 43: Start Rip Software(Hardware Dongle)
14. Follow the install wizard to install ColorGATE Productionserver. Start RIP Software(Hardware Dongle) 1. Insert the USB dongle to an USB port on your PC. 2. Start ColorGATE Productionserver. You can start ColorGATE Productionserver by double-clicking the shortcut icon or by selecting “Productionserver”... -
Page 44: Setup Driver
For details about updating the license file, see the manual or help file of ColorGATE Productionserver. Setup driver 1. Click [Printer], and then click [New]. - Page 45 2. Select [Ricoh] and [Ricoh Ri 2000], and then click [Next]. 3. Click [Import MIM…]. If the message on the window is not displayed properly, read the following sentences. For your chosen printer, you can import MIM combinations, which can be found on ColorGATE Service &...
- Page 46 4. Select the MIM file*, and then click [Next]. *Example: Filename of “RICOH Ri2000 MIM package.cmp” 5. Check on "All" in "Media", and then click [Next]. 6. Click [Next].
- Page 47 7. Click [Finish]. 8. Click [Next]. If the message on the window is not displayed properly, read the following sentences. For your chosen printer, you can import MIM combinations, which can be found on ColorGATE Service & Support website. The MIM combination contains presettings for media, ink and metamodes available for your printer.
- Page 48 Collector Module created on the desktop to complete the printer and user registration to use it. For details about how to setup and operate the Data Collector Module, see the Data Collector Module manual. You can view the manual from the following URL: https://contents-usstage.supervisori.ricoh.com/manual/supervisor-i.manual.pdf...
- Page 49 10. Click [Next]. 11. Click [Next].
-
Page 50: Print Method
12. Click [Finish]. Print method 1. Drag & drop your job file(s) from Windows Explorer into the “Job” queue. Job file(s) -
Page 51: Change Of Print Mode
2. Select the job in the “Job” archive, and then right-click the selected job. 3. Click [Print]. For details about loading jobs, see the manual or help file of ColorGATE Productionserver. Change of print mode 1. Select the job in the “Job” archive, and then right-click the selected job. 2. - Page 52 3. Click the [Media] in [Color] tab, and then select the Garment color. 4. Click the [Metamode], and then select the print mode.
- Page 53 <Metamode> • Superspeed : 600x300 dpi(1pass) Fastest print mode. • Speed : 600x600 dpi(2pass) Fastest print mode with default resolution. • Fine : 600x600 dpi(4pass) Standard print mode, recommended as default. • Superfine : 1200x1200 dpi(8pass) High definition print mode. Recommended image : photograph •...
-
Page 54: Appendix
5. Appendix Where to Inquire For inquiries, contact your sales or service representative. Revision history Revision Date issued Description Initial version Jun, 2020 Sep, 2020 Page.17,25-26 Oct, 2020 Page.8,17,33-51 Trademarks ColorGATE and Productionserver are registered trademarks of ColorGATE Digital Output Solutions GmbH. Adobe, Elements, Illustrator, and Photoshop are either registered trademarks or trademarks of Adobe in the United States and/or other countries. - Page 55 Consignes de sécurité Veuillez lire ce manuel avec attention avant d’utiliser l’appareil et conservez-le à portée de main pour pouvoir le consulter ultérieurement. Pour votre sécurité et pour une utilisation correcte de l’appareil, veuillez lire dans ce manuel les « Consignes de sécurité...
- Page 57 TABLE DES MATIÈRES TABLE DES MATIÈRES ..........................1 Introduction ..............................2 Avant de commencer........................... 2 Comment lire les manuels ........................... 2 Avis de non-responsabilité ........................2 Remarques ............................... 2 1. Consignes de sécurité ..........................3 Symboles de sécurité pour cet appareil ......................3 Consignes de sécurité...
-
Page 58: Introduction
Introduction Le présent manuel contient des instructions détaillées et des remarques relatives au fonctionnement et à l'utilisation de l'imprimante. Pour votre sécurité et votre bénéfice, veuillez lire attentivement le présent manuel avant toute utilisation. Conservez ce manuel dans un endroit accessible afin de pouvoir le consulter rapidement. -
Page 59: Consignes De Sécurité
1. Consignes de sécurité Symboles de sécurité pour cet appareil Les significations des symboles de sécurité pour cet appareil sont les suivantes : Interdiction Attention Avertissement ; Point de pincement Attention, risque d’électrocution Attention, risque de coincement des mains ou des bras Gardez hors de portée des enfants Interdiction de démontage Signe général d’action obligatoire... - Page 60 Ne pas toucher Attention surface chaude...
-
Page 61: Consignes De Sécurité Pour Cet Appareil
Consignes de sécurité pour cet appareil Sécurité durant l'utilisation Les symboles importants utilisés dans ce manuel sont les suivants : Indique une situation potentiellement dangereuse pouvant entraîner des blessures graves ou mortelles si les instructions ne sont pas suivies. Indique une situation potentiellement dangereuse pouvant entraîner des blessures mineures ou modérées ou causer des dégâts matériels. -
Page 62: Manipulation Du Cordon D'alimentation Et Des Prises Électriques
Ne laissez pas les enfants s’approcher de l’appareil. Leurs mains ou leurs doigts risqueraient de se • coincer dans l’ouverture et ils risqueraient de se blesser. Ne laissez personne d’autre que les personnes habilitées s’approcher de l’appareil. Leurs mains ou •... -
Page 63: Manipulation De L'appareil Principal
Assurez-vous de débrancher la fiche de la prise murale au moins une fois par an et de vérifier les • points suivants : • La fiche présente des marques de brûlure. • Les broches de la fiche sont déformées. Les fils internes du cordon d'alimentation sont à nu, cassés, etc. •... - Page 64 Si l’appareil dégage de la fumée ou des odeurs, ou s’il se comporte de manière inhabituelle, • éteignez-le immédiatement. Après avoir éteint l’appareil, veillez à le débrancher. Contactez ensuite votre SAV et signalez le problème. N’utilisez pas l’appareil. Cela risquerait de provoquer un incendie ou une électrocution.
-
Page 65: Manipulation De L'intérieur De L'appareil
(SDS) correspondante. Téléchargez la SDS sur le site internet suivant : • https://www.ricoh.com/environment/msds/ Conservez l'encre, les liquides de nettoyage et de prétraitement dans un endroit frais, bien aéré et •... -
Page 66: Réglage
Lors du remplacement d'une cartouche qui contient de l’encre, du liquide de nettoyage ou de • prétraitement, évitez de vous en mettre sur la peau. Si votre peau entre en contact avec ces produits, lavez soigneusement la partie affectée avec du savon et de l'eau. Lors du remplacement d'une cartouche qui contient de l'encre, du liquide de nettoyage ou de •... -
Page 67: Maintenance (Nettoyage Des Unités Et Élimination De L'encre Usagée)
Maintenance (nettoyage des unités et élimination de l’encre usagée) • Lors de la maintenance, le chariot peut se mettre en mouvement lorsque le capot avant est ouvert. Ne touchez pas le chariot en mouvement. Vous risqueriez de vous blesser. • Veillez à... -
Page 68: Étiquettes De Sécurité De Cet Appareil
Étiquettes de sécurité de cet appareil Cette section contient des informations concernant les étiquettes d'information de sécurité de l'appareil. Emplacements des étiquettes AVERTISSEMENT et ATTENTION Cet appareil comporte des étiquettes AVERTISSEMENT et ATTENTION situées aux emplacements illustrés ci-dessous. Pour votre sécurité, suivez les instructions et manipulez l'appareil de la manière indiquée. Avant Faites attention à... -
Page 69: Des Lunettes Et Des Gants
Des lunettes et des gants 1-5: Veillez à porter des lunettes et des gants disponibles dans le commerce. Attention surface chaude 1-5: Attention surface chaude... -
Page 70: Montage De Nettoyage De Tête
MONTAGE de nettoyage de tête Faites attention à ne pas vous coincer la main ou une autre partie du corps dans le chariot. Bouteille d’encre usagée Gardez la bouteille d’encre usagée hors de portée des enfants. Symboles pour le commutateur d'alimentation Les symboles pour le commutateur d'alimentation qui sont utilisés pour cet appareil sont les suivants : : SOUS TENSION •... - Page 71 © 2020 Ricoh Co., Ltd.
- Page 72 Printed in Korea J104-6600B...
Need help?
Do you have a question about the Ri 2000 and is the answer not in the manual?
Questions and answers