
Related Manuals for Assa Abloy Besam PowerSwing CSDB


Summary of Contents for Assa Abloy Besam PowerSwing CSDB
- Page 1 Besam Swing Door Operator PowerSwing (CSDB) Installation and Service Manual ILL-01558 1004935-US-1.0 – Issue 2008-11-13 ASSA ABLOY, the global leader in door opening solutions...
- Page 2 © All rights in and to this material are the sole property of ASSA ABLOY Entrance Systems AB. Copying, scanning, alter- ations or modifications are expressly forbidden without the prior written consent of the applicable company within ASSA ABLOY Entrance Systems AB. Rights reserved for changes without prior notice.
-
Page 3: Table Of Contents
Table of content Revision ............. 4 Important information . -
Page 4: Revision
Revision Following pages have been revised: Page Revision – This is the first version of Installation and Service Manual for Swing Door Operator PowerSwing (CSDB), No. 1004935-US-1.0, Issue 2008-11-13 Issue 2008-11-13 1004935-US-1.0... -
Page 5: Important Information
Important information Important notice To avoid bodily injury, material damage and malfunction of the product, the instruc- tions contained in this manual must be strictly observed during installation, adjust- ment, repairs and service etc. Only Besam-trained technicians should be allowed to carry out these operations. -
Page 6: Introduction
Introduction This manual contains the necessary details and instructions for the installation, main- tenance and service of the Besam PowerSwing. The Besam PowerSwing is suitable for most types of external and internal swing doors. The operator can be mounted to walls on either side of the door for pull or push action and is suitable for single or double doors fitted with butt hinges or pivots. -
Page 7: Technical Specifications
Technical specifications Mains power supply 120 V AC ±10%, 60 Hz fuse 10 A Note! A readily accessible switch with clearly marked OFF-position, having a contact separation of at least 1/8" in all poles, must be incorporated in the fixed wiring in accordance with local codes. Power consumption max. -
Page 8: How The Powerswing Works
How the PowerSwing works The PowerSwing works electro-hydraulically. It opens with an AC-motor that through a hydraulic unit and an arm system transmits the power to the door leaf. The closing power is from a coil spring. The movement of the door is controlled by limit switches and valve screws. - Page 9 5.3.3 Multi Voltage Input (MVI) MVI impulse accepts a dry (no voltage) contact or 6-24 V AC/DC. Status of lock (operation mode) can be selected through a function selector FS2 which depends on input TB2:11 and 13. TB2:11 and 13 TB2:11 and 13 FS-2 = OFF (factory setting) TB2:11 and 13 FS-3 = OFF (factory setting)
- Page 10 5.3.4 Kill Input When Kill mode is activated, the door will close immediately if not already closed. Hold open and low pass filter timers are reset. Key impulse will activate lock when kill is activated if key impulse 0 VDC is not con- nected to TB2:5.
- Page 11 5.3.7 Lock Output The Lock Output is short circuit proof and can source a lock with 24V, 375 mA. The output can be locked with power or locked without power. It can be selected through the Function Selector FS4 (Locked w. / w.o. power). The lock activation time can be either 1,5 s + opening delay or until closing.
- Page 12 Functions on the Extension Unit EXB 5.4.1 Inner Impulse Inner impulse will open the door if Program Selection is set to AUTO or EXIT and keep the door open during the hold open time. The hold open time is adjustable from 0 to 30 sec. 5.4.2 Low Pass Filter (automatic cycle delay) This function is used in Europe for handicap individuals who want to use an auto-...
- Page 13 5.4.5 Sensor Monitoring Monitoring can be selected through a function selector jumper (Presence Sensor Moni- toring). Test of Presence Detection is performed before opening. Test of Presence Impulse is performed before closing. The Master Sensors are tested first and the slave sensors are tested when the answer is received from Master Sensors.
-
Page 14: Models
Models Two main models of the PowerSwing are available: • Single Operator • Double Operator The operators are non-handed and not dependent on the hinges. The operators can be used on both pushing and pulling arm systems. Single Operator The product is delivered complete with back plate, control unit, end plates and cover. Length including end plates, L = 51"... -
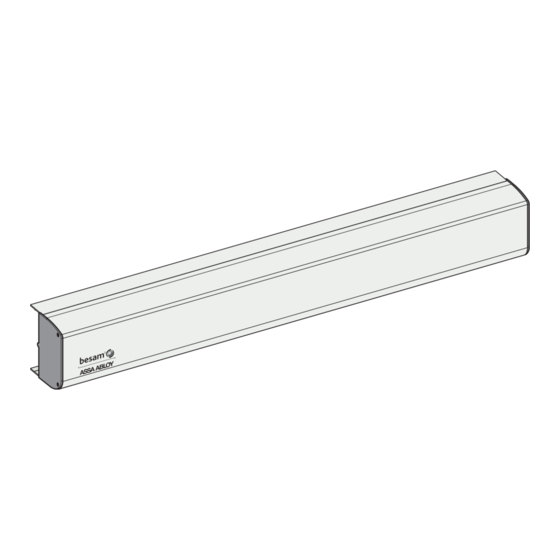
Page 15: Part Identification
Part identification ILL-01559 Item No. P/N Description 173721 Hydraulic unit 100/120 V AC, complete with motor, pump and spring tube — Motor / Pump — Spring tube 655580 Mains connection harness, 100/120 V 714254 Fuse 0.5 AT slow, 120 V 715236 Fuse 10 ATH slow, 120 V 1004204 Control unit CSDB, 120 V AC... -
Page 16: Options
Options Arm systems 8.1.1 Arm System, PUSH, Heavy Duty Arm / Hybrid PUSH: P/N: 173099BK Heavy Duty Arm / Hybrid: P/N: 21-06-173383 These arm systems are delivered with drive arm, telescopic part and door fitting. They are used if the operator is installed on the wall on the opposite side of the door swing and approved for fire door applications. - Page 17 8.1.4 Reveal Spacer, PULL P/N: 173804BK 40 mm (1-9/16") 40 (1-9/16") 60 (2-3/8") 8.1.5 Drive Shaft Extension Kits 70 mm (2-3/4") 50 mm (2") 20 mm (3/4") P/N: 21-03-205 P/N: 21-03-206 P/N: 21-03-207 Tool Kit to change rotation direction P/N: 173719 1004935-US-1.0 Issue 2008-11-13...
- Page 18 Door Stop P/N: 100147 Limit Switch P/N: 655614 (L = 19 3/4") P/N: 1004205 (L = 78 3/4") Extension Unit, EXB P/N: 1004116 ILL-02025 Control Switches 8.6.1 4-Position Switch with Key PS-4C (with EXB) P/N: 655845 ILL-00680 8.6.2 3-Position Switch PS-3B P/N: 1004117 Issue 2008-11-13 1004935-US-1.0...
- Page 19 Labels P/N: 75-20-100 Dual Side “Automatic Door / Do Not Enter” – (Out) AUTOMATIC DOOR P/N: 75-20-101 DO NOT Dual Side “Automatic Door / Do Not Enter” – (In) ENTER P/N: 75-20-102 AUTOMATIC CAUTION Dual Side “Caution Automatic Door” DOOR P/N: 1001695 Dual Side “Supervision of child”...
- Page 20 8.8.2 Remote Transmitter Push Plates PUSH PUSH PUSH TO OPEN OPEN PUSH TO OPEN OPEN P/N: 75-02-273 P/N: 75-02-272 P/N: 75-02-269 P/N: 75-02-270 8.8.3 Installation Box for Narrow Plates P/N: 75-21-002 8.8.4 Remote Receiver P/N: USRD433 Issue 2008-11-13 1004935-US-1.0...
-
Page 21: Pre-Installation
Pre-Installation General tips/Safety concerns • For enhanced security and vandalism protection, always mount the operator access in the interior of a building whenever possible. • Make sure that the power is off before installing. • Make sure that the door leaf and the wall are properly reinforced at the installation points. - Page 22 Installation examples 1. Aluminum profile system 2. Plasterboard wall 3. Reinforced concrete wall and brick wall 4. Plasterboard wall A. Steel reinforcement or rivnut B. Wood reinforcement C. Expansion-shell bolt (for brick wall min. M6x85, UPAT PSEA B10/25) Issue 2008-11-13 1004935-US-1.0...
- Page 23 Fastening requirements Base material Minimum requirements of wall profile* Steel 3/16" ** Aluminum 1/4" ** Reinforced concrete min. 2" from the underside Wood 2" Brick wall Expansion-shell bolt, min. M6x85, UPAT PSEA B10/25, min. 2" from the underside * Besam minimum recommended requirements. Building Codes may give different specifications.
-
Page 24: Mechanical Installation
Mechanical installation This instruction comprises the installation of the Besam PowerSwing with arm sys- tems PUSH/SAS-F, which push the door open and PULL, which pull the door open. See also “QuickStart” which is enclosed with each operator. 10.1 Wall Mounted Operator with Arm System PUSH / SAS-F PUSH 0"... - Page 25 Cont. “Wall Mounted Operator with Arm System PUSH / SAS-F” 9 10 1 2 3 4 5 6 7 8 9 10 1 2 3 4 5 6 7 8 1004935-US-1.0 Issue 2008-11-13...
- Page 26 Cont. “Wall Mounted Operator with Arm System PUSH / SAS-F” 90° 19 lbf . ft 2-3/8” 90° Issue 2008-11-13 1004935-US-1.0...
- Page 27 10.2 Wall Mounted Operator with Arm System PULL Note! If the operator is not ordered for pulling arm system, the direction of rotation must be reversed. 10.2.1 Changing the direction of rotation 165˚ ILL-01556 1004935-US-1.0 Issue 2008-11-13...
- Page 28 10.2.2 Installation of Operator with Arm System PULL PULL " " " 2" " " " ≤ 5 " " x 2 " C L 1 Right hand C L 1 Issue 2008-11-13 1004935-US-1.0...
- Page 29 Cont. “Installation of Operator with Arm System PULL” 1 / 4 " 1004935-US-1.0 Issue 2008-11-13...
- Page 30 Cont. “Installation of Operator with Arm System PULL” Connects to High Voltage Power Source (see page 33) 19 lbf . ft Issue 2008-11-13 1004935-US-1.0...
- Page 31 Cont. “Installation of Operator with Arm System PULL” 1004935-US-1.0 Issue 2008-11-13...
-
Page 32: Electrical Connection
Electrical Connection • During any work with the electrical connections the power supply must be discon- nected. • If the power cord or cable is damaged, it must be replaced by the manufacturer, its service agent or similarly qualified persons in order to avoid an electrical hazard. 11.1 Control Units The operator can be equipped with different control units adapted to the functions... - Page 33 11.2 Connection of Control Unit CSDB – single doors Connect the electrical input cable to the Terminal Block where and as indicated. Note! Accessories and activation units must not be connected until the adjustment of speeds etc. has been carried out. Note! It is important that the high and low voltage cables are separated and secured.
- Page 34 11.3 Connection of Control Units CSDB/CSDB – double doors For double door operators both operators have to be connected to the mains. A three- pole cable (not enclosed) has to be connected between TB1 on the CSDB (master) and TB2 on the CSDB (slave). Note! It is important that the high and low voltage cables are separated and secured.
- Page 35 11.4 Connection of Extension Unit EXB – option The extension unit EXB is to be installed on top of the CSDB. 1. Connect the flat cable on the EXB to the CSDB. 2. Snap on the EXB to the CSDB. Presence Impulse Configuration Blanking / Inhibit Switch Blanking / Inhibit Switch...
-
Page 36: Start-Up
Start-Up Give a short opening impulse by strapping the impulse input and adjust if necessary as follows. See also illustration on page 37. 1. Set the hold open time with the potentiometer on the Control Unit. 2. To adjust the opening speed. a Adapt the High Speed Opening (HSO), to the existing traffic situation. - Page 37 12.1 Closing torque To comply with authority requirements or to overcome over/under pressure, the clos- ing torque can be adjusted. The closing torque (spring force) is adjusted by means of an Allen screw placed at the end of the spring tube. Turning the screw clockwise increases the force. One turn equals a torque change of approx.
- Page 38 12.3 Connection of Activation Units and accessories (SuperScan) 4 SAFE Bodyguard EYE-TECH (monitored) Push Sentry plate Scan PRESS TO OPEN 1 2 3 4 5 6 7 1003909 1003921 CSDB/TB2 Key impulse 12 11 CSDB/TB2 MVI impulse CSDB/TB2 7 14 12 11 14 Outer impulse EXB/TB3...
-
Page 39: Cover
Cover The cover and mounting plate are manufactured in clear anodized aluminum. 13.1 Creating slot in the cover for the drive shaft 1. Measure the distance X on the mounted operator from the pivot end of the back plate to the center line of the output shaft. 2. -
Page 40: Signage And Safety Equipment
Signage Apply to both sides of the door. When using a wall switch, apply to both sides of the door. Apply the push decal to the push side and the pull decal to the pull side of the door. Push plate PRESS TO OPEN * To meet ANSI A156.10 Power Operated Pedestrian door standard for one-way and... -
Page 41: Troubleshooting
Troubleshooting Fault Possible reasons why Remedies/Explanation The door does not open Program selector is set to OFF Change setting - The motor does not start No motor power present Check motor cable No high voltage power Check power Blown fuse Replace fuse Activation unit does not function Strap impulse inputs... -
Page 42: Maintenance Plan
Maintenance plan HAZARD WARNING! Failure to observe this information may result in minor personal injury or damage to equipment. Regular inspections shall be made according to national regulations by a trained and qualified person. The number of service occasions shall be in accordance with national requirements. - Page 43 1004935-US-1.0 Issue 2008-11-13...
- Page 44 Tel: (704) 290 5520 Fax: (704) 290 5544 Tel: (877) 237 2687 (service) Tel: (866) 237 2687 (sales) marketing@besam-usa.com • www.besam.com ASSA ABLOY is the global leader in door opening solutions, dedicated to satisfying end-user needs for security, safety and convenience.
Need help?
Do you have a question about the Besam PowerSwing CSDB and is the answer not in the manual?
Questions and answers