Advertisement
Quick Links
Quick Start Guide
NEO LTO-7
*10400743 001*
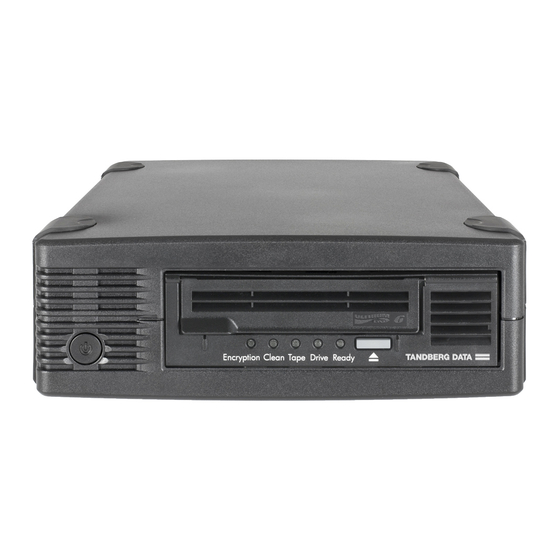
Internal Tape Drive
10400743-001
Step 1
Register the Unit
It is essential to activate your warranty. Technical and warranty
support are not available until the warranty is active:
1. Go to
http://Registration.tandbergdata.com/
Support > My Products.
2. At the
Site
Login, enter your
email address and password,
and click GO.
3. Click Register New Product.
4. Fill in the information (including
serial number) and click Submit.
Your warranty certificate will be emailed to you. Follow the instructions
included in the email to complete the registration process.
Step 2
Install and Connect to Host HBA
The following instructions are valid ONLY for servers with an HBA that
supports internal SAS ports. If you do not already have a SAS card
installed, you must supply an SAS cable and a supported HBA card and
cable. If your drive is fiber channel, then you will need a fiber channel
(FC) cable and supported FC HBA card. Refer to
for recommended products. You need a spare PCI slot for the new HBA.
1. If necessary, install the new HBA.
Follow the instructions supplied with the HBA to install the new
SAS HBA or FC HBA card.
2. Attach the mounting
hardware with the four
supplied M3 x 3mm
screws.
NOTE: The illustration shows one method of mounting hardware; it does not
apply to all servers. Please refer to your server documentation.
Install the Tape Drive
1. Slide the tape drive into the drive bay.
2. Secure the drive with the supplied screws.
Step 3
Connect Network and Power Cords
1. Connect the customer-supplied SAS or FC cables to the server SAS
or FC HBA card and to the drive interface port.
and select Service &
Enter
Enter
2. Connect the SAS/FC and power cables to the tape drive.
www.tandbergdata.com
3. Power up the server.
IMPORTANT: Follow the instructions in the screw pack. You may
damage your tape drive if you use screws that are too long,
because the Tandberg LTO half-height tape drive allows only
3mm of the engagement of the screw into the drive.
IMPORTANT: If cable access for the tape drive bay is awkward, it
may be easier to access power and other connections if the tape
drive is installed in the top bay. You may need to move other
devices to lower bays to achieve this.
Always use a spare power cable from the server's
CAUTION:
internal power supply. Never use the SAS connecting cable to
supply power.
Watch the boot screen carefully after installation. Check to see that
the new SAS or FC tape drive is listed in the boot sequence. If there
are any error or unexpected messages, go back and check the cabling
carefully.
4. Install drivers.
For Windows systems, download the latest drivers from
www.tandbergdata.com. For other operating systems, patch to the
latest version of the operating system, following the instructions in
the patch documentation.
5. Upgrade backup software.
Always upgrade your software application to ensure it works
correctly with the tape drive. Tandberg Data does NOT recommend
native backup applications, such as Windows Backup, because they
do not support the full features of the tape drive and may cause
performance problems.
NOTE: Some backup applications require you to use their own drivers. Refer
to the documentation of your software application to ensure you are using the
recommended driver.
Step 4
Hardware Encryption and Tandberg LTO-7 Tape Drive
Your Tandberg LTO-7 tape drive provides the ability to hardware
encrypt your data, applying the strongest level of AES industry-
standard encryption and protecting the data from unauthorized access
and use.
Your Tandberg drives uses the LTO Ultrium 6000 GB data cartridge and
is compatible with the cartridges of its predecessors, the Ultrium Tape
Drive Generation 6, and Generation 5. The drive completes these
functions:
• Reads and writes Ultrium 7 cartridges to Ultrium 7 format,
including WORM and Data Encryption.
• Reads and writes Ultrium 6 cartridges to Ultrium 6 format,
including WORM and Data Encryption.
• Support for encryption on Ultrium 5, Ultrium 6, and Ultrium 7 tape
cartridges.
Hardware encryption can be used with or without compression and
without speed or capacity penalties.
Hardware encryption is a powerful feature, but should
CAUTION:
be used with care. If you need to import your media onto another
machine or to recover after disaster you will be required to enter
an encryption key.
• Hardware encryption is turned off by default and is switched on by
settings in your backup application, where you also generate and
supply the encryption key.
• Your backup application must support hardware encryption for it to
work. The software supplied with the tape drive provides this
support. See
www.tandbergdata.com
for an up-to-date list of backup
software.
• You should keep a record or backup of your encryption keys and
store them in a secure place separate from the computer running the
backup software.
• If you are unable to supply the key when requested to do so, neither
you nor Tandberg Data Support will be able to access the encrypted
data.
Advertisement

Subscribe to Our Youtube Channel
Related Manuals for Tandberg Data NEO LTO-7


Summary of Contents for Tandberg Data NEO LTO-7
- Page 1 M3 x 3mm backup software. screws. • If you are unable to supply the key when requested to do so, neither you nor Tandberg Data Support will be able to access the encrypted data. 3. Power up the server.
- Page 2 • Keep media in the case provided. http://www.tandbergdata.com • Follow the temperature, humidity and acclimitization guidelines on For information on contacting Tandberg Data Support, the media packaging. see our Contact Support web page: • Avoid dropping it or rough handling, as this is likely to damage the http://www.tandbergdata.com...
Need help?
Do you have a question about the NEO LTO-7 and is the answer not in the manual?
Questions and answers