Advertisement
Quick Start Guide
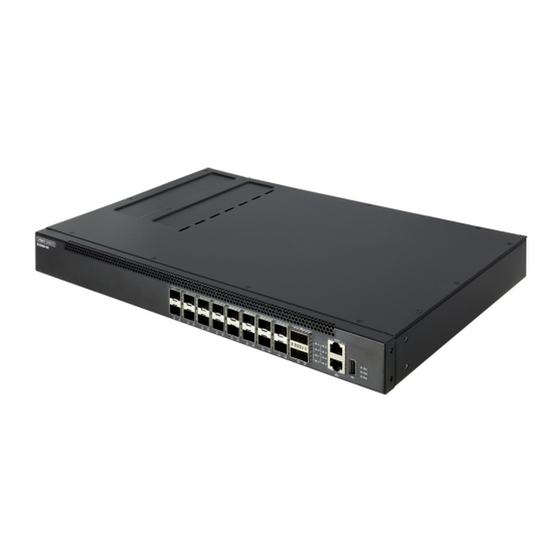
16-Port L2+/L3 Lite 10G Switch with Two 40G Uplinks
ECS5520-18X | ECS5520-18T
1.
ECS5520-18X or ECS5520-18T (with 1 AC PSU)
2.
Rack Mounting Kit—2 brackets and 8 screws
3.
Four adhesive rubber feet
4.
Power cord
1
Mount the Switch
2
1.
Attach the brackets to the switch.
2.
Use the screws and cage nuts supplied with the rack to secure
the switch in the rack.
Note:
The switch can also be installed on a desktop or shelf
using the included adhesive rubber foot pads.
2
Ground the Switch
1
2
1.
Ensure the rack on which the switch is to be mounted is properly
grounded and in compliance with ETSI ETS 300 253. Verify that
there is a good electrical connection to the grounding point on
the rack (no paint or isolating surface treatment)
2.
Attach a lug (not provided) to a #18 AWG minimum grounding
wire (not provided), and connect it to the grounding point on the
switch rear panel. Connect the other end of the wire to rack
ground.
Caution:
The earth connection must not be removed unless
all supply connections have been disconnected.
Attention:
Le raccordement à la terre ne doit pas être retiré
sauf si toutes les connexions d'alimentation ont été
débranchées.
*150200002210H_R01*
Package Contents
1
2
5.
Console cable—RJ-45 to DB-9
6.
Documentation—Quick Start Guide (this document) and
Safety and Regulatory Information
1
3
Connect Power
a. Connecting AC Power
1.
Install one or two universal AC PSUs in the switch.
2.
Connect an external AC power source to the PSUs.
b. (Optional) Connecting DC Power
1.
Install one or two DC PSUs in the switch.
2.
Connect the DC power supply wires to the supplied connector as
follows:
■
■
■
3.
Insert the DC supply connector into the DC PSU power input
socket.
– 1 –
3
4
Caution:
The device must be installed in a restricted-access
location. It should have a separate protective earthing terminal
on the chassis that must be permanently connected to earth to
adequately ground the chassis and protect the operator from
electrical hazards.
Attention:
L'appareil doit être installé dans un emplacement
à accès restreint. Il doit comporter une borne de terre de
protection distincte sur le châssis, qui doit être connectée en
permanence à la terre pour assurer une mise à la terre
adéquate du châssis et protéger l'opérateur des risques
électriques.
1
Note:
For international use, you may need to change the AC
line cord. You must use line cord sets that have been approved
for the socket type in your country.
1
1
3
A
1
C
A
Blue Wire: DC Return
–
B
Brown Wire:
–
-36 – -72 VDC
C
–
Yellow Wire - Chassis Ground
www.edge-core.com
5
6
2
2
B
E072020-CS-R01
150200002210H
Advertisement
Table of Contents

Subscribe to Our Youtube Channel
Related Manuals for Edge-Core ECS5520 Series


Summary of Contents for Edge-Core ECS5520 Series
- Page 1 Quick Start Guide 16-Port L2+/L3 Lite 10G Switch with Two 40G Uplinks www.edge-core.com ECS5520-18X | ECS5520-18T Package Contents ECS5520-18X or ECS5520-18T (with 1 AC PSU) Console cable—RJ-45 to DB-9 Rack Mounting Kit—2 brackets and 8 screws Documentation—Quick Start Guide (this document) and...
- Page 2 Quick Start Guide ■ 40GBASE-SR4 (ET6401-SR4) Caution: Use a UL/IEC/EN 60950-1 certified power supply ■ 40GBASE-LR4 (ET6401-LR4) to connect to a DC converter, and #14 AWG wire to connect to a DC PSU. As connections are made, check the port status LEDs to be sure Attention: Utilisez une alimentation certifiée UL/IEC/EN the links are valid:...
- Page 3 快 速 入 門 指 南 10G 超高速網路交換機 ECS5520-18X | ECS5520-18T www.edge-core.com 包裝內容物 ECS5520-18X 或 ECS5520-18T ( 搭配一顆 AC 電源 ) 電源線 機櫃安裝套件-包含兩個托架及八個螺絲 主控台纜線 —RJ-45 到 DB-9 4 個自黏腳墊 文件 — 快速入門指南 (本文件)和安全與法規資訊 安裝交換器 連接電源 a. 連接 AC 電源 在交換器上安裝 1 個或 2 個通用 AC 電源模組。...
- Page 4 快 速 入 門 指 南 確認交換器操作 硬體規格 交換器機殼規格 尺寸 (WxDxH) ECS5520-18X: 43.8 x 28.0 x 4.3 cm (17.26 x 11.02 x 1.71 in.) ECS5520-18T: 44.0 x 28.0 x 4.4 cm (17.32 x 11.02 x 1.73 in.) 重量 ECS5520-18X: 3.9 kg (8.6 lb) 含 1 個電源模組 透過檢查系統...
Need help?
Do you have a question about the ECS5520 Series and is the answer not in the manual?
Questions and answers