Table of Contents
Advertisement
Available languages
Available languages
Quick Links
Quick Star t Guide
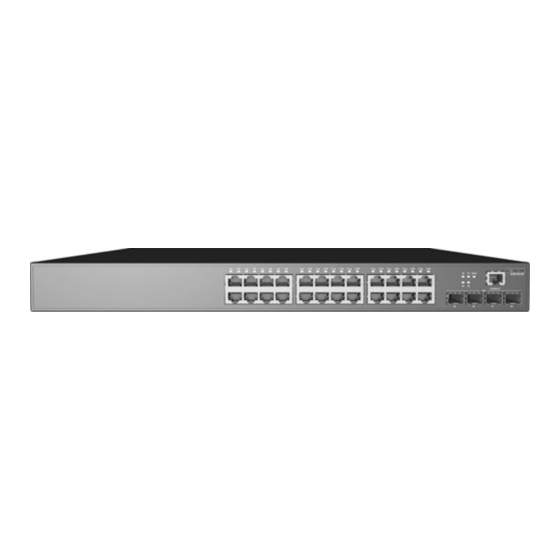
28-Port and 52-Port L2 Gigabit Ethernet Switches
ECS4120 Series
1. Unpack the Switch and Check Contents
28T/52T Mounting Kit — 4 brackets and 10 screws
28Fv2/28Fv2-I Mounting Kit — 2 brackets and 4 screws
Four adhesive foot pads
Power cord — US, Continental Europe, or UK
Console cable — RJ-45 to DB-9
Documentation—Quick Start Guide (this document)
and Safety and Regulatory Information
2. Mount the Switch
a. Mounting in a Rack
2
Attach the brackets to the front of the switch.
1
Use the screws and cage nuts supplied with the rack to
2
secure the switch in the rack.
Caution:
Installing the switch in a rack requires two
people. One person should position the switch in the rack,
while the other secures it using the rack screws.
Attention:
L'installation de l'appareil dans un rack
nécessite deux personnes. Une personne doit positionner
l'appareil dans le rack, tandis que l'autre le fixe à l'aide des
vis du rack.
*150200001742h_R06*
ECS4120-28T
ECS4120-28Fv2
ECS4120-28Fv2-I
ECS4120-52T
1
– 1 –
Note:
The switch can also be installed on a desktop or shelf
using the included adhesive rubber foot pads.
b. Mounting on a Wall
1
2
1
2
Caution:
Wall mount the switch with the network ports
facing down.
Attention:
Montez le commutateur au mur, les ports
réseau orientés vers le bas.
Caution:
Wall mount the switch using four brackets
(included) attached to the front and rear of the switch.
Attention:
Montez l'interrupteur au mur à l'aide de quatre
supports (inclus) fixés à l'avant et à l'arrière de l'interrupteur.
Rotate the brackets 90 degrees and attach them to the front
1
and rear of the switch. Use three screws for the front brackets
and two screws for the rear brackets.
In the required location, mark and drill eight holes in the wall
2
for the wall anchors (not included).
Note:
For a wood wall, drilling holes and using wall anchors
is not required.
Mount the switch on the wall and secure it in place using
3
eight #12 wood screws (5/8-inch, not included).
3. Ground the Switch
2
1
Ensure the rack on which the switch is to be mounted is
1
properly grounded and in compliance with ETSI ETS 300 253.
Verify that there is a good electrical connection to the
grounding point on the rack (no paint or isolating surface
treatment).
www.edge-core.com
3
3
E022023-AP-R06
150200001742H
Advertisement
Table of Contents

Related Manuals for Edge-Core ECS4120 Series


Summary of Contents for Edge-Core ECS4120 Series
- Page 1 Quick Star t Guide 28-Port and 52-Port L2 Gigabit Ethernet Switches www.edge-core.com ECS4120 Series 1. Unpack the Switch and Check Contents Note: The switch can also be installed on a desktop or shelf using the included adhesive rubber foot pads.
-
Page 2: Connect Power
Quick Start Guide Attach an 18 AWG minimum grounding wire (not included) The ECS4120-28Fv2/ECS4120-28Fv2-I switch supports the to the grounding point on the switch rear panel, and then to option of connecting an external -48 to -60 VDC power rack ground. source to its DC terminal block. -
Page 3: Connect Network Cables
Quick Start Guide 7. Connect Network Cables Hardware Specifications Switch Chassis Size (W x D x H) 28T: 44.0 x 22.0 x 4.4 cm (17.32 x 8.66 x 1.73 in) 28Fv2/28Fv2-I: 44.0 x 22.0 x 4.4 cm (17.32 x 8.66 x 1.73 in) 52T: 44.0 x 28.0 x 4.4 cm (17.32 x 11.02 x 1.73 in) Weight... - Page 4 快 速 安 装 指 南 ECS4120 1. 打开交换机的包装并检查内装物 b. 在墙上安装 ECS4120-28T ECS4120-28Fv2 ECS4120-28Fv2-I ECS4120-52T 28T/52T — 4 28Fv2/28Fv2-I — 2 — — RJ-45 DB-9 — 5/8- 2. 安装交换机 a. 在机架中安装 3. 将交换机接地 ETSI ETS 300 253 18 AWG – 4 –...
- Page 5 快 速 安 装 指 南 4. 连接电源 6. 执行初始配置 a. 交流电源 100-240 VAC, 50-60 Hz : 115200 bps b. 直流电源 CLI: “admin” “admin” 7. 连接网线 出 IEC/ DC -48 -60V 3.0A ECS4120-28Fv2/ECS4120-28Fv2-I -60 V -48 V “-” RJ-45 100-ohm Category 5 “+”...
- Page 6 快 速 安 装 指 南 硬件规格 28T:44.0 x 22.0 x 4.4 cm (W x D x H) 17.32 x 8.66 x 1.73 28Fv2/28Fv2-I:44.0 x 22.0 x 4.4 cm 17.32 x 8.66 x 1.73 52T:44.0 x 28.0 x 4.4 cm 17.32 x 11.02 x 1.73 28T:2.47 kg 5.45...
- Page 7 快 速 入 ⾨ 指 南 超⾼速交換器 ECS4120 系列 1. 拆開交換器包裝並檢查內容物 b. 在牆上安裝 ECS4120-28T ECS4120-28Fv2 ECS4120-28Fv2-I ECS4120-52T 28T/52T 機架安裝套件包含 4 個擴充托架、10 個用 於固定托架與交換器的螺絲 28Fv2/28Fv2-I 機架安裝套件包含 2 個擴充托架、4 個用於固定托架與交換器的螺絲 小心:將交換器安裝於牆上時,務必使 RJ-45 連接埠朝下。 4 個自黏腳墊 小心:使用隨附的四個耳掛,安裝於交換器前後。 將耳掛旋轉 90 度後將其安裝到交換機的前方和後方,三 個螺釘用來固定前⾯耳掛,⼀個螺釘用來固定後⾯耳 電源線 — 美規、歐規或英規 掛。...
- Page 8 快速入門指南 4. 連接電源 6. 初始設定 a. 連接 AC 電源 將電源線插入到 100-240 VAC, 50-60 Hz 交流電源。 使用隨附的控制電纜連接 PC 與交換器。 將電源線的另⼀端插入到交換器背板 AC 電源孔。 設定序列埠的如下:115200 bps、8 個字元、無同位檢 查、1 個停止位元、8 個資料位元且無流量控制。 b. 連接 DC 電源 您可使用預設設定 (使用者為 「admin」 ,密碼為 「admin」 )登入命令列介⾯ (CLI) 。 注意:有關更多初始化設定,請參考 Web 管理指南以及 CLI 參考指南。...
- Page 9 快速入門指南 硬體規格 交換器機殼規 格 尺 寸 28T:44.0 x 22.0 x 4.4 cm (17.32 x 8.66 x 1.73 英吋) (W x D x H) 28Fv2/28Fv2-I:44.0 x 22.0 x 4.4 cm (17.32 x 8.66 x 1.73 英吋) 52T: 44.0 x 28.0 x 4.4 cm (17.32 x 11.02 x 1.73 英吋)...
Need help?
Do you have a question about the ECS4120 Series and is the answer not in the manual?
Questions and answers