Table of Contents

Related Manuals for RACOM RipEX


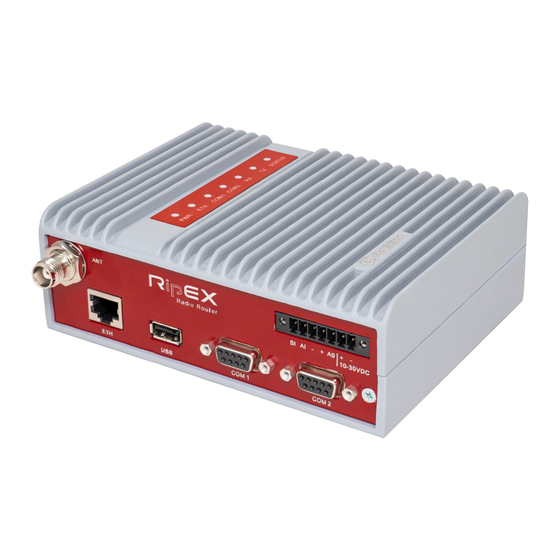
Summary of Contents for RACOM RipEX
- Page 1 RipEX – Radio modem & Router version 1.0 5/6/2013 fw 1.2.x.x RACOM s.r.o. • Mirova 1283 • 592 31 Nove Mesto na Morave • Czech Republic www.racom.eu Tel.: +420 565 659 511 • Fax: +420 565 659 512 • E-mail: racom@racom.eu...
-
Page 3: Table Of Contents
3.9. M!DGE General Overview ....................43 3.10. Accessing M!DGE ......................43 3.11. Basic M!DGE Configuration ....................45 3.12. Practical Tests ........................49 3.13. M!DGE Advanced Tests ....................55 3.14. Summary .......................... 56 © RACOM s.r.o. – RipEX – Radio modem & Router... -
Page 5: Ripex - Live Demo
There are two RipEX units connected to each other via a radio channel available 24/7 for testing. The units are set to factory settings every day at 02:00 GMT. Each access password is valid for one week and is changed every Monday at 02:00 GMT. -
Page 6: Wizard Configuration
1.4.1. Ping Ping is the basic tool for checking connectivity between two hosts with IP addresses. Because RipEX is a native IP device, ping can also be used for radio link testing. RipEX – Radio modem & Router – © RACOM s.r.o. - Page 7 Go to the Ping tab in the Diagnostic menu. You can either set the Ping Type to „ICMP“ (common ping) or to „RSS“. The RSS type is a RipEX proprietary ping with extended reports. The destination is the remote RipEX's IP address. For example when you are locally connected to RipEX-A (192.168.169.169), fill in 192.168.169.170 and vice versa.
-
Page 8: Diagnostic
RipEX web interface is equipped with comprehensive and detailed statistics and graphs. One could say, there is an embedded NMS (Network Management System) within RipEX. Every RipEX can broadcast its Watched values to other reachable RipEX units within the network. Among these Watched values are: current supply voltage, internal temperature, RF output power, Voltage Standing Wave Ratio on the antenna feed line, packet counters on separate interfaces and other values. - Page 9 The quick value descriptions are displayed in the balloon tips (place the cursor on any column header). The detailed description can be read in the respective Help. © RACOM s.r.o. – RipEX – Radio modem & Router...
- Page 10 Each graph can be created based on the values of the unit itself or any other neighbouring unit. The detailed Graphs description can be read in the respective Help. RipEX – Radio modem & Router – © RACOM s.r.o.
- Page 11 1.5.4. Monitoring Monitoring is an advanced on-line diagnostic tool, which enables detailed communication analysis over any RipEX interface. In addition to all physical interfaces (Radio, Ethernet, COM1 and COM2), several internal interfaces between software modules can be monitored. Go to the Diagnostic → Monitoring menu and just click on the Start button. In the default settings, it will display packet timing and payload on the Radio channel.
-
Page 12: Summary
Fig. 1.7: Monitoring the ping packets in two separate windows 1.6. Summary We have described just a few examples of Live demo usage. Feel free to download the RipEX User manual from http://www.racom.eu/download/hw/ripex/free/eng/ripex-m-en.pdf or the Application notes from http://www.racom.eu/download/hw/ripex/free/eng/ripex-app-en.pdf to conduct further tests. -
Page 13: Zabbix - Live Demo
Simple Network Management Protocol (SNMP) support for all the new generation RACOM products. Many RACOM customers use their own NMS, in which they need to manage our products. We can offer them this opportunity with general SNMP implementation. The following text is intended for all customers who are searching for the network management system applied to the RACOM products. -
Page 14: Zabbix Live Demo
This chapter will guide you through essential features which Zabbix offers you with the RACOM equipment. 2.3.1. Login screen The Zabbix front-end is available for your testing 24/7. - Page 15 Personal Dashboard is displayed after you login. With full-access you would be able to change the layout as you wish. On the following picture, you can see that NMS monitors two RAy units, two RipEX units and two GPRS units (M!DGE and MG102). Zabbix is monitoring itself too.
- Page 16 For every value, Zabbix provides its history. If the value is numerical, there is also a graph. The history values are stored in MySQL database for a defined time period. Note You can use a different database engine in your Zabbix installation. RipEX – Radio modem & Router – © RACOM s.r.o.
- Page 17 Each numerical monitored value can be displayed as a graph and in every graph, there can be more values displayed. You can define various colours, types of lines, legends and other parameters. You can also change the time period of the displayed graph. © RACOM s.r.o. – RipEX – Radio modem & Router...
- Page 18 In the example below, we have RAy10-H graphs. We can easily display the same graphs for the second RAy unit. You can also display graphs for both units within a single screen. RipEX – Radio modem & Router – © RACOM s.r.o.
- Page 19 For each unit, you can display various statistics and you can see each unit's status. In our example, there are two linked RipEX units with temperature, RSS and DQ values. The background image is the raster map of Nové Město na Moravě.
- Page 20 RAy RSS/SNR values. All other monitored values are OK (e.g. values are within the defined threshold ranges) and are displayed with a green colour. You can also display the values as in the Latest data menu. RipEX – Radio modem & Router – © RACOM s.r.o.
-
Page 21: Summary
2.4. Summary We have described just a few of the Zabbix features. Feel free to download the RipEX Application note with SNMP Configuration Guide from http://www.ra- com.eu/download/hw/ripex/free/eng/ripex-app-en.pdf and go through the Zabbix documentation: ht- tp://www.zabbix.com/documentation.php. - Page 22 ZABBIX – Live DEMO E-mail: <support@racom.eu> Tel.: +420 565 659 511 RACOM sales department Contact your respective sales manager or our Sales department (<racom@racom.eu>) RipEX – Radio modem & Router – © RACOM s.r.o.
-
Page 23: Demo Case - Ripex & M!Dge
RipEX Demo case should answer most of your questions regarding the RipEX product and give you a quick and easy summary about the product itself. There are three RipEX units and one M!dge unit in the case. All units are in the default state. See the following chapters for a detailed description. -
Page 24: Demo Case
M!DGE accessories • 1× Whip antenna (900–2100 MHz, 2.2dBi, vertical) 3.3. Programming RipEX via Computer To configure a RipEX you can connect it to your PC in two ways: http://www.racom.eu/download/hw/ripex/free/eng/7_supplies/MW_AD-155-spec.pdf http://www.racom.eu/download/hw/ripex/free/eng/7_supplies/12FGH23.pdf RipEX – Radio modem & Router – © RACOM s.r.o. - Page 25 The ETH/USB contains a built-in DHCP server, so if you have a DHCP client in your PC as most users, you don’t need to set anything up. The RipEX’s IP address for access over the ETH/USB adapter is fixed: 10.9.8.7.
- Page 26 Fig. 3.3: PC address setting Note: When you change the RipEX ETH address from the default value later on and the new IP network does not include the default one, you will have to change your PC's static IP again to be able to continue configuring the RipEX.
- Page 27 IP address unknown If you don’t have the adapter or you have forgotten the password, you can reset the access para- meters to defaults, see chapter Reset button in RipEX manual. http://www.racom.eu/eng/products/m/ripex/product.html#reset © RACOM s.r.o. – RipEX – Radio modem & Router...
-
Page 28: Ripex General Overview
Demo Case – RipEX & M!DGE 3.4. RipEX General Overview RipEX Demo case gives you the most straightforward way to discover and understand all RipEX features and functionalities. Pay attention to the Settings tab, where one can set most configuration parameters. - Page 29 After successful connection to the RipEX unit, go to the Wizards menu. Fig. 3.7: Wizard menu Leave everything in the default state except IP address and unit name. See the example for RipEX A. Fig. 3.8: Wizard menu – IP address Fig.
-
Page 30: Ripex Practical Tests
Demo Case – RipEX & M!DGE Fig. 3.10: Wizard menu – Applying the changes Repeat the procedure for other RipEX units. Do not forget to use the appropriate IP addresses and Unit names. 3.6. RipEX Practical Tests Since the best way to understand the product is through practice, we have described a few practical tests you may wish to conduct. - Page 31 PER/BER, RSS, Data Quality (DQ) and Round Trip Time (RTT) histogram. It can be very useful during RipEX unit installation and coverage optimisation. Please read the detailed Ping report description by clicking on the Help question mark.
- Page 32 Fig. 3.13: End-to-End Connectivity test RipEX units are already configured in the Bridge mode. We need to configure PCs with unique IP ad- dresses within the network subnet (192.168.1.0/24). For example 192.168.1.10 for PC 1 and 192.168.1.254 for PC 2. A description of how to set a static IP address in your Windows PC can be found in Section 3.3, “Programming RipEX via Computer”.
- Page 33 Remote station over the radio channel. The trick is that we do not transfer static data (e.g. web page graphical objects). All static data are downloaded from the local RipEX and only inform- ation specific to the remote RipEX is transferred over the radio channel.
- Page 34 To test this feature, just click on the Fast remote access button at the top of the screen, fill in the remote RipEX IP Ethernet address and click on the Connect button. In the following example, we are locally (Ethernet) connected to RipEX A and we want to connect re- motely to RipEX B.
- Page 35 3.6.3. Alarm Management – Fan Kit The Demo case also contains Fan kit connected to the RipEX A using HW alarm output, see Fig. 3.18, “Fan kit using Alarm Output”. Generally you can define when RipEX is in the alarm state. E.g. When the temperature is out of set interval, HW alarm output will be "on"...
- Page 36 We can now define that we want the Fan kit to turn on whenever the temperature drops under 25 °C or raises over 26 °C. Go to the Settings menu and click on the Alarm management button. RipEX – Radio modem & Router – © RACOM s.r.o.
- Page 37 Demo Case – RipEX & M!DGE Fig. 3.20: Alarm management location RipEX in the default state does not control the Fan kit. We need to set the following parameters: • Threshold to "Manual" • HW Alarm Output to "N.O. (Normally opened)"...
-
Page 38: Ripex Diagnostic
Fig. 3.22: RipEX temperature out of its threshold range The Fan kit can be turned on permanently. See the RipEX manual for more details, Chapter Fan kit 3.7. RipEX Diagnostic RipEX web interface is equipped with comprehensive and detailed statistics and graphs. One could say, there is an embedded NMS (Network Management System) within RipEX. - Page 39 The quick value descriptions are displayed in the balloon tips (place the cursor on any column header). The detailed description can be read in the respective Help. © RACOM s.r.o. – RipEX – Radio modem & Router...
- Page 40 (Chapter Section 3.6.3, “Alarm Management – Fan Kit”). When detail graph start has been activated for Fan kit test, you can see the details before and after alarm occurs. RipEX – Radio modem & Router – © RACOM s.r.o.
- Page 41 3.7.4. Monitoring Monitoring is an advanced on-line diagnostic tool, which enables detailed communication analysis over any RipEX interface. In addition to all physical interfaces (Radio, Ethernet, COM1 and COM2), several internal interfaces between software modules can be monitored. Go to the Diagnostic → Monitoring menu and just click on the Start button. In the default settings, it will display packet timing and payload on the Radio channel.
-
Page 42: Ripex Advanced Tests
3.8. RipEX Advanced Tests The Demo case is an ideal tool for conducting laboratory tests and benchmarks, which shows you how the particular application will behave with cooperation with RipEX radio modems. Connecting RTUs and central SW Fig. 3.27: Bench Test... -
Page 43: M!Dge General Overview
○ Configure the RipEX units in the Wizard menu. • Bridge mode with a repeater ○ Configure the RipEX units in the Wizard menu. Set the RipEX B as a repeater. You can check the features described in the RipEX manual, Chapter Bridge Mode: http://www.ra- com.eu/eng/products/m/ripex/ripex-detail.html#bridge_mode ○... - Page 44 Alternative: Instead of using the DHCP, configure a static IP address on your PC (e.g. 192.168.1.10, mask 255.255.255.0) so that it is operating in the same subnet as the M!DGE. The PC settings are very similar to the description in Chapter Section 3.3, “Programming RipEX via Computer”.
-
Page 45: Basic M!Dge Configuration
If you have a SIM card inserted and you are logged into the M!DGE unit, we can proceed with a basic Mobile configuration steps. SIM Configuration Go to the INTERFACES → Mobile → SIMs menu and click on the Edit button. © RACOM s.r.o. – RipEX – Radio modem & Router... - Page 46 SIM state set to ready. Fig. 3.30: SIM state ready The next step is to click on the Network submenu to check whether we are successfully registered into the mobile network. RipEX – Radio modem & Router – © RACOM s.r.o.
- Page 47 Now go to the Interfaces menu in the left section (Mobile menu) and click on the Add button. Fig. 3.32: Add the Mobile interface Fill in all appropriate values. You should get these values from your mobile operator. © RACOM s.r.o. – RipEX – Radio modem & Router...
- Page 48 The router should be connecting to the network now. Check whether the mobile connection is enabled in the INTERFACES → WAN → Link Management menu. You should have a WWAN1 interface se- lected as permanently connected. Fig. 3.34: WWAN1 Establishment Mode RipEX – Radio modem & Router – © RACOM s.r.o.
-
Page 49: Practical Tests
It depends on the SIM and APN settings. Go to the SYSTEM → Troubleshooting → Network Debugging menu. Fill in the Host IP address and other parameters and click on the Start button. © RACOM s.r.o. – RipEX – Radio modem & Router... - Page 50 Fig. 3.37: Ping results Note Once you can access public Internet IP addresses, you can also run your Web browser and fill in e.g. www.racom.eu to see our website. http://www.racom.eu RipEX – Radio modem & Router – © RACOM s.r.o.
- Page 51 M!DGE unit and the remote RipEX unit. The ping packets are transmitted over the Ethernet cable to the local RipEX and via the radio link to the remote RipEX and back again. © RACOM s.r.o. – RipEX – Radio modem & Router...
- Page 52 When the capturing is done, you can open the saved PCAP file in Wireshark or a similar program. RipEX – Radio modem & Router – © RACOM s.r.o.
- Page 53 Fig. 3.41: M!DGE darkstat tool We can see for how long the tool is running, how many packets/bytes have been stored and four graphs with different intervals. See the following example. © RACOM s.r.o. – RipEX – Radio modem & Router...
- Page 54 In the Tech Support menu, you can generate and download a tech support file, which you should send to our support team to speed up resolving the issue. RipEX – Radio modem & Router – © RACOM s.r.o.
-
Page 55: M!Dge Advanced Tests
○ Connection Supervision is used for switching between several connections if available. In addition it is possible to set an emergency action in case that no connection is available for a specified length of time. ○ For more details, see the M!DGE manual: © RACOM s.r.o. – RipEX – Radio modem & Router... -
Page 56: Summary
• And many others... 3.14. Summary We have described just a few examples of Demo case usage. Feel free to download the RipEX User manual from http://www.racom.eu/download/hw/ripex/free/eng/ripex-m-en.pdf or the Application notes from http://www.racom.eu/download/hw/ripex/free/eng/ripex-app-en.pdf to conduct further tests. With your M!DGE 3G router, you can easily extend the RipEX UHF/VHF network. Download the M!DGE manual from http://www.racom.eu/download/hw/midge/free/eng/midge-m-en.pdf or the Application...
Need help?
Do you have a question about the RipEX and is the answer not in the manual?
Questions and answers