
Related Manuals for MERLYN ARYSTO


Summary of Contents for MERLYN ARYSTO
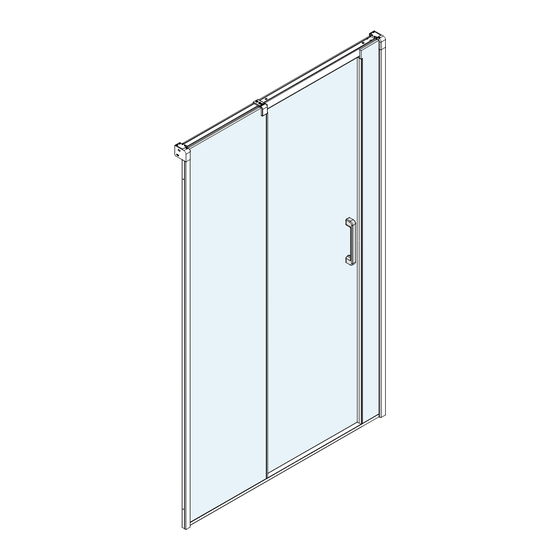
- Page 1 3 PANEL SLIDING DOOR MERLYN Merlyn Showering Unit 8, Purcellsinch Industrial Park, Dublin Road, Kilkenny, Ireland. Tel: 00353 56 779 1555 INSTALLATION GUIDE Fax: 00353 56 779 1576 www.merlynshowering.com...
- Page 2 IMPORTANT: Please read the complete instructions before commencing fitting . Make sure the tray is 100% level in all directions. Check that you have the tools required. Check the installation site is compatible with the sizes of door supplied. Check all the enclosure components are present. Check the installation kit is complete.
- Page 3 Care And Maintenance Guide 19A For cleaning the area between the top rail and the fixed glass panel use the micro fibre cloths and card provided. Using a mild detergent dampen one of the cloths and wrap it around the plastic card provided and push between the rail and the glass.
- Page 4 17A Note the top and bottom of the handle, BOTTOM disassemble and fit outer handle making INSIDE sure to place washers Check the orientation on both side of the of the glass. handle BOTTOM 17B When fitting the inner handle make sure the grub screws are to the bottom.
- Page 5 Aligning moving panel / adjusting rollers 1A Wall profiles are The height and alignment labeled Left and Right of the door can be adjusted so make sure you have using the hex key provided. noted the handing. The The moving panel must be seal should be flush on in the closed position to top and show a gap on...
- Page 6 Max. adjustment on each side is 15mm.Make sure to adjust the fixed panel in the wall 13A Lift the 3A Mark the centre of the slot. profile at the same time as the top rail. moving panel and top rail into the brackets 3B Drill the centre of the slot.
- Page 7 5A Check assembly is plumb and fix to the wall through the bottom 11A Using micro fibre cloth slot first making sure provided thoroughly clean the Second there is no gap inside of the glass around the between the join of the area of the top rail.
- Page 8 Fit the assembly Fix the middle bracket into the threshold. making sure the bolt The edge of the is on the inside. glass should be tight to the cover strip. Inside Inside Check assembly is plumb and fix to the First wall through the 10A Note the labels on the...
Need help?
Do you have a question about the ARYSTO and is the answer not in the manual?
Questions and answers