Advertisement
Quick Links
ISTRUZIONI - INSTRUCTION - ANLEITUNG - INSTRUCCIONES - INSTRUCTIONS
309022 - 309022R
Supporto smartphone/GPS Triumph Rocket 3
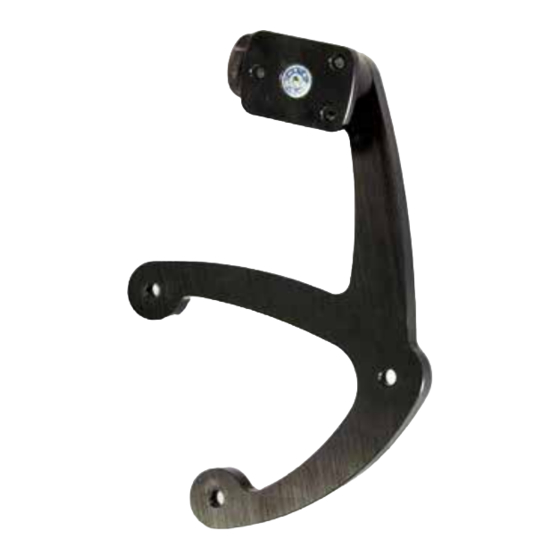
Triumph Rocket 3 mobile/GPS bracket
Smartphone/GPS Halterung für Triumph Rocket 3
Soporte smartphone/GPS para Triumph Rocket 3
Support de smartphone/GPS pour Triumph Rocket 3
Free Spirits Genuine Parts to be fitted by trained technician only
Tel. 0039 (0)445-390437
Email info@freespirits.it
Fax 0039 (0)445-395539
Site: www.freespirits.it
Advertisement

Subscribe to Our Youtube Channel
Related Manuals for Free Spirits 309022


Summary of Contents for Free Spirits 309022
- Page 1 Triumph Rocket 3 mobile/GPS bracket Smartphone/GPS Halterung für Triumph Rocket 3 Soporte smartphone/GPS para Triumph Rocket 3 Support de smartphone/GPS pour Triumph Rocket 3 Free Spirits Genuine Parts to be fitted by trained technician only Tel. 0039 (0)445-390437 Email info@freespirits.it Fax 0039 (0)445-395539...
- Page 2 ATTENZIONE ! - ATTENTION ! - ACHTUNG ! - ATENCIÓN ! - ATTENTION ! Per le operazioni di smontaggio e rimontaggio di parti originali attenersi scrupolosamente al manuale di officina. For disassemble and replacement OEM parts use the workshop manual Für den Ausbau und den Einbau den OEM Teilen muss man das Werkstatthandbuch aufmerksam befolgen.
- Page 3 IT) Rimuovere i 4 bulloni come da foto. EN) Remove four bolts as photo. S) Retire los cuatro pernos como en la foto. F) Retirer les 4 boulons comme sur la photo. IT) Sollevare e allentare i bulloni come da foto. EN) Lift and loosen the bolts as photo.
- Page 4 IT) Rimuovere la cover come da foto. EN) Remove the cover as photo. S) Retire la cubierta como en la foto. F) Retirer le couvercle comme sur les photos. IT) Rimuovere i bulloni come da foto. EN) Remove bolts as photo. S) Retire los pernos como en la foto.
- Page 5 IT) Alzare il cruscotto e rimuovere i bulloni come da foto. EN) Turn up the dashboard and remove the bolts as photo. S) Levante la Instrumentación y retire los pernos como en la foto. F) Soulever le tableau de bord et retirer les boulons comme sur les photos. IT) Coprire il serbatoio e rimuovere il gancio passacavo.
- Page 6 IT) Rimuovere i bulloni come da foto. EN) Remove bolts as photo. S) Remover el inserto de la custodia como en la foto. F) Retirer les boulons comme sur les photos. IT) (1) Posizionare le rondelle fornite una per lato. (2) Posizionare una coppia di rondelle come da foto.
- Page 7 IT) Rimuovere lo snodo e posizionare la staffa come da foto. EN) Remove the joint and position the bracket as photo. S) Retire la junta y coloque el soporte como en la foto. F) Retirer le joint et positionner le support comme sur les photos. 309022R ATTENZIONE ! - ATTENTION ! - ACHTUNG ! - ATENCIÓN ! - ATTENTION ! Per i dispositivi di navigazione di grandi dimensioni è...
- Page 8 IT) Fissare la boccola alla staffa come da foto. EN) Secure bushing to the bracket as photo. S) Sujete el casquillo al soporte como en la foto. F) Fixer la douille au support comme sur la photo. IT) Applicare la staffa al supporto principale come da foto. EN) Apply bracket to the main support as photo.
- Page 9 IT) Fissare il bullone tcce M6x14 come da foto. EN) Secure M6x14 bolt as photo. S) Fijar el tornillo M6x14 como en la foto. F) Serrer le boulon M6x14 comme sur la photo. FINE - END - ENDE - FINAL - FIN IT) Fissare i bulloni TPSCE M5x25.
- Page 10 IT) Fissare il passacavo come da foto. EN) Secure fairlead hook as photo. S) Asegure el gancho de guía como en la foto. F) Fixer le crochet du guide-câble comme sur la photo. IT) Fissare i bulloni come da foto. EN) Secure bolts as photo case as photo.
- Page 11 IT) Spingere verso il basso il cruscotto e fissare i bulloni. EN) Push down the dash board and secure bolts. S) Empuje el tablero hacia abajo y fije los tornillos. F) Pousser le tableau de bord vers le bas et fixer les boulons. IT) Fissare la cover come da foto.
- Page 12 IT) Fissare tutti i bulloni come da foto. EN) Secure all bolts as photo. S) Asegure todos los tornillos como en la foto. F) Fixer tous les boulons comme sur les photos. IT) Fissare il cupolino. EN) Secure windshield. S) Fijar el parabrisas. F) Fixer le pare-brise.
- Page 13 IT) Rimuovere l’inserto dalla custodia come da foto. EN) Remove the insert from the case as photo. S) Remover el inserto de la custodia como en la foto. F) Retirer l’insert existant sur la coque comme sur les photos. IT) Fissare lo snodo alla custodia e applicarlo alla staffa. EN) Secure joint ball on the case and attach it to the bracket.
- Page 14 IT) Fare attenzione alla tacca nella foto. EN) Pay attention to the notch as photo. S) Presta atención a la muesca en la foto. F) Faites attention à l’encoche sur la photo. IT) Inserire, ruotare di 90° gradi e fissare come da foto. EN) Insert, rotate to 90 degree and secure as shown in the photo.
- Page 17 -La ditta Free Spirits srl non è responsabile dei danni incorsi durante il trasporto. Precisazioni finali -La ditta Free Spirits srl non ha nessuna connessione con i marchi Harley Davidson, Buell e Triumph, e sono usati solo esclusivamente come riferimenti.
- Page 18 -Free Spirits srl company is not responsible for damages during transport. Final revisions -Free Spirits srl company has got no connection with Harley-Davidson, Buell and Triumph brands. They are used only as references. -The BUYER declares to be completely informed that some PRODUCTS in this catalogue could not comply with the Italian Traffic Code or with the Traffic Code of other Countries.
- Page 19 -La empresa Free Spirits srl no es responsable de los daños sufridos durante el transporte. Detalles finales -La empresa Free Spirits srl no tiene ninguna conexión con las marcas Harley Davidson, Buell y Triumph, y son utili- zadas exclusivamente como referencia.
- Page 20 La société Free Spirits srl n’est pas responsable des dégâts occasionnés durant le transport. Conclusion La société Free Spirits srl n’a aucune relation avec les marques Harley-Davidson, Buell et Triumph, elles sont indi- quées seulement à titre de référence. L’ACQUÉREUR déclare être parfaitement informé du fait que certains PRODUITS de ce catalogue pourraient ne pas être conforme au code de la route Italien ou au code de la route d’autres pays.
Need help?
Do you have a question about the 309022 and is the answer not in the manual?
Questions and answers