Advertisement
Table of Contents
- 1 Important Safety Instructions
- 2 Bs Plug Wiring
- 3 Blue - Neutral
- 4 Green and Yellow - Earth
- 5 Important Safeguards
- 6 Installation
- 7 Control Panel
- 8 Remote Control
- 9 Useful Informations
- 10 Sleep Mode
- 11 Night Mode
- 12 Cleaning and Maintenance
- 13 Useful Information
- 14 Storing the Appliance
- 15 Display Codes
- 16 Troubleshooting
- Download this manual
Advertisement
Table of Contents

Related Manuals for Ecoair CRYSTAL MK2 12K


Summary of Contents for Ecoair CRYSTAL MK2 12K
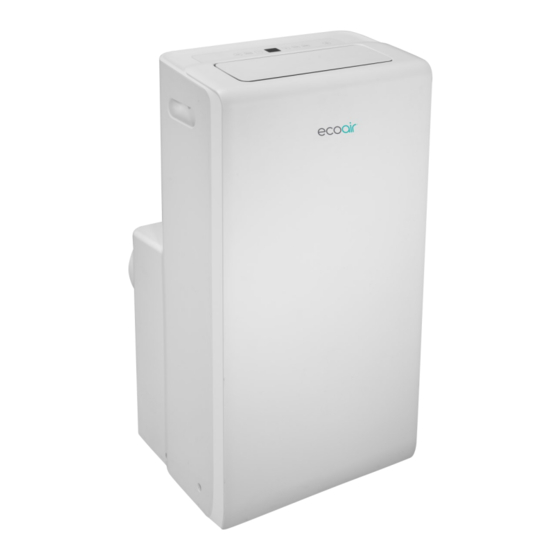
- Page 1 CRYSTAL MK2 12K PAC-100017 PORTABLE AIR CONDITIONER USER MANUAL Please read instructions before use Keep for future reference Visit ecoair.org to register your product @2021 EcoAir...
- Page 3 5 - 6 Installation 7 - 8 Setup Continuous Drainage for Dry Mode Setup Excess Drainage for Dry Mode & H8 Control Panel Remote Control Timer Sleep & Night Modes Wifi Cleaning & Maintenance Storing the Appliance Display Codes Troubleshooting @2021 EcoAir...
-
Page 4: Important Safety Instructions
• The appliance must be installed in accordance with the relevant national legislation. • Should repairs be necessary, contact EcoAir’s Authorised Service Centre. Self-servicing or unauthorised servicing can be dangerous. • The appliance is not intended for use by persons (including children) with reduced physi-... - Page 5 Keep any required ventilation openings clear of obstructions. Never attempt to service or repair the appliances yourself, always ensure it is only serviced by a EcoAir approved engineer using original EcoAir parts. If these appliances are installed, operated or stored in a non-ventilated area, then the room must be designed to prevent the accumulation of refrigerant leaks.
-
Page 6: Bs Plug Wiring
If a 13A (BS 1363) fused plug is used it must be fitted with a 13A -fuse. If in doubt consult a qualified electrician. Please note the Earth, Neutral and Live Terminals are marked as E , N and L respec- tively. Page 3 @2021 EcoAir - V2.0 All rights reserved (E&OE) - Page 7 Cable Tidy Cable Tidy Screw x 2 Power Cord Filter User Manual Air Inlet Grille Remote Control Drainage Connector Continuous Drainage Port Continuous Drainage Hose 14mm (not included) Excess Drainage Port Page 4 @2021 EcoAir - V2.0 All rights reserved (E&OE)
-
Page 8: Important Safeguards
Do not place objects on or cover the appliance. FIG 2. Allow at least 50cm of air space on all sides of the appliance for good ventila- tion to avoid overheating. FIG 3. FIG 2. FIG 1. FIG 3. Page 5 @2021 EcoAir - V2.0 All rights reserved (E&OE) - Page 9 3. Ensure that the hose is as straight as possible to ensure the heat is discharged efficiently. If there are kinks in the exhaust hose, the heat will not be dis- charged properly, causing it to overheat which can cause permanent malfunc- tion. Page 6 @2021 EcoAir - V2.0 All rights reserved (E&OE)
-
Page 10: Installation
EXHAUST HOSE Attach Joint A (B1) to Exhaust Hose (B2) Attach Joint B (B3) to Exhaust Hose (B2) Joint A (Hose to AC) Exhaust Hose B2 Exhaust Hose B2 Joint B Page 7 @2021 EcoAir - V2.0 All rights reserved (E&OE) - Page 11 STEP 6B. DISCHARGE EXHAUST HOSE (B2) THROUGH A WINDOW GAP Pre-seal the window with a Window Seal Nylon Cloth (available for purchase) Pass the exhaust hose B2 (with or without Joint B B3 attached) through the zipped opening. Page 8 @2021 EcoAir - V2.0 All rights reserved (E&OE)
- Page 12 Drainage port Do not submerge the end of the drainage hose in water (this will cause back pressure and the Drainage hose water will not drain. Page 9 @2021 EcoAir - V2.0 All rights reserved (E&OE)
- Page 13 Turn off the appliance and unplug from the socket Remove the plug from the bottom drainage port Attach a 14 mm hose Drain the water Reinsert the plug Excess Drainage Port A9 Page 10 @2021 EcoAir - V2.0 All rights reserved (E&OE)
-
Page 14: Control Panel
The display does not show any information FAN MODE Turn appliance on Select FAN mode Select your desired fan speed (Low, Med, High, Auto) The display does not show any information Page 11 @2021 EcoAir - V2.0 All rights reserved (E&OE) -
Page 15: Remote Control
When appliance is not in use for a long time, please remove batteries. If there is no display on the remote control, please replace batteries. Health button only applies to selected models. Page 12 @2021 EcoAir - V2.0 All rights reserved (E&OE) - Page 16 1. When a timer has been set, simply press the TIMER button to clear 2. The appliance will beep and the TIMER indicator light switches OFF on the control panel Page 13 @2021 EcoAir - V2.0 All rights reserved (E&OE)
-
Page 17: Sleep Mode
3. Hold the + and FAN button simultaneously until the Night Mode symbol disappears on the remote control. 4. To turn the control panel lights back on, press + and FAN button simultane- ously again. Page 14 @2021 EcoAir - V2.0 All rights reserved (E&OE) - Page 18 The WIFI icon will show on the remote control and the control panel when it is turned on. B Installing the WIFI APP Install the WIFI APP For up to date detailed information visit ecoair.org/pages/support CHILD LOCK (ON REMOTE CONTROL ONLY)
-
Page 19: Cleaning And Maintenance
Use vacuum cleaner, brush or water to clean The filter should be cleaned at least once the filter. every two weeks. For dusty environment, you should increase the cleaning frequency . Page 16 @2021 EcoAir - V2.0 All rights reserved (E&OE) -
Page 20: Storing The Appliance
1. Gently slide the battery cover to remove. 2. Replace two (AAA 1.5V) dry batteries and make sure the positions of plus and minus polar are correct. 3. Re-attach the cover of battery box. battery cover Page 17 @2021 EcoAir - V2.0 All rights reserved (E&OE) -
Page 21: Display Codes
Communication malfunction Poor connection between the indoor between indoor unit and unit and the inspection board. inspection board The main board of indoor unit is damaged. The inspection board is damaged. Page 18 @2021 EcoAir - V2.0 All rights reserved (E&OE) -
Page 22: Troubleshooting
Exhaust hose too long or not installed • Check Exhaust hose length is within properly 1.5m and elevation is within 130cm Water sound in the • Refrigerant or water flowing sound • Normal action appliance Page 19 @2021 EcoAir - V2.0 All rights reserved (E&OE) - Page 24 66129937315...
Need help?
Do you have a question about the CRYSTAL MK2 12K and is the answer not in the manual?
Questions and answers