Table of Contents
Advertisement
Quick Links
Room Air Conditioners
Bravo Range Split Type
Professional System
ECO911S
ECO1211S
ECO1811S
ECO2411S
Register your air conditioner
Model information can be found on the CE
label.
Please register your product online at
www.ecoair.org. For your future
convenience, record the model information
below.
____________________________________
MODEL NUMBER
____________________________________
SERIAL NUMBER
____________________________________
PURCHASE DATE
Advertisement
Table of Contents

Subscribe to Our Youtube Channel
Related Manuals for Ecoair ECO911S


Summary of Contents for Ecoair ECO911S
- Page 1 ECO911S ECO1211S ECO1811S ECO2411S Register your air conditioner Model information can be found on the CE label. Please register your product online at www.ecoair.org. For your future convenience, record the model information below. ____________________________________ MODEL NUMBER ____________________________________ SERIAL NUMBER ____________________________________...
-
Page 2: Safety Precautions
WARNING: Before operating your unit WARNING Make sure the wiring is adequate for your unit. Before you install or relocate this unit, be sure that the amperage rating of Electrical Shock Hazard the circuit breaker complies with the amp rating listed in Figure 1. Always consult a qualified electrician regarding the power supply to the appliance. -
Page 3: Bs Plug Wiring
BS Plug Wiring (For models up to 12000 Btu) Wiring Instructions: Should it be necessary to change the plug please note the wires in the mains lead are coloured in accordance with the following code : BLUE - NEUTRAL BROWN – LIVE GREEN AND YELLOW - EARTH As the colours of the wires in the mains lead of this appliance may not correspond with the coloured markings identifying the terminals in your plug, proceed as follows:... -
Page 4: Table Of Contents
Congratulations! You have purchased the very latest in room air conditioner technology. Your new EcoAir high efficiency room air conditioner will give you many years of dependable service. Many features have been built into your EcoAir air conditioner to assure quiet operation, the best circulation of cool, dry air, functional controls, and the most economical operation. -
Page 5: Operation And Maintenance Notices For Operation
Operation and maintenance-notices for operation ★ ★ ★ Earth: The ground Be sure to remove the power Select the most appropriate tem- be connected! plug when not using the air co- perature. nditioner for a long time. Keep room cool- er than outside about 5 degree. -
Page 6: Notices For Operation
Notices for operation ★ ★ The airflow direction can be adjusted appro- If the supply cord is damaged, it must be replaced priately. At operating, adjust the vertical airflow by the manufacturer or its service agent or a direction by adjusting the louvers of upward/do- similarly qualified person in order to avoid a wnward direction. -
Page 7: Notices For Use
Notices for use Working principle and special functions for cooling Principle: The air conditioner transfers heat from the indoor area to the outdoor area, thus reducing the indoor room temperature, using heat pump technology. Anti-freezing function: In COOL mode under low ambient temperature, frost will form on the heat exchanger. When the indoor heat exchanger temperature decreases to below 0℃, the indoor unit microcomputer will stop the compressor from running. -
Page 8: Working Temperature Range
Notices for use Working temperature range Indoor side DB/WB( Outdoor side DB/WB( Maximum cooling 32/23 43/ 26 21/15 Minimum cooling 21/- Maximum heating 27/--- 24/18 Minimum heating 20/--- -5/-6 The operating temperature range (outdoor temperature) for cooling unit is 10℃ 48℃;... -
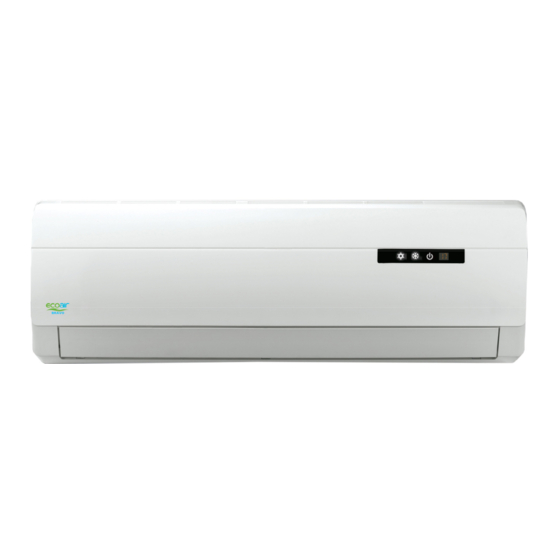
Page 9: Names And Functions Of Each Part
Names and functions of each part Indoor unit Air in ⑴ ⑶ ⑺ ⑹ ⑷ ⑸ Air out The pattern in displayer: ⑵ :Cool ⑴ Power cable :Dry Wireless ⑵ remote control :Heat Remote control :Run ⑶ Front panel :Set temp. ⑷... -
Page 10: Operation Of Remote Control
Operation of wireless remote control Names and functions of wireless remote control Don't drop or throw the remote control; Don't let any liquid the remote control put the remote control directly under the sunlight or Signal transmitter SLEEP SLEEP button ●... - Page 11 - 7 -...
-
Page 12: Operation Of Remote Control
Operation of remote control Guide for operation-general operation 1.Press ON/OFF button to start the unit after powering the main unit on.(Note: The louver will close automatically during Power on). ON/OFF MODE 2.Press MODE button to select desired running mode. 3.Press +/ - button to set the desired temperature (You cannot set the temperature in AUTO mode, it is preset) 4. - Page 13 Operation of remote control ★ About LIGHT Press + and FAN buttons simultaneously for 3 seconds to set the Light on or off. ★ About Blow over heat ★ About lock Press + and - buttons simultaneously to lock or unlock the keyboard. If the remote controller is locked, the LOCK icon will be displayed on it, in which case, press any button, the mark will flicker for three times.
-
Page 14: Emergency Operation
Emergency operation Display indicator light control of indoor unit It's a special selective button for the users, who are not accustomed to the light at sleeping. Press + and FAN buttons simultaneously for 3 seconds to set the Light on or off. Emergency operation If the wireless remote control is lost or broken, please use the manual switch button. -
Page 15: Clean And Care
Clean and care Caution Turn power off and pull out the power plug before cleaning air conditioner, or it may cause ● electric shock. Never sprinkle water on the indoor unit and the outdoor unit for cleaning because it can cause an ●... - Page 16 Clean and care Check before use ① Be sure that nothing obstructs the air outlet and intake vents. ② Check that ground wire is properly connected or not. (Important) ③ Check that the batteries of the remote control changed if remote is not working. ④...
-
Page 17: Troubleshooting
Troubleshooting CAUTION Don't attempt to repair the air conditioner by yourself, it can cause an electric shock or fire. Please check the following items before asking for repair, it can save your time and money. Problem Troubleshooting Not operate immediately when the air ●... - Page 18 Troubleshooting Troubleshooting Problem The unit is not • Has the power been shut down? running. • Is power connected properly? • Is the circuit protection device tripped off or not? • Is voltage higher or lower? (Tested by professionals) • Is the TIMER correctly used? Breaking off •...
- Page 19 Troubleshooting Problem Troubleshooting No air delivery from indoor unit. ● In HEAT mode, when the indoor temperature is very low, air delivery will be delayed for up to 5 minutes. ● In HEAT mode, when the outdoor temperature is low or high humidity, frost may form on the outdoor heat exchanger.
-
Page 20: Notices For Installation
Notices for installation Important Notices Installation work must be done by competent or qualified persons according to local rules and this manual. All electric supply to the unit must be carried out by qualified electrician. Reinstallation of the unit must be carried out by qualified persons. The appliance must be positioned so that the power supply is accessible. - Page 21 Notices for installation Outdoor Unit Installation Position Selection Select a location from which noise and outflow air emitted by unit will not be a nuisance to neighbours, animals or plants. Select a location where there should be sufficient ventilation. Select a location where there should be no obstructions to the inlet and outlet vent. The location should be level and able to withstand the full weight and vibration of the outdoor unit and permit safe installation.
- Page 22 - 18 -...
-
Page 23: Install Indoor Unit
Install indoor unit Install the rear panel 1.Always mount the rear panel horizontally. The outlet of water tray should be adjusted slightly downward when installing to enable gravity flow of condensation externally. 2.Fix the rear panel on the wall with screws. (Where is pre-covered with plastic granula) 3.Be sure that the rear panel has been fixed firmly enough to withstand the weight of an... - Page 24 Install indoor unit NOTE: Where the electric cable length is not long enough, replace with another that is long enough as joints on the cables are to be avoided. Ensure the replacement cable is of the same quality and diameter. The electric wiring must be correctly connected, wrong connection will cause malfunction.
-
Page 25: Install Outdoor Unit
Install outdoor unit Electric wiring Disassemble the handle on the outdoor unit right side plate. Take off cord anchorage. Connect and fix power connect cord (for cooling and heating unit, connect and fix power connect cord and signal control wire)to terminal block. Fix the power connection cable with cord anchorage, (for cooling and heating unit, use the cord anchorage to fix the power... -
Page 26: Check After Installation And Test Operation
Check after installation and test operation Check after installation Items to be checked Possible malfunction Has it been fixed firmly? The unit may drop, shake or emit noise. It may cause insufficient cooling(heating) Have you done the refrigerant leakage test? capacity It may cause condensation and dripping. -
Page 27: Installation And Maintenance Of Healthy Filter
Installation and Maintenance of Healthy Filter Installation Instructions 1. Forcibly pull the front panel for a specific angle from the two ends of the front panel according to the arrow direction. Then pull the air filter downwards to remove it. (See Fig. a) Fig. - Page 28 ONE (1) YEAR LIMITED WARRANTY SAVE THIS WARRANTY INFORMATION EcoAir guarantees this product free from defects in materials and workmanship for a period of one (1) year from the date of purchase, limited to parts only. Faults arising from a faulty installation is specifically excluded.
Need help?
Do you have a question about the ECO911S and is the answer not in the manual?
Questions and answers