
Related Manuals for Ecoair GELO


Summary of Contents for Ecoair GELO
- Page 1 GELO 9000Btu Portable Air Conditioner WIFI Enabled C372—180328 Local Air Conditioner...
- Page 2 As of the production date of this air conditioner this manual is the most the up to date version. This manual maybe subject to change post produc- tion without notice. Please visit www.ecoair.org for the most up to date version of this manual.
-
Page 3: Table Of Contents
INDEX Congratulations! You have purchased the very latest in room air conditioning technology. Your new EcoAir high efficiency room appliance will give you many years of dependable service. Many features have been built into your EcoAir portable appliance to assure quiet operation, the best circulation of cool and dry air, functional controls and the most economical operation. -
Page 4: Bs Plug Wiring
Wiring for a 13 Amp Plug (BS1363) Please note. The Earth Terminal is marked with the letter E or Earth Symbol. Earth - (Green/Yellow) Neutral - N (Blue) Live - L (Brown) © 2018 EcoAir All rights reserved... -
Page 5: Important Safety Instructions
This air conditioner is for use in domestic households and similar working as well as residential environments and is not for outdoor use. It must be used only as a domestic appliance. EcoAir cannot be held liable for damage resulting from incorrect or improper use or operation... -
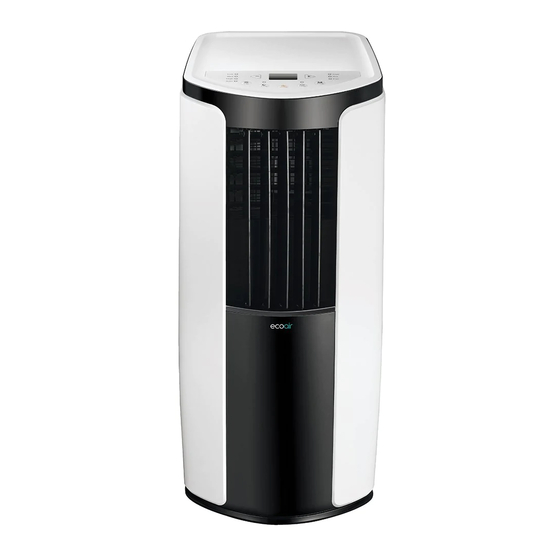
Page 6: Introduction
FRONT Control panel Guide louvre (manual) Swing louvre (manual) Castor Power cord hanger Plug of power cord Filter Air Inlet Joint A Discharge pipe Joint B+C (see page 10, step 2) REAR Remote Control © 2018 EcoAir All rights reserved... -
Page 7: Installation
Bottom drainage pipe battery (2) (AAA 1.5V) remote control (10mm) user manual drainage connector TOOLS NEEDED FOR INSTALLATION cross screwdriver straight screwdriver measurement tape scissors pencil © 2018 EcoAir All rights reserved... - Page 8 STEP 2. Attach the drain hose pipe clamp to the back pan- Rubber Plug el of the appliance near the bottom drainage port with the Pipe clip screw provided. Drainage pipe clamp Drainage pipe clamp Drainage pipe Bottom drainage port Drainage clip Screw © 2018 EcoAir All rights reserved...
- Page 9 The end of the drainage hose should not be outside Do not bend or kink the drainage hose. when temperature is below 1°C. IF ABOVE NOT FOLLOWED, APPLIANCE CAN LEAK WATER! Middle drainage port Drainage hose © 2018 EcoAir All rights reserved...
- Page 10 Place the appliance in an area where the temperature will not fall below 16°C. Otherwise the coils will be covered with frost at temperatures below 16°C and this may reduce performance. Note: The appliance has castors for easy movement. © 2018 EcoAir All rights reserved...
- Page 11 Put a 150mm whole through the wall. (outer diameter 142mm) Slide down Joint A to the air outlet Insert the discharge pipe through the hole. Seal the gap between the wall and the discharge pipe. Wall Appliance air outlet © 2018 EcoAir All rights reserved...
- Page 12 STEP 5. DISCHARGE PIPE CONNECTION In order to improve cooling efficiency, make sure the discharge pipe is as short and straight as possi- ble. Do not joint any other discharge pipe to the original pipe. © 2018 EcoAir All rights reserved...
-
Page 13: Installation
2. Drain the water out completely and the appliance should resume operation. Secure the plug and hose back into position. 3. Drain water completely before storage to avoid internal odours and mould. Rubber Plug Pipe clip Drainage pipe clamp Drainage pipe Drainage clip © 2018 EcoAir All rights reserved... -
Page 14: Quick Set Up
DRY: When drying Mode indicator is on, the display shows nothing. Appliance will operate at low speed only. FAN: When fan mode indicator is on, the display shows nothing. The appliance only blows out ambi- ent temperature air. © 2018 EcoAir All rights reserved... - Page 15 Press " WiFi " button to the WiFi function on or off. When the WiFi function is turned on, the " WiFi " icon will be displayed on remote controller; • This function is only available for some models. • In order to connect a handheld smartphone, tablet or laptop please visit www.ecoair.org for further instructions. © 2018 EcoAir All rights reserved...
- Page 16 Remote control signal may be interfered within the room where there is wireless telephone, fluorescent lamp. When appliance is not in use for a long time, please remove batteries. REMOTE CONTROL DISPLAY SCREEN © 2018 EcoAir All rights reserved...
- Page 17 – Heat Mode is not applicable on this unit Button Press button to increase/decrease the set temperature. In AUTO mode, the set tempera- ture is NOT adjustable. When setting Timer On or Timer Off, press button to adjust the time. © 2018 EcoAir All rights reserved...
- Page 18 • This function is only available for some models. • In order to connect a handheld smartphone, tablet or laptop please visit www.ecoair.org for further instructions. Button Press this button to achieve the on and off of healthy and scavenging functions in operation sta- tus.
- Page 19 2 seconds increases or decreases the CLOCK time by 1 mi- nute every 0.5 second and then by 10 minutes every 0.5 second. Press CLOCK button again to confirm the setting, and then will be constantly displayed. © 2018 EcoAir All rights reserved...
- Page 20 Gently pull clip back on the battery cover to remove. Replace two (AAA 1.5V) dry batteries and make sure the positions of plus and minus poles are correct. Re-attach the cover of battery box. Battery Cover © 2018 EcoAir All rights reserved...
-
Page 21: Cleaning & Maintenance
3. USEFUL INFORMATION Use vacuum cleaner, brush or water to clean the The filter should be cleaned at least once filter. every two weeks. For dusty environment, you should increase the cleaning frequency . © 2018 EcoAir All rights reserved... -
Page 22: Troubleshooting
35°C. Make sure the filters are clean. Overload malfunction Increase the room temperature Temperature or humidity is Switch off the appliance until the humidity rises very low again © 2018 EcoAir All rights reserved... - Page 23 Appliance cannot receive signal from controller Remote control signal blocked Move away the obstacles. by obstacles. Remote Control is not sensible Appliance does not respond to Replace the batteries. the remote control. © 2018 EcoAir All rights reserved...
- Page 24 Water Flowing sound from the Refrigerant flowing inside the This is normal. appliance. appliance In the unlikely event of a problem with your product, please refer in the first instance to: ECOAIR TECHNICAL SUPPORT www.ecoair.org/support © 2018 EcoAir All rights reserved...
-
Page 25: Specifications
31.5 Kg Net Dimension (W x H x D) Net weight 315mm x 770mm x 395mm 26.5 Kg Gross weight 30 Kg Gross Dimension (W x H x D) 358mm x 881mm x 463mm © 2018 EcoAir All rights reserved... -
Page 26: Guarantee Card
EcoAir shall not be liable for loss of goods, loss of use, or any special, indirect, consequential or pure eco- nomic loss, costs, damages, charges or expenses. This does not apply for death or personal injury re- sulting from negligence on the part of EcoAir, or for any damage incurred as a result of fraud or fraudu- lent misrepresentation by EcoAir. - Page 28 66129928843...
Need help?
Do you have a question about the GELO and is the answer not in the manual?
Questions and answers