
Related Manuals for Albrecht CDS


Summary of Contents for Albrecht CDS
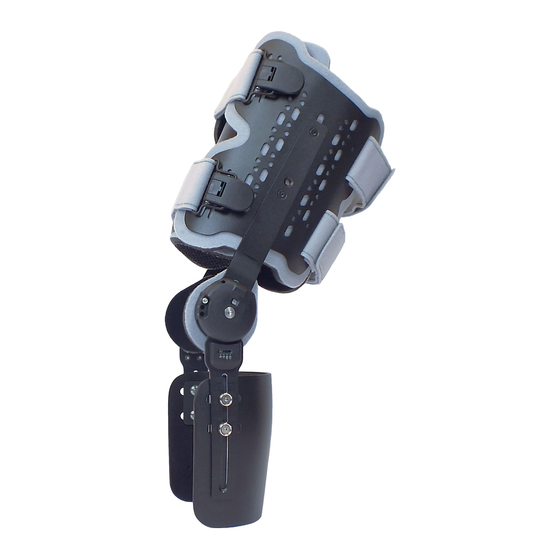
- Page 1 U S E R I N S T R U C T I O N S C D S K N E E B R A C E A M P U TA T I O N ® D Y N A M I C S P R I N G - L O A D E D K N E E O R T H O S I S...
-
Page 2: Table Of Contents
Knee Brace Amputation ® User Instructions Contents 1. Introduction ....................1.1. Foreword ..................... 1.2. Customer information .................. 1.3. Mode of operation ..................1.4. Application ....................1.5. Scope of delivery ..................1.6. Declaration of conformity ................1.7. Features ....................... 1.8. Indications .................... - Page 3 User Instructions 2.3. Attaching of the brace by the orthopaedic technician ......... 2.3.1. Deactivate the spring tension ............2.3.2. Attach the brace to the leg ..............2.3.3. Attaching the additional shell to the thigh and fastening of the straps ....................2.3.4.
-
Page 4: Introduction
User Instructions is not clear, or any instructions, operating procedures or safety information is not fully understandable, please contact the appropriate specialist retailer or albrecht GmbH directly, before you use the brace. This particularly applies to the safety instructions. 1.3. Mode of operation... -
Page 5: Features
User Instructions 1.7. Features 1.8. Indications • Therapy in extension The physician will prescribe the type of treatment to apply based on his or her • Infinitely variable adjustment of the diagnostic findings. redression range between -15° bis +30° Generally, the use is indicated in: •... -
Page 6: Safety Instructions
Knee Brace Amputation ® User Instructions • Currently there is no test for flammability. 1.10. Safety Instructions Exercise caution when using the orthosis in the direct vicinity of open flames such as The optimal effect of the brace is only lighters and cigarettes. -
Page 7: Adjustment By The Orthopaedic Technician
User Instructions 2. Adjustment by the orthopaedic technician 2.1. Fitting to the patient • Our CDS braces are constructed to be adjustable. ® • The position of the shell components can be changed and they can be shaped. • The hinge rods can be adapted to the shape of the extremity by using an orthopaedic bending iron. -
Page 8: Setting The Shell Components
Knee Brace Amputation ® User Instructions 2.1.2. Setting the shell components The shell components are moveable. Loosen the screws on the shell components with the supplied tool without unscrewing them completly. Move the shell components into the desired position. Tighten the screws again. The shell components can be adjusted to the shape of the extremity. -
Page 9: Setting The Limitation
® degrees 0, 15 and 30. In the hole marked with 0 is the stop screw.Then turn the stop screw with the supplied tool from the CDS ® housing. Before screwing it into one of the three holes, bring the brace into flexion, so that the holes are freely accessible. -
Page 10: Fine Adjustment
Knee Brace Amputation ® User Instructions 2.2.1. Fine adjustment Fine adjustment gives you the option of infinitely variable extension limitation. Set the fine adjustment to a value between 0 and -15. The setting reduces the limitation already set by the stop screw. All steps must be executed identically with both hinges... -
Page 11: Inserting The Stop Wedge
User Instructions 2.2.2. Inserting the stop wedge Flexion can be limited with the stop wedge. All steps must be executed identically with both hinges. Before adjusting the flexion limitation you must activate the spring tension. Turn the switches on both hinges to “on”. Bring the brace into flexion until you feel a slight resistance that you have to overcome in order to activate the spring tension. -
Page 12: Attaching Of The Brace By The Orthopaedic Technician
Knee Brace Amputation ® User Instructions 2.3. Attaching of the brace by the orthopaedic technician 2.3.1. Deactivate the spring tension Before attaching the brace you must deactivate the spring tension. Turn the switches on both hinges to “off”. Bring the brace as far into flexion as the patient is allowed to move. Now, the activation mechanism of the hinge is set to this the position and the patient can reactivate the spring tension in this postion. -
Page 13: Attach The Brace To The Leg
User Instructions 2.3.2. Attach the brace to the leg The patient bends the leg to an angle of about 30° to 45°. Now attach the brace to the patient’s leg from in front. Ensure that the pivots of the brace hinges match the physiological pivots of the knee. -
Page 14: Attaching The Additional Shell To The Thigh And Fastening Of The Straps
Knee Brace Amputation ® User Instructions 2.3.3. Attaching the additional shell to the thigh and fastening of the straps Position the additional shell at the thigh. Please make sure that the additional thigh shell is positioned within the lateral thigh shell. Place the anterior distal thigh strap over the additional shell and fasten the buckles. -
Page 15: Final Adjustment
User Instructions Attach the calf shell to the patient’s calf and correct the position if necessary. 2.3.4. Final adjustment After fastening the individual straps, check that the straps are the correct length and that the brace is in the correct position, and correct if necessary. Ensure that the straps are not too tight so as not to interfere with the circulation. -
Page 16: Activate The Spring Tension
Knee Brace Amputation ® User Instructions 2.3.5. Activate the spring tension To activate the spring tension, turn the switches on both hinges to “on”. Bring the brace into flexion until you feel a slight resistance that you have to overcome in order to activate the spring tension. The intensity of the spring tension is not altered by activation or deactivation of the spring tension. -
Page 17: Setting The Spring Tension To The Intensity Needed By The Patient
User Instructions 2.3.6. Setting the spring tension to the intensity needed by the patient The spring tension setting is displayed on the CDS housing by a scale from 0 ® to 15. The ranges above 15 and below 0 are marked in red. -
Page 18: Changing The Spring Tension
Knee Brace Amputation ® User Instructions Torque in Nm Drehmoment in Nm bei Beugung 90° Einstellungsstufen Settings 2.3.7. Changing the spring tension The spring tension can be adjusted according to the treatment progress. Insert the tool as far as it will go into the side hole on the hinge. By turning clockwise or towards + the spring tension is increased and it is decreased by turning anticlockwise or towards -. -
Page 19: Handling By The Patient
User Instructions 3. Handling by the patient 3.1. Removing the brace 3.1.1. Deactivate the spring tension Before removing the brace you must deactivate the spring tension. To do so, turn the switches on both hinges to “off”. Bring the brace into flexion. www.albrechtgmbh.com... -
Page 20: Open The Buckles Of The Straps (On Upper And Lower Shells)
Knee Brace Amputation ® User Instructions 3.1.2. Open the buckles of the straps (on upper and lower shells) Due to the user-friendly buckle system it is not necessary to open the hook and loop fasteners when fitting and removing the brace. To fit the brace, simply undo the buckles and open the anterior straps of the brace. -
Page 21: Putting On The Brace
User Instructions 3.2. Putting on the brace Close the clips in the stated order. Place the brace on your leg from behind. Position the additional shell at the thigh. Close the clips in the stated order. To activate the spring tension, turn the green switch to “on”. Bring the brace into flexion. -
Page 22: Cleaning, Maintenance And Disinfection
Knee Brace Amputation ® User Instructions 4. Cleaning, maintenance and disinfection The orthosis is designed to be maintenance-free. To ensure proper operation over the period of treatment the orthosis should be cleaned regularly (at least every 3 months) or as required, according to the following instructions. -
Page 23: Technical Data
User Instructions 5. Technical data Name Material Padding material PU foam with PA hook and loop velour Strap material PA strap with PA hook and loop velour Brace material Aluminium, Calf element ABS Weight 1256g (Medium) 6. Size chart and article numbers Length of thigh Length of lower Circumference... -
Page 24: Transfer Of The Brace
Knee Brace Amputation ® User Instructions 7. Transfer of the brace The brace is not intended for single use, but rather is intended for multiple use by a single person. We do not recommend transfer to other users. Should this be desired however, please ensure to pass on the care and cleaning instructions and have the brace checked by an authorized specialist dealer for safe and proper operation. - Page 25 User Instructions www.albrechtgmbh.com...
- Page 26 Knee Brace Amputation ® User Instructions...
- Page 27 User Instructions www.albrechtgmbh.com...
- Page 28 P A T E N T S : E P 0 8 4 1 0 4 4 U S 5 , 9 5 4 , 6 7 7 E P 3 3 5 2 7 1 3 F U R T H E R P A T E N T S P E N D I N G V E R S I O N : E N 0 9 .
Need help?
Do you have a question about the CDS and is the answer not in the manual?
Questions and answers