Table of Contents
Advertisement
Advertisement
Table of Contents

Related Manuals for Matrix SPARSH VP210


Summary of Contents for Matrix SPARSH VP210
- Page 3 SPARSH VP210 Entry Level IP Phone User Guide...
- Page 4 Neither Matrix Comsec nor its affiliates shall be liable to the purchaser of this product or third parties for damages, losses, costs or expenses incurred by the purchaser or third parties as a result of: accident, misuse or abuse of this product or unauthorized modifications, repairs or alterations to this product or failure to strictly comply with Matrix Comsec's operating and maintenance instructions.
-
Page 5: Table Of Contents
How to read the User Guide ..........................1 Know Your SPARSH VP210..........................4 Compatibility Version of Servers ........................10 Getting Started with SPARSH VP210 ......................11 Protecting the Phone and Yourself ........................11 Connecting and Configuring SPARSH VP210.................... 14 Connecting the Phone ............................14 Phone Home Screen............................. - Page 6 Call Transfer ..............................41 One Touch Transfer ............................43 Call Toggle ................................ 44 Conference 3-Party ............................45 Multiparty Conference ............................47 Auto Callback (ACB) ............................49 Auto Redial ................................ 50 Account Code ..............................51 Barge-In ................................52 Call Chaining ..............................53 Call Park ................................
- Page 7 Settings................................ 114 User Password ..............................117 Phone Settings ..............................118 Network Settings ............................. 119 Phone Info ............................... 124 PCAP ................................125 Appendix ..............................126 Frequently Asked Questions (FAQs) ......................126 Troubleshooting Tips ............................129 Technical Specifications ..........................130 Warranty Statement ............................132 Regulatory Information ............................
-
Page 8: Introduction
Introduction CHAPTER 1 This User Guide provides you all the necessary information about the SPARSH VP210 such as, installing and connecting the phone, using the phone for making/receiving calls and accessing the features of the System Intended Audience This User Guide is intended for the end-users, who will use the phone. They may be executives, include personnel of small and medium businesses, large enterprises, front desk and service staff of Hotels/Motels, hospitals, and other commercial and public organizations/institutions. - Page 9 Terminology Throughout this User Guide, the terms “Phone” are used synonymously to denote SPARSH VP210. Only for phone specific features the respective phone name is mentioned. Some specific terms used in this User Guide are defined below: •...
- Page 10 If you encounter any technical problems or have any issues regarding the System, please contact your Dealer/ reseller or the Matrix Customer Care. You can also refer the respective Server System Manual for further clarifications. The documentation can be found https://www.matrixtelesol.com/product-manuals.html...
-
Page 11: Know Your Sparsh Vp210
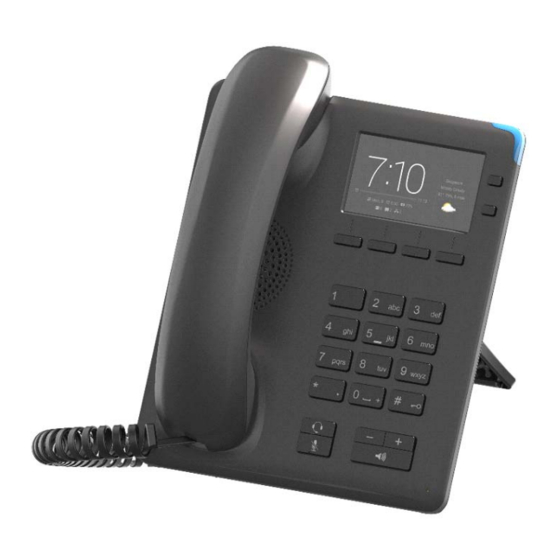
Know Your SPARSH VP210 CHAPTER 2 SPARSH VP210, the Entry Level IP Phone sets the benchmark for quality performance with elegant design and crystal-clear voice. SPARSH VP210 features a 128 x 64 Graphical LCD Display, SIP Line Keys, High Quality speaker-phone and high definition audio quality. - Page 12 Front View LCD Screen Ringer LED Navigation/Notification Keys Context Sensitive Key Dial Pad Volume Increase Key Volume Decrease Key Speaker Key Mute Headset Key Handset Matrix SPARSH VP210 User Guide...
- Page 13 The IP phone should be used with Matrix original power adapter (5V/0.6A) only. LCD Display The LCD display of the phone is Dot Matrix Graphic LCD. The LCD backlight can be turned on and off as well as adjusted for contrast and brightness from the “Customizing Your SPARSH VP210”...
- Page 14 Reply, Call Forward - Busy/No Reply, Call Forward - Not Registered. Dynamic Lock To change the Toll Control level of the phone. User Status To set User Present or Absent. Keypad Lock To lock the keypad of the phone. Matrix SPARSH VP210 User Guide...
- Page 15 Press the Select Key to select the desired Menu option. • Scroll by pressing the Up/Down Navigation Key to reach the desired sub-menu option. • Press the Select Key to select the desired sub-menu option. Matrix SPARSH VP210 User Guide...
- Page 16 Press Back Key. Go ON-Hook. To scroll Up or Down you need to use the Up/Down Navigation Keys. To scroll sideways, you need to use the Left Navigation < Context Key or Right Navigation > Key. Matrix SPARSH VP210 User Guide...
-
Page 17: Compatibility Version Of Servers
Compatibility Version of Servers Compatibility is an essential element for interactions between the Server and the client. The following table lists, version of the Servers compatible with SPARSH VP210. Clients Version SARVAM UCS ENT V1R6.7 and later SARVAM UCS SME V1R6.7 and later... -
Page 18: Getting Started With Sparsh Vp210
The phone can be powered from an AC supply or from the LAN network (PoE). • If you power the phone from an AC supply, purchase the power adapter from Matrix. The use of any third- party power adapter may cause damage to the phone. Damages to the phone caused by using other power adapters are not covered by Matrix warranty. - Page 19 When using external devices like the headset, cables, connectors with the phone, always ensure that they are of good quality, so that phone's performance is not affected. Matrix does not guarantee the performance of external devices with the phone, as it has no control over the quality of external devices, cables and connectors.
- Page 20 VoIP data and reconstruct a conversation. Though at present such activity may be a rare occurrence, it may increase as the deployment of VoIP spreads wider. Educate yourself further on the security risks involved in using VoIP and how to protect yourself. Matrix SPARSH VP210 User Guide...
-
Page 21: Connecting And Configuring Sparsh Vp210
“Package Contents”. • You can mount the phone on desk at a convenient location. Mount SPARSH VP210 on the Desk, • You can attach the Foot Stand in the following ways — at an angle of 45 degrees or 55 degrees... - Page 22 55 Degrees • Decide which of these positions would work for you best and accordingly attach the Stand. Refer to the diagram below for connectivity. Matrix SPARSH VP210 User Guide...
- Page 23 If both the power options, that is, PoE as well as Power Adapter are available to the phone, then the phone will derive power from the PoE enabled LAN Switch. The IP phone should be used with Matrix original power adapter (5V/0.6A) only. The use of any third-party power adapter may cause damage to the phone.
- Page 24 • Press OK Key, if you want the message to re-appear when you press the Dir, Logs, Fwd or Menu Key. • Press Ack Key, if you do not want the message to appear again. Matrix SPARSH VP210 User Guide...
-
Page 25: Phone Home Screen
Displays your Name and/or Number. It will display beside the User User Information Information when you have set your status as Absent. Refer “Presence”. System Date and Time Displays the System Day, Date and Time. Matrix SPARSH VP210 User Guide... - Page 26 Notification Key 1 - For Notifications — Call Back, Auto Redial, Trunk Reservation and Contact Sync. Notification Keys Notification Key 2 - To access any pending incoming or held call. Refer “Accessing an Active Call from the Home Screen”. Matrix SPARSH VP210 User Guide...
- Page 27 “Making Calls using Dir Key” Fixed Feature Keys Press to view the list of Call Logs. Refer “Call Logs”. Press to set Call Forward. Refer “Call Forward”. Press to access the Menu of the Phone. Matrix SPARSH VP210 User Guide...
-
Page 28: Customizing Your Sparsh Vp210
• Press Menu Key. • Scroll using the Up/Down Navigation Key to select Settings option and press Select Key. • Scroll using the Up/Down Navigation Key to select Phone Settings option and press Select Key. Matrix SPARSH VP210 User Guide... -
Page 29: Changing Ringtone And Alerts
Scroll using the Up/Down Navigation Key to select Phone Settings option and press Select Key. • Scroll using the Up/Down Navigation Key to select Ringtone and Alerts. • Press Select Key. Ringetone/Notification Tone • Select Ringtones option and press Select Key. Matrix SPARSH VP210 User Guide... - Page 30 For Notification Tone, scroll using Right Navigation > Key or Left Navigation < Key, to select the desired tone. • Press Save Key. • Scroll using the Up/Down Navigation Key to Play Notification Tone, to turn it On/Off press Change Key. • Press Save Key. Matrix SPARSH VP210 User Guide...
- Page 31 Scroll using the Up/Down Navigation Key to Play Ring option and press Select Key. • Scroll using Right Navigation > Key or Left Navigation < Key, to select the desired option — Immediately, After Delay, Ring Off. • Press Save Key. Matrix SPARSH VP210 User Guide...
- Page 32 If you set this timer as 00 , the Ringer Auto Acknowledgment is disabled and you must acknowledge the incoming call ring manually by answering the call. If you do not acknowledge, the ring will be played till you answer/reject the call. Matrix SPARSH VP210 User Guide...
-
Page 33: Changing The Display
You can also change the timer to turn off the LCD Backlight. • Scroll using the Up/Down Navigation Key to select Backlight Off Timer and enter the maximum time in second after which you want the Backlight to turn Off. • Click Save Key. Matrix SPARSH VP210 User Guide... -
Page 34: Setting The Time Format
Scroll using Up/Down Navigation Key to select the desired parameter — Auto Answer, Auto Answer Timer (If ‘Auto Answer’ is On), Waiting beeps-Internal Calls, Waiting beeps-External Calls. • Press Change Key to turn On/Off the respective options — Auto Answer, Waiting beeps-Internal Calls, Waiting beeps-External Calls. Matrix SPARSH VP210 User Guide... -
Page 35: Accessories
• Press Menu Key. • Scroll using the Up/Down Navigation Key to select Settings option and press Select Key. • Scroll using the Up/Down Navigation Key to select Phone Settings option and press Select Key. Matrix SPARSH VP210 User Guide... - Page 36 Scroll using the Up/Down Navigation Key to select Language option and press Select Key. • Scroll using Right Navigation > Key or Left Navigation < Key, to select the desired language. • Press Save Key. Matrix SPARSH VP210 User Guide...
-
Page 37: Making Calls
2. The System maintains a system wide corporate directory containing the external numbers accessible to its registered extensions. This is known as the Global Directory. You can get more information about Global Directory contact your System Administrator. Matrix SPARSH VP210 User Guide... -
Page 38: Making Calls Using Logs Key
Press More > Key to select the desired tab — Missed Calls, Answered Calls, Dialed Calls. • The phone displays the call log details by: Name, Date and Time. • Scroll using the Up/Down Navigation Key to the desired entry and press Call Key. Matrix SPARSH VP210 User Guide... -
Page 39: Receiving Calls
If you have multiple incoming calls, scroll up/down using the Up/Down Navigation Key to select the incoming call you wish to answer. Press Ans Key. Refer “Handling Multiple Calls”. By default, the Call Appearance set for your extension is 2. To know more, see “Receiving a Waiting Call”. Matrix SPARSH VP210 User Guide... -
Page 40: Call Screen Functionality
Press More > Key, to access the following features during an active call. These features appear as Feature key 1 or 2. • Press Hold Key, to put the call on Hold. Refer “Call Hold”. The access to the features differs according to the CoS and the state of the active call Matrix SPARSH VP210 User Guide... - Page 41 During an ongoing call you can also have held and waiting incoming calls. You can either answer the incoming calls or unhold the calls put on hold. These calls appear in the Pending Call bar. Pending Call bar Matrix SPARSH VP210 User Guide...
- Page 42 Press the Headset key to switch to the Headset. Replace the Handset. • Lift the Handset to switch back to the Handset. The respective icon — Handset , Headset or Speaker will be displayed in the Call screen. Matrix SPARSH VP210 User Guide...
-
Page 43: Making A Second Call
To make a Second Call by putting a call on hold, • During an active ongoing call, press Hold Key. • The call will be put on Hold, press New Key to make the second call. Matrix SPARSH VP210 User Guide... - Page 44 • Dial the desired number by using the Dir Key, Logs Key or using the Keypad. To know more about Exclusive and Global Hold, see “Call Hold”. Matrix SPARSH VP210 User Guide...
-
Page 45: Receiving A Waiting Call
The details of waiting calls are displayed only if the Call Appearances set for your extension is more than 1. Contact your System Administrator to know the number of Call Appearances set for your extension. Matrix SPARSH VP210 User Guide... -
Page 46: Call Features
During an ongoing call, press Hold Key. To resume a call put on Exclusive Hold, • Press Unhold Key. Global Hold • During an ongoing call, press More > Key and then press G. Hold Key. Matrix SPARSH VP210 User Guide... - Page 47 For internal calls, dial the extension number that was put on Global Hold. • For external calls, the call will be returned to the extension that put it on hold after the expiry of the Global Hold Retrieval Timer. Matrix SPARSH VP210 User Guide...
-
Page 48: Call Transfer
Dial the number of the desired party to whom you want to transfer the call. You can make the call using the Keypad or Dir Key or Logs Key. To know more, see “Making Calls”. Matrix SPARSH VP210 User Guide... - Page 49 Make sure, the Voicemail System (VMS) is available in the System. Contact your System Administrator for more information. • During an ongoing call, press More > Key. • Press VM.BT Key. • Dial the desired extension number. The call will be transferred to the mailbox of the desired extension user. Matrix SPARSH VP210 User Guide...
-
Page 50: One Touch Transfer
Enter the Extension Number to which you wish to transfer the call. • Press Save Key. To use One Touch Transfer, • During an ongoing call, press More > Key. • Press OTT Key. • The call is transferred to the configured extension. Matrix SPARSH VP210 User Guide... -
Page 51: Call Toggle
The active call is put on hold. • Repeat the previous step again, to talk to the party on hold. In this way, you can talk to both the parties alternately. Matrix SPARSH VP210 User Guide... -
Page 52: Conference 3-Party
A 3-party Conference is established. To see the details of the parties in the conference, press Details Key. You can also establish the conference with the held calls. • You have one held call and one ongoing call. Matrix SPARSH VP210 User Guide... - Page 53 To have a private talk with any party in the conference, scroll using the Up/Down Navigation Key to select the desired party, press Private Key, the other will be put on hold. Terminating the Conference You can terminate the Conference at any point of time. • Press End Key during a Conference. Matrix SPARSH VP210 User Guide...
-
Page 54: Multiparty Conference
Scroll using the Up/Down Navigation Key to select the desired participant you wish to remove from the Conference. The number of participants in the Conference depends on the variant of the System with which your application is registered. For details, contact your System Administrator. Matrix SPARSH VP210 User Guide... - Page 55 Temporary Leaving and Rejoining the Conference • Press Leave Key, to Temporarily Leave the Conference. • Press Rejoin Key, to Rejoin the Conference. Terminating or Permanently Leaving the Conference • Press End Key, to Terminate the Conference. Matrix SPARSH VP210 User Guide...
-
Page 56: Auto Callback (Acb)
Auto Callback Notification on the Home Screen • After you set Auto Callback, the Callback Notification appears on the Home screen. Canceling Auto Callback To Cancel Auto Callback, • Press Up/Down Navigation Key. Press this Key • Press Cancel Key. Matrix SPARSH VP210 User Guide... -
Page 57: Auto Redial
• When the number is available, the System will automatically place a call on your extension. Canceling Auto Redial To Cancel Auto Redial, • Press Up/Down Navigation Key. Press this Key • Press Cancel Key. Matrix SPARSH VP210 User Guide... -
Page 58: Account Code
Forced Account Code comes into play when you are required to enter the Account Code every time you dial an external number. • Dial the Trunk Access Code. • The message ‘Account Code Required’ is displayed on the LCD of your phone. • Dial the Account Code. • Dial the external number. Matrix SPARSH VP210 User Guide... -
Page 59: Barge-In
Press More > Key and then press Barge Key. • The called extension gets beeps during the ongoing conversation. If the called extension user answers the waiting call, speech is established else system forcibly connects the call and speech is established. Matrix SPARSH VP210 User Guide... -
Page 60: Call Chaining
The call is chained.The chained indication appears on the screen. • Complete the Transfer to the desired party. For instructions, see “Call Transfer”. • The chained call will return back to you as soon as their conversation ends. Matrix SPARSH VP210 User Guide... -
Page 61: Call Park
The system displays the Orbit Number in which the call is parked. To retrieve the call parked in Personal Orbit, • Press Menu Key. • Scroll using the Up/Down Navigation Key to select Call Retrieve. Matrix SPARSH VP210 User Guide... - Page 62 Press this Key • Press Unhold Key. If you do not retrieve the parked call, the call will land on your extension automatically after the expiry of the Call Park Timer (configurable, default: 5 minutes). Matrix SPARSH VP210 User Guide...
-
Page 63: Conversation Recording
To stop the recording press the StopR Key. The recording will stop if either party disconnects the call. Listening to the Recorded Conversation You must access the Voicemail, to listen to the recorded conversation. Refer “Voicemail” for more details. Matrix SPARSH VP210 User Guide... -
Page 64: Emergency Call
Emergency Call You can dial Emergency numbers immediately without any blocking. To dial an Emergency number, • Go Off-Hook. • Dial the Emergency Number. Dial Trunk Access Code followed by the Emergency Number. Matrix SPARSH VP210 User Guide... -
Page 65: Forced Answer
ON and you will be connected to the called party immediately. Forced Answer is possible when the called extension is a Matrix proprietary Digital Key Phone (DKP) or an Extended IP Phone and when the phone is idle. Forced Answer cannot be used on VARTA Clients. -
Page 66: Forced Disconnection (Forced Release)
• The dialed extension is busy. • Press More > Key and then press F. Rel Key • The call between the busy extensions disconnects. • Similarly, you can also forcibly disconnect a busy trunk. Matrix SPARSH VP210 User Guide... -
Page 67: Flashing On Trunks
For example the Call Waiting or Call Forward Services provided by the Service Providers. • During an ongoing call, press More > Key and then press F.Trunk Key • Dial the service provider feature access code. Matrix SPARSH VP210 User Guide... -
Page 68: Headset
“Customizing Your SPARSH VP210”. To use this feature make sure you have connected a compatible Headset to the phone. To enable the Headset mode, • Press Headset Key. To disable the Headset mode, • Press Headset Key. Matrix SPARSH VP210 User Guide... -
Page 69: Interrupt Request
• The dialed number is busy. • Press More > Key and then press Camp Key. • If the called extension user answers the waiting call, speech is established else it is disconnected. Matrix SPARSH VP210 User Guide... -
Page 70: Message Wait
Scroll using the Up/Down Navigation Key to select Message Wait. • Press Select Key. • Press Add Key. • Enter the Extension Number manually or press Dir Key to select the desired number. • Press Set Key. Matrix SPARSH VP210 User Guide... - Page 71 Home Screen. • Press Menu Key. Scroll using the Up/Down Navigation Key to select Voicemail. • Press Ret MW Key. • The call will be placed on the extension that has set Message Wait. Matrix SPARSH VP210 User Guide...
-
Page 72: Mute
To mute a call during speech, • Press Mute Key. To unmute a call during speech, • Press Mute Key again. Matrix SPARSH VP210 User Guide... -
Page 73: Trunk Reservation
Press Up/Down Navigation Key, to view the Notification. • Press Cancel Key. If not canceled manually, Trunk Reservation will be canceled automatically after the expiry of the Trunk Reservation Timer. This feature is not supported in PRASAR UCS. Matrix SPARSH VP210 User Guide... -
Page 74: Contacts
“Adding Contacts” “Editing and Deleting Contacts” Notification to Synchronize Contact appears on the Home screen, whenever there is any addition, alteration or deletion in the Global Directory or in the Extension numbers of the System. Matrix SPARSH VP210 User Guide... -
Page 75: Adding Contacts
Press Option Key and scroll using the Up/Down Navigation Key to select Add New Contact. • Press Select Key. • Enter the Name and scroll using Up/Down Navigation Key to enter the Number. • Press Save Key. Matrix SPARSH VP210 User Guide... - Page 76 • The contact is automatically stored at a free index number. The phone’s LCD displays the Index at which it is stored. Matrix SPARSH VP210 User Guide...
-
Page 77: Editing And Deleting Contacts
Enter the Initial letter(s) of the Contact’s name in the Search bar. • Scroll using the Up/Down Navigation Key to the desired Contact. • Press Option Key. • Scroll using the Up/Down Navigation Key to Edit Contact. Press Select Key. Matrix SPARSH VP210 User Guide... - Page 78 Enter the Initial letter(s) of the Contact’s name in the Search bar. • Scroll using the Up/Down Navigation Key to the desired Contact. • Press Option Key. • Scroll using the Up/Down Navigation Key to Delete Contact. Press Select Key. • The selected contact is deleted. Matrix SPARSH VP210 User Guide...
-
Page 79: Call Logs
Press Back Key, to return to the Menu Screen. Some entries in the Call Logs may appear as Unknown/Private, if the Number of that entry is not available. Calls cannot be made to these numbers. Matrix SPARSH VP210 User Guide... - Page 80 Matrix SPARSH VP210 User Guide...
-
Page 81: Missed Call Notification
• Press Option Key, to view the Details or Delete the log. • Press Back Key, to return to the Menu Screen. As soon as you access the Missed Calls log, the notification will disappear. Matrix SPARSH VP210 User Guide... -
Page 82: Editing An Entry Before Placing A Call
Edit the Number as per you requirement. • Scroll using the Up/Down Navigation Key and enter/edit the Trunk Access Code using which you want the system to dial the external call. • Press Call Key. Matrix SPARSH VP210 User Guide... -
Page 83: Deleting Call Logs
Press Logs Key on the Home Screen. • Scroll using the Right Navigation > Key to select the desired Call Log tab — Missed, Received, Dialed. • Press Option Key. • Scroll using the Up/Down Navigation Key to select Delete All. Matrix SPARSH VP210 User Guide... - Page 84 • Press Select Key. All entires in the selected call log tab are deleted. Matrix SPARSH VP210 User Guide...
-
Page 85: Other Features
Scroll using the Up/Down Navigation Key to select Alarm & Reminder. • Press Select Key. • Press More > Key to select the desired tab — Alarm or Reminder. • Press Add Key and enter the time in HHMM format. • Press OK Key. Matrix SPARSH VP210 User Guide... - Page 86 • Press Add Key and enter the date in DD MM YY and time in HHMM format. • Press OK Key. • The Reminder is set and the Alarm Notification appears on the Home Screen. Matrix SPARSH VP210 User Guide...
- Page 87 At the set time, the Alarm call rings. • Press Ans Key. You get music on hold. • Press Reject Key, to reject the call. • Similarly, you can answer or reject a Reminder call. Matrix SPARSH VP210 User Guide...
- Page 88 The Snooze option is set for the Alarm/Reminder Call to ensure that the call is acknowledged by the users. • Press Ans Key when the Alarm/Reminder call rings. • Press Ack Key to acknowledge the call. Matrix SPARSH VP210 User Guide...
-
Page 89: Call Forward
You can forward your calls to a pre-programmed destination number using Call Forward. The Call Forward screens differ according to the System (Server) with which SPARSH VP210 is connected. If your phone is connected with SARVAM UCS, PRASAR UCS or ANANT UCS you can set Call Forward as well as Call Forward Scheduled. - Page 90 Dual Ring option is not applicable for Call Forward -When not Registered. • When Call Forward is set, SET icon appears and also the Call Forward set indication appears on the Home Screen. To Cancel Call Forward, • Press Fwd Key again on the Home Screen. Matrix SPARSH VP210 User Guide...
- Page 91 • Scroll using the Up/Down Navigation Key, to select Use TAC. • Scroll using the Right Navigation > Key or Left Navigation < Key to select the desired TAC to dial the configured external number. Matrix SPARSH VP210 User Guide...
- Page 92 Press Cancel Key. • When you cancel Call Forward - Scheduled, it is canceled for the respective time zones. • If you have set Call Forward and Call Forward - Scheduled, both need to be canceled separately. Matrix SPARSH VP210 User Guide...
-
Page 93: Do Not Disturb
External Calls. Scroll using Right Navigation > Key or Left Navigation < Key to select the desired option. • Press OK Key. • The message DND set is displayed and the set indication appears on the Home Screen. Matrix SPARSH VP210 User Guide... - Page 94 Canceling Do Not Disturb • Press Menu Key. • Scroll using the Up/Down Navigation Key to select DND. • Press Cancel Key. • The message DND canceled is displayed and the set indication disappears from the Home Screen. Matrix SPARSH VP210 User Guide...
-
Page 95: Dnd-Override
DND - Override allows you to place a call on the extension that has set DND. • If the dialed extension has set DND, the DND message set is displayed on the phone’s LCD. • Press O’ride Key. • The dialed extension starts ringing. Matrix SPARSH VP210 User Guide... -
Page 96: Department Group Call Forward
Then scroll using the Up/Down Navigation Key to select the type of Call Forward — Always, When Busy, When no-reply, When on busy/no-reply. • Press Select Key. • By default, Call Forward is set On Voicemail. Matrix SPARSH VP210 User Guide... - Page 97 When Department Group Call Forward is set, SET icon appears. To Cancel Department Group Call Forward, • Press Menu Key. • Scroll using the Up/Down Navigation Key to select Department Group Call Fwd. • Press Cancel Key. Matrix SPARSH VP210 User Guide...
-
Page 98: Pin Dialing
To make a call using PIN Dialing, • Press Menu Key. • Scroll using the Up/Down Navigation Key to select Pin Dialing. • Press Select Key. • Enter PIN. • Press OK Key. Dial the desired number. Matrix SPARSH VP210 User Guide... -
Page 99: Presence
Detect, Away, On the Phone, Do Not Disturb, I am Mobile, In a Meeting, Out for a Meal, Out of Office, Absent. • Press OK Key. • Your Presence status is updated. If you set Absent as your status, the Absent status icon appears on the Home Screen. Matrix SPARSH VP210 User Guide... -
Page 100: Call Pickup
Scroll using the Up/Down Navigation Key to select the desired contact. Press Pickup Key. Call Pickup-Selective To pick-up any ringing call, • Press the Menu Key. • Scroll using the Up/Down Navigation Key to select Pickup. • Press Select Key. Matrix SPARSH VP210 User Guide... - Page 101 • Press Select... Key and then enter the Extension Number of the extension you wish to pick. Matrix SPARSH VP210 User Guide...
-
Page 102: Dynamic Lock
In Lock Level, you can select the type of calls — All Calls, Local Calls, National Calls, No Calls. Scroll using Right Navigation > Key or Left Navigation < Key to select the desired option. The Type of Calls are dependent on the Server Configurations. Matrix SPARSH VP210 User Guide... - Page 103 • To change the Lock Timer, scroll using Up/Down Navigation Key to select Lock Timer. • Enter desired Lock Time in minutes and press OK Key. Matrix SPARSH VP210 User Guide...
-
Page 104: Keypad Lock
• The Keypad is locked and the lock icon appears on the Home Screen. If your Keypad is locked, • you can dial Emergency Numbers. • during a call, you cannot access any Call feature. Matrix SPARSH VP210 User Guide... - Page 105 To Unlock the Keypad, • On the Home Screen, press Unlock Key. • Enter the User Password. The Keypad is unlocked. Matrix SPARSH VP210 User Guide...
-
Page 106: Dial-In Conference
Press Menu Key. • Scroll using the Up/Down Navigation Key to select Dial-In Conference. • Press Select Key. • Enter the Conference Number. • Scroll using the Up/Down Navigation Key to enter the Conference Password. Matrix SPARSH VP210 User Guide... - Page 107 In Conference Number, enter the desired number. • Scroll using the Up/Down Navigation Key to select Conference Password. • Press Join Key, to join the conference. • Press New Key, to include another participant in the conference. Matrix SPARSH VP210 User Guide...
- Page 108 When you leave the conference, and return to the Home Screen, this call appears in the pending calls list. • Press Up/Down Navigation Key. The Conference Screen appears. Then press Rejoin Key. After the Dial-In conference is initiated, it functions as a Multi Party Conference. See “Multiparty Conference” for more details. Matrix SPARSH VP210 User Guide...
-
Page 109: Hotline
If you select Trunk Access Code, you must select the desires trunk access code If you select Number, you must configure the Number along with the Trunk Access Code. • Scroll using the Up/Down Navigation Key, • In Number, enter the desired Number. Matrix SPARSH VP210 User Guide... - Page 110 To set delayed Hotline, enter the desired value in the Hotline Timer. • Press Save Key. Canceling Hotline • Press Menu Key. • Scroll using the Up/Down Navigation Key to select Hotline. • Press Cancel Key. Matrix SPARSH VP210 User Guide...
-
Page 111: Calling Line Identification Restriction
Press Menu Key. • Scroll using the Up/Down Navigation Key to select CLIR. • Press Set Key. Disable CLIR • Press Menu Key. • Scroll using the Up/Down Navigation Key to select CLIR. • Press Cancel Key. Matrix SPARSH VP210 User Guide... -
Page 112: Live Call Supervision
Scroll using the Up/Down Navigation Key to select Live Call Supervision. • Press Select Key. • Enter the Extension Number to be supervised. • Press OK Key. • The last external number out-dialed by the supervised extension number appears on the LCD. Matrix SPARSH VP210 User Guide... -
Page 113: Paging
• Press Select Key. These extensions must be either Matrix proprietary Digital Key Phones (DKP), or any type of SIP Phones (for example, Matrix pro- prietary Extended SIP Phones or any Standard (Open) SIP Phone which supports Auto Answer feature). - Page 114 • Press Start Key, to make your announcement. The speakers of the extensions configured in the specified Page Zone will be turned on automatically. Matrix SPARSH VP210 User Guide...
-
Page 115: Follow Me
Enter the Extension Number. • Scroll using Up/Down Navigation Key and enter the Password. • Press OK Key. Canceling Follow Me You can cancel Follow Me from your own extension only, refer Call Forward Cancel. Matrix SPARSH VP210 User Guide... -
Page 116: Room Monitoring
Room Monitoring allows you to listen to conversations taking place in other locations where a Matrix proprietary Digital Key Phone (DKP) or a Matrix proprietary Extended SIP Phone or a Standard (Open) SIP Phone supporting Auto Answer feature is present. -
Page 117: Meet Me Paging
Meet Me Paging can be used only if the Paging call is active. Therefore, extension users who are paging must keep their call active, if they want their call to be answered using Meet Me Paging. Matrix SPARSH VP210 User Guide... -
Page 118: Open Cosec Door
Make sure the COSEC Door Group is configured for COSEC Integration. To open the Cosec Door, • Press Menu Key. • Scroll using the Up/Down Navigation Key to select Open Cosec Door. • Press Open Key. The Cosec Door opens. Matrix SPARSH VP210 User Guide... -
Page 119: Voicemail
• Scroll using the Up/Down Navigation Key to select Voicemail. • Press Call Key. • Follow the voice prompts. • During the call you can press Rel Key, if you want to Release the call. Matrix SPARSH VP210 User Guide... -
Page 120: Walk In
If your Walk Out mode is set as Multiple Calls, you must walk out. To do so. • Press Menu Key. • Scroll using the Up/Down Navigation Key to select Walk-In. • Press Cancel Key. The set indication disappears from the Home Screen. Matrix SPARSH VP210 User Guide... -
Page 121: Settings
Settings CHAPTER 16 Settings can be accessed during Startup or from the Home screen after the SPARSH VP210 is registered. During Startup process, the following options will be accessible: • Network Settings • PCAP • Phone Info After Registration, the following parameters will be accessible: •... - Page 122 Scroll using the Up/Down Navigation Key to select Phone Info and press Select Key. It allows you to view the information of your phone such as MAC Address, Firmware, SIP Account. Phone Info For instructions, see “Phone Info”. Matrix SPARSH VP210 User Guide...
- Page 123 Matrix SPARSH VP210 User Guide...
-
Page 124: User Password
User Password You can change your User Password, if required. For instructions, see “Change User Password” under “Customizing Your SPARSH VP210”. Matrix SPARSH VP210 User Guide... -
Page 125: Phone Settings
You can customize following phone settings according to your requirement: • “Changing Ringtone and Alerts” • “Changing the Display” • “Setting the Time Format” • “Changing Call Settings” • “Accessories” • “Changing Language” • “Changing Advanced Settings” Matrix SPARSH VP210 User Guide... -
Page 126: Network Settings
Scroll using the Up/Down Navigation Key to select Connection Type and press Select Key. • Scroll using Right Navigation > Key or Left Navigation < Key, to select the desired Connection Type — DHCP, Static. If your connection type is DHCP, Matrix SPARSH VP210 User Guide... - Page 127 Scroll using the Up/Down Navigation Key to enter the Primary DNS Address and Secondary DNS Address. • Press OK Key. Server Settings • Scroll using the Up/Down Navigation Key to select Server Settings and press Select Key. Matrix SPARSH VP210 User Guide...
- Page 128 VLAN ID and a Class of Service (CoS). • Scroll using the Up/Down Navigation Key to select VLAN Settings and press Select Key. • You can turn on LAN VLAN/CoS Connection, to do so press Change Key. Matrix SPARSH VP210 User Guide...
- Page 129 You can turn on Use Clone MAC, to do so press Change Key. • Enter the Clone MAC Address. • Press OK Key. After you complete configuring the various Network parameters, you need to save all the Network Settings. Click Save Key. Matrix SPARSH VP210 User Guide...
- Page 130 Matrix SPARSH VP210 User Guide...
-
Page 131: Phone Info
It displays the Registration Time. Act.S.Address This is the current server that is active with which the phone is registered. 7. You can view Phone Status, even if the phone is not registered with the System. Matrix SPARSH VP210 User Guide... -
Page 132: Pcap
PCAP is used to monitor the network, analyze network problems, debug client/server communications, debug network protocol implementations. SPARSH VP210 supports PCAP Trace, which can be used to detect and diagnose network related problems. The phone captures upto 1 MB of packets. -
Page 133: Appendix
Q. I cannot make calls on Global Directory numbers using 3 digit index numbers in SARVAM UCS ENT, PRASAR UCS or ANANT UCS. A. When you dial Global Directory Index Number using Dial Pad, you need to dial Global Directory Access Matrix SPARSH VP210 User Guide... - Page 134 A. Interrupt Request will work only if the called party is in a normal 2-way speech with some other extension user or an external party. If the extension is busy due to being Off-hook (for example, Handset is not placed on the cradle Matrix SPARSH VP210 User Guide...
- Page 135 Q. If there is an incoming call on a trunk for me, I do not get any indication. A. SPARSH VP210 does not support the CO Call Waiting (or, Trunk Call Waiting) feature even if it is enabled in the Class of Service assigned to your extension.
-
Page 136: Troubleshooting Tips
Q. Whenever I try to grab a trunk to dial out an external number, the phone prompts for Account Code. A. Forced Account Code is enabled for your SPARSH VP210 and for the trunk that you are grabbing. In such case, on grabbing the trunk to dial out an external number, you are prompted to provide the Account Code Number or Account Code Name forcibly. -
Page 137: Technical Specifications
Table - Top Environmental Operating Temperature 0° C to 45°C Operating Humidity 5 to 95% RH, Non-Condensing Storage Temperature -20°C to +70°C Storage Humidity 5 to 95% RH, Non-Condensing Weight (Without Foot Stand) 650 gms Approx. Matrix SPARSH VP210 User Guide... - Page 138 SPARSH VP210 Sr. No. Item Quantity Phone, Handset and Spring Cord Ethernet Cable Foot Stand Matrix SPARSH VP210 User Guide...
-
Page 139: Warranty Statement
Matrix has been advised of the possibility of such damages or losses or for any claim by any other party. -
Page 140: Regulatory Information
This device complies with Part 15 of the FCC Rules. Operation is subject to the following two conditions: this device may not cause harmful interference, and this device must accept any interference received, including interference that may cause undesired operation. Matrix SPARSH VP210 User Guide... - Page 141 Matrix SPARSH VP210 User Guide...
-
Page 142: Disposal Of Products/Components After End-Of-Life
If there is any legal obligation for disposal, you may check with local authorities to locate approved plastic recyclers in your area. After end-of-life of the Matrix products, if you are unable to dispose-off the products or unable to locate e-waste recyclers, you may return the products to Matrix Return Material Authorization (RMA) department. -
Page 143: E-Waste Management And Handling Rules
Considering the benefits of electronics recycling, it is very important that people in various parts around the world embrace this concept. Creates Jobs E-waste recycling creates new jobs for professional recyclers and creates a second market for the recycled materials. Matrix SPARSH VP210 User Guide... - Page 144 Do not dispose your product in garbage bins along with municipal waste that ultimately reaches landfills. E-Waste Management Plan M/s. MATRIX COMSEC PVT LTD has partnered with E-Waste Recyclers India (EWRI) to comply with the new India E-Waste management and handling rules in providing drop-of centers and environmentally sound management of end of life electronics.
- Page 145 Shop No.8, New Gajuwaka, Opp. High Andhra Professional Vishakapatnam School Road, Vishakapatnam, Andhra 1800-102-5679 Pradesh Logistics Pradesh - 530026 Shop no:-19, Pharbhat Road, Opp:- Professional Chandigarh Pharbhat Road Tennis Academy, Zirakpur, Chandigarh, 1800-102-5679 Logistics Punjab Matrix SPARSH VP210 User Guide...
- Page 146 Dunlop, Kolkata -700108 Professional Acharya Vihar - jaydev Vihar Rd, Odisha Bhubaneswar 1800-102-5679 Logistics Bhubaneswar, Odisha Shop No-4 Asansol Station Bus Stand Professional West Bengal Asansol Road, Munshi Bazar, Asansol, West 1800-102-5679 Logistics Bengal - 713301 Matrix SPARSH VP210 User Guide...
-
Page 147: Index
Index Canceling Trunk Reservation 66 Change User Password 21 Accessing Voicemails 112 CO Network 2 Account Code 51 Conference 3-Party 45 Alarm and Reminder 78 Connecting Attended Transfer 41, 42 Cable 16 Auto Callback 49 Handset 16 Auto Callback Notification 49 Headset 16 Auto Redial 50 Mount on the Desk 14... - Page 148 Splitting the Conference 46 Join/Leave/Cancel the Dial-In Conference 100 Temporary Leaving and Rejoining the Confer- Keypad Lock 97 ence 48 Know Your SPARSH VP210 4 Terminating the Conference 46 Trunk Reservation 66 Language Selection 28 Live Call Supervision 105 Unattended Transfer 41...
- Page 149 M ATRI X COM SEC Head Office 394-GIDC, Makarpura, Vadodara - 390010, India. Toll Free No: 18002587747 E-mail: Customer.Care@MatrixComSec.com www.MatrixTeleSol.com...
Need help?
Do you have a question about the SPARSH VP210 and is the answer not in the manual?
Questions and answers
how can we reregister any old configured ip phone to other sip id and other network id, It is possible to reassign old configure device. if possible please explore the steps
To re-register the Matrix SPARSH VP210 IP phone to a different SIP ID and network ID, follow these steps:
1. Obtain New Network Information:
- Request the new IP Address, Subnet Mask, Gateway Address, and DNS Address from your LAN Administrator or ISP.
2. Get New SIP Account Details:
- Request the new SIP ID/User ID, Authentication User ID (usually same as SIP ID), Authentication Password, Registrar Server Address, and Registrar Server Port from your ITSP.
3. Access Phone Settings:
- Use the phone's interface to navigate to the network and SIP configuration menus.
4. Update Network Settings:
- Enter the new IP Address, Subnet Mask, Gateway, and DNS details.
5. Update SIP Settings:
- Enter the new SIP ID, Authentication ID, Password, Registrar Server Address, and Port.
6. Save and Restart:
- Save the settings and restart the phone for the changes to take effect.
This process will re-register the phone to the new SIP ID and network.
This answer is automatically generated
How to Factory Reset Sparsh VP210
To factory reset the Matrix SPARSH VP210 (for units with Serial Number 10009001 and onwards), follow these steps:
1. Power on the phone.
2. When the Loading/Starting screen appears, press #2.
3. Press the Yes key when prompted.
4. The phone will reboot and reset to factory default values.
This process also converts the phone to Extended SIP Phone mode.
This answer is automatically generated